Oh, the heartbreak! You spend time crafting perfectly fried chicken, the coating is golden and crisp, the inside is juicy… then you toss it in a delicious sauce, and within minutes, that beautiful crunch is gone, replaced by a disappointing chewiness. We’ve all been there, right? That dream of biting into crispy chicken coated in a glossy, flavorful glaze feels impossible sometimes.
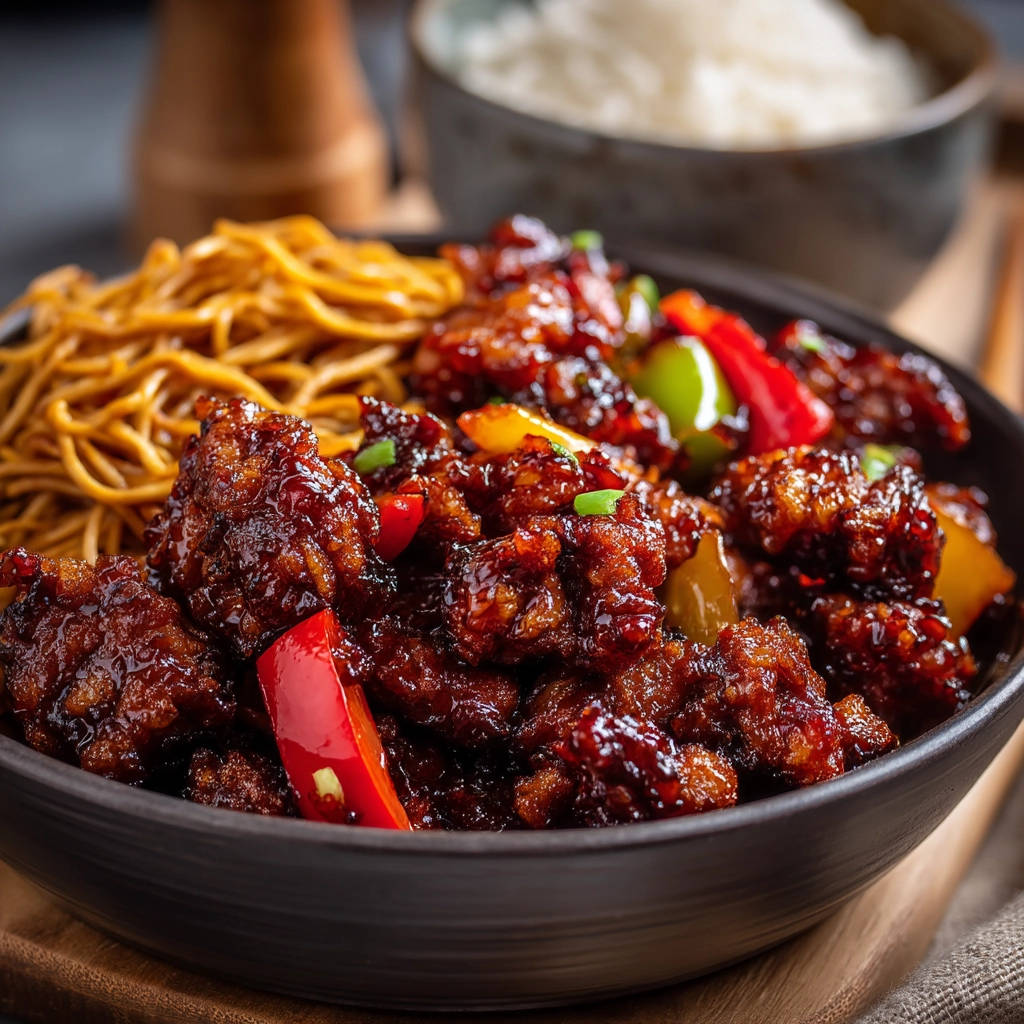
But what if I told you there’s a way to achieve that glorious combination – truly Crispy Glazed Chicken that stays crispy even after being drenched in sauce? It’s not a myth! After many kitchen experiments and soggy chicken sorrows, I finally discovered the simple yet revolutionary technique that makes all the difference. Get ready to say goodbye to soggy chicken disasters forever and hello to your new favorite weeknight meal!
Why You’ll Love This Crispy Glazed Chicken
Beyond the obvious (it stays crispy!), there are so many reasons this recipe will become a staple in your home:
- The Texture: That incredible, lasting crunch against tender chicken is truly crave-worthy.
- The Flavor: A perfect balance of sweet, savory, and tangy with fragrant garlic and ginger notes.
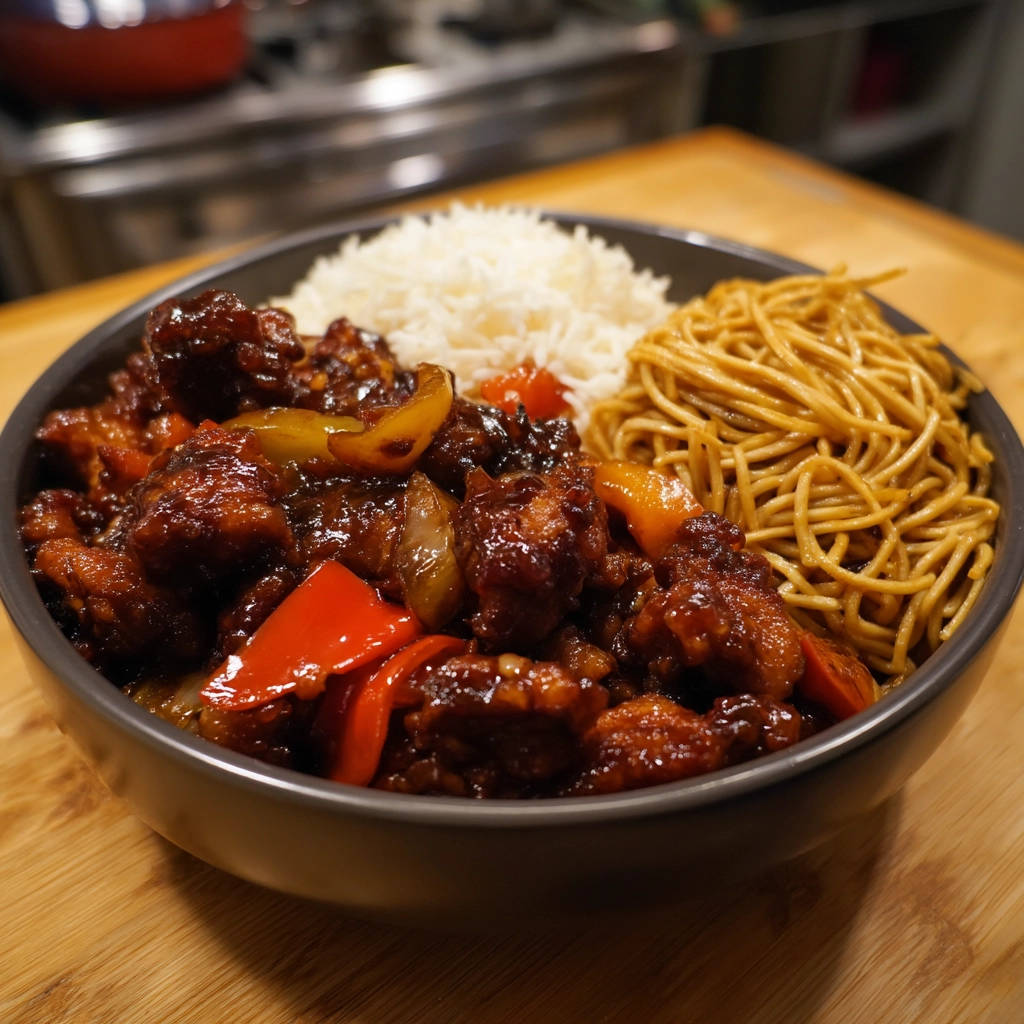
- It’s Adaptable: Serve it over rice or noodles, add your favorite veggies, or even turn it into a delicious wrap.
- Faster Than Takeout: Once you have the ingredients prepped, cooking this comes together quicker than waiting for delivery.
- The Secret Trick: You’ll learn a technique that can be applied to other fried and glazed dishes!
This isn’t just another chicken recipe; it’s a solution to a common culinary frustration. And honestly, who doesn’t love a good crispy chicken dish?
Gathering Your Ingredients for Crispy Glazed Chicken
The beauty of this Crispy Glazed Chicken lies in its relatively simple ingredient list, featuring pantry staples and fresh produce that come together to create magic. We’re building layers of flavor and texture, ensuring both the chicken coating and the sauce are absolute perfection.
For the chicken itself, we need a pound of boneless, skinless chicken thighs or breasts. Thighs tend to stay a bit juicier when fried, but breasts work beautifully too – just be mindful not to overcook them. Cut your chosen chicken into uniform, bite-sized pieces so they cook evenly.
The key to our ultra-crispy coating is cornstarch. We’ll use a generous amount, divided between the dry dredge and the sauce slurry. Cornstarch is fantastic for creating a light, extra-crisp crust that stands up to sauce better than just flour alone. We’ll combine a portion of the cornstarch with a little all-purpose flour, salt, and black pepper for our initial coating mix. You’ll also need one large egg to help the dry ingredients adhere to the chicken.
Frying requires vegetable oil. Choose an oil with a high smoke point suitable for deep frying. You’ll need enough to submerge the chicken pieces, typically 1 ½ to 2 inches in a pot.
For the vibrant, flavorful glaze, we’ll start with aromatics and fresh vegetables. A chopped red bell pepper and a chopped green bell pepper add color, sweetness, and a slight crunch. Freshly minced garlic and grated fresh ginger are non-negotiable for that essential sweet and savory Asian-inspired flavor profile. Using fresh ginger really elevates the taste compared to dried.
The sauce base is built on classic flavors: soy sauce provides the salty, umami depth; water helps balance the consistency; sugar brings necessary sweetness to create that lovely glaze effect; and rice vinegar (or apple cider vinegar if that’s what you have) adds the crucial tang to cut through the richness. Finally, the remaining cornstarch mixed with a little water creates a cornstarch slurry, which is our secret weapon for thickening the sauce into a beautiful, glossy glaze that clings perfectly to the crispy chicken.
Don’t forget the finishing touches! Sliced green onions add freshness and a pop of color right before serving. And of course, this dish is traditionally served over hot cooked rice or noodles – choose your favorite!
Here is a summary of everything you’ll need:
- 1 pound boneless skinless chicken thighs or breasts, cut into bite sized pieces
- 1 cup cornstarch, divided
- 1 large egg
- 1/4 cup all purpose flour
- 1/2 teaspoon salt
- 1/4 teaspoon black pepper
- Vegetable oil, for frying
- 1 red bell pepper, chopped
- 1 green bell pepper, chopped
- 2 cloves garlic, minced
- 1 teaspoon grated fresh ginger
- 1/2 cup soy sauce
- 1/2 cup water (for the sauce)
- 1/2 cup sugar
- 1/4 cup rice vinegar (or apple cider vinegar)
- 1 tablespoon cornstarch (for slurry)
- 2 tablespoons water (for cornstarch slurry)
- Sliced green onions, for garnish
- Cooked rice, for serving
- Cooked noodles, for serving
Crafting Your Crispy Glazed Chicken: Step-by-Step
Ready to unlock the secret to truly crispy, saucy chicken? This process involves a couple of key stages, but trust me, it’s straightforward and incredibly rewarding. Let’s break it down:
- Prep the Chicken & Coating: Begin by getting your chicken ready. Pat the cut pieces completely dry using paper towels. This step is absolutely non-negotiable! Excess moisture creates steam when it hits the hot oil, which hinders crisping and can make the coating soggy. Set up your dredging station: whisk the egg in one medium bowl, and in a separate bowl, combine ½ cup of the cornstarch with the flour, salt, and pepper.
- Coat the Chicken: Now, dip each piece of dry chicken first into the whisked egg, letting any excess drip off. Then, immediately transfer it to the cornstarch-flour mixture. Press the coating onto the chicken thoroughly from all sides, ensuring it’s well-covered. Set the coated pieces aside on a plate or wire rack as you work through the batch.
- First Fry (Cook & Set the Crust): Heat your vegetable oil in a large, heavy pot or Dutch oven over medium-high heat. Use a thermometer to bring the temperature up to 350°F (175°C). This initial fry is all about cooking the chicken through and starting to build the base of the crust. Carefully add about half of the coated chicken pieces to the hot oil. Avoid overcrowding the pot; too many pieces at once will drop the oil temperature significantly, leading to greasy, less crispy results. Fry for 3-4 minutes until the chicken is cooked through and lightly golden brown. Use a slotted spoon to remove the chicken and place it on a wire rack set over a baking sheet. This allows air to circulate, helping to keep it crisp while you fry the rest. Repeat with the remaining chicken.
- The Double Fry (Achieve Ultimate Crispiness): Here’s the magic step! Increase the oil temperature significantly to 375°F (190°C). Once the oil is up to temperature, return all of the partially fried chicken to the hot oil. This second, hotter, shorter fry is what develops that super tough, resilient crust that can withstand the sauce. Fry again for another 2-3 minutes, or until the chicken is deeply golden brown and looks visibly extra crispy. Remove the chicken once more with a slotted spoon and place it back on the wire rack. It’s crucial to let it rest on a rack, not paper towels, to maintain airflow.
- Prepare the Glaze Base: While the chicken is undergoing its crispy transformation (or just after the first fry if you prefer to multitask), prepare the sauce. In a small bowl, whisk together the remaining ½ cup of cornstarch with 2 tablespoons of water to create your cornstarch slurry. This is what will thicken our sauce.
- Cook the Sauce: In a large skillet or wok, heat just a tablespoon of oil over medium-high heat. Add the chopped red and green bell peppers and cook for 2-3 minutes until they start to soften slightly but still have a bit of bite. Add the minced garlic and grated ginger and cook for just 30 seconds more until they are fragrant.
- Build and Thicken the Glaze: Pour the soy sauce, ½ cup water, sugar, and vinegar into the skillet with the vegetables. Bring this mixture to a gentle simmer, stirring constantly to make sure the sugar fully dissolves. Once simmering, give your cornstarch slurry another quick stir (cornstarch settles!). Slowly pour the slurry into the simmering sauce while stirring constantly. Keep stirring for 1-2 minutes as the sauce thickens into a beautiful, glossy glaze that coats the back of a spoon. Remove the skillet from the heat.
- Combine and Serve: This part happens just before you’re ready to eat to preserve maximum crispiness. Add the double-fried crispy chicken pieces directly into the skillet with the warm glaze. Use tongs or a spoon to gently but quickly toss the chicken, ensuring each piece is evenly coated in the luscious sauce. Don’t let it sit in the sauce for too long! Serve immediately while hot and crispy over your choice of cooked rice or noodles. Garnish with sliced green onions for a touch of freshness.
Enjoy that satisfying crunch! You’ve earned it!
Tips for Crispy Glazed Chicken Success
Achieving that perfect, lasting crunch requires a little attention to detail. Here are some pro tips to ensure your Crispy Glazed Chicken turns out perfectly every time:
- Temperature is King: Use a thermometer to monitor your oil temperature accurately for both the first and second fry. This is the single most important factor for achieving and maintaining crispiness. Too cool, and the chicken will be greasy; too hot, and the coating will burn before the inside cooks, or in the second fry, it might burn before getting that extra tough crust.
- Don’t Crowd the Pot: Frying in batches prevents the oil temperature from dropping too low and ensures even cooking and browning.
- Rest Between Fries: Letting the chicken rest on a wire rack between the first and second fry helps some internal moisture evaporate, contributing to a crispier final product.
- The Wire Rack is Your Friend: Always drain fried food on a wire rack over a baking sheet, never directly on paper towels. Paper towels block airflow and trap steam, which makes things soggy.
- Sauce Last Minute: Seriously, wait until the very moment you are ready to serve before tossing the chicken in the sauce. The longer it sits in the sauce, the more the crisp coating will absorb moisture. A quick toss right before hitting the plate is key.
- Prep Ahead: You can cut and coat the chicken ahead of time and keep it in the fridge on a wire rack (unfried). You can also make the sauce base (steps 7-9) earlier and reheat it just before adding the slurry and chicken.
- Vinegar Choice: Rice vinegar provides a classic, mild tang. If you use apple cider vinegar, the flavor might be slightly more pronounced, but it works as a substitute.
What to Serve With Crispy Glazed Chicken
This Crispy Glazed Chicken is fantastic as the star of your meal! It pairs wonderfully with simple sides that let its texture and flavor shine.
Classic accompaniments include fluffy white rice or brown rice. If you prefer noodles, try serving it over lo mein noodles or simple stir-fried noodles. For some green on your plate, consider steamed broccoli, snap peas, or a simple side salad. If you’re looking for other ways to incorporate chicken into your meals, you might enjoy trying our Crispy Baked Chicken Bites or maybe even our Charred Chicken Rice Bowl for a different flavor profile.
Want to add more vegetables to the mix? Lightly stir-fried bok choy or roasted vegetables like our Perfectly Roasted Veggies would complement the glaze beautifully.
Your Crispy Glazed Chicken Questions Answered (FAQ)
Got questions about making the crispiest glazed chicken ever? Here are some common inquiries:
Can I bake this chicken instead of frying?
While you can bake chicken coated in cornstarch for crispiness (see our recipe for Crispy Baked Chicken Bites for that method!), the unique, long-lasting crispiness in this specific glazed chicken recipe comes from the double-frying method. Baking won’t achieve quite the same level of resilient crunch that stands up to the sauce.
How do I make the sauce thicker or thinner?
The amount of cornstarch slurry is designed for a perfect glossy glaze. If you prefer it thicker, you can make a little extra slurry (maybe ½ tsp cornstarch mixed with 1 tsp water) and stir it into the simmering sauce gradually, a little at a time, until the desired thickness is reached. If it’s too thick, you can whisk in a tablespoon of hot water at a time until it loosens up.
Can I use different vegetables in the sauce?
Absolutely! Feel free to swap the bell peppers for other quick-cooking vegetables like broccoli florets, snap peas, carrots (thinly sliced), or even some onion. Add them at step 8 and cook until they are tender-crisp.
Why is the double fry so important?
The first fry cooks the chicken and starts to form a base crust at a lower temperature. The second, hotter fry does two things: it crisps the exterior further and, more importantly, it dehydrates the outer layer of the coating and the chicken surface, creating a much harder, more stable structure that is less likely to absorb moisture from the sauce and become soggy.
Can I make the sauce spicier?
Yes! You can add a pinch of red pepper flakes to the skillet with the garlic and ginger, or stir in a teaspoon or two of sriracha or your favorite chili sauce at the end of step 10.
Enjoy Your Homemade Crispy Glazed Chicken!
You did it! You’ve successfully made Crispy Glazed Chicken that actually stays crispy. This recipe is a game-changer for anyone who loves saucy chicken dishes but hates sacrificing that satisfying crunch. The combination of the double-fried chicken and the perfectly balanced glaze is truly delightful.
Whip this up for a weeknight dinner, a weekend treat, or even for entertaining. It’s sure to impress! Give it a try and let me know what you think in the comments below. Happy cooking!
Crispy Glazed Chicken

Ingredients
- 1 pound boneless skinless chicken thighs or breasts, cut into bite sized pieces
- 1 cup cornstarch, divided
- 1 large egg
- 1/4 cup all purpose flour
- 1/2 teaspoon salt
- 1/4 teaspoon black pepper
- Vegetable oil, for frying
- 1 red bell pepper, chopped
- 1 green bell pepper, chopped
- 2 cloves garlic, minced
- 1 teaspoon grated fresh ginger
- 1/2 cup soy sauce
- 1/2 cup water
- 1/2 cup sugar
- 1/4 cup rice vinegar (or apple cider vinegar)
- 1 tablespoon cornstarch
- 2 tablespoons water (for cornstarch slurry)
- Sliced green onions, for garnish
- Cooked rice, for serving
- Cooked noodles, for serving
Directions
- Pat the chicken pieces completely dry with paper towels. This is key to getting a good coating.
- In a medium bowl, whisk together the egg. In a separate bowl, combine 1/2 cup cornstarch, flour, salt, and pepper.
- Dip chicken pieces first in the egg, then dredge in the cornstarch-flour mixture, pressing to coat thoroughly. Set aside.
- Heat 1 1/2 to 2 inches of vegetable oil in a large heavy pot or Dutch oven over medium high heat until it reaches 350°F.
- Carefully add about half of the chicken pieces to the hot oil, making sure not to overcrowd the pot. Fry for 3-4 minutes until lightly golden and cooked through. Remove chicken with a slotted spoon and place on a wire rack set over a baking sheet. Repeat with remaining chicken.
- Now for the trick to lasting crispiness: Increase the oil temperature to 375°F. Return the chicken to the hot oil and fry again for another 2-3 minutes until deeply golden brown and extra crispy. This second fry creates a tougher, more resilient crust. Remove and place back on the wire rack.
- While the chicken is frying, make the sauce. In a small bowl, whisk together the remaining 1/2 cup cornstarch with 2 tablespoons water to create a slurry.
- In a large skillet or wok, heat a tablespoon of oil over medium high heat. Add bell peppers and cook for 2-3 minutes until slightly softened. Add garlic and ginger and cook for 30 seconds until fragrant.
- Pour in the soy sauce, 1/2 cup water, sugar, and vinegar. Bring the mixture to a simmer, stirring to dissolve the sugar.
- Stir the cornstarch slurry again and slowly pour it into the simmering sauce, stirring constantly. Cook for 1-2 minutes until the sauce has thickened to a glossy glaze.
- Remove the sauce from the heat. Just before serving, add the double-fried chicken to the skillet with the sauce. Toss gently but quickly to coat the chicken evenly.
- Serve immediately over hot cooked rice or noodles, garnished with sliced green onions. Enjoy that lasting crunch!