
Why This Crispy Lemon Caper Chicken Piccata Succeeds
Picture this: you bite into chicken piccata and it’s dry as cardboard, ruining the whole plate. But this version changes everything with one pounding trick that thins the breasts to a perfect quarter-inch. You cook them in under four minutes per side, locking in juices under that irresistible crispy panko crust.
So why does it work so well? Traditional piccata often fails because thick chicken overcooks before the breading crisps up. Here, even thinness means fast searing that seals everything inside. Plus, the zesty lemon caper sauce cuts through with bright tang, making every forkful pop.
The real secret? Pat the pounded chicken super dry before breading. That moisture removal lets the panko cling tight and crisp to golden perfection. Oh man, the crunch gives way to juicy meat, then that briny sauce hits. It’s dinner that feels fancy but comes together quick.
Pounding Technique for Juicy Chicken Piccata Cutlets
Pound each chicken breast between two sheets of plastic wrap to an even quarter-inch thickness. Use a meat mallet or rolling pin, starting from the center and working out. This uniform thinness cooks the chicken fast, in just three to four minutes per side, without drying it out.
Without pounding, thick breasts take longer to cook through, so the outside overcooks while the inside stays raw. However, even cutlets hit 165 degrees perfectly every time. You’ll see the meat transform from pink to opaque white, staying tender and juicy.
For best results, check for uniform thickness by feel; it should be like a thin steak. Pat dry immediately after. That step prevents steaming and ensures crispy breading sticks right.
Choosing Chicken Breasts for Piccata
Pick boneless, skinless chicken breasts around six to eight ounces each. Smaller ones pound evenly without tearing. Fresh beats frozen because it holds up better under the mallet.
Avoid super thick or uneven breasts; they frustrate pounding. In addition, fresh chicken absorbs seasoning deeper for more flavor throughout.
Tools for Perfect Piccata Pounding
A meat mallet with flat sides pounds quickest and most evenly. Rolling pins work too, but they take more effort for uniform results. Plastic wrap keeps meat from sticking or tearing.
After pounding, pat dry with paper towels. Therefore, excess moisture won’t make the breading slide off during cooking.
Science of Crispy Breading in Lemon Caper Chicken Piccata
The breading trifecta starts with flour that absorbs surface moisture from the chicken. Next, egg acts as glue to bind everything. Finally, panko delivers superior crunch because its jagged flakes create more air pockets for crispiness.
Regular breadcrumbs flatten and sog out fast. Panko, however, traps steam during the Maillard reaction, that browning magic turning the outside golden and nutty. Heat the pan right, and you’ll hear the sizzle as it crisps up perfectly.
Pro tip: press panko firmly so no bare spots show. That full coverage means every bite crunches before juicy chicken melts in your mouth.
Seasoning Flour and Panko Mixtures
Season flour with half a teaspoon salt and quarter teaspoon pepper. Mix the rest into the panko. This layers flavor evenly, so the crust tastes balanced, not bland.
Seasoning each step separately prevents over-salting. Therefore, your piccata shines without one note overpowering.
Pressing Panko for Full Piccata Coverage
Dip in egg, then press both sides into panko firmly with your fingers. Shake off excess flour first to avoid clumps. This technique seals every inch for total crunch.
Bare spots happen from light pressing. However, firm pressure ensures the breading stays put through searing.
Key Ingredients for Crispy Lemon Caper Chicken Piccata
Start with four boneless skinless chicken breasts, pounded thin for juiciness. One cup all-purpose flour sets up the breading base. Two large eggs bind it all, and one-and-a-half cups panko breadcrumbs give that unbeatable crunch.
Season with one teaspoon salt and half teaspoon pepper. Use four tablespoons unsalted butter divided, since it lets you control saltiness in the sauce. Two tablespoons olive oil helps sear without burning.
One cup chicken broth, quarter cup fresh lemon juice from two lemons, quarter cup drained capers, and quarter cup chopped parsley make the zesty sauce. Lean chicken provides protein punch. Fresh elements keep it bright and briny.
Fresh Lemon and Capers in Piccata Sauce
Juice two fresh lemons for quarter cup; bottled tastes flat. Rinse capers if they’re too salty to balance the brine. Chop parsley fresh for vibrant green color and herby lift.
Pro tip: zest a bit of lemon peel into the sauce for extra pop without bitterness.
Step-by-Step: Searing Crispy Chicken Piccata Cutlets
Set up three bowls: flour with half teaspoon salt and quarter teaspoon pepper, beaten eggs, and panko with remaining seasoning. Dredge chicken in flour, shake excess, dip in egg, then press into panko.
Heat two tablespoons butter and olive oil in a large skillet over medium-high until shimmering. Cook cutlets in batches, three to four minutes per side till golden and 165 degrees inside. Don’t crowd; that steams instead of sears.
Transfer to a plate and tent with foil. The rest keeps them juicy while you make sauce. You’ll smell the toasty panko as it transforms.
Skillet Temperature for Piccata Crisp
Medium-high heat makes fat shimmer, signaling it’s hot enough for instant crust without burning butter. Test by dropping a panko crumb; it should sizzle right away.
Too low, and breading soaks oil. Therefore, shimmer ensures that perfect golden sear.
Building Zesty Lemon Caper Sauce for Chicken Piccata
In the same skillet, melt remaining two tablespoons butter. Add chicken broth and lemon juice, scraping browned bits for deep flavor. Simmer three minutes till it thickens slightly; those bits dissolve into savory gold.
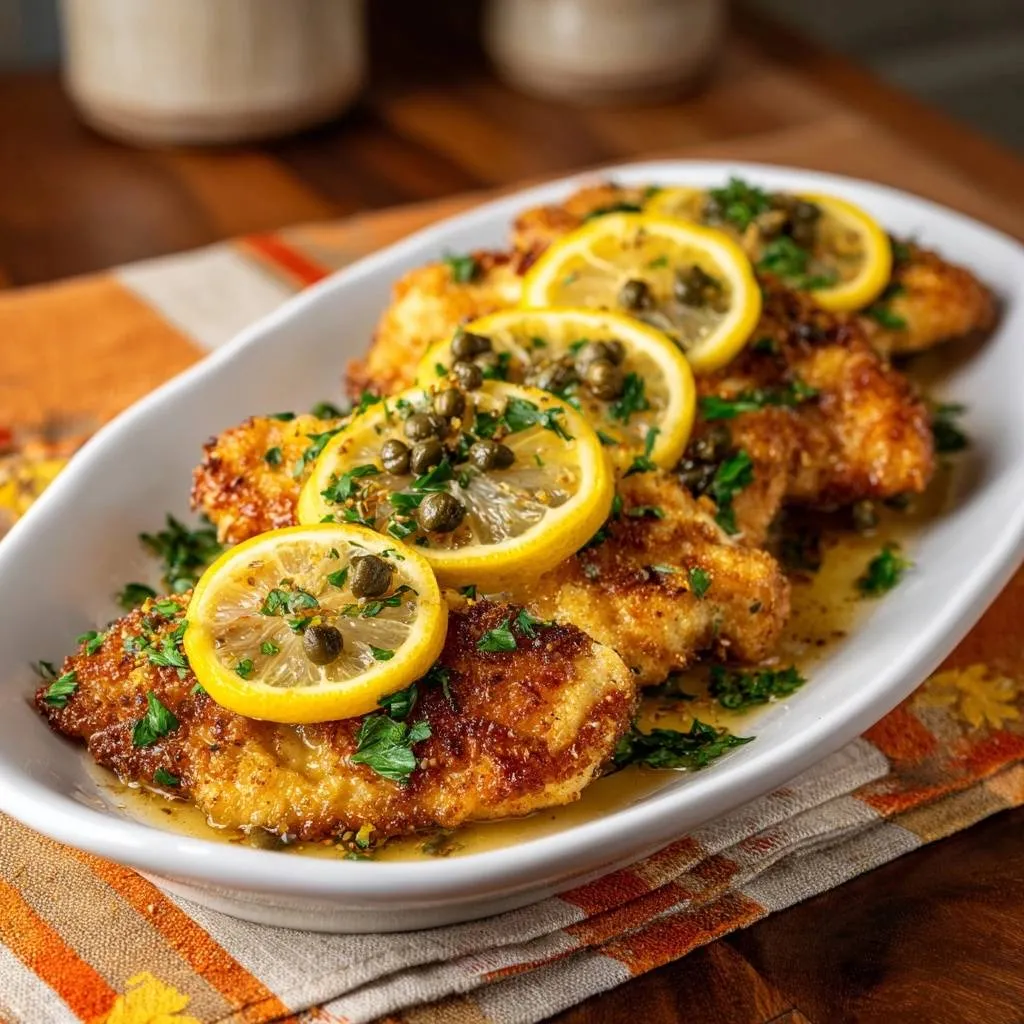
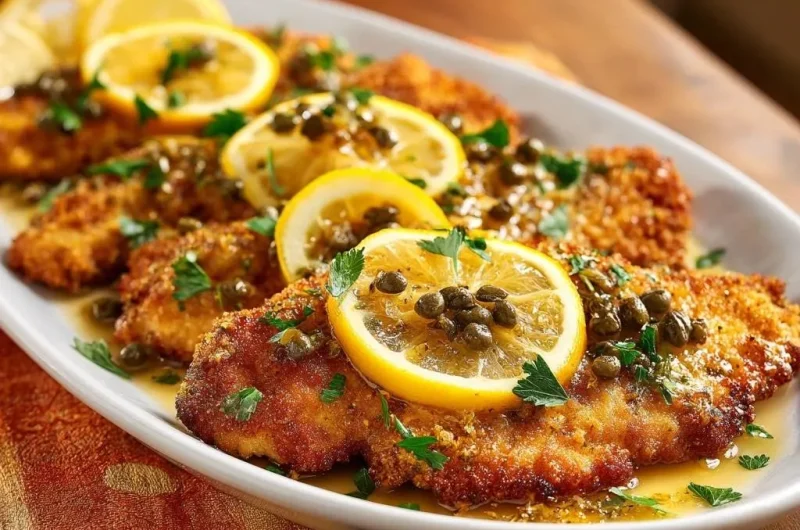
Stir in capers and parsley last to keep them bright. Spoon generously over chicken, and garnish with lemon slices. The sauce bubbles and reduces, turning glossy and tangy.
Serve right away so crisp meets zesty. Pro tip: taste sauce and add a squeeze more lemon if you crave extra tang.
Thickening Piccata Sauce Naturally
Simmer reduces liquid as flavors concentrate; no flour needed. Stir occasionally so it doesn’t stick. In three minutes, it clings beautifully to the chicken.
If too thin, give it another minute. However, don’t boil hard or it turns bitter.
Avoiding Mistakes in Crispy Lemon Caper Chicken Piccata
Overpounding tears meat; stop at quarter-inch and check often. Skipping the pat-dry step leaves moisture that sogs breading. Therefore, always dry thoroughly for adhesion.
Crowding the pan steams chicken instead of crisping it. Cook in batches. Overcooking past 165 dries it out, so use a thermometer.
Pro tip: if breading falls off, your pan wasn’t hot enough. Fixes keep every batch perfect.
Temperature Checks for Juicy Piccata
Insert thermometer into thickest part; pull at 165 degrees. Let rest two minutes under foil. Juices redistribute for max tenderness.
Visual cues help too: firm, opaque white means done. Therefore, no guesswork.
Flavor Twists on Lemon Caper Chicken Piccata
Add minced garlic to the sauce for aromatic depth. Swap parsley for thyme or basil to change herb notes. For gluten-free, use panko alternative; it crisps just as well.
Dairy-free? Olive oil works in place of butter. These keep the crispy core while personalizing. In addition, a splash of white grape juice mimics wine brightness without alcohol.
Experiment confidently; the pounding and breading hold up to tweaks.
Spice Levels for Bold Piccata
Stir in quarter teaspoon red pepper flakes with broth for subtle heat. Or add a teaspoon Dijon mustard to sauce for creamy tang.
Adjust to taste; start small so capers don’t get lost.
Pairing Sides with Crispy Chicken Piccata
Roasted asparagus echoes the lemon brightness and adds crisp contrast. Garlic mashed potatoes soak up sauce perfectly, creamy against the crunch.
Angel hair pasta twirls with capers, or keep it light with green salad. These balance tang and provide varied textures.
Portion one cutlet per person with a cup of side. Therefore, plates feel complete and satisfying.
Storing and Reheating Lemon Caper Chicken Piccata
Store leftovers in an airtight container in the fridge up to three days. Sauce may separate, so stir before reheating. Freezes well for two months; wrap individually to prevent sticking.
Thaw overnight in fridge. Reheat in 350-degree oven ten minutes for crisp restore; microwave sogs it. Pro tip: bread ahead and freeze raw for quick meals.
Troubleshooting Crispy Lemon Caper Chicken Piccata
Why isn’t my breading crispy?
Usually overcrowding or cold pan causes steaming. Cook in batches on shimmering fat. Pat chicken extra dry next time for better adhesion.
Why is my sauce too thin?
It needs more simmer time to reduce. Cook four to five minutes, stirring. If still thin, add a teaspoon cornstarch slurry, but natural reduction works best.
Why is the chicken tough?
Uneven pounding leads to overcooking thick spots. Pound to exact quarter-inch. Rest after cooking so juices settle.
Why is my lemon flavor bitter?
Pith from lemons adds bitterness. Juice carefully, avoiding white parts. Use fresh lemons always over bottled.
Why do capers overpower the dish?
They pack salt; rinse well under water. Taste sauce and add more parsley or lemon to balance brininess.
FAQ
How do I store leftovers of Crispy Lemon Caper Chicken Piccata?
Place chicken and sauce in separate airtight containers in the fridge for up to three days. The sauce might separate, so whisk it back together before reheating. For freezing, wrap individual cutlets tightly and freeze up to two months; thaw overnight in the fridge. Reheat in a 350-degree oven for ten to twelve minutes to restore crispiness, flipping halfway. Avoid microwaving, as it makes the breading soggy. Pro tip: store extra parsley in a damp towel in the fridge to keep it fresh for days.
Why did my chicken turn out dry in this piccata recipe?
Dry chicken usually comes from uneven pounding or overcooking past 165 degrees. Always pound to a uniform quarter-inch thickness for quick, even cooking in three to four minutes per side. Use an instant-read thermometer in the thickest part and tent with foil during rest to redistribute juices. If breasts were too thick initially, slice them horizontally first for better results. This technique seals moisture inside every time.
Can I substitute ingredients in Crispy Lemon Caper Chicken Piccata?
Swap panko for gluten-free version or crushed rice cereal for crunch. No fresh lemons? Use bottled juice, but add a teaspoon extra for brightness. Chicken broth can become vegetable broth for vegetarian twist, keeping sauce savory. For dairy-free, use plant-based butter or all olive oil. Unsalted butter is best, but if salted, cut back salt by half in breading. Capers are key for brine; if unavailable, try chopped green olives rinsed well.
Why isn’t my breading sticking to the chicken?
Skipping the pat-dry after pounding leaves moisture that repels breading. Always pat super dry with paper towels. Shake off excess flour firmly too, or it clumps and blocks egg adhesion. Press panko extra hard on both sides. If still issues, chill breaded cutlets five minutes before frying for better grip.
How can I make the sauce thicker without flour?
Simmer longer, four to five minutes, while stirring to evaporate liquid naturally. Scrape all browned bits as they add body. For faster thickening, stir in a teaspoon of cornstarch mixed with cold water, but simmer one more minute. Keep heat medium to avoid breaking the butter emulsion. Fresh lemon juice helps it cling better to the crispy chicken.
Can I make Crispy Lemon Caper Chicken Piccata ahead of time?
Bread and sear cutlets up to four hours ahead; hold at room temp tented loosely. Or freeze breaded raw cutlets up to a month, then cook from frozen adding a minute per side. Make sauce fresh right before serving for best zing. Re-crisp seared chicken in a hot skillet one minute per side if needed. This way, dinner’s ready in under ten minutes total.
Crispy Lemon Caper Chicken Piccata
Course: Main CourseCuisine: Italian-AmericanDifficulty: easy4
servings15
minutes20
minutes35
Minutes450
kcalItalian-American
Ingredients
4 boneless skinless chicken breasts
1 cup all-purpose flour
2 large eggs
1 1/2 cups panko breadcrumbs
1 teaspoon salt
1/2 teaspoon black pepper
4 tablespoons unsalted butter, divided
2 tablespoons olive oil
1 cup chicken broth
1/4 cup fresh lemon juice (about 2 lemons)
1/4 cup capers, drained
1/4 cup fresh parsley, chopped
Lemon slices for garnish
Directions
- Place each chicken breast between two sheets of plastic wrap. Pound to an even 1/4-inch thickness using a meat mallet or rolling pin. This is the key no-dry-chicken trick: uniform thinness cooks the meat in under 4 minutes per side, sealing juices inside without overcooking. Pat dry with paper towels.
- Set up three shallow bowls: flour seasoned with 1/2 teaspoon salt and 1/4 teaspoon pepper in one, beaten eggs in second, panko mixed with remaining salt and pepper in third.
- Dredge each pounded cutlet in flour, shake off excess, dip in egg, then press firmly into panko to coat completely.
- Heat 2 tablespoons butter and olive oil in a large skillet over medium-high heat until shimmering hot.
- Cook chicken in batches, 3-4 minutes per side until golden brown and internal temperature hits 165F. Transfer to a plate and tent with foil to rest.
- In same skillet, melt remaining 2 tablespoons butter. Add chicken broth and lemon juice, scraping up browned bits. Simmer 3 minutes until slightly thickened.
- Stir in capers and parsley. Spoon sauce over chicken. Garnish with lemon slices. Serve immediately for crispy, juicy perfection.
Notes
- Pound chicken to 1/4-inch thickness for juicy results. Cook in batches to maintain oil temperature for crispiness.