
There’s nothing quite as disappointing as sitting down to a plate of beautifully golden chicken cutlets, only to find them dry and flavorless inside. We’ve all been there, right? That perfectly crispy exterior is a tease when the inside lacks moisture and tenderness. For years, I struggled with this very problem, chasing that elusive combination of crunch and succulence with pan-fried chicken cutlets.
But friends, I discovered a simple, game-changing trick that ensures perfectly juicy results every single time, paired with that glorious crispy coating we all crave. This isn’t some fancy technique or secret ingredient; it’s about understanding how to treat the chicken itself before it even hits the pan. Let me share the secret to making the best crispy pan-fried chicken cutlets you’ve ever had!
Why These Pan-Fried Chicken Cutlets Are the Best
So, what makes this particular approach to pan-fried chicken cutlets stand out from the rest? It boils down to a few key factors that guarantee success where other methods might fail.
- Guaranteed Juiciness: The primary reason this recipe works so well is its focus on keeping the chicken moist. No more tough, dry bites!
- Incredible Crispiness: We achieve a shatteringly crisp exterior that provides the perfect textural contrast to the tender meat within.
- Quick Cooking: Because the chicken is prepared in a specific way, the cooking time is drastically reduced, making this a perfect weeknight meal.
- Simple Ingredients: You likely have most of what you need in your pantry and fridge already.
- Versatile Base: These cutlets are delicious on their own, in sandwiches, on salads, or paired with countless sides.
Gathering Your Ingredients for Perfect Chicken Cutlets
Making delicious pan-fried chicken cutlets starts with selecting the right ingredients. Think of these components as building blocks for flavor and texture. We’re aiming for a simple yet effective coating that delivers maximum crunch and adheres beautifully to the chicken.
Here’s what you’ll need:
- Boneless, Skinless Chicken Breasts: We start with standard chicken breasts. The key here isn’t the quantity, but how we prepare them. They’ll be transformed into thin cutlets.
- All-Purpose Flour: This provides the initial dry layer for our breading, giving the egg something to cling to.
- Large Eggs: Whisked eggs act as the essential binder, helping the breadcrumbs stick to the flour-dusted chicken.
- Breadcrumbs or Panko: You can use traditional fine breadcrumbs for a classic coating or panko breadcrumbs for an extra-crispy, airy texture. Panko is often my preference for ultimate crunch!
- Grated Parmesan Cheese (Optional): Adding a bit of finely grated Parmesan to the breadcrumbs infuses the coating with a salty, nutty flavor and contributes to that golden-brown color. It’s a fantastic addition if you have it on hand.
- Salt and Freshly Ground Black Pepper: Essential for seasoning the chicken itself. Don’t be shy; properly seasoned meat is crucial for overall flavor.
- Cooking Oil for Frying: A neutral oil with a high smoke point is best for pan frying. Vegetable or canola oil are excellent, readily available choices. You’ll need enough to create about a half-inch layer in your pan.
- Fresh Parsley, chopped (for garnish): A sprinkle of fresh herbs at the end adds a touch of brightness and color.
Achieving Pan-Fried Perfection: Step-by-Step
Ready to make magic happen? Follow these steps closely, paying attention to the “why” behind each one, and you’ll be enjoying perfectly juicy, crispy chicken cutlets in no time.
Prepare the Chicken the Smart Way: This is where our little secret comes in! Take your boneless, skinless chicken breasts and place them one at a time between two sheets of plastic wrap or inside a large zip-top bag. Using the flat side of a meat mallet (or even a rolling pin if you don’t have a mallet), gently but firmly pound each chicken breast to an even thickness of about 1/4 inch. Why do we do this? Pounding the chicken flat and thin is the magic trick! It ensures the chicken cooks incredibly quickly and evenly in the hot pan. When meat cooks fast, it retains its natural moisture, preventing that dreaded dryness. Once pounded, you can leave them as large cutlets or cut them in half or into smaller portions if you prefer. Make sure to season both sides generously with salt and freshly ground black pepper. Don’t underestimate the importance of seasoning the meat directly!
Set Up Your Breading Stations: A smooth breading process requires organization. You’ll need three shallow dishes or pie plates lined up in a row. In the first dish, place your all-purpose flour. In the second dish, crack and whisk the large eggs until the whites and yolks are fully combined and slightly frothy. In the third dish, combine your breadcrumbs (or panko) and the grated Parmesan cheese, if you’re using it. Stir them together to ensure the cheese is evenly distributed throughout the crumbs. Having these stations ready makes dipping and coating a breeze.
Bread the Chicken for Maximum Adhesion: Now it’s time to give the chicken its fabulous crispy coat. Take each pounded chicken piece and first dredge it completely in the flour, shaking off any excess. You want just a thin, even dusting. Next, dip the floured chicken into the whisked egg, letting any excess egg drip back into the dish. Finally, transfer the egg-dipped chicken to the breadcrumb mixture. Gently press the breadcrumbs onto both sides of the chicken, ensuring a thorough and even coating. The flour helps the egg stick, and the egg helps the breadcrumbs stick – it’s a team effort! Set the breaded cutlets aside on a plate or wire rack while you prepare the oil.
Heat the Oil to the Perfect Temperature: Pour about 1/2 inch of your chosen cooking oil (like vegetable or canola) into a large, heavy-bottomed skillet. Place the skillet over medium-high heat. Achieving the correct oil temperature is crucial for crispiness without burning and cooking through without drying. Aim for around 350°F (175°C). If you have a thermometer, use it! If not, a quick test is to drop a tiny pinch of breadcrumbs into the hot oil. If they immediately sizzle and turn golden brown within 30 seconds, your oil is ready. If they just sit there or sink, it’s not hot enough. If they burn instantly, it’s too hot – reduce the heat slightly and let it cool down a bit before trying again.
Fry the Cutlets Until Golden and Cooked: Carefully, using tongs, place the breaded chicken cutlets into the hot oil. Be gentle to avoid splashing. This next part is absolutely crucial for success: DO NOT OVERCROWD THE PAN. Cooking too many cutlets at once will lower the oil temperature, resulting in soggy chicken instead of crispy. Fry in batches if necessary, giving each cutlet space. Fry for approximately 3 to 4 minutes per side. You’ll know they’re ready to flip when the edges look golden brown and you can see the golden color creeping up the sides. Once flipped, fry the second side for another 3 to 4 minutes until both sides are a beautiful golden brown and the chicken is cooked through. Because the chicken is so thin from pounding, it cooks surprisingly fast, which is key to keeping it juicy. To be absolutely sure they are cooked, you can use an instant-read thermometer inserted into the thickest part of a cutlet – it should register 165°F (74°C).
Drain and Serve Immediately: As each batch of cutlets finishes frying, use tongs to transfer them from the skillet to a plate lined with paper towels. The paper towels help absorb any excess oil, keeping your cutlets extra crispy. Serve them hot off the pan for the very best texture and flavor. Garnish with a sprinkle of fresh chopped parsley and maybe a little extra pinch of salt or Parmesan cheese if you like! They are fantastic served with a side of creamy cheesy potatoes or a simple side of roasted root vegetables.
Pro Tips for Crispy, Juicy Pan-Fried Chicken Cutlets
Mastering pan-fried chicken cutlets is all about a few key details. Keep these tips in mind for consistent success:
- Pound Uniformly: Ensure all your cutlets are roughly the same thickness after pounding. This guarantees they cook at the same rate.
- Season Generously: Don’t forget to season the chicken before breading. The salt and pepper penetrate the meat, adding flavor from the inside out.
- Pat Dry: Before pounding, pat the chicken breasts completely dry with paper towels. Excess moisture can make the pounding harder and prevent the breading from sticking properly.
- Chill After Breading (Optional but Recommended): If you have time, pop the breaded cutlets in the refrigerator for 10-15 minutes before frying. This helps the breading adhere better and reduces the chance of it falling off in the oil.
- Use Enough Oil: Don’t skimp on the oil. You need enough to come halfway up the side of the cutlet for even cooking and crisping.
- Monitor Oil Temperature: Keep an eye on the oil temperature throughout the frying process. Adjust the heat as needed between batches. Too hot, and the outside burns before the inside cooks. Too cool, and the cutlets become greasy.
- Cook in Batches: Seriously, don’t overcrowd! It’s the biggest mistake people make. Giving the cutlets space ensures the oil stays hot and the cutlets fry instead of steam.
- Drain Properly: Always drain on paper towels immediately after frying to remove excess grease. For maximum crispiness, transfer to a wire rack set over paper towels after a minute or two on the towels.
What to Serve With Chicken Cutlets
These versatile crispy chicken cutlets pair beautifully with so many dishes! For a classic pairing, think mashed potatoes or pasta with a light sauce. They’re also fantastic alongside a fresh green salad, roasted or steamed vegetables, or even turned into a delicious sandwich on crusty bread. If you’re looking for other quick chicken ideas, you might enjoy exploring recipes like Crispy Baked Chicken Cutlets for a lighter option, or perhaps trying a different flavor profile with our Easy Chicken Gyros.
Your Crispy Chicken Cutlet Questions Answered (FAQ)
Let’s tackle some common questions about making perfectly crispy and juicy pan-fried chicken cutlets.
Can I use chicken thighs instead of breasts?
While you technically could pan-fry chicken thighs, this specific technique of pounding and quick cooking is optimized for the leaner, faster-cooking chicken breast. Chicken thighs have more connective tissue and fat and are generally better suited for methods like braising or slower cooking where that breaks down. For these crispy cutlets, stick to breasts for the best results.
How do I keep the breading from falling off?
Several things help! Make sure you pat the chicken dry first. Follow the flour-egg-breadcrumb sequence correctly, ensuring each layer has excess shaken off before moving to the next. Gently pressing the breadcrumbs onto the chicken helps them adhere. As mentioned in the tips, chilling the breaded cutlets for 10-15 minutes before frying can also significantly improve breading adhesion.
What’s the best oil to use for frying?
A neutral-flavored cooking oil with a high smoke point is ideal. Vegetable oil and canola oil are excellent, widely available choices. Peanut oil also works well if you don’t have allergy concerns. Olive oil is not recommended as its smoke point is too low for pan frying at the required temperature.
How do I reheat leftover chicken cutlets?
Reheating fried chicken can be tricky if you want to maintain crispiness. The best way is usually in a toaster oven or a regular oven set to around 350°F (175°C) for about 10-15 minutes, or until heated through. Microwaving is not recommended as it will make them soggy. You can also reheat them gently in a skillet over medium heat with a tiny bit of oil.
Enjoy Your Homemade Crispy Pan-Fried Chicken Cutlets!
There you have it! The simple secret to achieving crispy, juicy pan-fried chicken cutlets right in your own kitchen. This recipe is a go-to for a reason – it’s quick, easy, and delivers fantastic results every time. Whether you serve them as a main dish, slice them for salads, or tuck them into sandwiches, they are sure to be a hit.
Give this recipe a try and say goodbye to dry chicken forever! Let me know how they turn out in the comments below, or if you have any other favorite ways to enjoy chicken cutlets. Happy cooking!
Crispy Pan-Fried Chicken Cutlets

Ingredients
- 2 boneless, skinless chicken breasts
- 1/2 cup all purpose flour
- 2 large eggs
- 1 cup breadcrumbs or panko
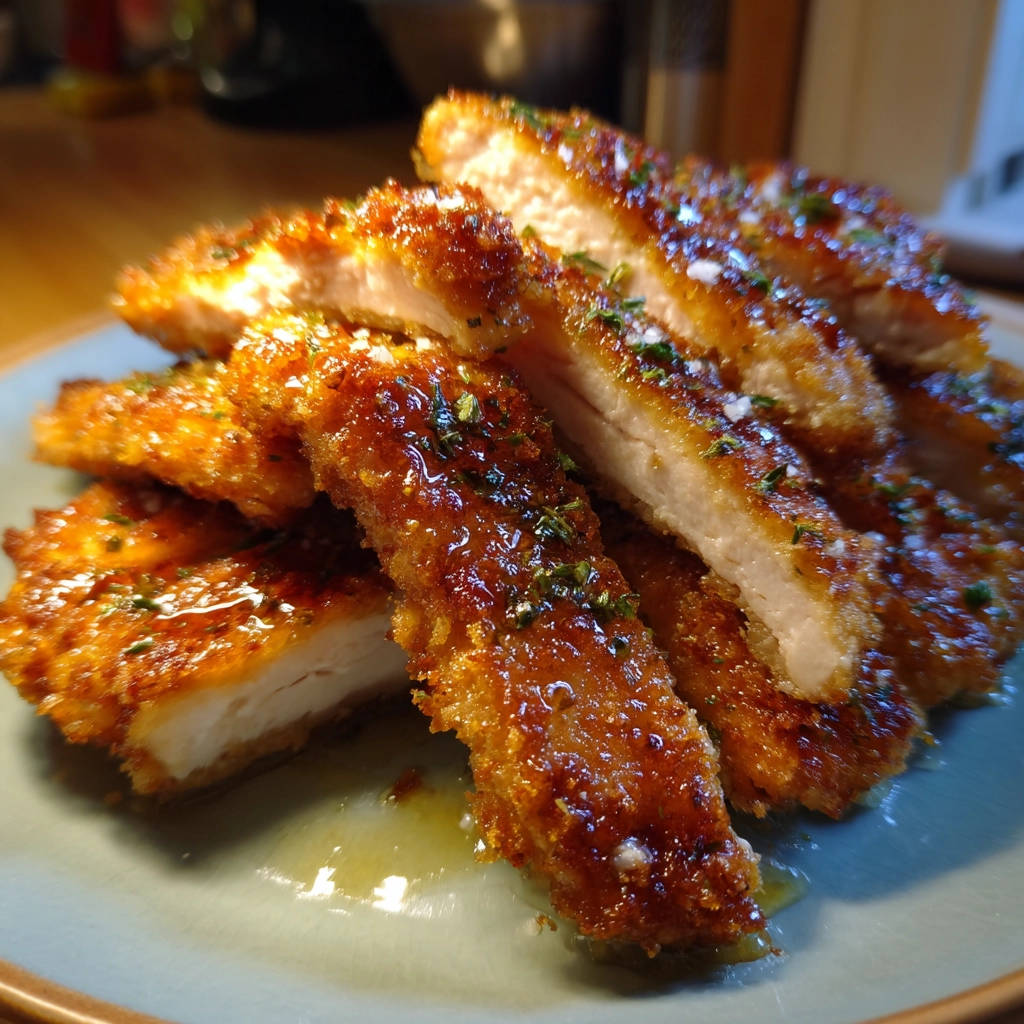
- 1/4 cup grated Parmesan cheese (optional, based on white flecks in image)
- Salt to taste
- Freshly ground black pepper to taste
- Cooking oil for frying (vegetable or canola oil)
- Fresh parsley, chopped (for garnish)
Directions
- Prepare the chicken: Place chicken breasts between two sheets of plastic wrap or in a large zip-top bag. Using a meat mallet or rolling pin, pound each breast to about 1/4 inch thickness. This is the key to keeping them juicy, as they cook very fast! Cut each pounded breast in half or into portions if desired. Season both sides generously with salt and pepper.
- Set up breading stations: Place the flour in a shallow dish. In a second shallow dish, whisk the eggs. In a third shallow dish, combine the breadcrumbs or panko and Parmesan cheese (if using).
- Bread the chicken: Dredge each chicken piece in the flour, shaking off excess. Dip into the beaten egg, letting excess drip off. Finally, coat thoroughly in the breadcrumb mixture, pressing gently to ensure the crumbs adhere.
- Heat the oil: Pour about 1/2 inch of cooking oil into a large skillet. Heat over medium-high heat until the oil reaches about 350°F (175°C). You can test if it’s hot enough by dropping a tiny pinch of breadcrumbs in, they should sizzle immediately.
- Fry the cutlets: Carefully place the breaded chicken cutlets in the hot oil. Do not overcrowd the pan; cook in batches if necessary. This is crucial for even cooking and crispness. Fry for about 3 to 4 minutes per side, until golden brown and cooked through. Because the chicken is thin, it cooks very quickly, preventing it from drying out. The internal temperature should reach 165°F (74°C).
- Drain and serve: Use tongs to transfer the fried cutlets to a plate lined with paper towels to drain excess oil. Garnish immediately with chopped fresh parsley and a little extra sprinkle of salt or Parmesan if you like. Serve hot.