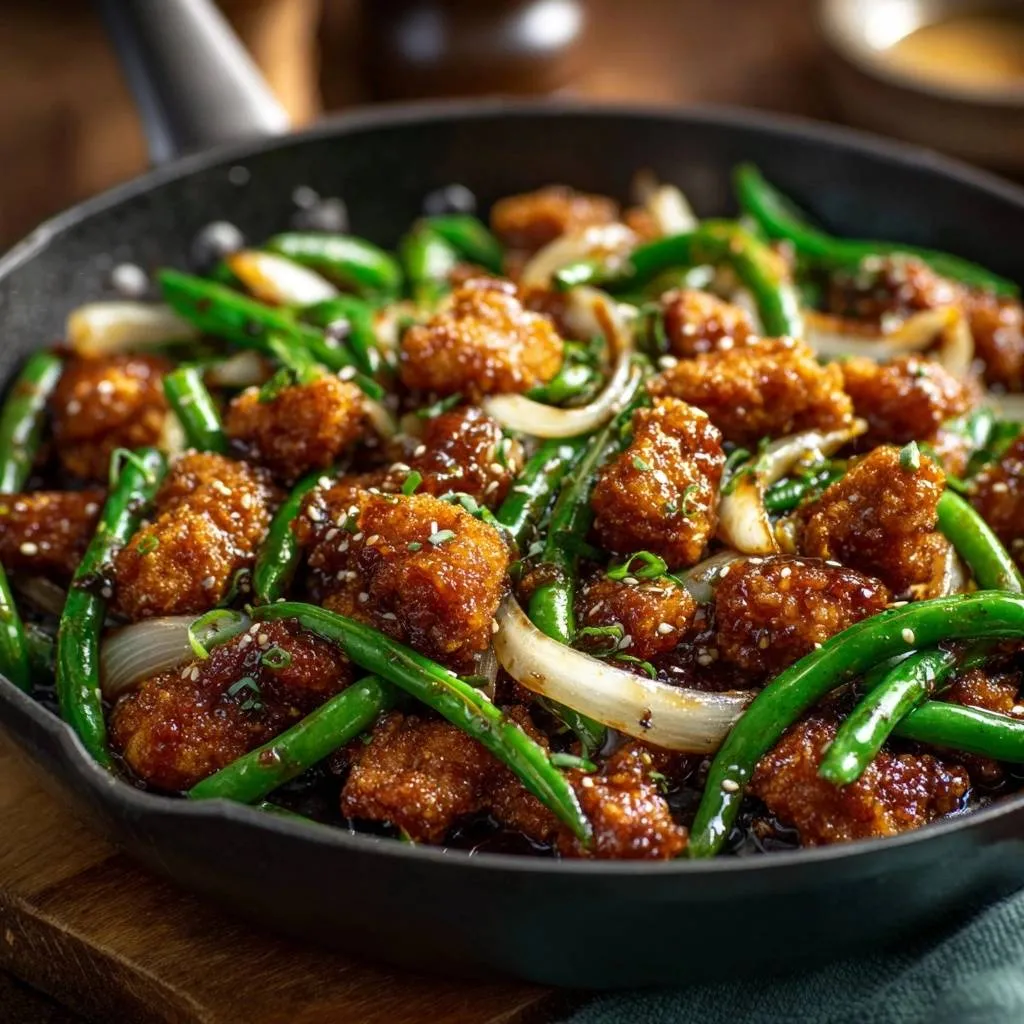
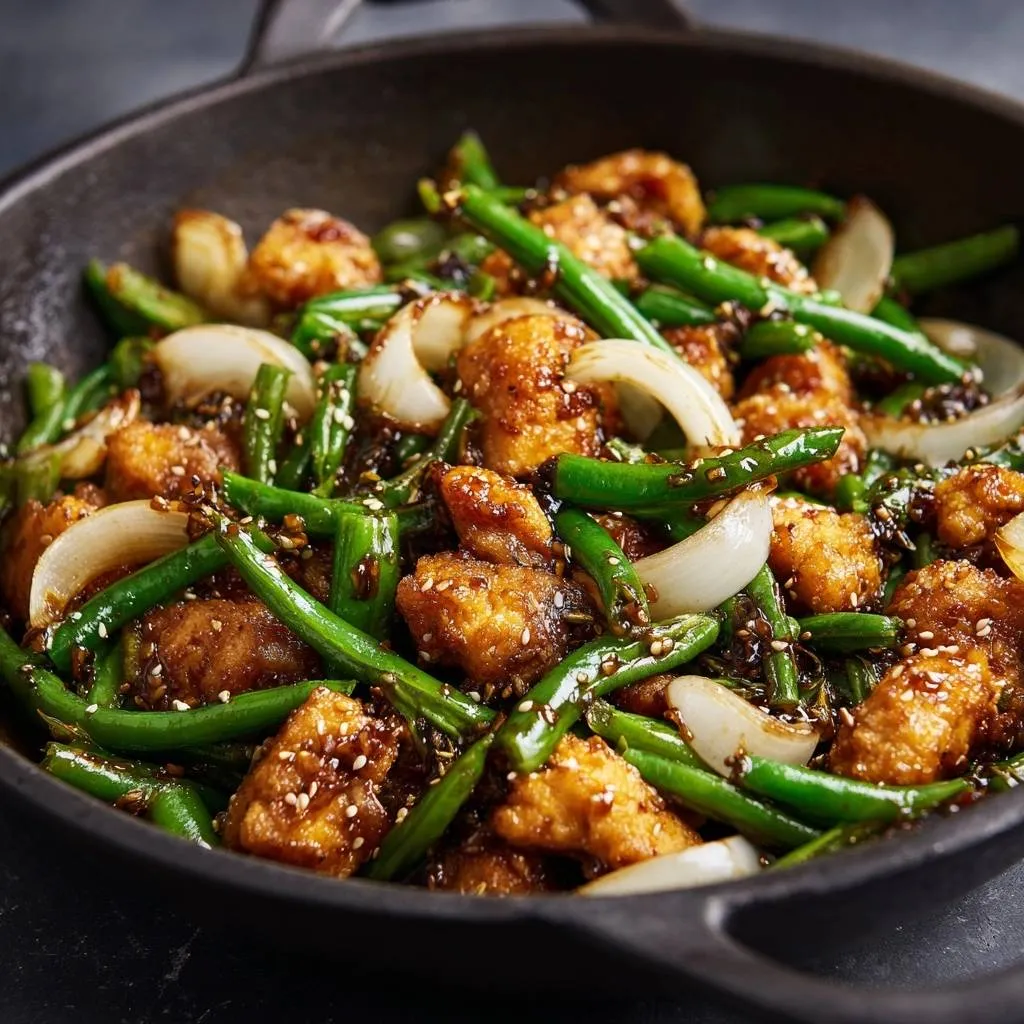
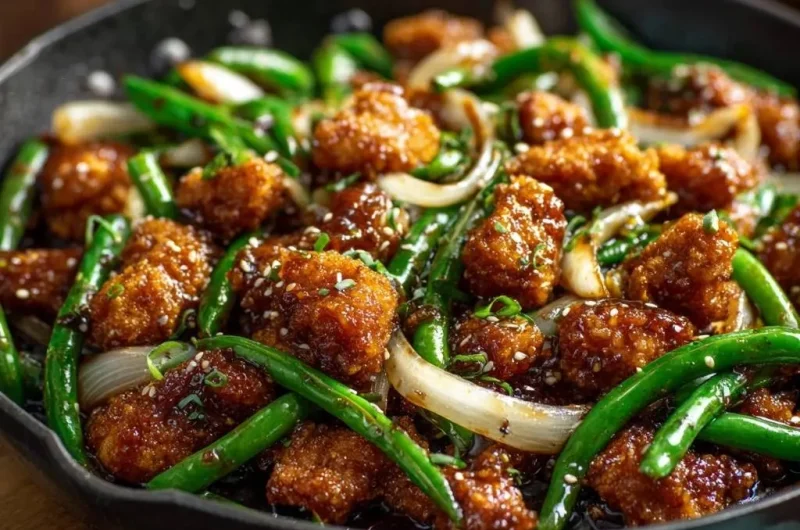
We’ve all been there. You order sesame chicken from the local takeout spot, dreaming of that perfect crunch, only to open the container and find a pile of soggy, gummy breading swimming in syrup. It’s a heartbreak that happens far too often because most recipes don’t account for the steam trapped inside the coating. This Crispy Sesame Chicken and Green Bean Stir-Fry changes the game by focusing on a glass-like crust that shatters when you bite into it, paired with green beans that actually snap.
The secret lies in the contrast of textures. While the chicken provides a rich, savory crunch, the fresh green beans are blistered over high heat until they develop charred skins and a tender-crisp interior. This isn’t just another stir-fry; it’s a technical approach to home cooking that ensures your dinner stays crispy from the first bite to the very last. You’ll get that deep golden, craggy look that usually requires a professional deep fryer, all from a simple shallow fry in your favorite skillet.
If you want to master this dish, you have to respect the starch. Most people make the mistake of using only flour, which creates a soft, bread-like shell. However, by using a high ratio of cornstarch mixed with a touch of baking powder, we create a coating that is physically incapable of turning mushy. The baking powder reacts with the heat to create tiny micro-bubbles, increasing the surface area and making the crust lighter and airier than any takeout version you’ve ever tried.
The Physics of the Perfect “Craggy” Chicken Crust
Achieving a “craggy” texture isn’t about luck; it’s about the “wet-to-dry” dredging method. When you toss the chicken in a beaten egg, you’re creating a sticky protein binder. As you move that wet chicken into the dry mixture of cornstarch and flour, the starch clings to the egg in uneven clumps. Don’t try to smooth these out! Those little bumps and ridges are exactly what you want because they transform into the ultra-crispy bits that trap the honey-soy glaze later on.
Baking powder plays a silent but vital role in this chemical reaction. When it hits the hot oil, it releases carbon dioxide gas, which puffs up the coating ever so slightly. This prevents the breading from becoming a dense, hard brick. Instead, you get a delicate, honeycomb-like structure that feels light on the tongue but provides a satisfying, audible crunch. It’s the difference between a heavy fried nugget and a sophisticated tempura-style crust.
Finally, you must let the breaded chicken rest for at least five minutes before it touches the pan. This step is non-negotiable for protein-starch bonding. During this rest, the moisture from the egg hydrates the flour and cornstarch, essentially “gluing” the coating to the meat. If you skip this, you’ll likely find half of your beautiful breading stuck to the bottom of the skillet rather than on your chicken. Patience here pays off in a crust that stays put.
Essential Components for the Sesame Stir-Fry Base
Quality ingredients are the foundation of a great stir-fry. While many people reach for chicken breasts, I highly recommend using boneless, skinless chicken thighs. Thigh meat contains more fat and connective tissue, which means it stays juicy and tender even under the intense heat of shallow frying. If you do choose breasts, keep a close eye on the clock to ensure they don’t dry out and become stringy.
The green beans are just as important as the protein. You want fresh, vibrant green beans that have a clear “snap” when you break them. Avoid frozen green beans at all costs for this specific recipe. Frozen vegetables release a significant amount of water as they thaw in the pan, which creates steam. That steam is the natural enemy of your crispy chicken and will turn your hard-earned crust into a soggy mess in seconds.
Selecting the Right Starch: Cornstarch vs. Flour
The ratio of cornstarch to all-purpose flour is the “golden ticket” for texture. Cornstarch is pure starch with no gluten, which means it fries up incredibly crisp and brittle. However, a 100% cornstarch coating can sometimes feel too thin or “dusty.” By adding a bit of all-purpose flour, you introduce just enough gluten to give the coating structural integrity and a pleasant chew that holds up against the liquid glaze.
If you use only flour, the result is a heavy, doughy exterior that acts like a sponge for oil. This makes the dish feel greasy and heavy. Our specific blend ensures the oil stays on the outside, cooking the crust quickly while the inside of the chicken steams to perfection in its own juices. It’s a balanced approach that gives you the best of both worlds: the snap of a chip and the heartiness of a meal.
The Aromatics: Ginger, Garlic, and Scallions
Aromatics provide the soul of the sauce. For the best results, mince your ginger and garlic as finely as possible. You want them to melt into the honey and soy sauce to create a smooth, lacquer-like glaze rather than biting into a large, raw chunk of garlic. Fresh ginger is essential here; the powdered stuff simply cannot replicate that bright, peppery zing that cuts through the richness of the fried chicken.
When it comes to scallions, think of them in two parts. The white and light green bottoms have a sharper, more onion-like flavor and can be tossed in with the green beans to mellow out. The dark green tops are delicate and fresh, making them the perfect final garnish. Adding them at the very end preserves their color and provides a hit of freshness that balances the sweet and salty notes of the glaze.
Mastering the Shallow-Fry Technique at Home
Oil management is the most technical part of this recipe. You don’t need a deep fryer; a large skillet with about half an inch of oil works perfectly. The goal is to hit 350°F. If the oil is too cold, the breading will soak it up like a sponge and become greasy. If it’s too hot, the outside will burn before the chicken is cooked through. You’ll know it’s ready when a small pinch of flour sizzles immediately upon contact.
One of the biggest mistakes home cooks make is overcrowding the pan. It’s tempting to throw all the chicken in at once to save time, but this causes the oil temperature to plummet. Instead of frying, the chicken ends up “stewing” in lukewarm oil, leading to a limp, oily coating. Fry in batches, giving each piece enough space to breathe. This ensures the heat stays consistent and every inch of the chicken gets that golden-brown finish.
Once the chicken is done, move it to a wire rack set over a baking sheet. Most people reach for paper towels, but these can actually be counterproductive. When hot, fried food sits directly on a flat surface, steam gets trapped underneath, softening the bottom crust. A wire rack allows air to circulate around the entire piece of chicken, keeping it crispy on all sides while the excess oil drips away. It’s a small professional trick that makes a massive difference.
Step-by-Step: Executing the Crispy Sesame Chicken and Green Bean Stir-Fry
Now it’s time to bring everything together. This process moves fast once the heat is on, so make sure your sauce is whisked and your vegetables are chopped before you start. You’re looking for a seamless transition from frying the protein to blistering the vegetables and finally emulsifying the glaze. It’s a high-energy cooking style that results in a restaurant-quality meal in under 40 minutes.
Phase 1: The Double-Coat Dredging Process
Start by dipping your chicken chunks into the beaten egg. Use one hand for the “wet” work and the other for the “dry” starch mixture to keep your fingers from becoming breaded themselves. As you move the chicken into the starch, press down firmly. You want to feel the flour mixture adhering to the egg. Shake off the excess gently, but leave those craggy bits intact. Let them rest on a plate while you heat your oil.
Phase 2: Blistering the Green Beans and Onions
After frying the chicken and clearing the pan, keep the heat high. Add the green beans and onions to the remaining tablespoon of oil. You should hear a loud sizzle immediately. Don’t stir them constantly; let them sit for a minute to develop those beautiful charred “blister” marks. This high-heat sear cooks the beans quickly so they stay bright green and crunchy rather than turning a dull, mushy olive color.
Phase 3: Emulsifying the Honey-Soy Glaze
Pour your sauce mixture into the pan with the vegetables. Because of the cornstarch slurry, the liquid will transform from a thin brown juice into a thick, glossy lacquer almost instantly. As soon as it starts to bubble and thicken, kill the heat. Toss the crispy chicken back in and move fast! You only want to coat the chicken, not soak it. A quick 30-second toss ensures every nook and cranny is filled with glaze while the crust remains structurally sound.
Troubleshooting Common Stir-Fry Pitfalls
If your breading is falling off in the pan, you likely didn’t let the chicken rest long enough after dredging, or you moved the chicken too much before the crust had a chance to set. Let the chicken fry undisturbed for at least two minutes before flipping. This allows the proteins to firm up and create a solid bond with the starch. If the sauce tastes too salty, check your soy sauce; always opt for a low-sodium version, or add an extra teaspoon of honey to balance the flavors.
Tough chicken is usually a result of overcooking. Chicken breast chunks only need about 3-4 minutes per side in hot oil. If you’re worried about the meat being dry, switch to chicken thighs next time—they are much more forgiving. Finally, if your green beans feel “squeaky” or raw, give them an extra two minutes in the pan with a splash of water and a lid before adding the sauce. This creates a quick burst of steam to soften them without ruining the chicken.
Flavor Variations and Ingredient Substitutions
This recipe is incredibly versatile. If you aren’t a fan of green beans, broccoli florets or sugar snap peas make excellent substitutes. Just remember to cut broccoli into small pieces so they cook at the same rate as the chicken. For those who love a bit of heat, add a teaspoon of red chili flakes to the sauce or a drizzle of sriracha at the very end. It cuts through the sweetness of the honey beautifully.
If you need a gluten-free version, this recipe is easy to adapt. Replace the all-purpose flour with more cornstarch or arrowroot powder, and swap the soy sauce for tamari. The texture will actually be even crispier! You can also experiment with the sweetener; maple syrup or agave nectar works well if you don’t have honey on hand, though they will slightly alter the floral notes of the final glaze.
Optimal Pairings for a Balanced Meal
Since this dish has a bold, savory-sweet profile, it pairs best with simple sides. A bowl of fluffy jasmine rice is the classic choice because it acts as a sponge for that glossy sesame glaze. If you want something heartier, brown rice adds a nice nutty flavor that complements the toasted sesame seeds. For a lower-carb option, cauliflower rice works surprisingly well, provided you season it with a little lime juice and salt.
To balance the richness of the fried chicken, I love serving this alongside a cold smashed cucumber salad. The acidity from the rice vinegar and the cooling crunch of the cucumbers provide a refreshing contrast to the warm, glazed stir-fry. It cleanses the palate between bites and makes the whole meal feel much lighter. A simple slaw with shredded cabbage and a ginger-lime dressing is another fantastic way to add crunch and brightness.
Expert Tips for Preparation and Storage
This dish is at its absolute peak the moment it leaves the pan. However, if you have leftovers, don’t lose hope! Avoid the microwave, as it will turn the chicken into a rubbery, soggy mess. Instead, use an air fryer at 350°F for about 3-5 minutes. This will re-activate the oils in the crust and bring back a surprising amount of that original crunch. An oven set to 400°F on a wire rack also works in a pinch.
To make this a lightning-fast weeknight meal, you can prep almost everything 24 hours in advance. Trim the beans, slice the onions, and whisk the sauce ingredients together in a jar. You can even cube the chicken and keep it in the fridge. When you’re ready to eat, all you have to do is the dredging and frying. This turns a “project” meal into a 15-minute reality, making it perfect for busy schedules.
How to Scale This Recipe for Large Groups
If you’re cooking for a crowd, do not try to double the recipe in one pan. You’ll end up with a soggy disaster. Instead, fry the chicken in several small batches. As each batch finishes, place it on a wire rack in an oven set to 200°F. This keeps the chicken warm and dry while you finish the rest. Once all the chicken is fried, cook the vegetables in the largest pan you have, then toss everything together at the very last second.
Frequently Asked Questions
Can I bake the chicken instead of frying?
You can bake the chicken at 425°F on a greased wire rack, but you will lose that signature “glass-like” crunch. Frying creates an immediate sear that locks in moisture while hardening the starch. Baked versions tend to be more like standard breaded nuggets. If you do bake, spray the chicken liberally with oil to help the starch brown and crisp up as much as possible.
Why is my sauce too thick?
The sauce thickens because the water evaporates and the cornstarch activates. If it becomes too gloopy or “jelly-like,” simply whisk in a tablespoon of water or chicken broth at a time over low heat until it reaches a glossy, pourable consistency. This often happens if the pan is too hot or if the sauce bubbles for more than two minutes before you add the chicken.
Can I use frozen green beans?
It is not recommended. Frozen green beans are blanched before freezing, which breaks down their cell walls. When they hit the pan, they release a lot of internal moisture. This moisture creates steam that will immediately soften the crispy coating on your chicken. If you must use them, thaw and pat them extremely dry with paper towels first, but fresh beans will always yield a superior result.
What is the best oil for this recipe?
You need an oil with a high smoke point. Vegetable oil, canola oil, or peanut oil are all excellent choices. Avoid extra virgin olive oil or butter, as they will burn at the temperatures required for a proper shallow fry. Peanut oil is a favorite for many chefs because it adds a very subtle nutty aroma that complements the sesame seeds and soy sauce perfectly.
How do I keep the breading from falling off?
The most common reason breading falls off is skipping the resting period. Those five minutes allow the starch to hydrate and form a physical bond with the chicken. Additionally, make sure your oil is hot enough before adding the chicken. If the oil is cold, the egg wash will dissolve into the oil before the starch can set, causing the coating to slide right off the meat.
Can I make this dish spicy?
Absolutely. The base glaze is quite sweet due to the honey, so it handles heat very well. You can add a teaspoon of dried red chili flakes to the aromatics while they sauté, or whisk a tablespoon of chili garlic sauce into the glaze mixture. For a cleaner heat, a few slices of fresh serrano or jalapeño peppers tossed in with the green beans will do the trick.
Crispy Sesame Chicken and Green Bean Stir-Fry
Course: Main CourseCuisine: Asian-AmericanDifficulty: easy4
servings20
minutes15
minutes35
Minutes450
kcalAsian-American
Ingredients
1.5 lbs chicken breast or thighs, cut into 1-inch chunks
1/2 lb fresh green beans, trimmed
1 large white onion, sliced into thick wedges
1 egg, beaten
1/2 cup cornstarch
1/4 cup all-purpose flour
1/2 teaspoon baking powder
1/2 teaspoon salt
1/2 cup vegetable oil (for shallow frying)
For the Glaze:
1/2 cup soy sauce
2 tablespoons honey or brown sugar
1 tablespoon rice vinegar
1 tablespoon ginger, minced
2 cloves garlic, minced
1 teaspoon cornstarch (mixed with 1 tablespoon water)
1 tablespoon sesame seeds
2 green onions, thinly sliced
Directions
- Prepare the Chicken: In a medium bowl, toss the chicken pieces with the beaten egg until fully coated. In a separate shallow bowl, whisk together the cornstarch, flour, baking powder, and salt.
- Dredge: Working in batches, remove chicken from the egg and press firmly into the flour mixture. Ensure each piece is heavily coated and “craggy.” Let the breaded chicken rest on a plate for 5 minutes; this prevents the breading from falling off in the pan.
- Shallow Fry: Heat the vegetable oil in a large skillet over medium-high heat until shimmering (about 350°F). Carefully add the chicken in a single layer. Fry for 3-4 minutes per side until the crust is deep golden brown and very crisp. Remove chicken and drain on a wire rack or paper towels.
- Sauté Vegetables: Carefully pour out all but 1 tablespoon of the hot oil from the skillet. Add the green beans and onions. Stir-fry over high heat for 3-4 minutes until the beans are blistered and bright green, and onions are translucent but firm.
- Thicken the Sauce: In a small bowl, whisk the soy sauce, honey, vinegar, ginger, garlic, and the cornstarch slurry. Pour the mixture into the skillet with the vegetables. Let it bubble for 1-2 minutes until it transforms into a thick, glossy glaze.
- The Final Toss: Add the crispy chicken back into the skillet. Toss rapidly for no more than 30 seconds to coat every piece in the glaze while maintaining the structural integrity of the crust.
- Garnish: Remove from heat immediately. Top with a generous amount of sesame seeds and sliced green onions. Serve immediately over steamed rice.
Notes
- The secret to the craggy crust is letting the breaded chicken rest for 5 minutes before frying. This ensures the coating adheres perfectly and doesn’t flake off in the oil.