Ever dream of a layered dessert that looks as good as it tastes? This Decadent Chocolate Lush recipe is your answer! Forget those soggy, disappointing layered desserts of the past. This version, with its creamy layers and rich chocolate flavor, stays perfectly intact, slice after beautiful slice. The secret? A simple technique to prevent that dreaded watery bottom layer. Get ready for a chocolatey dream come true!
Why You’ll Love This Chocolate Lush
This Chocolate Lush isn’t just another dessert; it’s an experience. Here’s why it’ll become a family favorite:
- No Soggy Bottom: Our secret technique guarantees perfectly defined, delicious layers.
- Rich Chocolate Flavor: From the chocolate cake crust to the creamy pudding, it’s a chocolate lover’s paradise.
- Easy to Make: Uses simple ingredients and comes together quickly.
- Crowd-Pleasing: Perfect for potlucks, parties, or any special occasion.
- Make-Ahead Friendly: Prepare it in advance and let the flavors meld for an even better taste.
Gathering Your Ingredients for Decadent Chocolate Lush
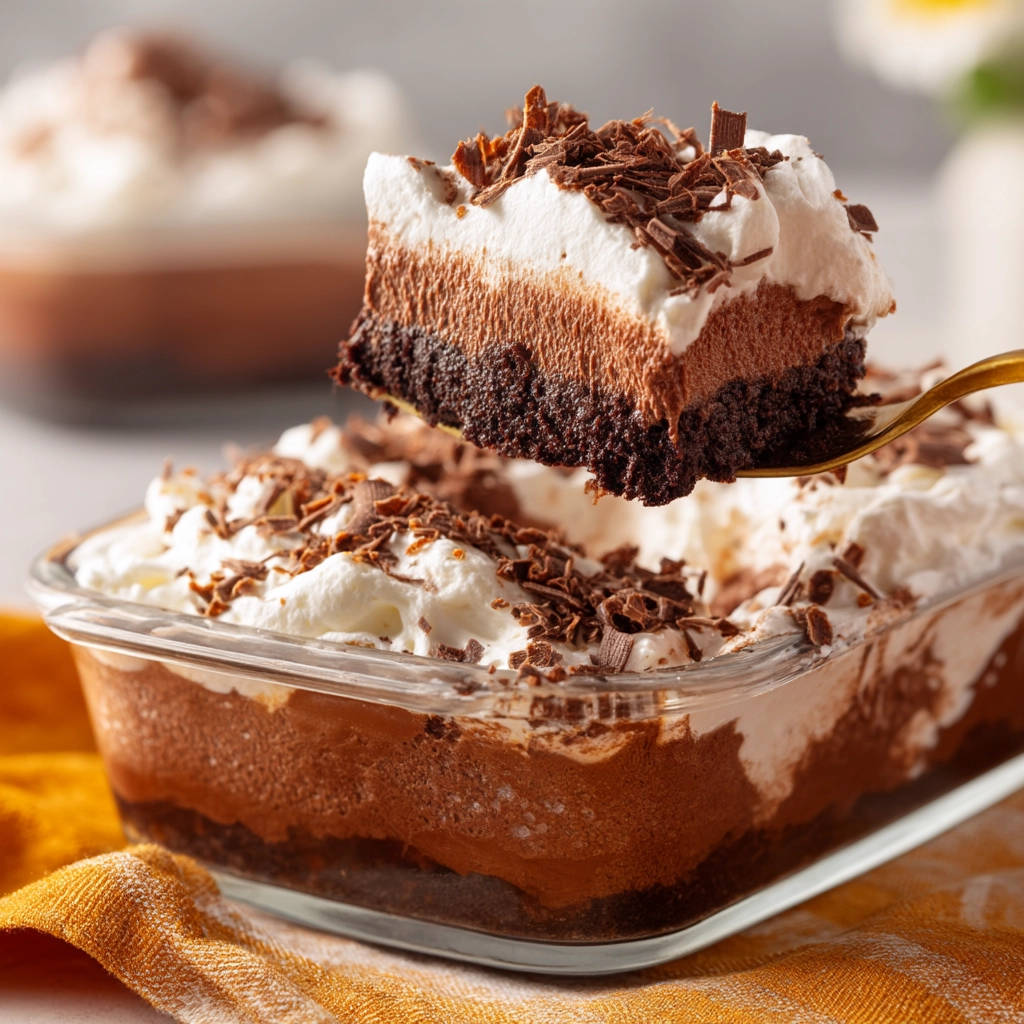
This recipe relies on a balance of textures and flavors, starting with a rich chocolate base, followed by a creamy, tangy layer, then a decadent chocolate pudding, and finally, a light and airy topping. The combination is simply irresistible! Let’s break down the key ingredients and why they’re so important.
- Chocolate Cake Mix: This forms the base of our lush. It’s quick and convenient, providing a rich chocolate flavor. Use your favorite brand, but a devil’s food or dark chocolate mix will amp up the intensity.
- Unsalted Butter: Melted butter binds the cake mix crust together, creating a tender and flavorful base. Be sure to use unsalted butter, as the cake mix already contains salt.
- Cream Cheese (Softened): This is the star of our creamy layer. Softening it is crucial for a smooth, lump-free mixture. Full-fat cream cheese provides the best flavor and texture.
- Powdered Sugar: Also known as confectioners’ sugar, this dissolves easily into the cream cheese, creating a perfectly smooth and sweet layer.
- Non-Dairy Whipped Topping (Divided): This adds a light and airy texture to both the cream cheese layer and the topping. Make sure it is a non-dairy product. Using a divided portion allows the layers to have their own unique identity.
- Instant Chocolate Pudding Mix: Two boxes of instant pudding ensure a thick and creamy chocolate layer. Instant pudding is key for its quick setting ability.
- Milk: The milk activates the instant pudding, creating that luscious chocolate layer. Whole milk will result in the richest flavor, but reduced-fat milk can also be used.
- Chocolate Shavings: For garnish! Because who doesn’t love extra chocolate? Use a vegetable peeler on a bar of good-quality chocolate for beautiful shavings.
Crafting Your Chocolate Lush: Step-by-Step
Ready to create a dessert masterpiece? Don’t be intimidated! This Chocolate Lush is surprisingly easy to make, and the results are truly impressive. The most important thing to remember is the chilling step – it’s the key to preventing a soggy bottom. Let’s get started!
- Preheat and Prep: Begin by preheating your oven to 350 degrees F (175 degrees C). While the oven heats, prepare a 9×13 inch baking dish. A light spray with cooking spray or a quick wipe with butter will ensure the crust doesn’t stick.
- Make the Crust: In a medium bowl, combine the chocolate cake mix and melted butter. Mix until the ingredients are evenly distributed and have formed a slightly crumbly mixture. Press this mixture firmly into the bottom of the prepared baking dish, creating an even crust.
- Bake the Crust: Bake the crust for 15-20 minutes, or until it’s set and slightly firm to the touch. Keep a close eye on it to prevent burning. Let the crust cool completely before adding the next layer. This is important, as a warm crust can melt the cream cheese layer.
- Prepare the Cream Cheese Layer: While the crust is cooling, prepare the cream cheese layer. In a large bowl, beat the softened cream cheese and powdered sugar together until smooth and creamy. Make sure there are no lumps! Gently fold in one cup of the non-dairy whipped topping until just combined. Be careful not to overmix, as this can deflate the whipped topping. Spread this mixture evenly over the cooled crust.
- Prepare the Chocolate Pudding Layer: In a separate bowl, whisk together the instant chocolate pudding mix and milk until smooth. This step is crucial for a perfect pudding layer. Let the mixture stand for 5 minutes to thicken slightly. This is the key to preventing a watery sauce!
- The Freezing Secret: Pour the thickened pudding evenly over the cream cheese layer. Immediately place the dessert in the freezer for 20 minutes to chill. This quick freeze helps the pudding set and prevents it from seeping into the cream cheese layer, ensuring those beautiful, distinct layers.
- Assemble the Lush: Remove the dessert from the freezer. Spread the remaining 2 cups of non-dairy whipped topping evenly over the pudding layer. Make sure to create a smooth and appealing finish.
- Garnish and Chill: Garnish with chocolate shavings. Refrigerate for at least 2 hours before serving to allow the layers to fully set. This final chill time is essential for the best flavor and texture.
Tips for Perfect Chocolate Lush Every Time
Want to ensure your Chocolate Lush is a showstopper? Here are a few pro tips to keep in mind:
- Don’t Overbake the Crust: Overbaking will result in a dry, crumbly crust. Aim for a golden-brown color and a slightly firm texture.
- Soften the Cream Cheese: Ensure your cream cheese is properly softened before mixing. This will prevent lumps and create a smooth, creamy layer.
- Thicken the Pudding: Letting the pudding mixture stand for 5 minutes before pouring is crucial. This allows the pudding to thicken slightly, preventing a watery bottom layer.
- Don’t Skip the Freezer Step: The 20-minute freezer chill is the secret to perfectly defined layers. Don’t be tempted to skip it!
- Make Ahead: This dessert is perfect for making ahead of time. In fact, the flavors meld together even better if it sits in the refrigerator for a day or two.
- Garnish Creatively: Get creative with your garnishes! Besides chocolate shavings, you can use cocoa powder, chocolate chips, or even fresh berries.
- Even Whipped Topping: Use a rubber spatula for even distribution of your whipped topping layer.
Optional variations
You can experiment with different pudding flavors! A vanilla pudding instead of the chocolate would give a totally different taste and mouthfeel. Or, if you would like to try out other dessert options, take a look at our easy caramel nut dessert jars recipe for another delicious make-ahead treat.
Your Chocolate Lush Questions Answered (FAQ)
Can I use a different type of cake mix?
Absolutely! While chocolate cake mix is classic, you can experiment with other flavors like vanilla, yellow, or even red velvet. Keep in mind that the flavor profile will change accordingly.
Can I use regular whipped cream instead of non-dairy whipped topping?
Yes, if you prefer, you can use real whipped cream. However, keep in mind that whipped cream tends to deflate over time, so the dessert may not hold its shape as well. Non-dairy whipped topping is more stable and holds its shape for longer. You can find many more options, including those appropriate for dairy allergies. Consider also adding a touch of stabilizer to regular whipped cream.
Can I make this dessert gluten-free?
Yes! Simply use a gluten-free chocolate cake mix and ensure that your pudding mix and whipped topping are also gluten-free. Double-check all labels to be sure.
How long will this dessert last in the refrigerator?
This Chocolate Lush will last for up to 3-4 days in the refrigerator. Be sure to store it in an airtight container to prevent it from drying out.
Can I freeze Chocolate Lush?
While you can freeze it, the texture of the whipped topping may change slightly upon thawing. If you do freeze it, wrap it tightly in plastic wrap and then foil for maximum protection. Thaw it in the refrigerator overnight before serving.
Enjoy Your Homemade Chocolate Lush!
There you have it – a Decadent Chocolate Lush that’s guaranteed to impress! This layered dessert is the perfect combination of rich chocolate flavor, creamy textures, and a touch of sweetness. Whether you’re serving it at a party or simply enjoying a sweet treat at home, this Chocolate Lush is sure to be a hit. Don’t forget to leave a comment below and let me know how yours turned out! And if you’re in the mood for other delicious desserts, give our easy delicious chocolate sheet cake recipe a try!
Decadent Chocolate Lush (Never Watery Sauce)

Ingredients
- 1 box chocolate cake mix
- 1/2 cup unsalted butter melted
- 1 8oz package cream cheese softened
- 1 cup powdered sugar
- 3 cups non-dairy whipped topping divided
- 2 boxes instant chocolate pudding mix
- 3 cups milk
- Chocolate shavings for garnish
Directions
- Preheat oven to 350 degrees F (175 degrees C). Prepare a 9×13 inch baking dish.
- Prepare the crust: Combine the chocolate cake mix and melted butter. Press the mixture into the bottom of the baking dish. Bake for 15-20 minutes, or until set. Let cool completely.
- Prepare the cream cheese layer: In a large bowl, beat together the softened cream cheese and powdered sugar until smooth. Gently fold in 1 cup of the non-dairy whipped topping. Spread this mixture evenly over the cooled crust.
- Prepare the chocolate pudding layer: In a separate bowl, whisk together the instant chocolate pudding mix and milk until smooth. Let stand for 5 minutes to thicken slightly. This is key. Pour the pudding evenly over the cream cheese layer, then immediately place the dessert in the freezer for 20 minutes to chill.
- Assemble the Lush: Remove the dessert from the freezer. Spread the remaining 2 cups of non-dairy whipped topping evenly over the pudding layer.
- Garnish with chocolate shavings. Refrigerate for at least 2 hours before serving to allow the layers to set.