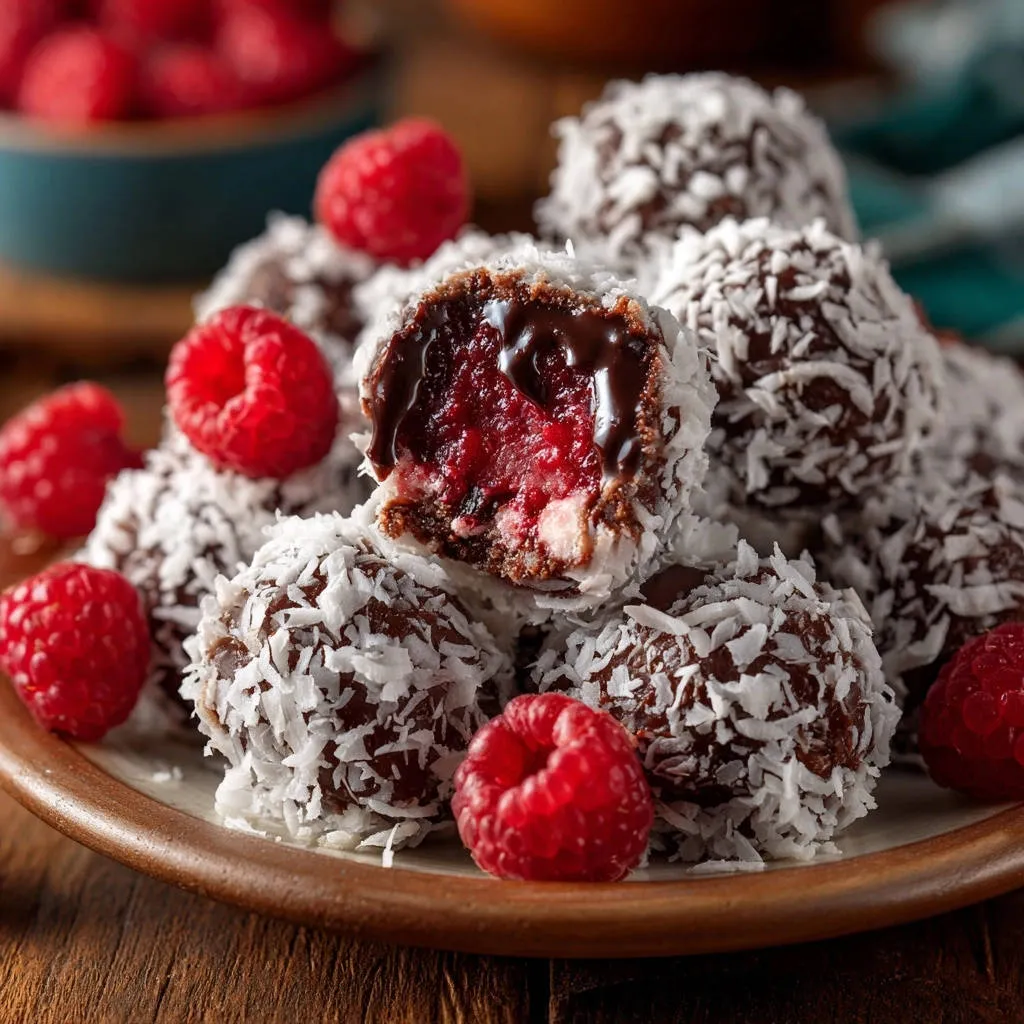
Oh, the joy of a homemade truffle! That decadent bite, the rich chocolate yielding to a burst of creamy, flavorful filling. It’s a little piece of edible magic, isn’t it? But if you’ve ever tried making filled truffles at home, you might have encountered a frustrating foe: the dreaded leaky filling. You spend time crafting that luscious center, carefully encasing it in chocolate, only to find it seeping out the sides before you even get to share (or devour) your creations.
For the longest time, I struggled with this exact problem, especially with fruit fillings. Raspberries are notoriously juicy, and keeping their vibrant flavor contained seemed like a culinary impossibility. But after much experimentation and a few failed batches (where my truffles looked more like sad, bleeding chocolates), I discovered a simple yet game-changing technique. The secret to these delightful Raspberry Chocolate Coconut Truffles lies in one crucial step that guarantees a perfectly sealed, burst-in-your-mouth experience every single time. Get ready to make truffles that are as beautiful as they are delicious, with no more leaks!
Why You’ll Love This Recipe (Leak-Proof!)
Beyond solving the leaky filling dilemma, these Raspberry Chocolate Coconut Truffles are simply a dream come true for anyone who loves the classic combination of dark chocolate, tart raspberries, and sweet coconut. Here’s why they’re destined to become a favorite in your treat repertoire:
- They combine three incredible flavors: The slight bitterness of dark chocolate, the bright tang of fresh raspberries, and the tropical sweetness of coconut. It’s a flavor party!
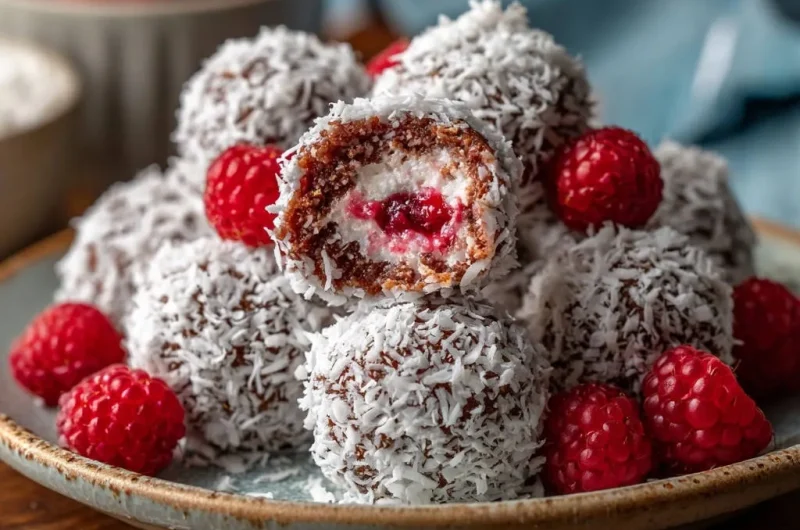
- That perfect texture contrast: A firm, slightly chewy chocolate shell and coating gives way to a smooth, intensely flavored raspberry center.
- Homemade satisfaction: There’s something truly special about creating beautiful confectionery treats right in your own kitchen.
- The secret weapon: The method for handling the raspberry filling ensures a mess-free, picture-perfect truffle with every bite. No more sadness over lost filling!
- Impressive yet simple: Despite looking fancy, these truffles are surprisingly straightforward to make once you know the key technique.
Gathering Your Ingredients for Raspberry Chocolate Coconut Truffles
Making these gorgeous truffles starts with selecting quality ingredients. Each component plays an important role in building the layers of flavor and texture that make these treats so irresistible. Think of these as the building blocks for your delicious edible gems.
Let’s talk chocolate first. We’re using dark chocolate chips for the base. The higher cocoa content provides a lovely depth of flavor that balances the sweetness of the coconut and the tartness of the raspberries. Using good quality dark chocolate chips will make a noticeable difference in the final taste and texture of your truffle base. Paired with unsalted butter, the chocolate melts into a smooth, rich ganache-like mixture that’s pliable enough to shape.
Powdered sugar is whisked into the melted chocolate base not just for sweetness, but also to help give it structure and that classic truffle texture once cooled and firmed up. It contributes to a smooth melt-in-your-mouth feel.

For the star filling, we need fresh raspberries. Using fresh berries brings the brightest, most vibrant flavor. We’ll gently cook them down just a little to concentrate their taste and slightly thicken their natural juices. A touch of optional granulated sugar can be added if your berries are particularly tart, or if you simply prefer a sweeter filling. Remember, this cooked berry mixture is the key component we’ll treat specially to prevent leaks.
Finally, the generous coating of shredded sweetened coconut adds a lovely tropical crunch and sweetness that perfectly complements the chocolate and raspberry. It gives these truffles their signature look and another layer of delightful texture.
Here’s everything you’ll need:
- 1 cup dark chocolate chips
- 1/4 cup unsalted butter
- 2 tablespoons powdered sugar
- 1/4 cup crushed fresh raspberries
- 1 teaspoon granulated sugar (optional)
- 1 cup shredded sweetened coconut
Crafting Your Raspberry Chocolate Coconut Truffles: Step-by-Step
Alright, let’s dive into the making! The process is broken down into a few simple stages, with the crucial filling preparation step being our secret weapon against leaks. Don’t rush the chilling times – they are essential for success!
Prepare the Raspberry Filling (The Leak-Proof Secret!): Start by gently mashing your fresh raspberries right in a small saucepan. You want them broken down but still with some texture. If your berries are quite tart or you have a sweet tooth, add the optional granulated sugar here. Cook this mixture over very low heat. This isn’t about making jam; it’s about just softening the berries and allowing their natural juices to slightly reduce and thicken, concentrating that wonderful raspberry flavor. Stir occasionally for about 3 to 5 minutes until you see it thicken just a bit. Remove the pan from the heat and let this vibrant raspberry mixture cool completely. Now, here’s the critical part for preventing leaks: transfer the cooled filling to a small container. Place this container in the freezer for about 30 to 45 minutes. You want it to become quite firm, almost like a solid fruit paste. This firmness is what will allow you to easily wrap the chocolate around it without the liquid escaping.
Prepare the Chocolate Base: While your raspberry filling is firming up in the freezer, work on the chocolate part. Grab a microwave-safe bowl and combine the dark chocolate chips and the unsalted butter. Melt them together by heating in short intervals in the microwave – think 30 seconds at a time. After each interval, take the bowl out and give it a good stir. Continue this until the mixture is completely smooth and melted. It should look glossy and inviting. Stir in the powdered sugar until it’s fully combined and there are no lumps. Now, let this chocolate mixture cool down. This is important! If it’s too warm, it will melt your firm raspberry filling when you try to assemble. Let it cool at room temperature for about 30 to 45 minutes, or until it’s firm enough to scoop and hold its shape, but still pliable enough to mold easily in your hands. It should feel like a soft dough.
Assemble the Truffles (Focus on the Seal!): Now for the fun part – putting it all together! Take a small scoop of your cooled, pliable chocolate mixture, roughly a teaspoon. Roll it gently in your palm for a second, then flatten it into a small disc or circle in your hand. Go back to your freezer and grab the now-firm raspberry filling. Take just a small piece of this frozen filling, about half a teaspoon – it should be easy to handle because it’s frozen. Place this piece of firm raspberry filling right in the center of your flattened chocolate disc. This is where you become a truffle architect! Carefully bring the edges of the chocolate up and around the raspberry filling, completely enclosing it. Work gently to ensure there are absolutely no cracks or openings. The firmness of the frozen filling makes this much easier than working with a soft filling. Once the filling is fully encased, gently roll the ball between your palms. This smooths the surface and, more importantly, helps to seal the seam and ensure the filling is perfectly contained inside.
Firm Up the Assembled Truffles: As you form each truffle ball, place it onto a plate or tray that you’ve lined with parchment paper. Once you’ve assembled all your truffles, pop the plate into the refrigerator. Let them chill for at least 30 minutes. This refrigeration step is absolutely crucial. It allows the chocolate shell to firm up around the raspberry filling, making the truffles sturdy and ready for their final coating. A well-chilled truffle holds its shape beautifully.
Coat the Truffles: Get your shredded sweetened coconut ready! Pour the cup of coconut into a shallow dish. Take the chilled truffle balls from the refrigerator, working with a few at a time to keep the others cold. Roll each truffle ball in the shredded coconut, pressing gently so the coconut flakes adhere all over the surface. The slightly cool surface of the truffle will help the coconut stick nicely. Ensure they are fully coated for that perfect look and texture.
Final Chill and Storage: Once all your truffles are beautifully coated in coconut, place them back onto the parchment-lined plate or into an airtight container. Store the finished Raspberry Chocolate Coconut Truffles in the refrigerator until you are ready to serve them. Keeping them cold helps maintain their shape and, most importantly, keeps that delightful raspberry filling right where it belongs until you take that first amazing bite. These truffles are best enjoyed chilled.
Tips for Perfect Truffles Every Time
Making truffles can feel intimidating, but with a few simple tips, you’ll master these Raspberry Chocolate Coconut beauties in no time. Remember, the key is often in the details and the temperature control!
For a different flavor profile, consider these peppermint chocolate truffles next.
- Quality Matters: Using good quality dark chocolate chips makes a big difference in the flavor and how smoothly the chocolate melts and sets.
- Don’t Rush the Cooling/Chilling: The cooling time for the chocolate base and the chilling times for the truffles are non-negotiable for successful shaping and sealing. Patience is your friend here!
- Handle with Care (and Cool Hands!): Warm hands can quickly melt the chocolate base during assembly. If you find the chocolate getting too soft as you work, pop it back in the fridge for a few minutes, or rinse your hands under cold water.
- Size Uniformity: Try to make your chocolate scoops and raspberry filling pieces roughly the same size. This helps ensure consistent truffles that look lovely when served. Using small measuring spoons (like 1 tsp for chocolate and 1/2 tsp for filling) can help with this.
- Sealing is Key: Seriously, take the extra moment in Step 3 to ensure the chocolate completely covers the raspberry filling with no gaps or cracks. This is the absolute best defense against leaks.
- Alternative Coatings: While coconut is specified and delicious, you could experiment! If you’re not a coconut fan, consider rolling the chilled truffles in cocoa powder, finely chopped nuts, or even dipping them in more melted chocolate (though dipping can be trickier than rolling). For another sweet treat rolled in coconut, you might enjoy making Coconut Caramel Chocolate Cheesecake bites!
- Make Ahead: These truffles need chilling time anyway, making them perfect for preparing in advance for a party or gathering.
What to Serve With Your Raspberry Chocolate Coconut Truffles
These decadent treats are wonderful on their own, but they also pair beautifully with a variety of accompaniments. A hot cup of coffee or tea is a classic choice, offering a warm contrast to the chilled truffles. For a special occasion, they make a delightful addition to a dessert platter alongside other small bites like mini cheesecakes or simple sugar cookie bars. The vibrant color also makes them a beautiful garnish for larger desserts, like a dark chocolate layer cake or a strawberry trifle.
Your Raspberry Chocolate Coconut Truffles Questions Answered (FAQ)
Got questions? You’re not alone! Here are some common inquiries about making these delightful, leak-proof truffles.
Can I use frozen raspberries instead of fresh?
Yes, you can, but you’ll need to adjust slightly. Thaw the frozen raspberries first. They will release more liquid than fresh berries. Be sure to drain off any excess liquid before mashing and cooking them. Cook them for the instructed time, and ensure the resulting mixture is thoroughly cooled and properly frozen until very firm, as directed in the recipe, to prevent leaks.
What kind of dark chocolate chips are best?
Choose a quality brand that you enjoy eating on its own. Chips labeled as ‘semi-sweet’ or ‘dark’ will work, but chips with a higher cocoa percentage (like 60% or 70%) will give a richer, less sweet chocolate flavor that complements the raspberry well. Avoid using baking chocolate bars that aren’t specifically for melting or coating, as they can be harder to work with.
How long do these truffles last? How should I store them?
When stored in an airtight container in the refrigerator, these truffles will keep well for up to a week. Keep them chilled until just before serving to maintain their shape and prevent the filling from softening prematurely.
My chocolate base is too hard to scoop and shape after cooling. What happened?
This likely means it cooled for too long or the room temperature was quite cold. Chocolate sets up firmly when cold. Just let it sit at room temperature for a few minutes until it becomes pliable again. You should be able to easily scoop and mold it. If it’s still too hard, you can gently warm it in the microwave for just a few seconds (literally 5-10 seconds) to soften it, then stir and test the consistency.
Can I use different fruit fillings?
Absolutely! The key technique of cooking and then freezing the fruit filling applies to many juicy fruits. Cooked and frozen blueberry, strawberry, or even cherry filling could work beautifully. Just ensure the mixture is reduced and thick enough before freezing, and frozen until very firm before assembling.
Why is freezing the raspberry filling so important?
Fresh or even just cooked and cooled fruit filling is often too soft and liquidy. When you try to wrap the warmer, pliable chocolate around it, the liquid can easily push through any tiny imperfection in the chocolate shell, leading to leaks. Freezing the filling until it’s firm gives it structure. This makes it much easier to completely encase it in the chocolate without it pushing through, ensuring a perfectly sealed truffle.
Enjoy Your Homemade Raspberry Chocolate Coconut Truffles!
There you have it! The secret is out. With a little patience and that crucial freezing step, you can confidently create beautiful, delicious, leak-proof Raspberry Chocolate Coconut Truffles right in your own kitchen. They’re perfect for gifting, sharing at parties, or simply enjoying a moment of pure indulgence all to yourself. The combination of rich dark chocolate, bright raspberry, and sweet coconut is simply divine.
Give this recipe a try and discover how satisfying it is to make truffles that stay perfectly sealed until that first incredible bite. Don’t forget to leave a comment below and let me know how yours turn out!
Raspberry Chocolate Coconut Truffles
Course: DessertCuisine: AmericanDifficulty: easy8
servings5
minutes3
minutes350
kcal8
MinutesDelicious Raspberry Chocolate Coconut Truffles! Learn the secret to making homemade truffles with a perfect, non-leaky raspberry filling. Easy recipe!
Ingredients
1 cup dark chocolate chips
1/4 cup unsalted butter
2 tablespoons powdered sugar
1/4 cup crushed fresh raspberries
1 teaspoon granulated sugar (optional)
1 cup shredded sweetened coconut
Directions
- Prepare the raspberry filling: Gently mash the fresh raspberries in a small saucepan. Add the optional granulated sugar if using. Cook over low heat for 3-5 minutes, stirring occasionally, until the berries soften and the liquid slightly thickens. Remove from heat and let cool completely. For best results preventing leaks, transfer this mixture to a small container and freeze it for about 30-45 minutes until it’s very firm, almost solid.
- Prepare the chocolate base: In a microwave-safe bowl, combine the dark chocolate chips and unsalted butter. Heat in 30-second intervals, stirring between each, until completely melted and smooth. Stir in the powdered sugar until well combined. Let this chocolate mixture cool at room temperature for about 30-45 minutes, or until it is firm enough to handle but still pliable. You should be able to scoop and shape it.
- Assemble the truffles, focusing on the seal: Scoop about a teaspoon of the cooled chocolate mixture. Flatten it slightly in your palm. Take a small piece (about half a teaspoon) of the firmly frozen raspberry filling and place it in the center of the flattened chocolate. Carefully and completely wrap the chocolate around the raspberry filling, ensuring there are no cracks or openings where the filling could escape. Gently roll the ball between your palms to smooth the surface and ensure the filling is sealed inside.
- Firm up the assembled truffles: Place the formed truffle balls on a plate lined with parchment paper. Refrigerate for at least 30 minutes until they are firm. This step is vital for the next coating stage.
- Coat the truffles: Place the shredded sweetened coconut in a shallow dish. Roll each chilled truffle ball in the coconut, pressing gently so the coconut adheres to the surface.
- Final chill: Store the finished truffles in an airtight container in the refrigerator until ready to serve. The cold helps maintain their shape and keeps the filling contained until they are enjoyed.
Notes
- For a smoother chocolate base, stir the melted chocolate and butter until completely smooth before adding the sugar. Ensure your raspberry filling is cool before scooping it into the chocolate to prevent it from melting too quickly.