
Oh, the dreaded soggy bottom! If you’ve ever eagerly sliced into a beautiful tart, only to find the crust beneath the filling is a disappointing, damp mess, you know the feeling. It’s a common pitfall, especially with moist, savory fillings like the one in this Savory Onion Bacon Tart. For years, I struggled with this very issue, resigning myself to sometimes-perfect, sometimes-floppy crusts. But after much trial and error, I unlocked the simple yet crucial secrets to achieving a perfectly crisp crust every single time. And let me tell you, mastering this one technique changed my tart-baking game forever! Get ready to create a stunning, flavorful tart with a bottom crust that holds up beautifully.
Why You’ll Fall in Love with This Savory Onion Bacon Tart
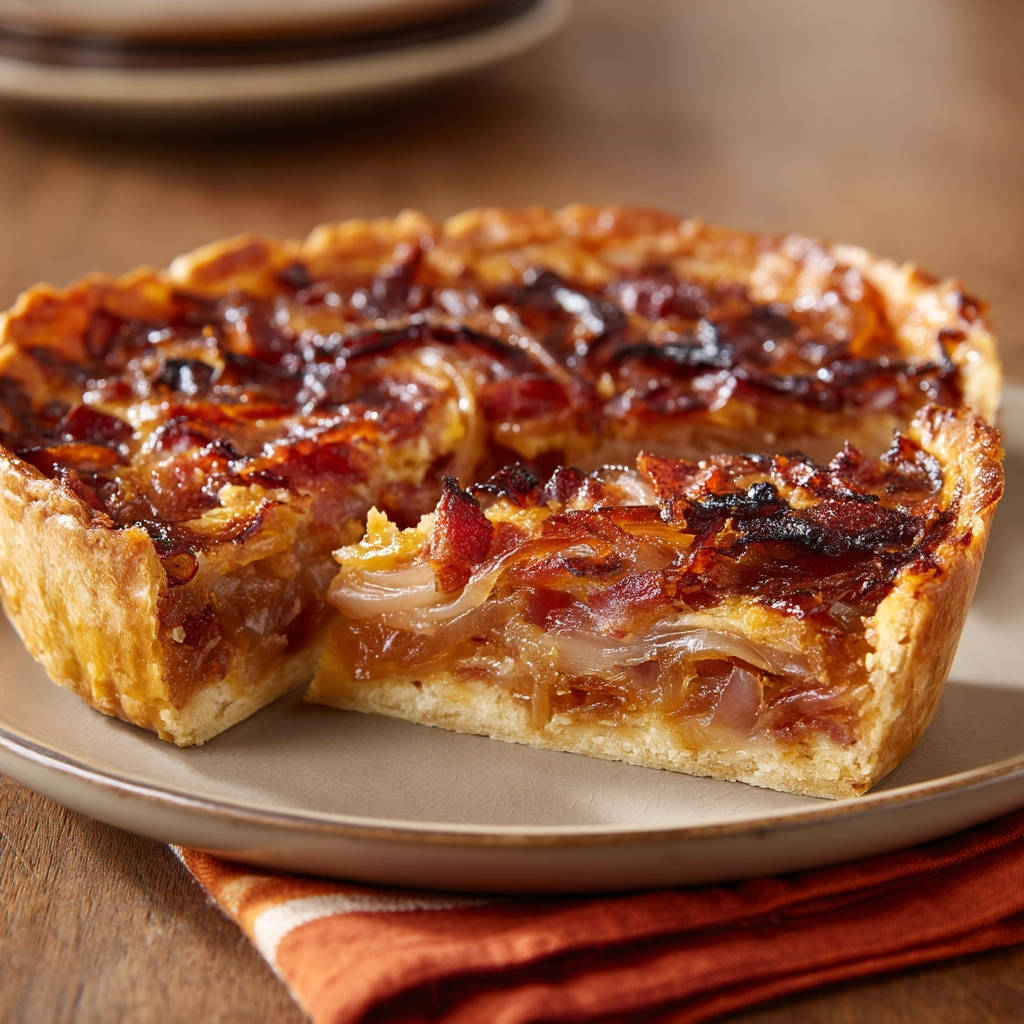
Beyond conquering the soggy bottom (which, let’s be honest, is reason enough!), this savory tart is an absolute delight for so many reasons. It’s a harmonious blend of rich, creamy custard, sweet, caramelized onions, and salty, crispy bacon, all nestled in a golden, flaky shell.
This tart isn’t just delicious; it’s incredibly versatile. It makes an elegant centerpiece for a brunch spread, a satisfying lunch served with a light salad, or a sophisticated appetizer sliced into smaller wedges for a gathering. The flavors are comforting yet sophisticated, making it a dish that appeals to just about everyone.
Plus, once you understand the core principles – especially that foolproof par-baking technique – you’ll feel empowered to tackle other savory tart recipes or even classic quiches with confidence! It’s truly a foundational recipe worth adding to your repertoire.
Gathering Your Ingredients for This Decadent Tart
Creating this beautiful tart starts with sourcing quality ingredients that will build layers of flavor and provide the right texture. Here’s what you’ll need to assemble this delicious creation:
- 1 refrigerated pie crust (for a 9-inch tart pan): Starting with the base, a good quality refrigerated crust saves time and offers a consistent result. Ensure it’s designed for a standard 9-inch tart pan, preferably one with a removable bottom, which simplifies both baking and serving. If you prefer, you can certainly use your favorite homemade pastry recipe instead.
- 1 pound yellow onions, thinly sliced: These are the unsung heroes of the tart. Yellow onions are ideal because their natural sweetness intensifies and mellows as they cook, transforming into deeply golden, incredibly flavorful strands that form the luscious base layer of our filling. Slicing them thinly helps them cook down evenly and relatively quickly.
- 6 slices bacon, diced: The crispy, salty counterpoint to the sweet onions and creamy custard. Using about six slices gives you plenty of rich, smoky flavor and delightful crunchy bits throughout the tart. We’ll also reserve some of the rendered fat for cooking the onions, boosting that savory depth.
- 3 large eggs: The essential binder for the rich, custardy filling. Large eggs provide just the right structure to set the cream and hold the other components together beautifully when baked.
- 1 1/2 cups heavy cream: This is where the luxurious, silky texture of the filling comes from. Heavy cream provides unparalleled richness. For the best results and a truly decadent custard, avoid substituting with lighter milks or half-and-half.
- 1/2 teaspoon salt: A fundamental seasoning that enhances the sweetness of the onions and the savory notes of the bacon, balancing the overall flavor profile.
- 1/4 teaspoon black pepper: Adds a subtle warmth and classic savory seasoning. Using freshly ground black pepper will provide the most vibrant flavor.
- 2 tablespoons unsalted butter (if needed): Think of this as supplemental fat. While the bacon will render some fat, you might need a little extra butter to ensure you have enough to properly sauté and caramelize a full pound of onions without them sticking or scorching.
With these simple yet powerful ingredients in hand, you’re well on your way to creating a truly memorable savory tart.
Crafting Your Delicious Savory Onion Bacon Tart: Step-by-Step Mastery
Now for the fun part – bringing all these wonderful ingredients together! Follow these steps closely, paying special attention to the techniques designed to give you that coveted crispy crust and perfectly set filling. We’ll walk through each stage, explaining the ‘why’ behind the actions.
Step 1: Prepare and Prick the Crust for Success. Your first task is to get the oven and the tart shell ready. Preheat your oven to 400 degrees F (200 degrees C). Unroll or prepare your pie crust dough and carefully fit it into your 9-inch tart pan. Gently press the dough into the bottom and all the way up the sides, ensuring it’s snug in the fluted edges. Trim away any excess dough from the top edge – you want a neat finish. Now, take a fork and systematically prick the bottom of the crust all over. These small holes are crucial vents that allow steam to escape during the initial bake, preventing the crust from puffing up unevenly or shrinking excessively. This prepares the crust beautifully for par-baking.
Step 2: Execute the Crucial Par-Bake for a Crispy Bottom. This step is the key defender against the dreaded soggy bottom! To par-bake, you need to blind bake the crust partially. Line the inside of your pricked dough with parchment paper or aluminum foil, making sure to press it firmly against the sides and into the corners. Fill this lined shell with pie weights, dried beans, or even plain uncooked rice. These weights hold the crust in place and prevent the sides from slumping. Place the weighted crust in the preheated 400°F (200°C) oven and bake for 15 minutes. This starts the cooking process. Carefully remove the pie weights and the paper or foil liner. Return the tart shell to the oven and bake for another 5-7 minutes. During this second bake, watch the bottom of the crust closely. You’re looking for it to appear dry and start to turn a very light golden color. This final short bake is vital for sealing the surface of the pastry, creating a barrier that moisture from the filling won’t be able to penetrate. Once it looks dry and lightly golden, remove the crust from the oven and set it aside to cool slightly while you prepare the filling. Remember to reduce your oven temperature down to 350 degrees F (175 degrees C) in preparation for the final bake with the filling.
Step 3: Cook the Bacon and Reserve the Flavorful Fat. While your crust is cooling slightly, it’s time to cook the bacon. Dice your six slices of bacon into small pieces. Heat a large skillet over medium heat and add the diced bacon. Cook, stirring occasionally, until the bacon is wonderfully crispy. The goal here is rendering out the fat and getting those bits perfectly crunchy – they’ll soften slightly in the tart but retain great texture. Use a slotted spoon to remove the cooked bacon bits and place them on a plate lined with paper towels to drain excess fat. Leave about 1-2 tablespoons of the rendered bacon fat in the skillet – this flavorful fat is liquid gold for the next step!
Step 4: Slowly Caramelize Those Onions to Perfection. Now, let’s transform those thinly sliced yellow onions. Add them to the skillet with the reserved bacon fat. If you don’t have 1-2 tablespoons of bacon fat, add the 2 tablespoons of unsalted butter to make up the difference. Reduce the heat to medium-low. This is where patience is key! Cook the onions slowly, stirring occasionally, for about 25-30 minutes. You’ll notice them soften, turn deeply golden brown, and significantly reduce in volume as their moisture cooks off. This slow caramelization not only develops incredible sweetness and depth of flavor but, crucially, removes excess water. Removing moisture from the filling ingredients is another vital step in preventing a soggy crust. Don’t rush this part – properly cooked onions are essential for this tart.
Step 5: Layer the Flavor in the Tart Shell. Once your par-baked crust is slightly cooled and your onions are beautifully caramelized and your bacon is crispy, it’s time to assemble the tart. Spread the cooked, softened onions evenly across the bottom of the par-baked crust. Next, sprinkle those lovely crispy bacon bits right over the layer of onions. This distribution ensures you get a burst of flavor and texture in every bite.
Step 6: Whisk Together the Creamy Custard. In a medium-sized bowl, crack your three large eggs. Add the heavy cream, salt, and black pepper. Use a whisk to gently combine everything until the eggs are fully incorporated and the mixture is smooth. Don’t over-whisk to the point of creating excessive foam, just enough to bring it all together.
Step 7: Pour the Custard over the Fillings. Carefully pour the whisked egg and cream mixture over the onions and bacon in the tart shell. Pour slowly and evenly, ensuring the liquid settles into all the spaces around the fillings. Give the pan a gentle shake if needed to distribute the custard evenly.
Step 8: Bake Until Set and Golden. Place the assembled tart carefully into your oven, now preheated to 350 degrees F (175 degrees C). Bake for 30-40 minutes. The tart is ready when the custard is set – it shouldn’t jiggle much in the center when you gently nudge the pan – and the top surface has turned a lovely golden brown. The exact timing can vary depending on your oven, so keep an eye on it after 30 minutes. Once baked, remove the tart from the oven and place it on a wire rack. Let it cool for at least 10-15 minutes before attempting to slice it. This cooling period is important; it allows the custard to finish setting completely, making for clean, beautiful slices. Slicing too early can result in a runny filling.
There you have it! By following these steps, especially those crucial par-baking and onion-cooking stages, you’ve created a savory tart that’s not only packed with incredible flavor but boasts a wonderfully crisp crust from edge to center.
Tips for Tart Perfection Every Time
Even with a solid recipe, a few extra tips can elevate your tart-making experience and guarantee success. Here are some pointers for making the best Savory Onion Bacon Tart:
- Don’t Skip the Chill: If using a refrigerated crust, keep it chilled until just before you’re ready to use it. Cold dough is much easier to handle and press into the tart pan.
- Precision in Pricking: When pricking the crust, make sure you cover the entire bottom surface with fork marks, close together. This maximizes the venting that prevents bubbles.
- Weight Distribution: When par-baking with weights, ensure the weights are spread evenly and pushed right up against the sides of the tart pan. This helps hold the shape of the crust as it bakes. If you love baking and want to ensure a perfect base for all your pies and tarts, mastering a crispy crust is key, just like we do in our guide to avoiding a soggy bottom on apple pie.
- Low and Slow for Onions: Resist the urge to turn up the heat on the onions. High heat will brown them quickly but won’t cook off the moisture or develop that deep, sweet caramelization. Patience is a virtue here!
- Cooling is Non-Negotiable: Letting the tart cool for the recommended time is essential. The custard continues to set as it cools, resulting in slices that hold their shape beautifully.
Serving Suggestions: What Pairs with Savory Onion Bacon Tart?
This delightful tart is quite substantial on its own, but it truly shines when paired with complementary sides. Here are a few ideas:
For a light lunch or dinner, a simple green salad with a tangy vinaigrette is perfect. The fresh, crisp greens cut through the richness of the tart beautifully. You could also serve it alongside an easy side like perfectly roasted vegetables, such as asparagus, broccoli, or root vegetables, for a more complete meal.
If serving for brunch, consider offering fresh fruit salad or a simple yogurt parfait to balance the savory flavors. It also pairs wonderfully with other breakfast favorites if you’re creating a larger spread, maybe alongside some easy bacon and egg bites.
Ultimately, the rich flavor of the tart means simple sides work best, allowing its deliciousness to be the star.
Your Savory Onion Bacon Tart Questions Answered (FAQ)
Making a tart for the first time or just looking for clarification? Here are some common questions about this savory treat:
Can I use different types of onions?
While yellow onions are recommended for their balanced sweetness and ability to caramelize well, you could experiment. White onions will be sharper and less sweet when cooked down. Red onions could work but will impart a stronger flavor and color. A mix of yellow and sweet onions (like Vidalia) would also be delicious.
Can I add cheese to this tart?
Absolutely! Cheese would be a fantastic addition. Grated Gruyère, Swiss, or even sharp cheddar would pair wonderfully with the bacon and onions. You could sprinkle about 1/2 cup to 1 cup of grated cheese over the onions and bacon before pouring in the custard. This adds another layer of savory richness.
Can I make this tart ahead of time?
Yes, you can prepare parts of it ahead. You can par-bake the crust a day in advance and store it covered at room temperature. You can also cook the bacon and caramelize the onions a day ahead and store them in separate airtight containers in the refrigerator. Assemble and bake the tart just before serving for the best texture, especially the crust.
How should I store leftovers?
Leftovers should be stored in an airtight container in the refrigerator for up to 3-4 days. The crust may soften slightly upon refrigeration.
How do I reheat leftover tart?
To reheat, place slices on a baking sheet and warm in a preheated oven at 300-325°F (150-160°C) for 10-15 minutes, or until heated through. Reheating in the oven helps the crust crisp up slightly again, which is preferable to microwaving, which will make the crust soft.
What if I don’t have pie weights for par-baking?
No problem! Dried beans (like kidney beans or chickpeas) or uncooked rice work perfectly well as substitutes. Just make sure you use enough to fill the tart shell almost to the top to hold the crust shape effectively. Keep these beans/rice separate after use; they are no longer suitable for cooking but can be reused for future blind baking.
How do I know when the custard is set?
A good test is to gently nudge the side of the tart pan. The outer edges of the filling should look firm and set, while the very center might have a slight, subtle wobble. It shouldn’t look liquid or jiggle excessively. The custard will continue to set as it cools on the wire rack.
Enjoy Your Homemade Savory Onion Bacon Tart!
There’s something truly special about baking a savory tart from scratch, especially one that turns out just right – golden crust, flavorful filling, and not a hint of sogginess! This Savory Onion Bacon Tart delivers on all fronts. It’s comforting, elegant, and incredibly satisfying to make and share.
Whether you serve it warm from the oven or at room temperature, it’s bound to be a hit. So gather your ingredients, follow these steps, and get ready to enjoy a slice of homemade perfection. I hope this recipe becomes a favorite in your kitchen!
Have you tried this tart? Or do you have your own secret for a crispy tart crust? I’d love to hear from you in the comments below!
Savory Onion Bacon Tart

Ingredients
- 1 refrigerated pie crust (for a 9-inch tart pan)
- 1 pound yellow onions, thinly sliced
- 6 slices bacon, diced
- 3 large eggs
- 1 1/2 cups heavy cream
- 1/2 teaspoon salt
- 1/4 teaspoon black pepper
- 2 tablespoons unsalted butter (if needed)
Directions
- Preheat your oven to 400 degrees F (200 degrees C). Place the pie crust dough into a 9-inch tart pan and press it evenly into the bottom and up the sides. Trim any excess dough. Prick the bottom of the crust all over with a fork. This is a key first step to prevent bubbling and prepare for par-baking.
- To prevent a soggy bottom, you need to par-bake the crust. Line the dough with parchment paper or aluminum foil, pressing it into the edges. Fill with pie weights, dried beans, or rice. Bake for 15 minutes. Carefully remove the weights and paper/foil. Bake for another 5-7 minutes, or until the crust looks dry and lightly golden on the bottom. This crucial step helps seal the crust against moisture from the filling. Remove from oven and let cool slightly. Reduce oven temperature to 350 degrees F (175 degrees C).
- While the crust bakes and cools, cook the bacon in a large skillet over medium heat until crispy. Remove the bacon with a slotted spoon and drain on paper towels, reserving about 1-2 tablespoons of the bacon fat in the skillet.
- Add the thinly sliced onions to the skillet with the reserved bacon fat (add butter if you need more fat). Cook over medium-low heat, stirring occasionally, for 25-30 minutes, or until the onions are very soft, deeply golden brown, and significantly reduced in volume. Cooking the onions properly like this removes excess moisture, which is vital for avoiding a soggy tart.
- Spread the cooked onions evenly over the bottom of the par-baked crust. Sprinkle the crispy bacon bits over the onions.
- In a medium bowl, whisk together the eggs, heavy cream, salt, and pepper until well combined.
- Carefully pour the egg mixture over the onions and bacon in the tart shell.
- Bake for 30-40 minutes, or until the custard is set (it shouldn’t jiggle much in the center) and the top is golden brown. Let the tart cool on a wire rack for at least 10-15 minutes before slicing and serving. This allows the custard to finish setting.