There’s a special kind of joy that comes with sinking your fork into a slice of creamy, luscious cheesecake. But let’s be honest, tackling a traditional baked cheesecake can feel a bit intimidating with water baths and worrying about cracks. That’s where no-bake versions swoop in to save the day! They offer all the delightful tang and richness of cheesecake without ever needing to touch the oven.
However, I know the struggle. So many no-bake cheesecake recipes promise simplicity but end up delivering a filling that’s more like a soft pudding than a sliceable dessert. It’s frustrating when you want to serve beautiful squares, and they just kind of… melt onto the plate. I’ve been there! For years, I tinkered and tested, searching for that magical touch that would guarantee a perfectly firm set every single time.
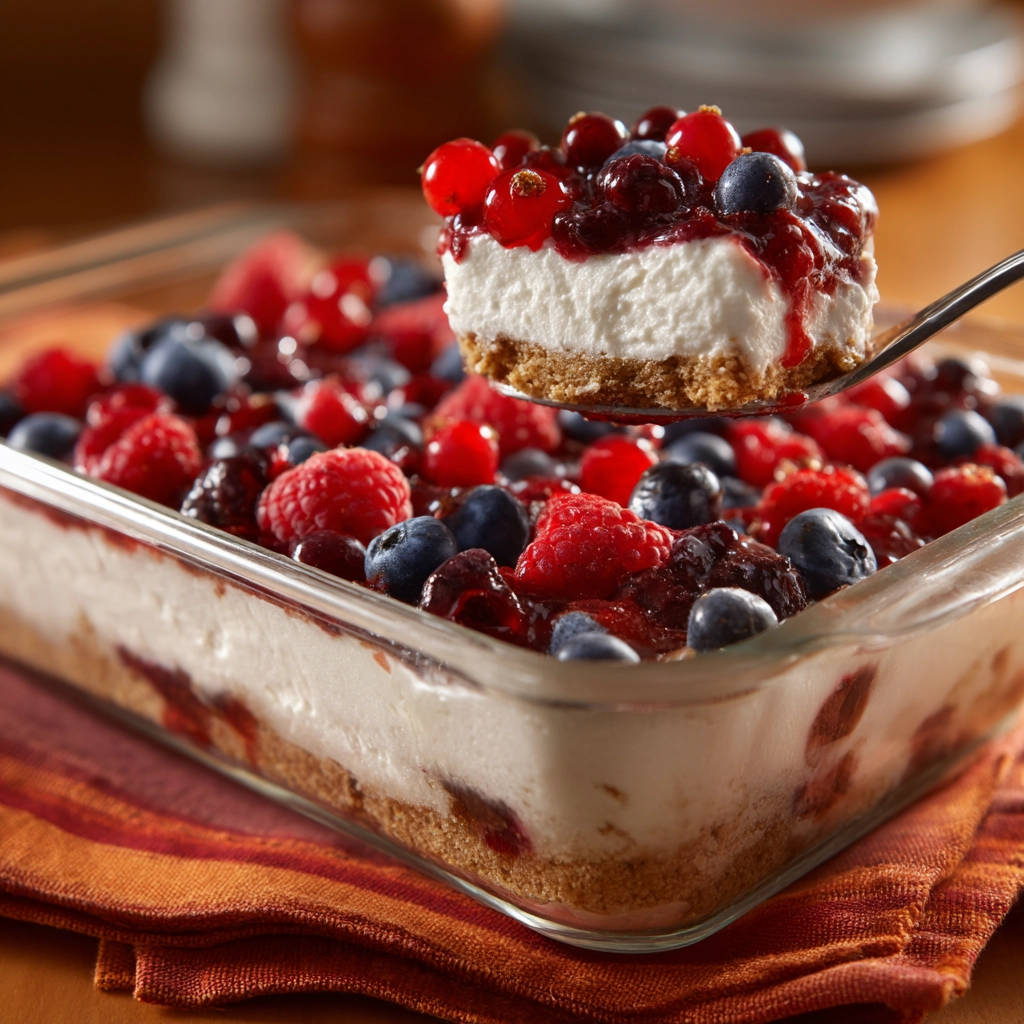
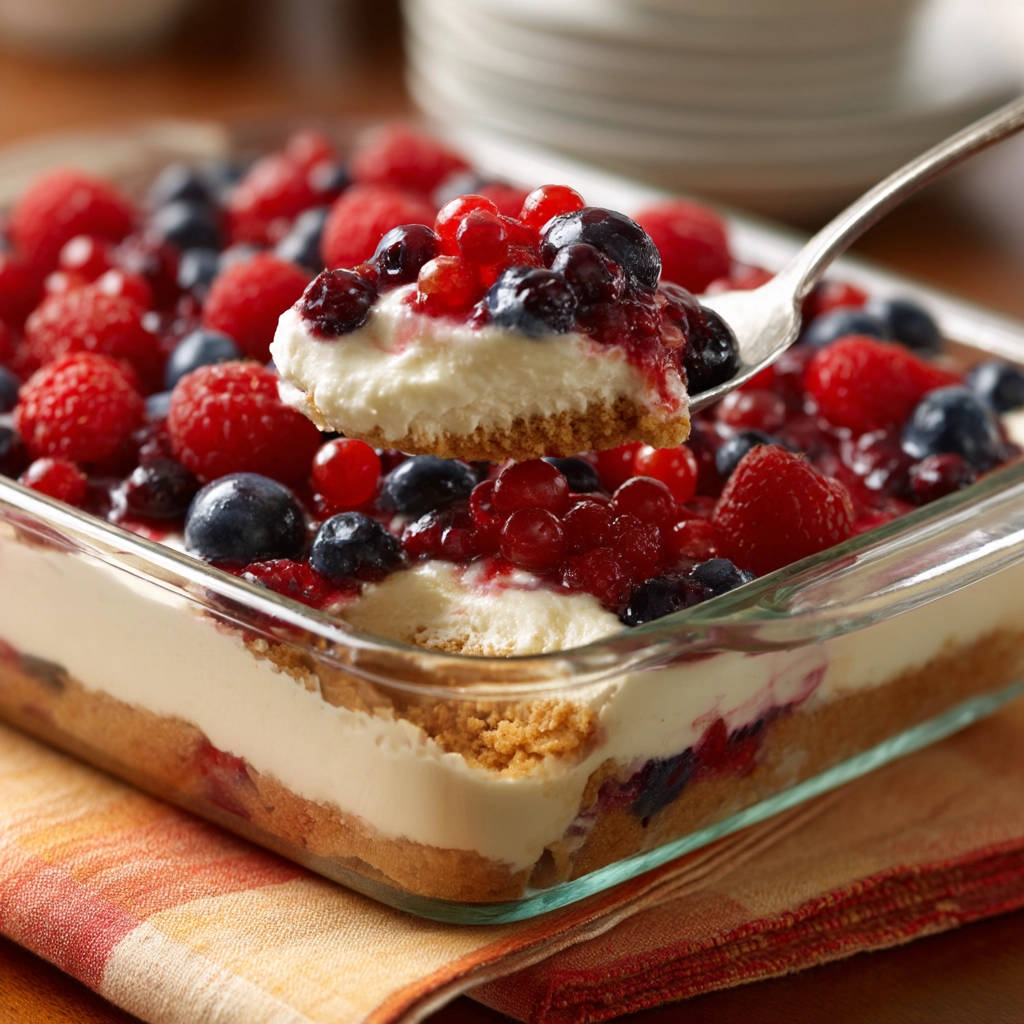
And I found it! The secret is surprisingly simple and incorporated into this recipe for No-Bake Berry Cheesecake Bars. It’s the key difference between a runny mess and a dessert that slices cleanly, holding its shape beautifully, just like the pictures you see. Piled high with vibrant, sweet-tart berries, these bars are the ultimate easy-breezy treat, perfect for summer gatherings, potlucks, or just a simple weeknight indulgence. If you love cool, creamy desserts, you might also enjoy our classic Key Lime Pie.
Why You’ll Love These No-Bake Berry Cheesecake Bars
Aside from that glorious firm texture, there are so many reasons these berry cheesecake bars will become a regular in your dessert rotation.
- Effortless Elegance: They look absolutely stunning layered with the bright berry topping, yet they require minimal effort and no baking.
- Guaranteed Success: Forget soggy crusts or runny fillings. This recipe is specifically designed for a reliable, sliceable texture.
- Fresh & Fruity Flavor: The combination of tangy cream cheese and sweet berries is a match made in dessert heaven.
- Versatile: While mixed berries are featured, you can easily adapt the topping to your favorite fruits.
- Perfect for Any Occasion: From casual picnics to more formal gatherings, these bars are always a crowd-pleaser.
Gathering Your Ingredients for Creamy Berry Bliss
One of the beauties of this recipe is the simplicity of the ingredients. You likely have many of these pantry staples already! Each component plays a crucial role in building the layers of flavor and texture that make these no-bake berry cheesecake bars so delightful. Let’s look at what you’ll need and why each ingredient is important.
For the sturdy, classic crust:
- Graham Cracker Crumbs (1 and 1/2 cups): These are the foundation! Pre-crushed crumbs are a time-saver, but you can easily make your own by pulsing whole graham crackers in a food processor until fine crumbs form.
- Melted Unsalted Butter (1/4 cup): The butter is essential for binding the graham cracker crumbs together. Using unsalted butter gives you control over the final flavor; if you only have salted, you can use it but maybe consider omitting any extra salt you might add to the crust (though this recipe doesn’t call for it). Make sure it’s fully melted so it coats the crumbs evenly.
For the star of the show, the velvety, firm filling:
- Cream Cheese (16 ounces), softened to room temperature: This is absolutely critical. Cream cheese mixes smoothly and incorporates air much better when it’s soft. Cold cream cheese will result in a lumpy filling, no matter how long you beat it. Plan ahead and set it out a couple of hours before you start.
- Granulated Sugar (1/2 cup): Provides the perfect amount of sweetness to balance the tang of the cream cheese.
- Vanilla Extract (1 teaspoon): A touch of vanilla enhances all the other flavors and adds warmth to the filling. Use good quality vanilla for the best results.
- Frozen Whipped Topping (8 ounces), thawed: And here is the secret ingredient for that guaranteed firm set! Using frozen whipped topping (like Cool Whip, thawed in the refrigerator) provides incredible stability to the cream cheese mixture. It’s lighter than heavy cream but holds its structure remarkably well when folded in correctly. Ensure it’s fully thawed but still very cold.
For the jewel-toned berry topping:
- Mixed Berries (4 cups), fresh or frozen: The star fruit! Raspberries, blueberries, red currants, and blackberries are suggested, but feel free to use your favorite mix. Using frozen berries is convenient and works just as well as fresh since they’ll be cooked down anyway.
- Granulated Sugar (1/4 cup), optional: This adds sweetness to the topping, balancing the tartness of the berries. Adjust the amount based on how sweet your berries are and your personal preference.
- Lemon Juice (2 tablespoons), optional: A splash of lemon juice brightens the berry flavor and adds a lovely tart counterpoint to the sweet filling. It also helps the sauce thicken slightly as it cools.
Having all your ingredients measured and ready before you begin will make the assembly process even smoother!
Crafting Your No-Bake Berry Cheesecake Bars: Step-by-Step
Making these bars is incredibly straightforward, broken down into simple stages: the crust, the filling, and the topping. Just follow these steps, paying special attention to the chilling times, and you’ll be rewarded with perfect no-bake cheesecake bars.
- Begin by preparing the base for your cheesecake bars. Take your graham cracker crumbs and melted butter and combine them in a medium-sized bowl. Use a fork or your hands to mix until the crumbs are evenly moistened with the butter – they should resemble wet sand. This mixture will be the foundation of your dessert. Once combined, pour the mixture into a 9×13 inch baking dish. Using the bottom of a glass or a flat-bottomed measuring cup, press the crumbs down very firmly into an even layer across the bottom of the dish. Compacting the crust well is key to it holding together when you slice the bars later. Place the dish in the refrigerator to chill while you move on to the next step. Chilling allows the butter to solidify, creating a stable crust.
- Now, let’s work on the creamy filling. Get out a large bowl and add your softened cream cheese and 1/2 cup of granulated sugar. Using an electric mixer (either hand-held or stand mixer), beat the cream cheese and sugar together. Start on low speed to combine, then increase to medium-high speed and beat until the mixture is wonderfully smooth, light, and creamy, with absolutely no lumps. This step is important for a smooth final texture. Once smooth, add the vanilla extract and give it another quick mix to incorporate.
- Here is the crucial step for achieving that perfect, sliceable firm set that makes all the difference! Gently fold in the thawed whipped topping. Switch from your electric mixer to a rubber spatula. Add the thawed whipped topping to the cream cheese mixture. Using a gentle lifting and folding motion, carefully incorporate the whipped topping until just combined. Avoid stirring or beating vigorously, as this can deflate the whipped topping and prevent the filling from setting properly. You’ll know you’re done when there are no longer any white streaks of whipped topping visible, and the mixture is uniform. The whipped topping adds stability and lightness to the dense cream cheese.
- Once the filling is ready, retrieve your chilled graham cracker crust from the refrigerator. Spoon the creamy cheesecake filling evenly over the top of the chilled crust. Use your spatula or the back of a spoon to spread the filling right to the edges in a smooth, even layer. Cover the baking dish tightly with plastic wrap. This prevents any odors from the refrigerator from getting into your delicate cheesecake filling.
- Patience is a virtue, especially with no-bake desserts! For the filling to set completely and achieve that guaranteed firm texture for slicing, it needs adequate time in the cold. Refrigerate the covered dish for at least 4 hours. For the absolute best, most sliceable results, leaving it overnight (8 hours or more) is highly recommended. This extended chill time allows the ingredients, particularly the fat in the cream cheese and the structure from the whipped topping, to solidify properly in the cold environment. Don’t rush this step!
- While your cheesecake bars are chilling to perfection, prepare the vibrant berry topping. In a medium saucepan, combine your mixed berries (fresh or frozen), the optional 1/4 cup of granulated sugar, and the optional 2 tablespoons of lemon juice. Place the saucepan over medium heat. Stir occasionally as the berries begin to warm up and release their juices. Continue to cook for about 5-10 minutes, or until the berries have softened slightly and started to break down, creating a lovely, slightly thickened sauce.
- Remove the berry topping from the heat. Transfer it to a bowl and allow it to cool down completely. It’s important that the topping is cool before adding it to the chilled cheesecake, as warm topping could soften the filling. As it cools, the berry sauce will thicken up slightly, giving it a perfect consistency to spoon over the bars.
- Once the cheesecake bars have had their required chill time and are fully set and firm (you should be able to gently touch the surface and feel that it’s solid), and the berry topping has cooled completely, you’re ready to assemble the final masterpiece. Just before serving, spoon the cooled berry topping generously over the top of the chilled cheesecake filling. Spread it out evenly to cover the surface, letting some of that beautiful color peek through.
- Now for the moment of truth! Using a sharp knife dipped in hot water and wiped clean between cuts, slice the bars into your desired size. The firm filling should allow for clean, neat slices. Alternatively, you can scoop portions into bowls for a slightly more casual presentation. Serve immediately and enjoy the delightful contrast of the creamy, firm cheesecake and the sweet-tart berry sauce.
Tips for Perfect No-Bake Cheesecake Bars Every Time
Making sure your no-bake cheesecake bars turn out perfectly is easier than you think! Here are a few extra tips to help you achieve dessert perfection:
- Room Temperature Cream Cheese is Non-Negotiable: Seriously, this is probably the most important tip. Cold cream cheese will be lumpy and hard to work with, resulting in a grainy filling. Leave it on the counter for at least 1-2 hours, or gently soften it in the microwave on a low setting for a few seconds (be very careful not to melt it).
- Handle Whipped Topping Gently: When folding in the thawed whipped topping, be delicate. Overmixing can break down the airy structure, which is what contributes to the firm set. Use a spatula and a gentle folding motion until just combined.
- Chill, Chill, Chill: The specified chilling time is crucial. While 4 hours is the minimum, overnight is truly best for the filling to set properly and become sliceable. Resist the urge to cut into it too early!
- Berry Topping Timing: Cook and cool the berry topping before the cheesecake is fully chilled. This way, it’s ready to go right when the bars are set, and you don’t risk adding warm topping to the cold dessert.
- Slicing Secrets: For the cleanest slices, use a long, sharp knife. Dip the knife in hot water and wipe it dry between each cut. This helps it glide through the creamy filling without dragging.
- Flavor Variations: While mixed berries are wonderful, feel free to experiment! Try using just strawberries, blueberries, or a mix of raspberries and peaches when they’re in season. You could even swap the graham cracker crust for vanilla wafers or shortbread cookies pulsed into crumbs.
- Make Ahead: These bars are an excellent make-ahead dessert. Prepare the crust and filling, chill overnight, and then make the berry topping the next day just before serving.
Serving Suggestions for Your Berry Cheesecake Bars
These No-Bake Berry Cheesecake Bars are truly a dessert highlight all on their own, but they can also be part of a larger spread. If you’re serving them as part of a dessert table, they pair beautifully with other fruit-forward treats or simple cookies. Consider offering them alongside something like Strawberry Crumble Parfaits for a delightful contrast in texture, or maybe some light and airy Easy Blueberry Scones.
For a touch of extra flair, you could garnish individual slices with a sprig of fresh mint or a dollop of fresh, unsweetened whipped cream. A dusting of powdered sugar is also a simple way to add a touch of elegance just before serving.
Your No-Bake Berry Cheesecake Bar Questions Answered (FAQ)
Let’s address some common questions you might have while making these delightful no-bake bars.
Can I use fresh berries in the filling instead of the topping?
It’s generally not recommended to mix raw fresh berries directly into this specific no-bake filling. The moisture from the fresh berries can potentially make the filling less stable and contribute to a softer set. The magic of this recipe’s firm set relies on the specific ratio and method with the whipped topping. The berry topping is designed to be cooked down into a slightly thickened sauce, which works perfectly on top and doesn’t compromise the filling’s texture.
I only have store-brand thawed whipped topping. Will that work?
Yes, absolutely! “Frozen whipped topping” is a generic term often referring to products like Cool Whip or other store-brand versions found in the freezer aisle. Just make sure it’s fully thawed in the refrigerator before you use it according to the recipe.
Can I make a gluten-free crust?
Yes! You can easily make a gluten-free crust by using gluten-free graham cracker crumbs. Follow the same instructions for combining with melted butter and pressing into the dish.
How long do these cheesecake bars last in the refrigerator?
Properly stored in an airtight container in the refrigerator, these No-Bake Berry Cheesecake Bars should last for about 3-4 days. The crust might soften slightly over time, but the filling should remain firm.
Can I freeze these No-Bake Berry Cheesecake Bars?
Yes, you can freeze these bars! To freeze, prepare the crust and filling and let them set completely in the refrigerator (skip the berry topping for now). Once fully firm, slice the bars. Place them on a baking sheet lined with parchment paper and freeze until solid. Then, transfer the frozen bars to an airtight freezer-safe container, placing parchment or wax paper between layers to prevent sticking. They can be frozen for up to 1-2 months. Thaw individual bars in the refrigerator for several hours before serving. Prepare the berry topping fresh when you are ready to serve.
My filling still seems a little soft. What went wrong?
The most common culprits for a soft no-bake filling are usually either not chilling it for long enough (seriously, overnight is best!) or overmixing the whipped topping. Make sure your cream cheese was properly softened and the whipped topping was only gently folded in until just combined. And always give it ample time in the cold to set fully.
Enjoy Your Homemade No-Bake Berry Cheesecake Bars!
Say goodbye to runny no-bake cheesecakes and hello to perfectly sliceable, creamy, berry-topped bliss! These No-Bake Berry Cheesecake Bars are designed for easy success and maximum deliciousness. They’re simple enough for a novice baker but impressive enough for any occasion.
Give this recipe a try, and I promise you’ll love the firm, luscious filling and the burst of fresh berry flavor. Don’t forget to tell me how yours turned out in the comments below! Happy dessert making!
No-Bake Berry Cheesecake Bars

Ingredients
- 1 and 1/2 cups graham cracker crumbs
- 1/4 cup melted unsalted butter
- 16 ounces cream cheese, softened to room temperature
- 1/2 cup granulated sugar
- 1 teaspoon vanilla extract
- 8 ounces frozen whipped topping, thawed
- 4 cups mixed berries (fresh or frozen), such as raspberries, blueberries, red currants, blackberries
- 1/4 cup granulated sugar (for berry topping, optional)
- 2 tablespoons lemon juice (optional, for berry topping)
Directions
- In a medium bowl, combine graham cracker crumbs and melted butter. Press firmly into the bottom of a 9×13 inch baking dish to form the crust. Chill the crust in the refrigerator while you prepare the filling.
- In a large bowl, beat the softened cream cheese and 1/2 cup granulated sugar with an electric mixer until smooth and creamy, with no lumps. Add vanilla extract and mix again.
- This is the key to the firm set: Gently fold in the thawed whipped topping using a spatula. Be careful not to overmix, which can deflate the whipped topping. Fold until just combined and no streaks remain. The whipped topping provides stability for the cream cheese.
- Spread the cream cheese filling evenly over the chilled graham cracker crust. Cover the dish tightly with plastic wrap.
- Refrigerate for at least 4 hours, or preferably overnight, until the filling is completely set and firm. This extended chill time is crucial for the no-bake filling to solidify properly.
- While the dessert chills, prepare the berry topping. In a medium saucepan, combine the mixed berries, 1/4 cup granulated sugar (if using), and lemon juice (if using). Cook over medium heat, stirring occasionally, until the berries start to break down slightly and release their juices, creating a sauce. This takes about 5-10 minutes.
- Remove the berry topping from the heat and let it cool completely. The sauce will thicken slightly as it cools.
- Once the cheesecake bars are fully chilled and firm, spoon the cooled berry topping over the top just before serving.
- Slice into bars or scoop to serve, enjoying the perfectly set filling.