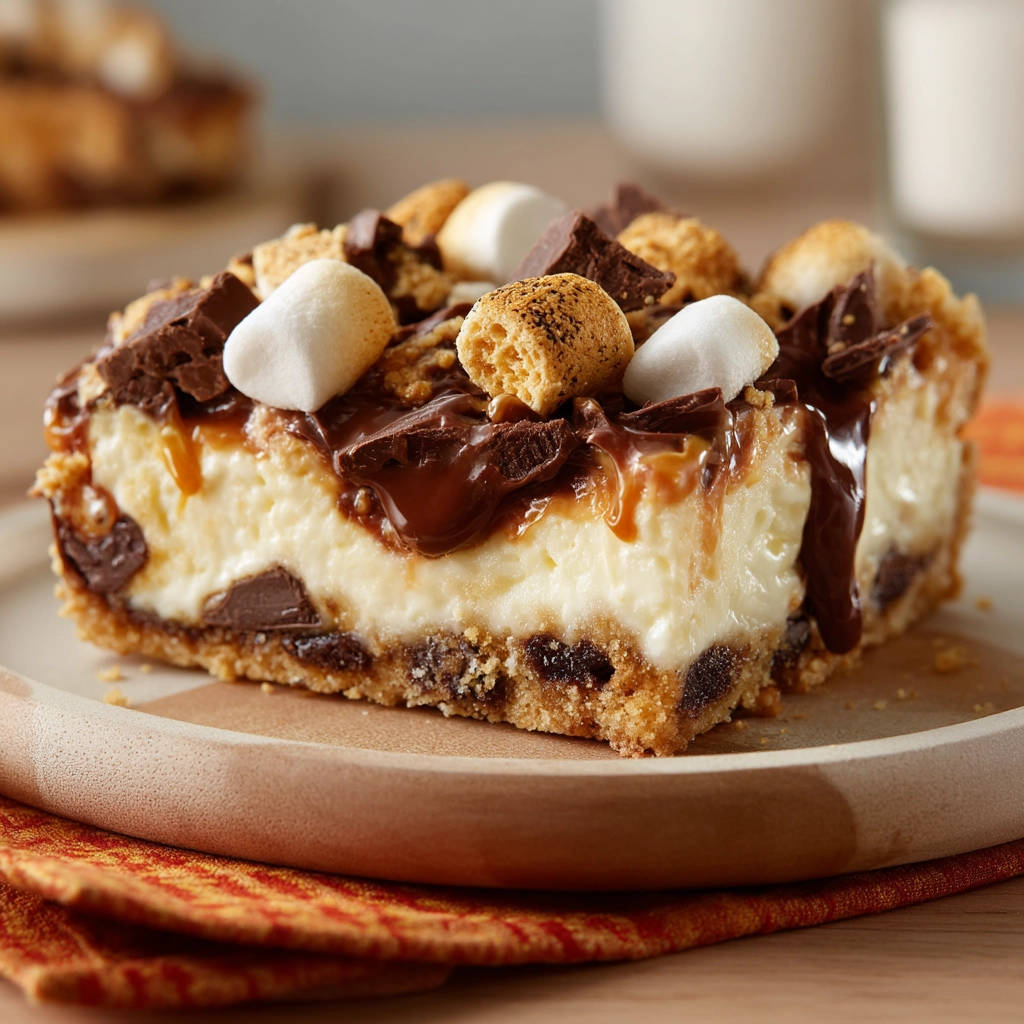
Picture this: the gooey, toasted goodness of a classic s’more meets the rich, creamy indulgence of cheesecake. Sounds like heaven, right? Epic S’mores Bars deliver exactly that – layers of buttery graham cracker crust, a luxuriously smooth cheesecake filling, melty chocolate, and perfectly toasted marshmallows. But let’s be honest, achieving that perfectly smooth cheesecake can sometimes feel like a baking mystery. Lumps? Cracks? A weird, grainy texture? We’ve all been there, staring into the bowl wondering where we went wrong.
For years, I tinkered and tested, determined to conquer the common pitfalls of cheesecake making, specifically for bars. I wanted that guaranteed luscious filling every single time. And finally, I cracked the code! It all boils down to one straightforward technique that makes all the difference between a good bar and an absolutely epic one.
These Epic S’mores Bars aren’t just a dessert; they’re an experience. They capture the essence of sitting around a campfire, translated into a decadent, shareable treat. Whether you’re making them for a party, a potluck, or just because you deserve something truly special, this recipe will become your go-to.
Why You’ll Fall in Love with These Epic S’mores Cheesecake Bars
These aren’t your average dessert bars. They stand out for several delicious reasons:
- Unbeatable Texture: Thanks to that one simple trick (which I’ll reveal shortly!), the cheesecake layer is incredibly smooth and creamy, a perfect contrast to the crisp crust and gooey toppings.
- Classic Flavor Combo: All the beloved tastes of s’mores are present – the honey-kissed graham, the deep chocolate, and the sweet, slightly smoky char of marshmallows (even without a campfire!).
- Surprisingly Simple: While cheesecake can seem intimidating, breaking it down into layers makes it very approachable.
- Perfect for Sharing: Cut into easy squares, these are ideal for parties, picnics, or gifting to friends and family. They’re a guaranteed crowd-pleaser.
- Make-Ahead Magic: These bars actually need time to chill, making them a fantastic dessert to prepare in advance.
Gathering Your Ingredients for Epic S’mores Cheesecake Bars
Creating these delightful bars starts with selecting the right ingredients. Each component plays a crucial role in building those irresistible s’mores layers. Quality counts, especially when it comes to your dairy and chocolate, so grab the best you can find!
For the sturdy and flavorful base, you’ll need the classic graham cracker crust components:
- Graham Cracker Crumbs: You can buy pre-crushed crumbs for convenience, or crush your own from whole graham crackers. About 9-10 full graham crackers should yield the necessary amount.
- Granulated Sugar: Just a touch added to the crust mixture helps bind the crumbs and gives it a slightly sweeter edge that complements the rest of the bar.
- Unsalted Butter, Melted: The butter is the glue that holds your crust together. Using unsalted butter allows you to control the overall saltiness of the dessert. Make sure it’s fully melted so it evenly coats the crumbs.
Now, for the star of the show – the smooth and creamy cheesecake filling. This is where the magic happens, and the quality of your cream cheese is paramount!
- Packages 8 ounce Cream Cheese, Softened: This is arguably the most important ingredient. Use full-fat block cream cheese, not the spreadable kind from a tub, as it yields the best texture. The “softened” part is non-negotiable for achieving a smooth filling. Leave it out on the counter for an hour or two until it’s truly soft to the touch.
- Granulated Sugar: Sweetens the cream cheese and helps create that classic cheesecake consistency.
- Large Eggs, Room Temperature: Just like the cream cheese, having your eggs at room temperature is vital. Cold eggs don’t incorporate as smoothly into the batter and can lead to a lumpy or cracked filling. Large eggs provide the right amount of structure and richness.
- Vanilla Extract: A dash of pure vanilla extract enhances the sweetness and adds a warm, aromatic note that pairs beautifully with the other flavors.
And finally, the toppings that transform these into s’mores bars, bringing that signature campfire flair:
- Chopped Chocolate Chunks or Chips: Chocolate is essential for s’mores! Using chopped chocolate chunks gives you delightful pockets of melted chocolate, while chips work just as well. You can use milk chocolate, semi-sweet, or even a mix.
- Mini Marshmallows: These are scattered over the warm bars and get wonderfully gooey and slightly toasted under the broiler (or with a kitchen torch). Mini marshmallows are ideal for even distribution.
- Caramel Sauce for Drizzling: Adds an extra layer of rich, sweet indulgence. Use your favorite store-bought or homemade caramel sauce.
- Chocolate Sauce for Drizzling: Reinforces the chocolate flavor and adds another dimension of sweetness and moisture.
- Optional Additional Graham Cracker Crumbs for Topping: A final sprinkle of crumbs or even broken graham cracker pieces adds a lovely textural contrast and visual cue to the s’mores theme.
Crafting Your Smooth S’mores Bars: Step-by-Step Guide
Ready to bake some s’mores magic? Follow these detailed steps, paying close attention to the nuances, especially when it comes to that smooth cheesecake filling!
Prepare Your Pan and Oven: Begin by preheating your oven to 350 degrees Fahrenheit (175 degrees Celsius). This ensures your oven is at the correct temperature from the moment the bars go in, promoting even baking. Select an 8×8 inch baking pan. Lining the pan with parchment paper is a game-changer! Leave enough overhang on the sides so you can easily lift the finished, chilled bars out later. This makes cutting and serving so much simpler.
Create and Bake the Graham Cracker Crust: In a medium-sized bowl, combine your graham cracker crumbs, the quarter cup of granulated sugar, and the melted unsalted butter. Stir these ingredients together using a fork or spoon until everything is well combined. The mixture should resemble wet sand – crumbly but holding together when you press a bit between your fingers. Pour this mixture into your prepared 8×8 inch pan. Use the bottom of a glass or a flat measuring cup to firmly and evenly press the mixture into the bottom of the pan. You want a compact, solid base. Bake this crust for about 8 minutes. This brief bake time helps set the crust so it doesn’t crumble when you add the filling. It should look lightly golden around the edges and smell wonderfully buttery. Remove the crust from the oven and let it cool slightly in the pan while you move on to the filling. You want it to be mostly cool but not necessarily ice cold.
The Secret to a Smooth Cheesecake Filling: This step is the absolute key to guaranteed success! Ensure your cream cheese and eggs are at room temperature – this is critical for a smooth batter. In a large bowl, place the softened cream cheese by itself. Using an electric mixer (either a hand mixer or stand mixer with the paddle attachment) on medium speed, beat the cream cheese. Beat it until it is completely smooth and there are absolutely no lumps visible. This might take a few minutes, especially if your cream cheese wasn’t perfectly soft, but persevere! This step breaks down the cream cheese’s structure into a silky consistency before other ingredients are added. Next, add the three quarters cup of granulated sugar. Beat until the sugar is fully incorporated and the mixture becomes even creamier and smooth. Be sure to scrape down the sides and bottom of the bowl with a spatula periodically to ensure everything is evenly mixed and no cream cheese is sticking to the bowl.
Incorporate Eggs and Vanilla Gently: With the cream cheese and sugar mixture now beautifully smooth, it’s time to add the room temperature eggs. Add them one at a time. Beat on low speed just until each egg is incorporated into the batter. The crucial part here is to avoid overmixing once the eggs are added. Overmixing at this stage incorporates too much air into the batter, and that air expands during baking, leading to cracks on the surface of your cheesecake. Once the eggs are just combined, gently stir in the vanilla extract using a spatula. A spatula helps you mix without adding unnecessary air.
Assemble the Layers: Pour the smooth, lump-free cream cheese filling gently over the partially cooled graham cracker crust in the pan. Use your spatula or the back of a spoon to gently spread the filling into an even layer, making sure it goes all the way to the edges. Try not to overwork it or press down too hard, which could disturb the crust.
Bake to Perfection: Carefully place the pan in the preheated oven. Bake for 30-35 minutes. The cheesecake is done when the edges look slightly set and maybe just a tiny bit puffed, but the very center (about 1-2 inches in diameter) is still slightly jiggly when you gently shake the pan. This slight jiggle is what you want! It indicates the center will finish setting as it cools. Do not overbake, as this is a primary cause of cracks and dry texture.
Cool and Chill (The Patience Part): Remove the pan from the oven and place it on a wire rack to cool completely. Letting it cool gradually in the pan helps prevent sudden temperature changes that can cause cracks. Once the bars are at room temperature (this can take a couple of hours), cover the pan loosely with plastic wrap and transfer it to the refrigerator. Chill for at least 4 hours, but ideally, leave them overnight. Chilling is absolutely essential for the cheesecake to fully set and firm up, making it easy to cut and ensuring that creamy texture.
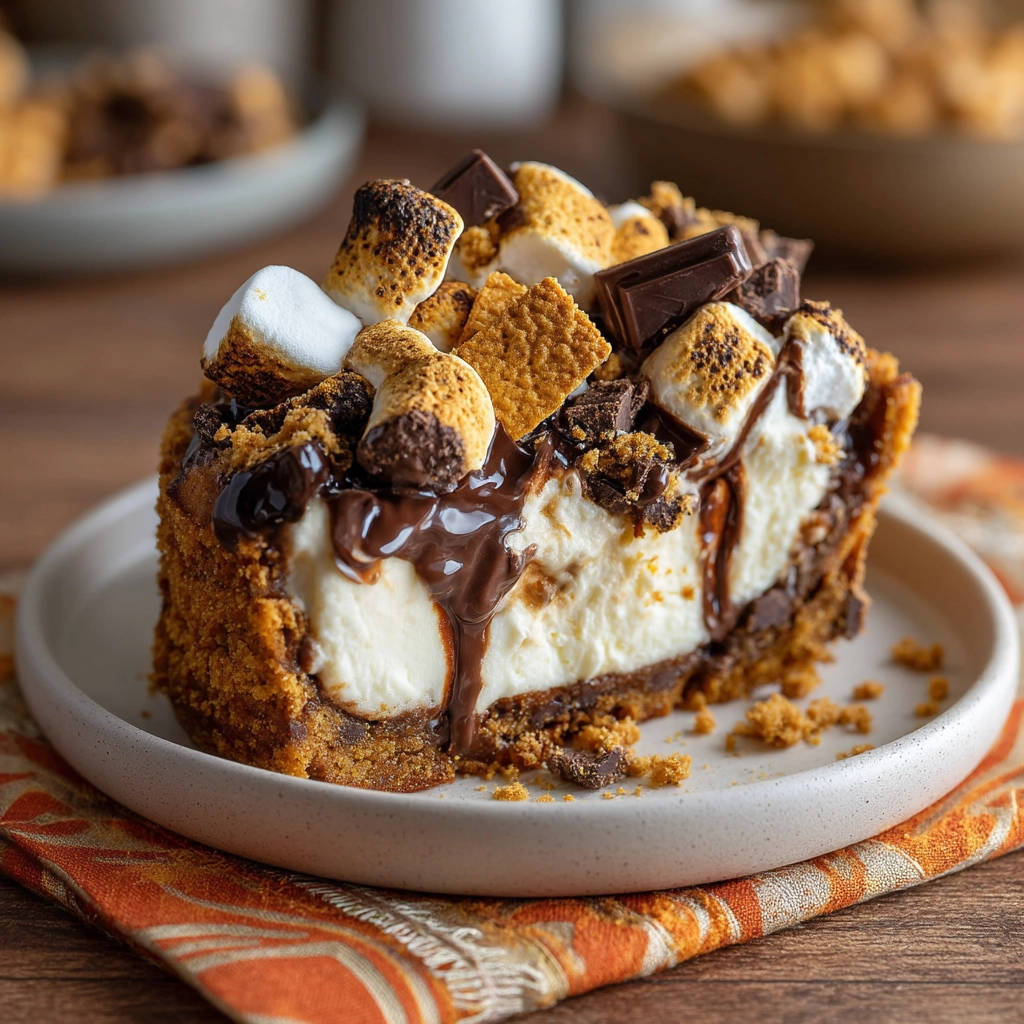
Add the S’mores Toppings: Once the bars are thoroughly chilled and set, it’s topping time! Scatter the chopped chocolate chunks or chips and the mini marshmallows evenly over the top surface of the chilled cheesecake layer. If you like that slightly toasted marshmallow flavor, you can briefly place the pan under a broiler for just 30-60 seconds (watch very carefully, marshmallows burn fast!) or use a kitchen torch until the marshmallows are golden brown and gooey. Then, generously drizzle both the caramel sauce and the chocolate sauce over the top. If you have extra graham cracker crumbs or toasted pieces, sprinkle them on now for extra s’mores authenticity.
Cut and Serve: Use the parchment paper overhang as handles to lift the entire block of chilled s’mores bars out of the pan onto a cutting board. For the cleanest cuts, use a sharp knife. Wipe the knife blade clean with a hot, damp cloth between each cut. This prevents the cheesecake and toppings from sticking and dragging, giving you beautiful, clean squares. Serve the bars chilled for the best texture and flavor experience.
Tips for Achieving Perfect S’mores Cheesecake Bars Every Time
Beyond the main steps, here are a few extra pointers to ensure your Epic S’mores Bars are nothing short of spectacular:
- Room Temperature is King: Seriously, I can’t stress this enough. Cold cream cheese will absolutely lead to lumps, no matter how long you beat it with sugar. Cold eggs shock the batter and contribute to cracking. Plan ahead!
- Don’t Overmix: Especially after adding the eggs. Mixing too much incorporates excess air, which expands and then contracts, causing cracks. Low speed and mixing just until combined is the goal.
- Gentle Baking: Cheesecake likes gentle heat. Avoid opening the oven door unnecessarily while baking. The gentle wobble test is your friend – trust it!
- Patience with Cooling and Chilling: Don’t rush these steps. Gradual cooling prevents cracks, and thorough chilling is necessary for the cheesecake to set properly. Warm cheesecake bars are messy and don’t have the right firm-yet-creamy texture.
- Quality Toppings: Use good quality chocolate and sauces. They make a difference in flavor. If you’re a caramel lover, you might enjoy exploring other caramel-centric treats too!
- Cutting Technique: Wiping the knife with hot water between cuts truly makes a difference in presentation.
Recipe Variations to Try
Want to mix things up? These bars are wonderfully adaptable:
- Chocolate Variations: Instead of chunks, use milk chocolate chips, dark chocolate, or even white chocolate. Chopped up s’mores-flavored chocolate bars would be extra fun!
- Toasted Marshmallows: If you don’t have a broiler or torch, you can toast the marshmallows on a baking sheet separately, then immediately place them on the chilled bars. They won’t be gooey and melted into the cheesecake, but you’ll still get that toasted flavor.
- Add Peanut Butter: Swirl some melted peanut butter into the cream cheese layer before baking, or drizzle melted peanut butter over the top along with the sauces. Peanut butter and s’mores? Yes, please! (Check out our peanut butter chocolate bars for another great combo!)
Common Questions About S’mores Bars Answered (FAQ)
Got questions? I’ve got answers! Here are some common queries about making these delightful Epic S’mores Bars.
Why are my cheesecake bars lumpy?
The most common culprit is using cold cream cheese! Make sure your cream cheese is truly softened to room temperature before you start beating it. Also, ensure you beat the cream cheese alone until it’s completely smooth before adding other ingredients. Don’t rush this crucial first step.
How can I prevent cracks in my cheesecake layer?
Several things help: using room temperature ingredients (cream cheese and eggs), not overmixing the batter once the eggs are added (this incorporates too much air), not overbaking (the slight jiggle is key!), and allowing the cheesecake to cool gradually (first in the pan, then chilling fully). Sudden temperature changes are cheesecake’s enemy!
Can I make the graham cracker crust from scratch?
Absolutely! You’ll need about 9-10 full graham crackers. Pulse them in a food processor until fine crumbs form. Then proceed with mixing in the sugar and melted butter as directed.
How long do these S’mores Bars need to chill?
They need at least 4 hours in the refrigerator to set properly. However, chilling them overnight (preferably 8 hours or more) yields the best texture and makes them much easier to cut cleanly. Patience is a virtue here!
Can I freeze S’mores Bars?
Yes, you can! Once the bars are completely chilled and cut, you can wrap individual squares tightly in plastic wrap, then place them in an airtight container or freezer bag. They can be frozen for up to 1-2 months. Thaw them in the refrigerator overnight before serving. Hold off on adding the marshmallow/chocolate/drizzle toppings until after thawing if you want the freshest look, or freeze them with toppings if convenience is key (the marshmallows might lose some texture). If you love freezing desserts, you might also want to check out our Easy Carrot Cake Squares, which freeze well too.
What size pan should I use?
This recipe is specifically designed for an 8×8 inch square baking pan. Using a different size will change the thickness of the layers and potentially affect the baking time. A 9×13 inch pan would require increasing the ingredient quantities significantly.
How long do S’mores Bars last in the refrigerator?
Stored properly in an airtight container in the refrigerator, these bars will stay fresh for 3-4 days. The graham cracker crust might soften slightly over time, but the cheesecake layer will remain delicious.
Enjoy Your Homemade Epic S’mores Bars!
There you have it – the secret to ultra-smooth, absolutely dreamy Epic S’mores Bars! With just a little attention to temperature and mixing technique, you can conquer the cheesecake and create a dessert that will have everyone asking for the recipe. The combination of the crunchy crust, creamy filling, and gooey, chocolatey toppings is truly irresistible.
These bars are perfect for any occasion, bringing a little bit of campfire magic indoors. Whether you’re making them for a summer barbecue, a holiday gathering, or just a weeknight treat, they’re sure to be a hit. Don’t be shy with those drizzles!
Give this recipe a try, and let me know how much you love them in the comments below! If you captured that perfect slice, share a photo! Happy baking!
Epic S’mores Bars

Ingredients
- 1 and a half cups graham cracker crumbs
- 1 quarter cup granulated sugar
- 6 tablespoons unsalted butter melted
- 2 packages 8 ounce cream cheese softened
- 3 quarters cup granulated sugar
- 2 large eggs room temperature
- 1 teaspoon vanilla extract
- 1 cup chopped chocolate chunks or chips
- 1 cup mini marshmallows
- 1 quarter cup caramel sauce for drizzling
- 1 quarter cup chocolate sauce for drizzling
- Optional additional graham cracker crumbs for topping
Directions
- Preheat oven to 350 degrees Fahrenheit. Line an 8×8 inch baking pan with parchment paper leaving an overhang on the sides.
- In a medium bowl combine the graham cracker crumbs 1 quarter cup sugar and melted butter. Stir until well combined and the mixture resembles wet sand. Press firmly and evenly into the bottom of the prepared pan to form the crust. Bake for 8 minutes until lightly golden. Remove from oven and let cool slightly while you make the filling.
- This is the key to smooth filling: Ensure your cream cheese and eggs are at room temperature. In a large bowl beat the softened cream cheese alone with an electric mixer on medium speed until it is completely smooth and lump-free. This might take a few minutes but is essential. Add the 3 quarters cup sugar and beat until fully incorporated and the mixture is creamy and smooth scraping down the sides of the bowl as needed.
- Add the room temperature eggs one at a time beating on low speed just until each egg is incorporated. Do not overmix after adding the eggs as this can incorporate too much air. Stir in the vanilla extract gently.
- Pour the smooth cream cheese filling over the partially cooled crust in the pan. Spread gently to an even layer.
- Bake for 30-35 minutes or until the center is just slightly jiggly when the pan is gently shaken. Do not overbake.
- Let the bars cool completely in the pan on a wire rack. Once cool cover and refrigerate for at least 4 hours preferably overnight until completely chilled and set.
- Once chilled add the toppings. Scatter the chopped chocolate chunks and mini marshmallows over the top. Drizzle generously with caramel sauce and chocolate sauce. If desired sprinkle with additional graham cracker crumbs or toasted graham cracker pieces.
- For easy cutting use the parchment paper overhang to lift the bars out of the pan. Cut into squares using a sharp knife wiping the knife clean between cuts for the cleanest edges. Serve chilled.