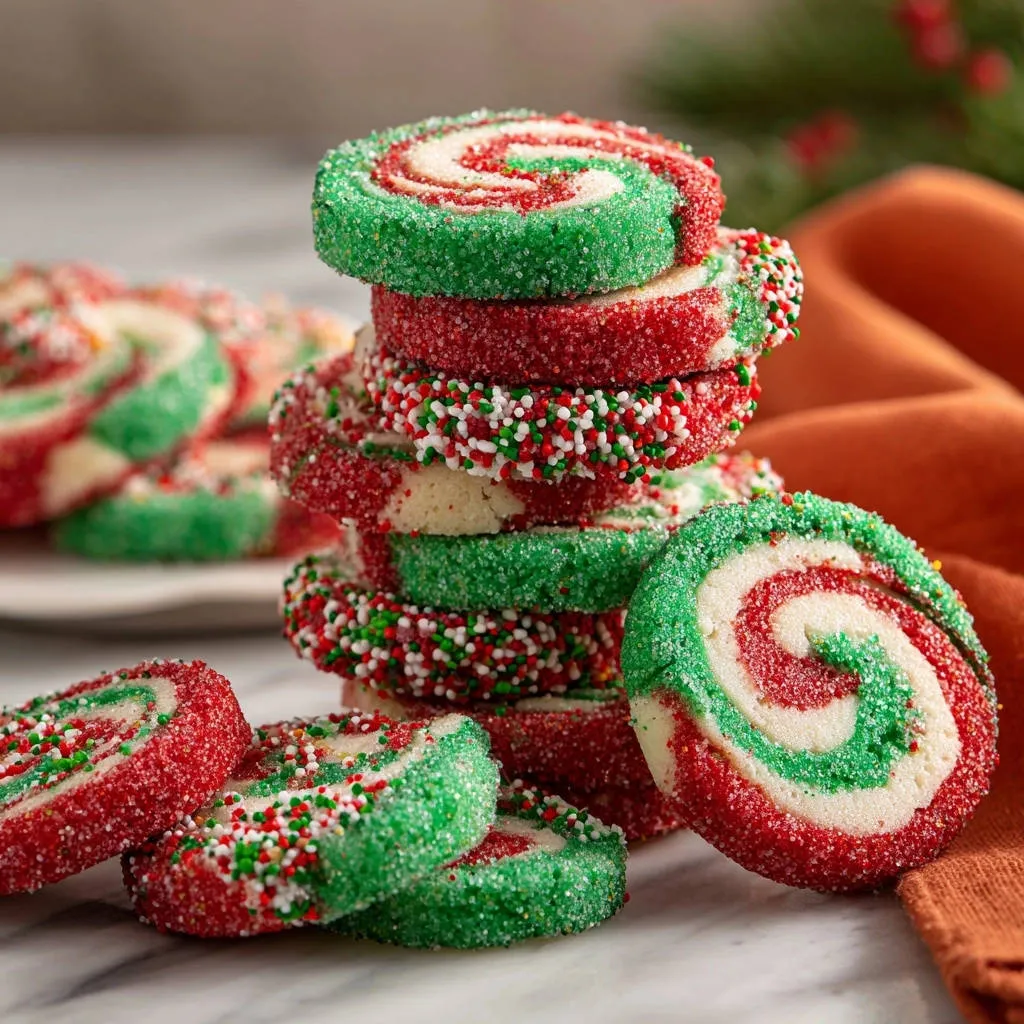
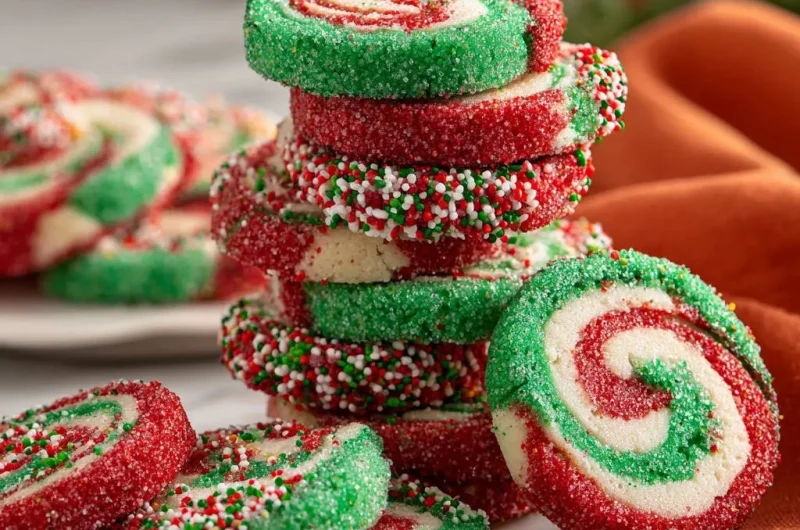
As a seasoned baker, few things frustrate me more than picture-perfect cookie dough that spreads into a formless blob in the oven. That’s why I’m thrilled to share my foolproof recipe for Festive Pinwheel Cookies, guaranteed to deliver those crisp, vibrant swirls you dream of.
This recipe focuses on a crucial chilling technique that ensures your cookies hold their stunning shape, making them a show-stopping addition to any holiday table. Get ready to bake with confidence and create truly impressive treats!
Unveiling the Magic: Why This Pinwheel Recipe Wins Hearts
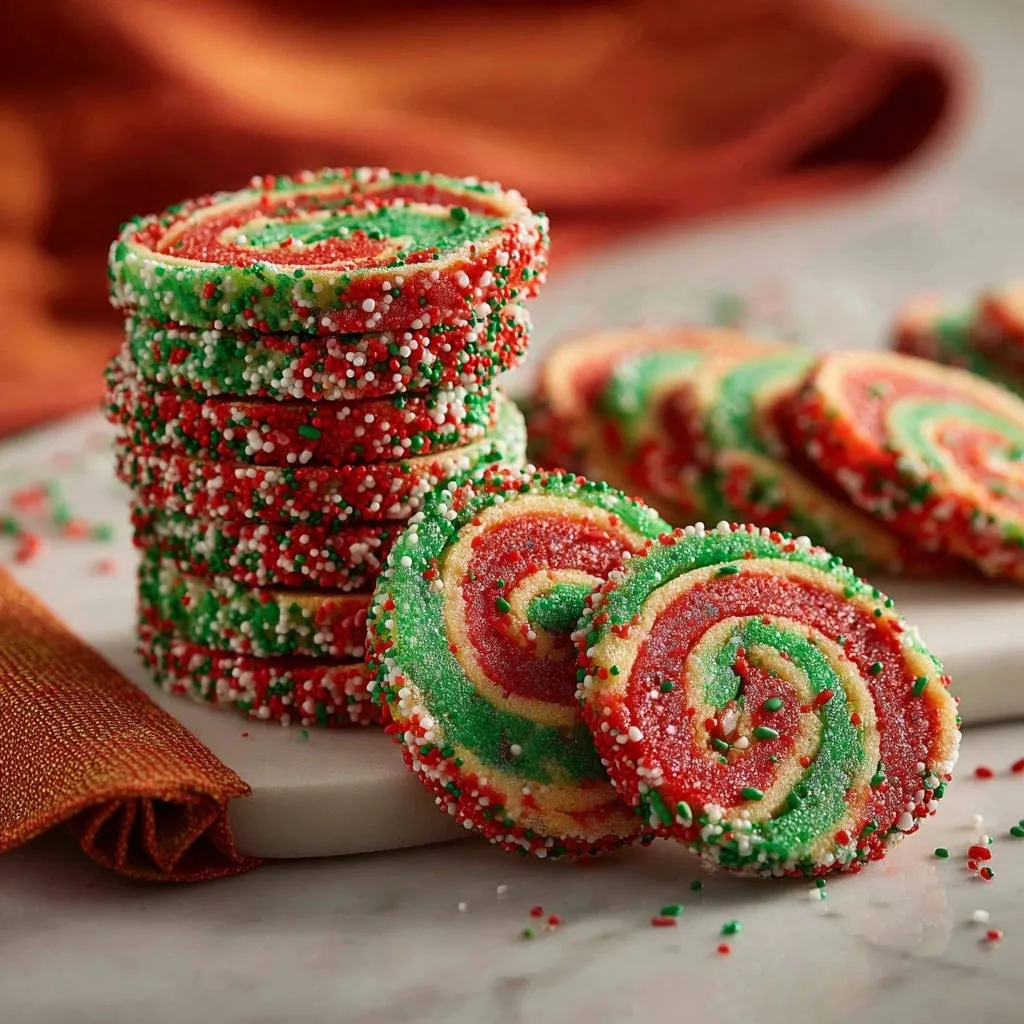
This Festive Pinwheel Cookies recipe is designed for success, tackling the common challenge of cookies losing their beautiful shape. My method ensures each pinwheel bakes with distinct, clean lines and brilliant colors that truly pop.
The secret lies in proper dough preparation and a non-negotiable chilling step, leading to perfectly defined swirls every single time. You’ll achieve a tender cookie with a delightful visual appeal, making them ideal for gifting or holiday entertaining.
Gather Your Tools: Kitchen Essentials for Pinwheel Success
Having the right tools simplifies the pinwheel-making process and contributes to a professional finish. Here are the essentials you’ll need to create your Festive Pinwheel Cookies:
Electric Mixer: Essential for creaming butter and sugar until light and fluffy, ensuring a tender cookie texture.
Large Mixing Bowls: You’ll need at least two – one for dry ingredients and one for combining the dough.
Parchment Paper: Crucial for rolling out the dough evenly and preventing sticking, making layering and rolling effortless.
Rolling Pin: To achieve consistent thickness across your dough rectangles, which is vital for even baking and defined swirls.
Sharp Knife: A good quality, un-serrated knife is key for clean, crisp slices without distorting the pinwheel pattern.
Baking Sheets: Sturdy sheets ensure even heat distribution for perfectly baked cookies.
Wire Cooling Rack: Allows air circulation, preventing the bottoms of your cookies from getting soggy as they cool.
The Heart of the Swirl: Understanding Your Pinwheel Ingredients
Each ingredient in these Festive Pinwheel Cookies plays a vital role in achieving their perfect texture, vibrant appearance, and delicious flavor. Understanding their function helps you ensure success.
Building the Perfect Dough Base
All-Purpose Flour: This provides the primary structure for our cookies. Too much can make them tough; too little, and they might spread excessively.
Baking Powder: Our leavening agent, it gives the cookies a slight lift and a tender crumb without making them overly cakey.
Salt: A pinch of salt balances the sweetness and enhances all the other flavors in the cookie dough.
Unsalted Butter, Softened: Using softened butter is critical for creaming with sugar, creating air pockets that contribute to a light texture. Unsalted butter allows you to control the exact salt content.
Granulated Sugar: This provides sweetness, helps with crisping, and aids in creating that lovely light and fluffy texture when creamed with butter.
Vibrant Hues and Sweet Aromas
Large Egg: The egg binds the ingredients, adds moisture, and enriches the dough, contributing to a chewier texture.
Vanilla Extract: A classic flavor enhancer, vanilla adds a warm, aromatic depth that complements the sweetness of the cookies.
Red and Green Food Coloring: Gel food coloring is recommended here for intense, concentrated color without altering the dough’s consistency. This ensures your pinwheels pop with holiday cheer.
Sparkle and Festive Flair
Red and Green Sanding Sugar: These coarse sugars provide a beautiful, sparkling coating and a delightful textural crunch around the edges of your Festive Pinwheel Cookies.
Holiday Sprinkles: An optional but highly recommended addition, sprinkles add extra visual appeal and a fun, festive touch that makes these cookies even more special.
Your Path to Pinwheel Perfection: A Detailed Baking Journey
Follow these steps carefully to create stunning Festive Pinwheel Cookies with perfectly defined swirls and a delightful texture.
- Step 1: Prepare Dry Ingredients.
In a medium bowl, whisk together the flour, baking powder, and salt. Set this aside; combining dry ingredients separately ensures even distribution.
- Step 2: Cream Butter and Sugar.
In a large bowl, using an electric mixer, cream together the softened unsalted butter and granulated sugar until the mixture is light, fluffy, and pale yellow.
This aeration is key for a tender crumb and helps prevent dense cookies.
- Step 3: Incorporate Wet Ingredients.
Beat in the large egg and vanilla extract to the creamed butter mixture until everything is thoroughly combined.
- Step 4: Form the Dough.
Gradually add the whisked dry ingredients to the wet ingredients. Mix on low speed until the dough just comes together and a soft, pliable dough forms.
Do not overmix; overworking the gluten can lead to tough cookies.
- Step 5: Color the Dough.
Divide the dough neatly in half. To one half, add several drops of red food coloring; to the other half, add several drops of green food coloring.
Mix each portion separately until the color is uniformly distributed and vibrant.
- Step 6: Roll Out the Dough.
On two separate sheets of parchment paper, roll out each colored dough into a roughly 10×12 inch rectangle, aiming for about ¼ inch thick.
Rolling on parchment paper prevents sticking and makes the next step much easier.
- Step 7: Layer the Colors.
Carefully invert the green dough rectangle directly onto the red dough rectangle, aligning the edges as precisely as possible.
Gently press the two layers together to remove any air pockets and ensure they adhere.
- Step 8: Roll the Log.
Starting from one of the long edges (the 12-inch side), carefully and tightly roll the layered dough into a compact log.
Wrap the log tightly in its parchment paper, then again securely in plastic wrap to protect it.
- Step 9: Chill for Success (The Key Step!).
Place the wrapped dough log in the refrigerator for at least 3 to 4 hours, or ideally, overnight.
This firm chilling is absolutely essential to prevent spreading during baking and to maintain the beautiful, crisp swirl definition when slicing.
- Step 10: Preheat Oven and Prepare Pans.
Once your dough is thoroughly chilled, preheat your oven to 375°F (190°C).
Line your baking sheets with fresh parchment paper to prevent sticking and ensure easy cleanup.
- Step 11: Add Festive Coating (Optional).
Remove the chilled dough log from the refrigerator. If desired, lightly moisten the outside of the log with a tiny bit of water.
Roll the log generously in a festive mixture of red sanding sugar, green sanding sugar, and holiday sprinkles for an extra sparkle.
- Step 12: Slice and Bake.
Using a sharp, un-serrated knife, slice the dough log into ¼ inch thick rounds. Place the sliced cookies about 1 inch apart on your prepared baking sheets.
- Step 13: Bake to Perfection.
Bake for 8 to 10 minutes, or until the edges are lightly golden and the cookies appear set but still slightly soft in the center.
Avoid overbaking to keep them tender and prevent them from becoming too crisp or dry.
- Step 14: Cool Completely.
Let the cookies cool on the baking sheets for a few minutes after baking; they will firm up as they cool.
Then, carefully transfer them to a wire rack to cool completely before storing or serving.
Unlock the Secret: The Chilling Technique for Flawless Festive Pinwheel Cookies
The chilling step in this Festive Pinwheel Cookies recipe isn’t just a suggestion; it’s the absolute game-changer that differentiates perfect, crisp swirls from flattened, undefined cookies. This often-overlooked phase is critical for several scientific reasons.
Firstly, chilling allows the butter in the dough to firm up significantly. When butter is cold, it melts more slowly in the oven, creating steam that helps the cookie hold its shape rather than spreading out prematurely. This ensures your vibrant red and green colors stay distinct and don’t bleed into each other, preserving the stunning pinwheel effect.
Secondly, the chilling period allows the gluten in the flour to relax. Dough that hasn’t rested can be elastic and resistant to rolling, but after a good chill, it becomes easier to slice cleanly without distortion. This relaxation also contributes to a more tender, less tough cookie texture. Aim for at least 3-4 hours, or preferably an overnight chill, for optimal results and truly flawless Festive Pinwheel Cookies.
Beyond the Recipe: Pro Tips for Festive Pinwheel Cookies Success
Achieving truly perfect Festive Pinwheel Cookies goes beyond just following the steps. Incorporate these expert tips for an even better baking experience and superior results.
Don’t Overmix the Dough: After adding the dry ingredients, mix only until just combined. Overmixing develops gluten, which can lead to tough, chewy cookies instead of tender ones.
Use a Sharp Knife for Slicing: A dull knife will drag and distort your beautifully layered dough, ruining the pinwheel design. A sharp, non-serrated knife makes clean cuts, ensuring each cookie has perfectly defined swirls.
Achieve Vivid Colors: For the most intense and true-to-life red and green, opt for gel food coloring over liquid varieties. Gel colors are highly concentrated and won’t thin your dough, allowing you to achieve vibrant hues with less product.
The Perfect Bake Time: Keep a close eye on your cookies as they bake. They are ready when their edges are lightly golden, but the centers might still appear slightly soft. Overbaking is the enemy of tender cookies, turning them dry and crumbly.
Maintain Dough Temperature: If you’re slicing multiple batches, return the dough log to the refrigerator between batches if your kitchen is warm. This prevents the dough from softening and ensures consistent results. For more tips on preventing spread, you might find insights from our recipe for White Chocolate Caramel Cookies That Don’t Spread Flat helpful.
Pinwheel Pitfalls? Solving Your Common Festive Cookie Woes
Even with the best intentions, baking can sometimes present challenges. Here are solutions to common issues you might encounter with Festive Pinwheel Cookies.
Cookies Spreading Too Much?
The primary culprit is insufficient chilling. Ensure your dough log is thoroughly chilled for at least 3-4 hours, or preferably overnight, before slicing.
Warm butter in the dough will melt too quickly in the oven, causing spreading. Additionally, make sure your butter was softened, not melted, when creaming, and avoid overmixing the dough, which can warm it up.
Colors Bleeding Together?
This often happens if the dough is too soft or if it’s been handled too much, causing the colors to merge. The firm chilling step is crucial here, as it sets the colors before baking.
Also, avoid using excessive amounts of liquid food coloring; gel colors offer more pigment with less moisture, reducing the risk of bleeding.
Dough Too Sticky or Crumbly to Roll?
If the dough is too sticky, it might be too warm or have too much liquid. Try chilling it for 15-30 minutes before rolling, or lightly flour your parchment paper if needed.
If it’s too crumbly, it might be overmixed or lack enough moisture. Add a tiny bit (half a teaspoon at a time) of milk or water, mixing just until it comes together, and ensure your butter was truly softened.
My Pinwheel Swirls Aren’t Defined!
Lack of definition is usually due to not rolling the dough log tightly enough, or insufficient chilling before slicing. Roll the layered dough as snugly as possible to create tight swirls.
A very sharp knife is also key to clean cuts; a dull knife can smudge the layers together, blurring the pattern. For another cookie that maintains shape beautifully, check out our Soft Spiced Glazed Cookies.
Enjoying and Preserving Your Festive Pinwheel Cookies
Once you’ve mastered these beautiful Festive Pinwheel Cookies, you’ll want to enjoy them and keep them fresh for as long as possible. Here’s how.
Creative Ways to Serve Your Pinwheels
These cookies are naturally festive, perfect for holiday platters, cookie exchanges, or as a delightful treat with a warm cup of coffee or tea. Arrange them on a white platter to let their colors truly shine.
You can also use them as edible decorations for dessert tables, or crush them slightly and sprinkle over vanilla ice cream for a festive topping.
Optimal Storage for Maximum Freshness
Store your baked Festive Pinwheel Cookies in an airtight container at room temperature for up to 5-7 days. To prevent them from drying out, you can place a slice of bread in the container; the cookies will absorb moisture from the bread.
For longer storage, they freeze beautifully. Once completely cooled, place them in a single layer on a baking sheet to freeze solid, then transfer to a freezer-safe bag or container for up to 3 months.
Make-Ahead Magic: Prepare Dough in Advance
One of the best features of this recipe is its make-ahead potential. The unbaked dough log can be wrapped tightly and stored in the refrigerator for up to 3-4 days.
For even longer storage, the dough log can be frozen for up to 1 month. Thaw it in the refrigerator overnight before slicing and baking, making it incredibly convenient for last-minute holiday baking.
Frequently Asked Questions About Festive Pinwheel Cookies
Here are answers to some common questions that arise when baking Festive Pinwheel Cookies.
Can I use different food colorings or natural alternatives?
Absolutely! Feel free to experiment with other colors to suit different occasions, such as pastels for spring or orange and black for Halloween. While natural food colorings can be used, note that their hues might not be as vibrant or stable as gel options.
Can I freeze the cookie dough or baked cookies?
Yes, both the dough and the baked cookies can be frozen. The tightly wrapped dough log can be frozen for up to a month, thawed in the fridge before slicing. Baked, cooled cookies can be frozen for up to three months in an airtight container.
What if I don’t have parchment paper?
While parchment paper is highly recommended for ease and non-stick properties, you can try rolling the dough between two sheets of lightly floured wax paper or plastic wrap. For baking, silicone baking mats are an excellent reusable alternative to parchment paper.
Are these Festive Pinwheel Cookies gluten-free or dairy-free friendly?
This specific recipe uses all-purpose flour and dairy butter. To make them gluten-free, you would need to experiment with a 1:1 gluten-free baking flour blend. For dairy-free, use a high-quality plant-based butter substitute, ensuring it’s suitable for baking and creaming.
How can I make the swirls even more dramatic?
For more dramatic swirls, ensure your dough is rolled to a consistent ¼-inch thickness, and roll the log as tightly as possible from the start. The longer chilling time also helps in achieving sharper, more defined patterns when sliced.
Your Pinwheel Adventure Awaits: Share the Joy!
Now that you have all the tools, tips, and tricks for flawless Festive Pinwheel Cookies, your holiday baking dreams are within reach! This recipe isn’t just about baking; it’s about creating edible art and sharing joy with loved ones.
I can’t wait to see your stunning creations. Tag me on social media or leave a comment below to share your experience and your beautiful pinwheels!
Festive Pinwheel Cookies
Course: DessertCuisine: American CuisineDifficulty: easy48
cookies45
minutes10
minutes240
minutesAmerican Cuisine
Ingredients
2 ½ cups all-purpose flour
1 teaspoon baking powder
½ teaspoon salt
1 cup (2 sticks) unsalted butter, softened
1 ½ cups granulated sugar
1 large egg
1 teaspoon vanilla extract
Red food coloring
Green food coloring
Red sanding sugar
Green sanding sugar
Holiday sprinkles
Directions
- In a medium bowl, whisk together the flour, baking powder, and salt. Set aside.
- In a large bowl, cream together the softened butter and granulated sugar until light and fluffy. Beat in the egg and vanilla extract until well combined.
- Gradually add the dry ingredients to the wet ingredients, mixing on low speed until just combined and a soft dough forms. Do not overmix.
- Divide the dough in half. To one half, add several drops of red food coloring and mix until uniformly red. To the other half, add several drops of green food coloring and mix until uniformly green.
- On separate sheets of parchment paper, roll out each colored dough into a roughly 10×12 inch rectangle, about ¼ inch thick.
- Carefully invert the green dough rectangle onto the red dough rectangle, aligning the edges as best as possible. Gently press them together.
- Starting from one long edge, carefully roll the layered dough tightly into a log. Wrap the log tightly in parchment paper, then again in plastic wrap.
- This is the key step for intact swirls: Place the wrapped dough log in the refrigerator for at least 3 to 4 hours, or preferably overnight. This firm chilling is essential to prevent spreading and maintain the swirl definition when slicing and baking.
- Preheat your oven to 375 degrees Fahrenheit (190 degrees Celsius). Line baking sheets with parchment paper.
- Remove the chilled dough log from the refrigerator. If desired, lightly moisten the outside of the log with water and roll it in a mixture of red sanding sugar, green sanding sugar, and holiday sprinkles to coat generously.
- Using a sharp knife, slice the dough log into ¼ inch thick rounds. Place the sliced cookies about 1 inch apart on the prepared baking sheets.
- Bake for 8 to 10 minutes, or until the edges are lightly golden and the cookies are set but still soft in the center. Avoid overbaking.
- Let the cookies cool on the baking sheets for a few minutes before transferring them to a wire rack to cool completely.
Notes
- Chilling the dough log thoroughly is crucial for maintaining defined swirls and preventing spreading during baking.