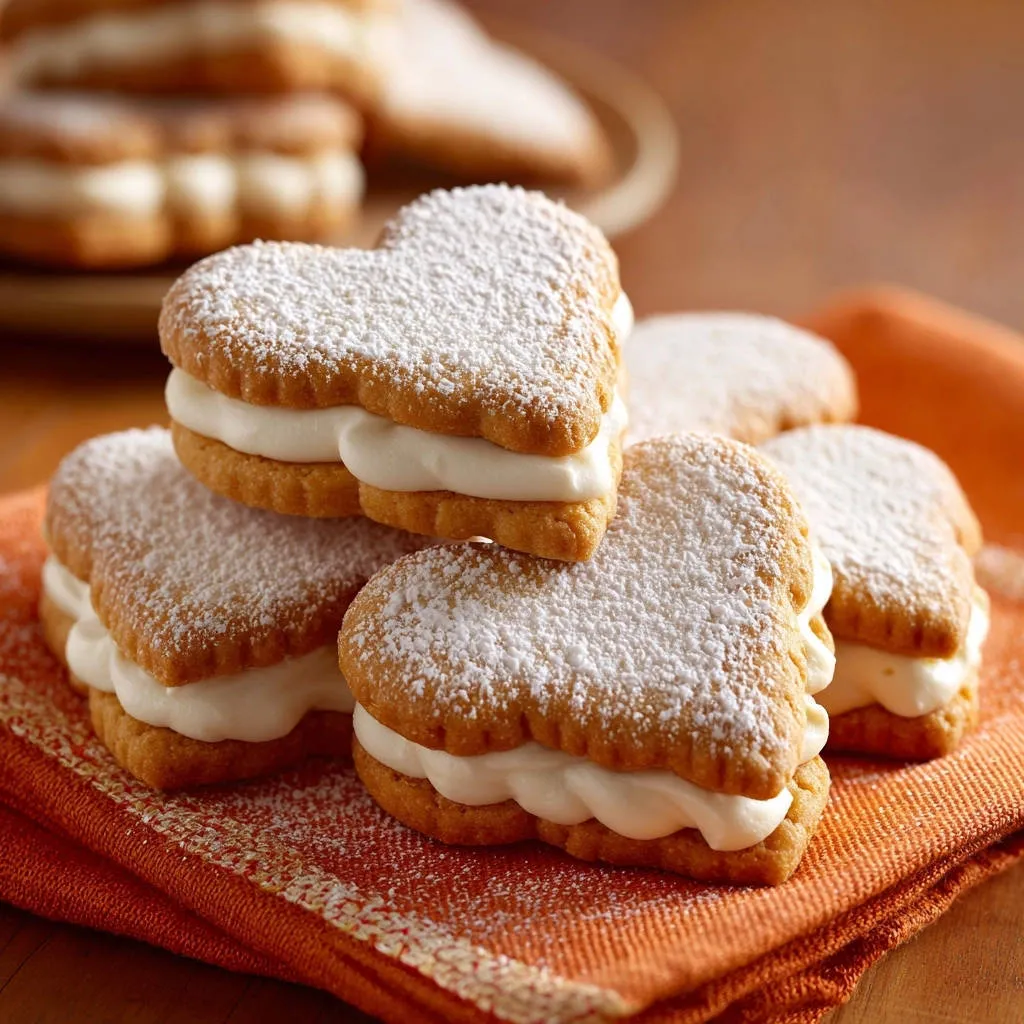
For years, my pursuit of perfectly delicate Heart-Shaped Vanilla Sandwich Cookies often ended with frustratingly crumbly results that refused to hold their shape. After extensive testing, I’ve finally mastered a recipe that ensures these beloved treats are always beautifully tender and structurally sound. Prepare to create enchanting cookie sandwiches that are as delightful to look at as they are to eat!
The Secret to Perfectly Tender Sandwich Cookies That Hold Their Shape
This recipe isn’t just about pretty shapes; it’s about achieving that elusive melt-in-your-mouth texture without any fragility. We address common pitfalls head-on, ensuring your baking experience is enjoyable and successful.
Why Our Recipe Stands Out from the Rest
Our method focuses on precise ingredient ratios and crucial technique nuances, preventing the common issue of tough or crumbly cookies. We emphasize proper dough chilling and gentle mixing, which are paramount for a tender crumb that holds its form. The result is a cookie that’s firm enough to sandwich yet delicate with every bite.
A Sweet Treat for Any Occasion (Especially Valentine’s!)
While Heart-Shaped Vanilla Sandwich Cookies are a natural fit for Valentine’s Day or anniversaries, their timeless appeal extends far beyond. They’re perfect for baby showers, bridal events, afternoon tea, or simply as a comforting homemade treat. Gifting a box of these charming cookies always brings a smile.
Gather Your Essentials: Simple Ingredients, Delicious Results
High-quality ingredients are the starting point for any exceptional baked good. Here’s a closer look at what you’ll need and why each element is important.
For the Cookie Dough: Building the Foundation
Unsalted butter, softened: Essential for a rich flavor and tender texture. Softened butter creams easily, allowing for optimal air incorporation.

Granulated sugar: Provides sweetness and helps create a crisp exterior while maintaining a soft interior.
Large egg: Acts as a binder, adding structure and moisture to the dough.
Vanilla extract: The star flavor, providing that classic, comforting aroma and taste.
All-purpose flour: The main structural component. Proper measurement is key to avoid dense cookies.
Baking powder: A leavening agent that helps the cookies rise slightly, contributing to their delicate texture.
Salt: Balances the sweetness and enhances all the other flavors.
The Creamy Heart: Crafting the Perfect Vanilla Filling
Unsalted butter, softened: Forms the creamy base of our frosting, providing richness and smooth consistency.
Powdered sugar, sifted: Creates a smooth, lump-free filling. Sifting is crucial for a professional finish.
Vanilla extract: Reinforces the beloved vanilla flavor profile, harmonizing with the cookies.
Milk or cream: Adjusts the filling’s consistency, allowing you to achieve the perfect spreadable or pipeable texture.
The Finishing Touch: A Hint of Sweetness
Powdered sugar: Used for a light dusting, it adds an elegant touch and a subtle extra layer of sweetness to the assembled Heart-Shaped Vanilla Sandwich Cookies.
Essential Tools for Your Heart-Shaped Cookie Creation
Having the right tools makes the baking process smoother and more enjoyable. These are the essentials for our vanilla cookie sandwiches.
Baking Basics: Must-Have Kitchen Equipment
Large and medium mixing bowls: For combining wet and dry ingredients separately before bringing them together.
Electric mixer (stand or hand-held): Crucial for properly creaming butter and sugar, and for whipping the filling to perfection.
Measuring cups and spoons: Accurate measurements are fundamental for consistent results in baking.
Whisk: To aerate and combine dry ingredients evenly.
Rubber spatula: For scraping down bowls and ensuring all ingredients are fully incorporated.
Baking sheets: Sturdy sheets ensure even heat distribution for consistent baking.
Parchment paper: Prevents sticking and makes cleanup a breeze, ensuring your delicate cookies transfer easily.
Wire cooling rack: Allows air to circulate around cookies, preventing sogginess and ensuring they cool completely.
Specialty Tools for Perfect Heart Shapes
Heart-shaped cookie cutter: The essential tool for giving these tender heart cookies their signature charming shape.
Rolling pin: For rolling out the dough evenly to the ideal thickness, ensuring uniform baking.
Step-by-Step Perfection: Crafting Your Heart-Shaped Vanilla Sandwich Cookies
- Cream Butter and Sugar:
In a large bowl, cream together the softened butter and granulated sugar until light and fluffy.
This process incorporates air, crucial for tender cookies, and ensures a smooth, uniform base for your dough.
- Incorporate Wet Ingredients:
Beat in the egg and vanilla extract until well combined.
Scrape down the sides of the bowl to ensure all ingredients are fully incorporated before moving on.
- Whisk Dry Ingredients Separately:
In a separate bowl, whisk together the all-purpose flour, baking powder, and salt.
This step ensures that the leavening agents and seasoning are evenly distributed throughout the flour, preventing pockets of unmixed ingredients.
- Combine Wet and Dry:
Gradually add the dry ingredients to the wet ingredients, mixing on low speed until just combined.
Crucial Tip: Avoid overmixing the dough. Overmixing can develop gluten, leading to tough, crumbly cookies. Stop mixing as soon as no dry streaks of flour remain visible.
- Chill the Dough:
Divide the dough in half, flatten each half into a disk, wrap tightly in plastic wrap, and refrigerate for at least 1 hour.
Essential Step: This chilling step is vital for helping the cookies hold their shape during baking and ensures a tender, non-crumbly texture. Cold dough is much easier to roll and cut.
- Prepare for Baking & Roll Out Dough:
Preheat your oven to 375 degrees Fahrenheit (190 degrees Celsius). Line baking sheets with parchment paper.
On a lightly floured surface, roll out one disk of chilled dough to about 1/4 inch thickness. Use minimal flour to prevent a dry dough.
- Cut & Transfer Shapes:
Use a heart-shaped cookie cutter to cut out shapes. Carefully transfer the cutouts to the prepared baking sheets.
Gently reroll any dough scraps and cut more cookies, minimizing re-rolling to maintain the dough’s tenderness. Overworked dough can become tough.
- Bake the Cookies:
Bake for 8 to 10 minutes, or until the edges are lightly golden and the centers are just set.
Do NOT Overbake: It is crucial not to overbake, as this is the primary cause of dry and crumbly cookies. They should still be slightly soft and appear pale in the center when removed from the oven, as they will continue to set as they cool.
- Cool Completely:
Let the cookies cool on the baking sheets for 5 minutes before transferring them to a wire rack to cool completely.
This brief cooling period on the sheet allows them to firm up slightly, preventing breakage when you move them. Complete cooling is essential before filling.
- Prepare the Filling Base:
While cookies cool, prepare the filling: In a medium bowl, beat the softened butter until creamy.
Gradually add the sifted powdered sugar, beating until smooth and lump-free.
- Achieve Desired Consistency:
Beat in the vanilla extract and milk or cream, 1 tablespoon at a time, until the desired consistency is reached.
The ideal filling should be light and fluffy, yet firm enough to hold its shape beautifully once sandwiched between two cookies. Add liquid sparingly.
- Assemble Sandwich Cookies:
Once cookies are completely cool, spread or pipe a generous spoonful of filling onto the flat side of one cookie.
Gently top with another cookie, pressing lightly to form a sandwich. Be careful not to press too hard, or the filling will squeeze out the sides.
- Dust for Presentation:
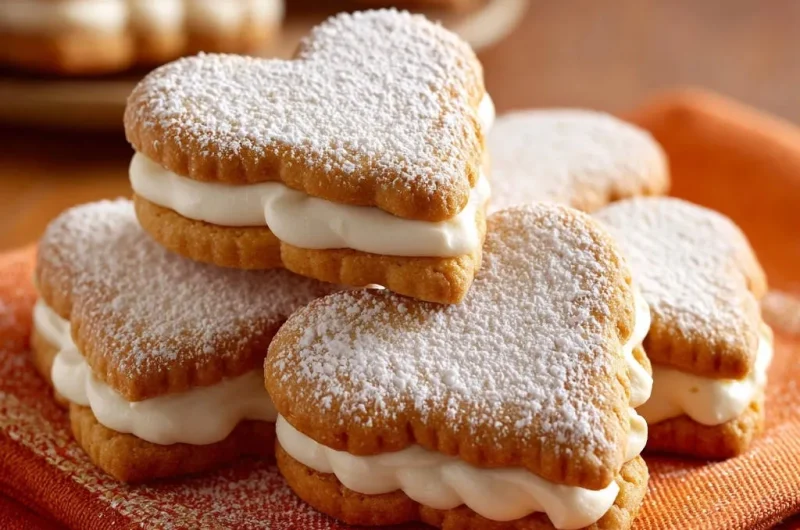
Lightly dust the assembled sandwich cookies with powdered sugar before serving.
This adds a beautiful, professional finish and an extra touch of delicate sweetness to your homemade sandwich cookies.
Part 1: Mastering the Cookie Dough
Part 2: The Crucial Chill and Roll
Part 3: Baking to Golden Perfection
Part 4: Whipping Up the Dreamy Vanilla Filling
Part 5: Assembling Your Sweet Masterpiece
Chef’s Secrets: Unlock Even Better Heart-Shaped Sandwich Cookies
Baking is an art, and these expert tips will elevate your Heart-Shaped Vanilla Sandwich Cookies from good to unforgettable.
The Magic of Chilling: Why It Matters
Chilling the dough firms up the butter, preventing the cookies from spreading too much in the oven. This allows them to hold their intricate heart shape.
It also gives the flour time to fully hydrate, resulting in a more tender cookie with a superior texture.
Mixing Smarter, Not Harder: Avoiding Tough Cookies
When combining wet and dry ingredients, mix just until no dry streaks of flour remain. Any more, and you start developing gluten, which makes cookies chewy and tough, not tender.
A gentle touch with the mixer on low speed is all that’s needed for the final incorporation.
Spotting Perfection: Knowing When Your Cookies Are Done
Look for lightly golden edges and centers that appear just set, even if still slightly soft. Cookies continue to bake from residual heat once removed from the oven.
Undercooking slightly is always better than overbaking, which leads to dry, crumbly results. Trust your eyes, not just the timer.
Handling Delicate Dough with Ease
Once chilled, the dough is much more manageable. Use a lightly floured surface and rolling pin, dusting just enough to prevent sticking.
When transferring cutouts, use a thin, flexible spatula to gently lift them to the baking sheet, supporting the shape.
Achieving the Ideal Filling Consistency
For piping, the filling needs to be a bit firmer; add milk or cream sparingly. For spreading, a slightly looser consistency is fine.
If your filling is too stiff, add a tiny bit more milk or cream (1/2 teaspoon at a time). If too runny, beat in a tablespoon more sifted powdered sugar.
Troubleshooting Your Heart-Shaped Vanilla Sandwich Cookies: Common Fixes
Don’t worry if things don’t go perfectly on your first try. Here are common issues and how to fix them.
Why Are My Cookies Spreading Too Much?
Solution: The most common culprits are insufficient chilling time or butter that was too soft when you started. Ensure your butter is softened but still cool to the touch. Always chill your dough for at least 1 hour, or even longer for very warm kitchens.
My Cookies Are Crumbly/Dry – What Went Wrong?
Solution: This usually indicates overbaking or overmixing the dough. Bake only until the edges are lightly golden and the centers are just set. For mixing, stop as soon as the flour disappears.
Incorrect flour measurement (too much flour) can also contribute to dryness, so spoon and level your flour carefully.
Filling Too Runny or Too Stiff?
Solution: If the filling is too runny, gradually beat in more sifted powdered sugar until it reaches your desired consistency. If it’s too stiff, add milk or cream a tiny bit at a time (1/2 teaspoon increments) until it’s smooth and spreadable/pipeable.
Cookies Sticking to the Baking Sheet?
Solution: Always use parchment paper! It’s a non-negotiable for delicate cookies like these. If you don’t have parchment, a very light greasing and flouring of the baking sheet might work, but parchment is always best.
Your Top Questions Answered About Heart-Shaped Vanilla Sandwich Cookies
Can I Make These Cookies Ahead of Time?
Absolutely! The dough can be made up to 2-3 days in advance and stored tightly wrapped in the refrigerator. Baked cookies, unfilled, can be stored in an airtight container at room temperature for up to 3 days, or frozen for up to 2 months.
For the best fresh taste and texture, assemble the vanilla cookie sandwiches the day you plan to serve them, or the day before at most. This helps maintain the cookie’s delicate crispness.
How Should I Store Leftover Sandwich Cookies?
Store assembled cookies in an airtight container at room temperature for up to 2-3 days. For longer storage, you can refrigerate them for up to 5 days, though the cookie may soften slightly.
For best results, separating layers with parchment paper can help prevent sticking and smudging of the delicate frosting.
Can I Use Different Cookie Cutters?
Certainly! While hearts are perfect for special occasions, this versatile dough works beautifully with any cookie cutter shape. Stars, circles, squares, or even themed shapes for holidays like Christmas or Easter are all great options.
Are There Gluten-Free or Dairy-Free Alternatives?
For a gluten-free version, use a high-quality 1:1 gluten-free baking flour blend that contains xanthan gum. The texture might be slightly different but still delicious.
For dairy-free, you can substitute plant-based butter (sticks, not tub) and plant-based milk or cream. I recommend a quality vanilla cupcake frosting recipe if you’re looking for other dairy-free frosting ideas that pipe perfectly!
What Other Flavors Can I Add?
Get creative with your vanilla sandwich cookies! Add citrus zest (lemon, orange, lime) to the dough or filling for a brighter flavor. A touch of almond extract can complement the vanilla beautifully.
You can also tint the filling with food coloring for festive occasions or add a teaspoon of cocoa powder for a chocolate swirl. For more classic dessert inspiration, check out our recipe for classic shortbread fingers.
Serving Suggestions & Storage Tips
Presentation is key when serving these lovely Heart-Shaped Vanilla Sandwich Cookies.
Delightful Ways to Serve Your Heart-Shaped Treats
Arrange them on a beautiful platter for a dessert spread, or stack them in clear cello bags tied with a ribbon for charming edible gifts. They pair wonderfully with a warm cup of tea or a cold glass of milk.
For a truly elegant presentation, consider a tiered dessert stand. These cookies are also a delightful addition to any cookie exchange or bake sale.
Keeping Your Cookies Fresh: Storage Best Practices
To maintain their tender texture, store the assembled cookies in an airtight container at room temperature. A piece of parchment paper between layers can prevent the filling from sticking.
If storing for more than a couple of days, refrigeration is fine, but bring them to room temperature before serving for optimal flavor and texture.
Make-Ahead Magic: Preparing for Special Occasions
The dough is excellent for freezing; wrap disks tightly and freeze for up to a month. Thaw in the refrigerator overnight before rolling.
Baked, unfrosted cookies can also be frozen for up to two months. Thaw at room temperature, then fill them fresh on the day of your event for peak deliciousness.
Share Your Sweet Success!
There’s immense satisfaction in baking something truly special, and these Heart-Shaped Vanilla Sandwich Cookies are certainly that. I encourage you to try this recipe and experience the joy of creating perfectly tender, non-crumbly cookie sandwiches.
I’d love to hear about your baking triumphs! Please share your photos and tell me how these delightful cookies brightened your day in the comments below.
Heart-Shaped Vanilla Sandwich Cookies
Course: DessertCuisine: American CuisineDifficulty: easy4
2-3 dozen cookies1
hour8
minutes60
minutesAmerican Cuisine
Ingredients
1 cup (2 sticks) unsalted butter, softened
3/4 cup granulated sugar
1 large egg
1 teaspoon vanilla extract
2 1/2 cups all-purpose flour
1 teaspoon baking powder
1/2 teaspoon salt
For the Filling:
1/2 cup (1 stick) unsalted butter, softened
2 cups powdered sugar, sifted
1 teaspoon vanilla extract
2 to 3 tablespoons milk or cream
For Dusting:
2 tablespoons powdered sugar
Directions
- In a large bowl, cream together the softened butter and granulated sugar until light and fluffy.
- Beat in the egg and vanilla extract until well combined.
- In a separate bowl, whisk together the all-purpose flour, baking powder, and salt.
- Gradually add the dry ingredients to the wet ingredients, mixing on low speed until just combined. Avoid overmixing the dough, as this can develop gluten and lead to tough, crumbly cookies. Stop mixing as soon as no dry streaks of flour remain.
- Divide the dough in half, flatten each half into a disk, wrap tightly in plastic wrap, and refrigerate for at least 1 hour. This chilling step is essential for helping the cookies hold their shape and ensuring a tender, non-crumbly texture.
- Preheat your oven to 375 degrees Fahrenheit (190 degrees Celsius). Line baking sheets with parchment paper.
- On a lightly floured surface, roll out one disk of chilled dough to about 1/4 inch thickness. Use a heart-shaped cookie cutter to cut out shapes. Carefully transfer the cutouts to the prepared baking sheets. Gently reroll any dough scraps and cut more cookies.
- Bake for 8 to 10 minutes, or until the edges are lightly golden and the centers are just set. It is crucial not to overbake, as this is the primary cause of dry and crumbly cookies. They should still be slightly soft when removed from the oven.
- Let the cookies cool on the baking sheets for 5 minutes before transferring them to a wire rack to cool completely.
- While cookies cool, prepare the filling: In a medium bowl, beat the softened butter until creamy. Gradually add the sifted powdered sugar, beating until smooth. Beat in the vanilla extract and milk or cream, 1 tablespoon at a time, until the desired consistency is reached. It should be light and fluffy but firm enough to hold its shape in the sandwich.
- Once cookies are completely cool, spread or pipe a generous spoonful of filling onto the flat side of one cookie. Gently top with another cookie, pressing lightly to form a sandwich.
- Lightly dust the assembled sandwich cookies with powdered sugar before serving.
Notes
- Do not overmix dough or overbake cookies to ensure tender, non-crumbly texture. Chilling the dough is essential for shape retention.