
Ninja Air Fryer, Thermometer, Roast, Bake, Air Fry, Crisps, Broil, Reheats, Keep Warm, 10-in-1, Fries, Frozen Food, Veggies, and Meat, Quick Meals, Healthy Meals, Less Oil, 10 QT, Cyberspace, DZ550GY
$129.99 (as of November 3, 2025 15:13 GMT +00:00 - More infoProduct prices and availability are accurate as of the date/time indicated and are subject to change. Any price and availability information displayed on [relevant Amazon Site(s), as applicable] at the time of purchase will apply to the purchase of this product.)
Tervis Wisconsin University Badger Emblem Tumbler (Set of 2), 16 oz, Clear -
(as of November 3, 2025 15:13 GMT +00:00 - More infoProduct prices and availability are accurate as of the date/time indicated and are subject to change. Any price and availability information displayed on [relevant Amazon Site(s), as applicable] at the time of purchase will apply to the purchase of this product.)
GoodCook Everyday Nonstick Carbon Steel Baking Sheet Set, 3 Pack – Small 13” x 9”, Medium 15” x 10”, Large 17” x 11” – Carbon Steel Cooking Pans, Cookie Sheet Bakeware Set
$17.99 (as of November 3, 2025 15:13 GMT +00:00 - More infoProduct prices and availability are accurate as of the date/time indicated and are subject to change. Any price and availability information displayed on [relevant Amazon Site(s), as applicable] at the time of purchase will apply to the purchase of this product.)
STANLEY Quencher H2.0 Tumbler with Handle and Straw 30 oz | Flowstate 3-Position Lid | Cup Holder Compatible for Travel | Insulated Stainless Steel Cup | BPA-Free | Lilac
(as of November 3, 2025 15:13 GMT +00:00 - More infoProduct prices and availability are accurate as of the date/time indicated and are subject to change. Any price and availability information displayed on [relevant Amazon Site(s), as applicable] at the time of purchase will apply to the purchase of this product.)
Simple Modern Halloween 40 oz Trek Tumbler with Handle and Straw Lid | Cup Holder Friendly Insulated Stainless Steel Travel Mug | Autumn Maple
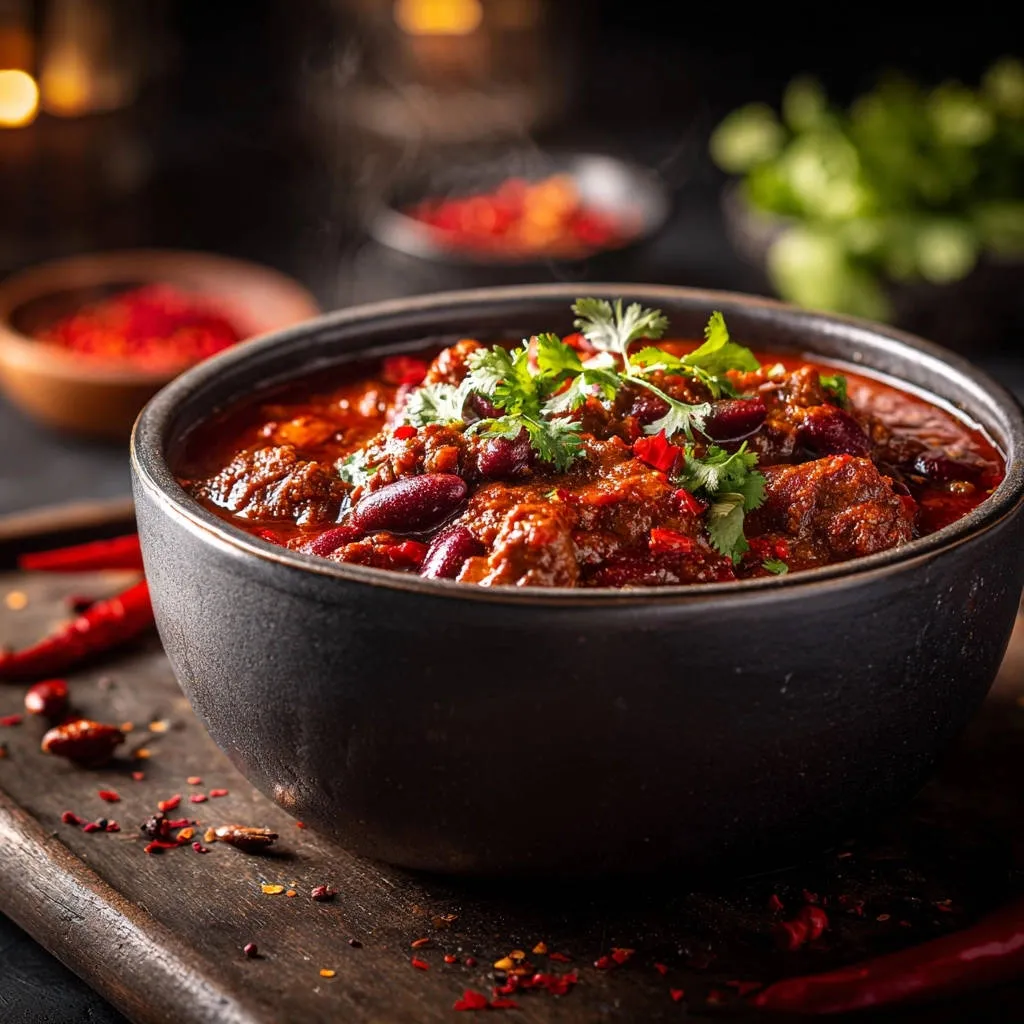
$44.99 (as of November 3, 2025 15:13 GMT +00:00 - More infoProduct prices and availability are accurate as of the date/time indicated and are subject to change. Any price and availability information displayed on [relevant Amazon Site(s), as applicable] at the time of purchase will apply to the purchase of this product.)For years, I found myself making chili that was good, but never truly great. It wasn’t until I discovered the power of strategic flavor layering that my Hearty Beef & Bean Chili transformed into something absolutely unforgettable.
This recipe isn’t just about mixing ingredients; it’s a reliable guide to achieving that deep, rich, and comforting taste we all crave. Prepare to elevate your chili game and delight everyone at your table.
Why This Hearty Beef & Bean Chili Will Be Your New Go-To
The “Cracked the Code” Advantage: Layering for Deep Flavor
Many chili recipes simply dump ingredients together, leading to a one-dimensional taste. Our method focuses on building flavor in stages, from deep searing to blooming spices.
This intentional layering creates an incredible depth that permeates every spoonful, ensuring a complex and satisfying chili experience.
Comfort in Every Spoonful: A Satisfying Family Meal
There’s nothing quite like a warm bowl of chili to bring comfort and joy to a meal. This Hearty Beef & Bean Chili is robust and hearty, making it perfect for family dinners.
It’s a wholesome dish that satisfies the soul, ideal for chilly evenings or gathering with loved ones.
Effortless Mastery: Simple Steps, Spectacular Results
Despite its profound flavor, this chili is surprisingly straightforward to prepare. The steps are intuitive and designed for home cooks of all skill levels.
You’ll achieve spectacular results with manageable effort, boosting your confidence in the kitchen.
The Flavor Foundation: What You’ll Need for Your Best Chili
Protein Power: Selecting Your Beef Chuck
Beef chuck is the star here, chosen for its excellent marbling and rich flavor. As it slowly simmers, the connective tissues break down, resulting in incredibly tender, melt-in-your-mouth beef.
Cut it into 1-inch cubes to ensure even searing and thorough cooking. This foundational ingredient is crucial for a truly hearty chili.
The Aromatic Symphony: Onion, Garlic & Oil
Olive oil provides a neutral base for searing and sautéing, allowing other flavors to shine. Yellow onion creates a sweet, pungent aromatic foundation that mellows beautifully during cooking.
Minced garlic adds a sharp, savory kick, essential for building the chili’s complex flavor profile. These ingredients are the backbone of any great chili.
The Heart of the Heat: Our Signature Spice Blend
Chili powder is the primary flavor driver, offering a warm, earthy base. Ground cumin adds a distinctive, smoky depth that complements the beef and beans.
Smoked paprika contributes a rich, smoky nuance, enhancing the overall savory profile. Dried oregano brings a subtle, herbaceous note, balancing the bolder flavors.
Liquid Gold & Beans: Broth, Tomatoes & Kidney Beans
Crushed tomatoes provide body, acidity, and a natural sweetness, forming the core of the chili’s sauce. Beef broth adds savory liquid, enriching the overall flavor while ensuring a perfect consistency.
Kidney beans are a classic chili addition, offering a hearty texture and absorbing the surrounding flavors beautifully. Remember to rinse and drain them thoroughly to remove excess sodium and improve digestibility.
The Finishing Touches: Salt, Pepper & Garnishes
Salt and black pepper are essential for seasoning, enhancing all the other ingredients and balancing the flavors. Always taste and adjust as you go.
Fresh chopped cilantro adds a bright, fresh finish and a pop of color. Optional red chili flakes or fresh chilies offer an adjustable kick for those who love extra heat.
Essential Tools for Your Chili Masterpiece
The Mighty Dutch Oven (or Heavy-Bottomed Pot)
A heavy-bottomed pot or Dutch oven is indispensable for this Hearty Beef & Bean Chili. Its excellent heat retention and even heat distribution are perfect for searing beef and slow simmering.
This ensures consistent cooking and helps prevent scorching, allowing flavors to develop beautifully over time.
Basic Prep Gear: Knives and Cutting Boards
Sharp knives and sturdy cutting boards are fundamental for efficient ingredient preparation. They ensure safe and precise chopping of onions, garlic, and beef.
Properly prepped ingredients contribute to even cooking and a cohesive final dish.
Measuring & Stirring Essentials
Accurate measuring spoons and cups ensure the correct balance of flavors in your spice blend and liquids. A sturdy wooden spoon or spatula is crucial for stirring.
This allows for thorough mixing and helps scrape up flavorful browned bits from the bottom of the pot.
Crafting Your Masterpiece: A Step-by-Step Chili Journey
Sear the Beef for Ultimate Depth of Flavor
Begin by heating one tablespoon of olive oil in your Dutch oven over medium-high heat. The oil should be shimmering, signaling it’s hot enough for a good sear.
Add half of your beef chuck cubes in a single layer, ensuring not to overcrowd the pan. Crowding lowers the pan temperature, steaming the meat instead of browning it.
Sear for 4-5 minutes per side until each piece develops a deep, rich brown crust. This browning, known as the Maillard reaction, is absolutely crucial for building the foundational, savory flavor of your chili.
Remove the browned beef and set it aside. Repeat this process with the remaining beef and an additional tablespoon of oil if needed, then set all the seared beef aside.
Build the Aromatic Base: Onions and Garlic
Reduce the heat to medium in the same pot. Add the chopped yellow onion, scraping up any delicious browned bits (“fond”) from the bottom of the pot.
Cook the onion, stirring occasionally, for about 5-7 minutes until it softens and becomes translucent. This gentle cooking mellows its pungent flavor.
Add the minced garlic and cook for just one minute more until incredibly fragrant. Be careful not to burn the garlic, as it can turn bitter.
Bloom the Spices for Intensity – The Magic Step!
This is where the magic happens for an incredibly flavorful Hearty Beef & Bean Chili. Push the softened onions and fragrant garlic to one side of the pot, creating a clear space on the hot bottom.
Directly into this hot spot, add your chili powder, ground cumin, smoked paprika, and dried oregano. Toast the spices for 30-60 seconds, stirring them constantly.
You’ll notice a remarkable change in aroma as their essential oils are released and their full flavor potential is unlocked. This blooming step is a game-changer for deep, rich chili.
Combine and Simmer: The Heart of the Hearty Beef & Bean Chili
Stir the bloomed spices thoroughly into the onion and garlic mixture, combining all those incredible aromatics. Return the seared beef cubes to the pot, ensuring they are nestled among the aromatics.
Pour in the crushed tomatoes and beef broth, then add the rinsed and drained kidney beans, salt, and black pepper. Stir everything well to combine all ingredients.
Bring the mixture to a gentle boil, then immediately reduce the heat to low. Cover the pot tightly and let it simmer for at least 1.5 to 2 hours, or even longer.
This long, slow simmer is vital for the beef to become incredibly tender and for all the flavors to deeply meld together. Stir occasionally to prevent any sticking to the bottom.
Taste, Adjust, Serve, and Garnish
Once the chili has simmered to perfection, taste it and adjust the seasoning as needed. You might want a bit more salt, pepper, or even a dash more chili powder.
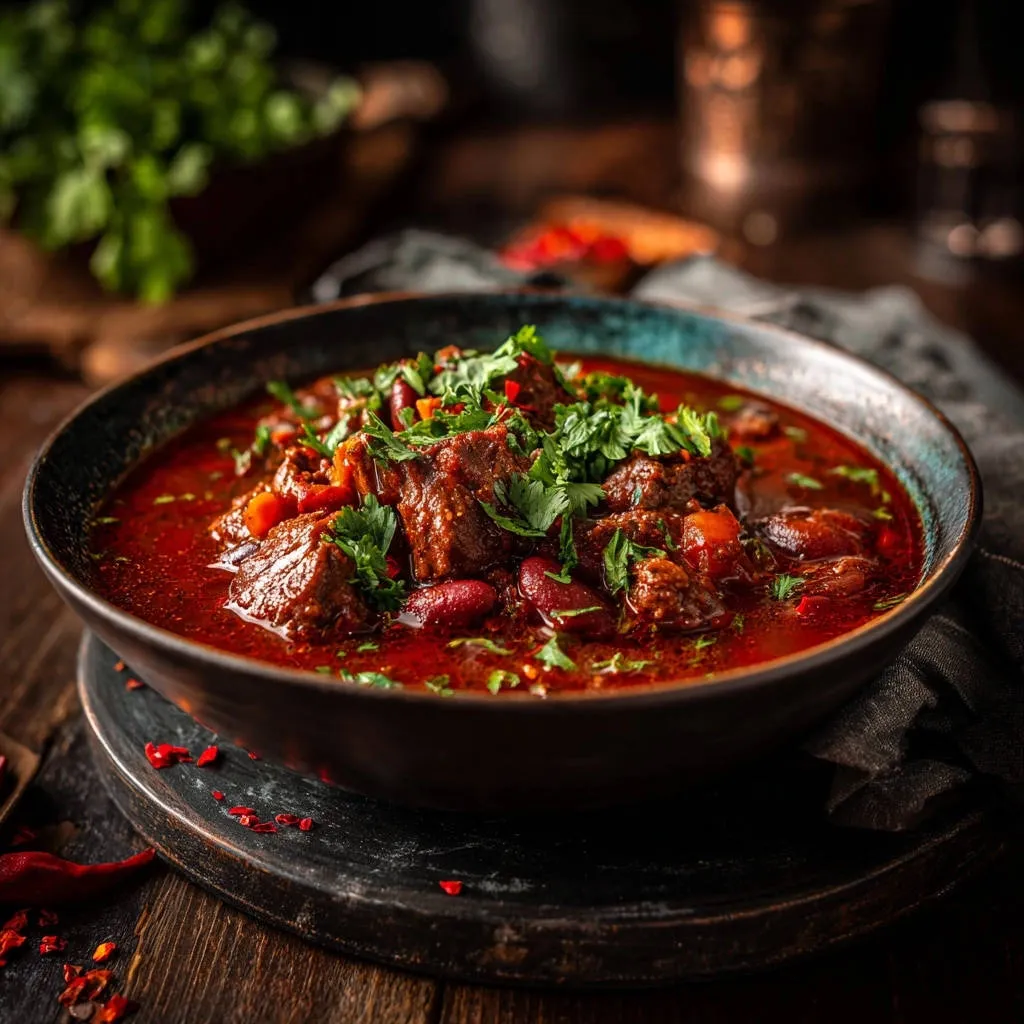
Ladle the steaming Hearty Beef & Bean Chili into warm bowls. Garnish generously with fresh chopped cilantro for a bright, herbaceous note.
For an optional extra kick, sprinkle with red chili flakes or fresh chopped red chilies. Enjoy the incredible depth of flavor you’ve created!
Unlock Deeper Flavors: Pro Tips for Your Best Chili Yet
Don’t Skimp on the Sear: The Foundation of Flavor
A deep, dark sear on the beef is absolutely non-negotiable for incredible flavor depth. This step creates hundreds of complex flavor compounds that infuse the entire chili.
Resist the urge to rush this process; it’s the most critical foundational step for a truly memorable Hearty Beef & Bean Chili.
The Power of the Simmer: Patience Pays Off
While 1.5 to 2 hours is a good starting point, longer simmering times truly equate to richer, more melded flavors. The beef also becomes even more wonderfully tender.
If you have the time, let your chili gently simmer for 3-4 hours on low heat. Taste periodically to appreciate how the flavors evolve.
Quality Spices Make All the Difference
Fresh, high-quality spices have vibrant aromas and flavors that make a significant impact. Old, stale spices lose their potency and can leave your chili tasting flat.
Purchase spices from a reputable source and replace them regularly for maximum impact, especially during the crucial blooming stage.
Taste as You Go: Seasoning Adjustments Are Key
Seasoning is a dynamic process, not a one-time addition. Always taste your chili throughout cooking and especially at the very end.
Adjust salt, pepper, and even a pinch of sugar or a splash of vinegar to balance and brighten the flavors to your preference.
The Day-After Phenomenon: Chili Gets Better with Time
Chili is famous for tasting even better the next day. The flavors continue to meld and deepen as it rests, creating a more harmonious and complex profile.
Store cooled chili in an airtight container in the refrigerator overnight. Gently reheat to enjoy an even richer experience.
Serving Your Hearty Beef & Bean Chili: Perfect Pairings & Garnishes
Classic Toppings to Elevate Every Bowl
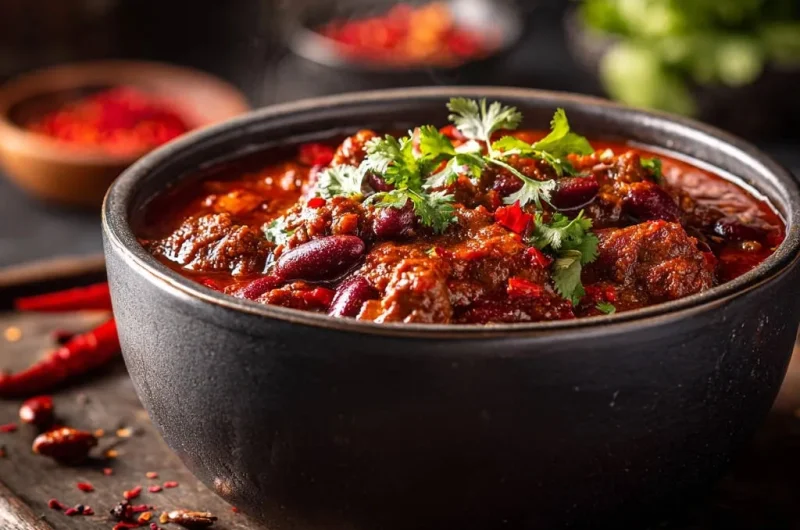
Elevate your Hearty Beef & Bean Chili with a variety of classic toppings. Shredded cheddar or Monterey Jack cheese melts beautifully into the warm chili.
A dollop of sour cream or a swirl of plain Greek yogurt adds a creamy, cooling contrast. Diced avocado, corn chips, or thinly sliced green onions also make fantastic additions.
Delicious Sides to Complete Your Meal
Round out your chili meal with complementary side dishes. Warm, buttery cornbread is a quintessential pairing, perfect for soaking up every last bit of savory sauce.
A simple side of fluffy white or brown rice can stretch the meal further and adds another layer of comfort. A fresh green salad provides a crisp, refreshing counterpoint to the rich chili.
Chili for Later: Make-Ahead & Storage Solutions
Can You Make Chili Ahead? Absolutely!
Chili is an ideal make-ahead meal, as its flavors deepen and meld beautifully over time. Preparing it a day or two in advance often results in an even more delicious dish.
This also makes entertaining effortless, as the main course is ready to go when your guests arrive.
Refrigerating Your Leftovers
Allow any leftover Hearty Beef & Bean Chili to cool completely before storing. Transfer it to an airtight container to prevent flavor absorption and keep it fresh.
Properly refrigerated chili will maintain its quality for 3-4 days. Label with the date for easy tracking.
Freezing for Future Comfort
Chili freezes exceptionally well, making it perfect for meal prepping. Portion cooled chili into freezer-safe bags or airtight containers, leaving some headspace for expansion.
It can be safely stored in the freezer for up to 3 months. Thaw overnight in the refrigerator before reheating.
Reheating Your Hearty Beef & Bean Chili
To reheat, gently warm the chili on the stovetop over medium-low heat, stirring occasionally, until it reaches a simmering temperature. Add a splash of broth or water if it seems too thick.
Alternatively, microwave individual portions in 1-2 minute intervals, stirring between each, until heated through. Ensure it is piping hot before serving to maintain food safety and quality.
Chili Conundrums Solved: Common Issues & Quick Fixes
Problem: My Chili Tastes Flat or Bland
If your chili lacks punch, start by adding a bit more salt, tasting as you go. A pinch of sugar can balance acidity and enhance overall flavor.
A splash of red wine vinegar or lime juice can brighten the taste. Don’t hesitate to bloom an extra half teaspoon of chili powder and cumin in a separate pan with oil, then stir it in.
Problem: The Beef Isn’t Tender Enough
This usually indicates the chili hasn’t simmered long enough. Continue simmering over low heat, ensuring the lid is on tight to retain moisture.
Patience is key; the beef will eventually become fork-tender with extended cooking time.
Problem: My Chili is Too Thin (or Too Thick)
If your chili is too thin, simmer uncovered for an additional 15-30 minutes to allow some liquid to evaporate. Alternatively, mash a portion of the beans against the side of the pot to thicken it naturally.
For a too-thick chili, simply stir in additional beef broth or water, a quarter cup at a time, until the desired consistency is reached.
Problem: It’s Lacking That “Kick”
To increase the heat, stir in additional red chili flakes, a dash of your favorite hot sauce, or fresh chopped red chilies (like jalapeños or serranos) during the last 30 minutes of simmering.
You can also offer extra chili flakes at the table for individual customization.
Your Chili Questions Answered: FAQs
Can I Use a Different Cut of Beef for this Hearty Beef & Bean Chili?
While beef chuck is highly recommended for its tenderness and flavor when slow-cooked, you can use other cuts. Beef round or stew meat can work, but may require a longer simmering time to become tender.
Ground beef is also an option for a quicker cook, but the texture and depth of flavor will differ from the cubed chuck.
Are There Substitutions for Kidney Beans?
Absolutely! If kidney beans aren’t your preference, pinto beans, black beans, or cannellini beans are excellent substitutes. Each will impart a slightly different flavor and texture.
Pinto beans offer a creamy texture, while black beans provide a darker color and earthy flavor. Ensure to rinse and drain all canned beans.
How Can I Make This Chili Spicier?
To really amp up the heat, consider adding a finely minced jalapeño or serrano pepper along with the onion. For a deeper heat, include a pinch of cayenne pepper with the other spices.
A dash of chipotle powder adds both heat and smoky depth, while a few dashes of your favorite hot sauce at the end can provide an immediate kick.
Is This Recipe Gluten-Free?
Yes, this Hearty Beef & Bean Chili recipe is naturally gluten-free. All the listed ingredients, including beef chuck, vegetables, spices, canned tomatoes, and beans, are typically free of gluten.
Always double-check labels on ingredients like beef broth or spice blends to ensure no hidden gluten-containing additives, if strict dietary restrictions apply.
Can I Make This in a Slow Cooker or Instant Pot?
Yes, this recipe is adaptable. For a slow cooker, follow the searing and aromatic base steps on the stovetop first, then transfer everything to the slow cooker and cook on low for 6-8 hours or high for 3-4 hours.
For an Instant Pot, use the Sauté function for searing and building the base, then cook on high pressure for 30-40 minutes with a natural release, adjusting liquid as needed.
Ready to Savor? Share Your Hearty Chili Creation!
You’ve now unlocked the secrets to crafting an extraordinary Hearty Beef & Bean Chili, a dish that will undoubtedly become a staple in your home. The depth of flavor, the tender beef, and the comforting warmth make it truly special.
Don’t wait to bring this incredible recipe to life in your kitchen. We encourage you to try it, savor every spoonful, and share your delicious experience with friends and family. Happy cooking!
Hearty Beef & Bean Chili
Course: Soups-StewsCuisine: American CuisineDifficulty: easy6
servings20
minutes2
hours120
minutesAmerican Cuisine
Ingredients
2 pounds beef chuck, cut into 1 inch cubes
2 tablespoons olive oil
1 large yellow onion, chopped
4 cloves garlic, minced
2 tablespoons chili powder
1 tablespoon ground cumin
1 teaspoon smoked paprika
1/2 teaspoon dried oregano
1 (28 ounce) can crushed tomatoes
1 (15 ounce) can kidney beans, rinsed and drained
2 cups beef broth
1 teaspoon salt, or to taste
1/2 teaspoon black pepper, or to taste
Fresh cilantro, chopped, for garnish
Red chili flakes or fresh chopped red chilies, for garnish (optional)
Directions
- Sear the Beef for Ultimate Depth: Heat 1 tablespoon of olive oil in a large, heavy-bottomed pot or Dutch oven over medium-high heat until shimmering. Add half of the beef cubes in a single layer, ensuring not to overcrowd the pan. Sear for 4-5 minutes until deeply browned on all sides, creating a rich crust. This browning is crucial for building the foundational flavor. Remove the browned beef and set aside. Repeat with the remaining beef and an additional tablespoon of oil if needed, then set aside.
- Build the Aromatic Base: Reduce the heat to medium. Add the chopped onion to the same pot, scraping up any browned bits from the bottom (this is called “fond” and it’s packed with flavor!). Cook until softened, about 5-7 minutes. Add the minced garlic and cook for another minute until fragrant.
- Bloom the Spices for Intensity: Here’s the magic step! Push the onions and garlic to one side of the pot. Add the chili powder, cumin, smoked paprika, and dried oregano directly to the hot spot in the pot. Toast the spices for 30-60 seconds, stirring constantly, until incredibly fragrant. This “blooming” step unlocks their full flavor potential.
- Combine and Simmer: Stir the spices into the onion and garlic mixture. Return the seared beef to the pot. Pour in the crushed tomatoes and beef broth. Add the rinsed and drained kidney beans, salt, and black pepper. Bring the mixture to a gentle boil, then reduce the heat to low, cover, and let it simmer for at least 1.5 to 2 hours, or until the beef is incredibly tender and the flavors have deeply melded. Stir occasionally to prevent sticking. The longer it simmers, the richer the flavor!
- Serve and Garnish: Taste and adjust seasoning as needed. Ladle the hearty chili into bowls, and garnish generously with fresh chopped cilantro and optional red chili flakes or fresh chilies for a little extra kick. Enjoy that incredible depth of flavor!
Notes
- Searing the beef for a deep crust and blooming the spices are crucial steps for maximum flavor depth.

8/14/26/36 Christmas Knob Covers for Cabinets, Holiday Decorative Knob Covers, Red Stretchable Peppermint Handle Covers for Cabinet Pulls on Kitchen, Bathroom, Dressers & Home Furniture (26Pcs)
$28.99 (as of November 3, 2025 15:13 GMT +00:00 - More infoProduct prices and availability are accurate as of the date/time indicated and are subject to change. Any price and availability information displayed on [relevant Amazon Site(s), as applicable] at the time of purchase will apply to the purchase of this product.)
Tervis Highpoint University Emblem Individual Tumbler, 16 oz, Clear
(as of November 3, 2025 15:13 GMT +00:00 - More infoProduct prices and availability are accurate as of the date/time indicated and are subject to change. Any price and availability information displayed on [relevant Amazon Site(s), as applicable] at the time of purchase will apply to the purchase of this product.)
STANLEY Quencher ProTour Flip Straw Tumbler with Leakproof Lid | Built-In Straw & Handle | Cupholder Compatible for Travel | Insulated Stainless Steel Cup | BPA-Free
$26.25 (as of November 3, 2025 15:13 GMT +00:00 - More infoProduct prices and availability are accurate as of the date/time indicated and are subject to change. Any price and availability information displayed on [relevant Amazon Site(s), as applicable] at the time of purchase will apply to the purchase of this product.)
Pyrex Essentials (3-Pack) Glass Measuring Cups Set, (1, 2 & 4 Cup) Measuring Cups For Prepping, Baking and Cooking, Preheated Oven, Dishwasher, Freezer, and Microwave Safe
$25.99 (as of November 3, 2025 15:13 GMT +00:00 - More infoProduct prices and availability are accurate as of the date/time indicated and are subject to change. Any price and availability information displayed on [relevant Amazon Site(s), as applicable] at the time of purchase will apply to the purchase of this product.)