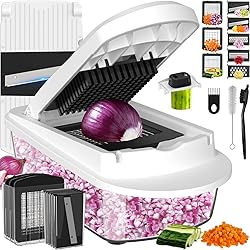
8 Blade All-in-1 Vegetable Chopper Mandoline Slicer with Container, Food Chopper, Onion Chopper, Veggie Cutter for Salad, Kitchen Gadgets Accessories Essentials, White
$19.99 (as of November 3, 2025 15:13 GMT +00:00 - More infoProduct prices and availability are accurate as of the date/time indicated and are subject to change. Any price and availability information displayed on [relevant Amazon Site(s), as applicable] at the time of purchase will apply to the purchase of this product.)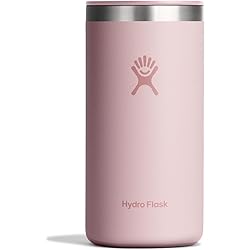
Hydro Flask Travel Coffee Cup – Insulated Stainless Steel, Non-Spill, Leak Proof to-Go Tumbler 16 Oz Trillium Pink
$24.95 (as of November 3, 2025 15:13 GMT +00:00 - More infoProduct prices and availability are accurate as of the date/time indicated and are subject to change. Any price and availability information displayed on [relevant Amazon Site(s), as applicable] at the time of purchase will apply to the purchase of this product.)
Tervis Wisconsin University Badger Emblem Tumbler (Set of 2), 16 oz, Clear -
(as of November 3, 2025 15:13 GMT +00:00 - More infoProduct prices and availability are accurate as of the date/time indicated and are subject to change. Any price and availability information displayed on [relevant Amazon Site(s), as applicable] at the time of purchase will apply to the purchase of this product.)
8/14/26/36 Christmas Knob Covers for Cabinets, Holiday Decorative Knob Covers, Red Stretchable Peppermint Handle Covers for Cabinet Pulls on Kitchen, Bathroom, Dressers & Home Furniture (26Pcs)
$28.99 (as of November 3, 2025 15:13 GMT +00:00 - More infoProduct prices and availability are accurate as of the date/time indicated and are subject to change. Any price and availability information displayed on [relevant Amazon Site(s), as applicable] at the time of purchase will apply to the purchase of this product.)
Hiasan Black Rectangle Tablecloth - 54 x 80 Inch - Waterproof & Wrinkle Resistant Washable Fabric Table Cloth for Dining, Party and Outdoor use
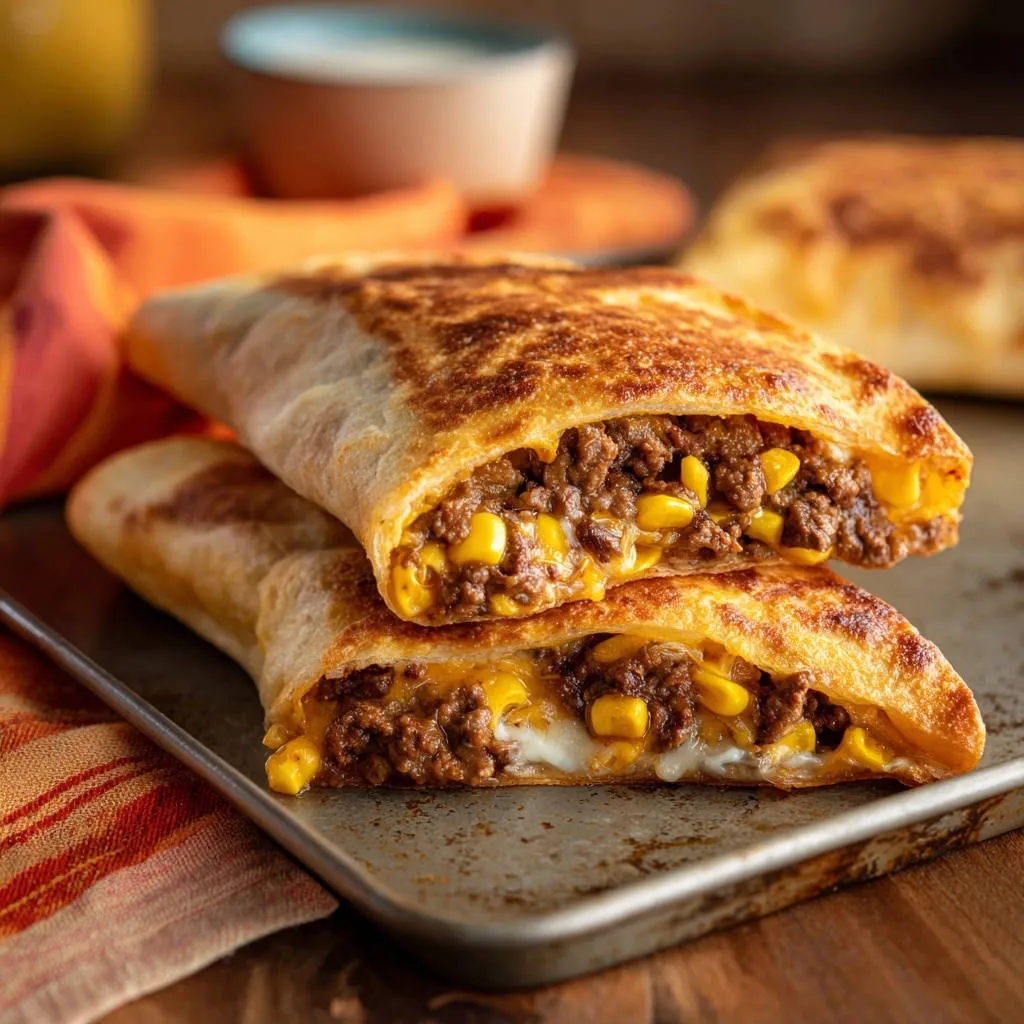
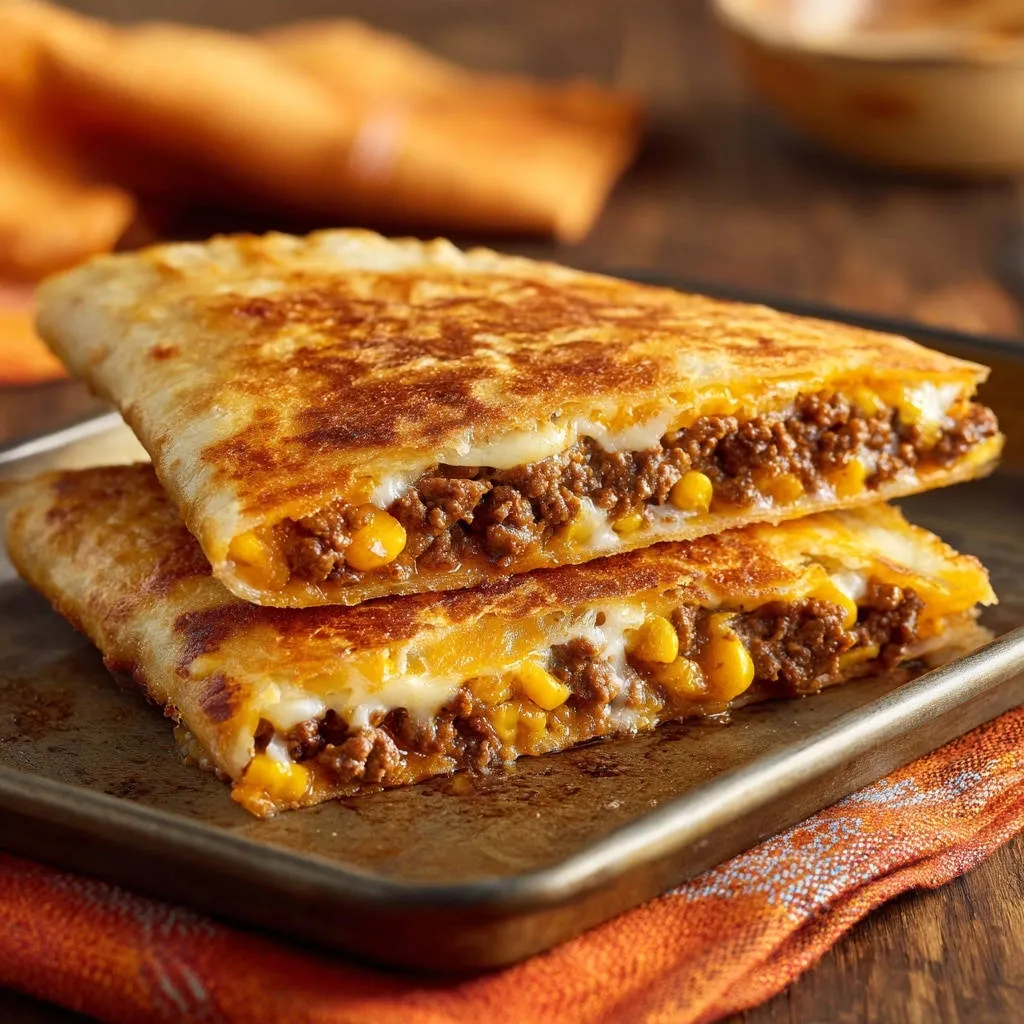
$8.54 (as of November 3, 2025 15:13 GMT +00:00 - More infoProduct prices and availability are accurate as of the date/time indicated and are subject to change. Any price and availability information displayed on [relevant Amazon Site(s), as applicable] at the time of purchase will apply to the purchase of this product.)I remember a time when my homemade wraps, while delicious inside, often lacked that satisfying crunch. After countless experiments, I finally cracked the code to achieving a perfectly golden, crispy shell on these incredible Hearty Beef & Cheese Wraps, transforming them into an absolute family favorite. This recipe isn’t just about flavor; it’s about a textural experience that elevates a simple meal into something truly extraordinary.
The Secret to Unbeatable Crispy Hearty Beef & Cheese Wraps (Every Time!)
This isn’t just another weeknight dinner; it’s a testament to simple techniques delivering extraordinary results. We’re focusing on elevating every element, from the seasoned beef to that all-important golden exterior.
Why You’ll Love This Texture Revelation
The magic of these crispy beef wraps lies in their irresistible texture. Each bite offers a delightful crunch from the tortilla, giving way to a warm, savory, and cheesy filling.
It’s a game-changer for anyone tired of soggy or soft wraps, proving that a little extra attention to the finish can make all the difference.
A Family Favorite, Perfect for Any Weeknight
These Hearty Beef & Cheese Wraps are a staple in my home, cherished by kids and adults alike. They are straightforward to prepare, making them an ideal solution for busy weeknights.
The ingredients are easily accessible, and the steps are intuitive, allowing you to get a delicious, satisfying meal on the table without stress.
Hearty & Satisfying: The Ultimate Comfort Food
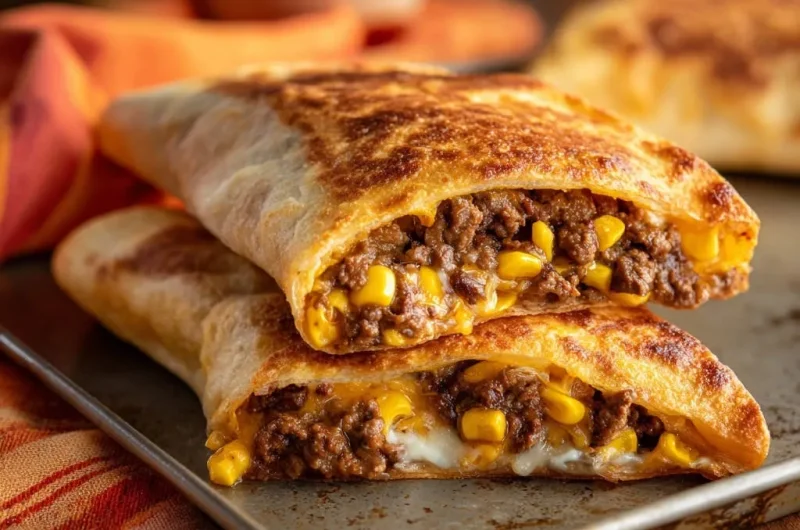
Packed with seasoned ground beef, sweet corn, and a generous blend of cheeses, these wraps are incredibly filling. They offer a comforting warmth that satisfies the soul.
They truly embody the essence of comfort food, making them perfect for cozy evenings or when you need a substantial, delicious meal.
Gather Your Flavor Arsenal: What You’ll Need
Quality ingredients are the foundation of any great dish. Here’s a closer look at what makes these Hearty Beef & Cheese Wraps sing, along with tips for selection.
The Hearty Beef Base
Ground Beef (80/20 lean recommended): This lean-to-fat ratio ensures flavorful results without excessive grease.
The fat provides moisture and taste, while draining any excess keeps the filling from becoming oily and ensures the tortillas crisp beautifully.
Creamy, Melty Cheese Duo
Shredded Cheddar Cheese & Monterey Jack Cheese: This combination offers the best of both worlds.
Cheddar brings a sharp, classic flavor, while Monterey Jack provides superior meltiness and a mild, creamy balance, creating that perfect gooey center.
The Tortilla Canvas: Choosing Wisely
Large Flour Tortillas (Burrito Size): Opt for soft, fresh, and generously sized flour tortillas. These are crucial for holding ample filling and folding securely.
Their flexibility is key to preventing tears during the rolling process and achieving a compact wrap.
Essential Flavor Boosters & Fillings
Taco Seasoning Mix: A pre-packaged mix offers a convenient and consistent blend of savory spices, perfectly complementing the beef.
Frozen Corn (thawed and drained): Adds a touch of natural sweetness and pops of texture to the savory filling, enhancing the overall experience.
Olive Oil: Essential for browning the ground beef, ensuring it develops a rich, savory crust before seasoning.
Water: Used to create a saucy, flavorful consistency with the taco seasoning, allowing it to coat the beef evenly during simmering.
Sour Cream or Preferred Dipping Sauce: An optional but highly recommended accompaniment. It adds a cool, tangy contrast to the warm, rich wraps.
Essential Tools for Your Wrap-Making Journey
Having the right equipment makes the cooking process smoother and helps achieve the best results for your crispy beef wraps.
Skillets: The Key to Browning & Crisping
Large Skillet (for beef): A sturdy, large skillet is needed to brown the ground beef thoroughly and evenly.
Large, Dry Non-Stick Skillet (for crisping): This is the most crucial tool for achieving that golden, crispy exterior. Its non-stick surface prevents sticking, and the dry heat is essential for developing texture.
Basic Kitchen Utensils
You’ll also need a few standard items to make your prep easy:
-
A sturdy spatula or wooden spoon for breaking up beef and pressing wraps.
-
A colander for draining fat from the beef.
-
Measuring cups and spoons for precise ingredient amounts.
Crafting Your Perfect Hearty Beef & Cheese Wraps: A Step-by-Step Guide
- Brown the Beef:
In a large skillet, heat 1 tablespoon of olive oil over medium-high heat. Add the ground beef and cook, breaking it up with a spoon, until fully browned.
Ensure you drain any excess fat thoroughly to prevent soggy wraps and for a cleaner flavor. This step lays the foundation for a delicious filling.
- Season & Simmer the Filling:
Stir in the taco seasoning and 1/2 cup water. Bring to a simmer and cook for 5-7 minutes, or until the liquid has mostly evaporated and the beef is well coated.
The simmering allows the flavors to meld beautifully and reduces moisture, preventing a watery filling.
Finally, stir in the thawed corn and remove the skillet from heat. This completes your savory, ready-to-fill mixture.
- Assemble Your Wraps:
Lay out a flour tortilla on a clean surface. Spoon about 1/2 cup of the beef and corn mixture onto the center.
Generously sprinkle with a mix of cheddar and Monterey Jack cheeses over the filling. This ensures cheesy goodness in every bite.
- Fold & Roll Tightly:
To fold, bring the bottom edge of the tortilla up over the filling, then fold in both sides.
Roll tightly from the bottom up to create a compact wrap. Repeat with the remaining tortillas and filling.
A tight roll is essential for keeping the filling secure and achieving that perfect crispy texture during cooking.
- The Crucial Crisping Step: Pan-Fry to Golden Perfection:
Heat a large, dry non-stick skillet over medium-high heat until hot. This dry heat is absolutely key for creating the perfect, crackling shell.
Place one or two wraps, seam-side down, in the skillet. Cook for 3-4 minutes per side, pressing down gently with a spatula to ensure full contact with the pan.
Continue until each side is deeply golden brown and wonderfully crispy. Adjust heat as needed to prevent burning while ensuring quick, even browning.
- Serve & Enjoy:
Serve your Hearty Beef & Cheese Wraps immediately with sour cream or your favorite dipping sauce, if desired.
The wraps are best enjoyed fresh off the skillet when they are at their crispiest, delivering maximum flavor and texture.
Unlock Pro Secrets: Elevate Your Hearty Beef & Cheese Wraps
Achieving truly exceptional Hearty Beef & Cheese Wraps goes beyond just following the steps. These expert tips will help you master the craft.
Mastering the “Crispy Golden Shell” Technique
-
Dry Skillet is Key: Don’t add oil to the skillet when crisping the wraps. The dry heat is what creates that perfect, crackling shell without making them greasy. Oil at this stage can lead to a chewy, rather than crispy, tortilla.
-
Press for Success: Gently pressing down on the wraps with a spatula ensures maximum surface contact with the hot pan. This leads to even browning and consistent crispiness across the entire surface.
-
Monitor Heat: Keep a close eye on your skillet’s temperature. It should be hot enough to brown quickly but not so hot that it burns the tortilla before the cheese inside melts and becomes perfectly gooey. Adjust heat as necessary.
Flavor Enhancements & Customizations
-
Spice It Up: For those who love a kick, add a pinch of cayenne pepper, a dash of your favorite hot sauce, or a finely minced jalapeño to the beef filling.
-
Veggies Welcome: Feel free to add finely diced bell peppers, onions, or a can of drained black beans to the beef mixture. These additions boost nutrition, flavor, and texture.
-
Cheese Swaps: Experiment with different cheese blends to customize your crispy beef wraps. Pepper Jack offers a spicy twist, while a Mexican blend enhances authentic flavor.
Perfecting Your Wrap-Folding Skills
-
Don’t Overfill: While tempting to pack in more, too much filling can make wraps hard to roll tightly and prone to tearing. Aim for about 1/2 cup of filling per tortilla.
-
Tuck and Roll Tightly: A snug roll is crucial for structural integrity, ensuring the filling stays put during cooking. It also creates a compact shape that crisps more evenly.
Beyond the Bite: Serving Suggestions & Smart Prep
Make your Hearty Beef & Cheese Wraps a complete meal with these ideas for serving, making ahead, and storing.
Delicious Pairings for Your Wraps
These savory wraps are fantastic on their own, but can be even better with the right accompaniments.
Serve with a fresh green salad tossed in a light vinaigrette, a side of cilantro-lime rice, or a bowl of creamy guacamole and salsa.
Make-Ahead Magic & Freezing Tips
The seasoned beef filling can be prepared a day or two in advance and stored in the refrigerator. This significantly cuts down on prep time for busy evenings.
For freezing, assemble the wraps but do not cook them. Wrap individually in plastic wrap, then foil, and freeze for up to 1 month. Cook from frozen, adding extra time in the skillet until hot through and crispy.
Storing Leftovers Safely
Store any leftover cooked wraps in an airtight container in the refrigerator for up to 3 days.
To reheat, the best method is to use a dry skillet over medium heat for a few minutes per side, helping to restore some of their original crispiness. Microwaving will heat them but will result in a soft tortilla.
Troubleshooting Common Wrap Woes
Even seasoned cooks can encounter small hiccups. Here are solutions to common issues you might face when making your crispy beef wraps.
“My Wraps Aren’t Crispy Enough!”
Ensure your skillet is truly hot before adding the wraps. It’s also vital that the skillet is dry, with no added oil for this crisping step.
Press down gently but firmly with a spatula during cooking to maximize contact with the hot surface, promoting even browning and superior crispiness.
“The Filling is Too Dry/Soggy!”
If your filling is too dry, you might have simmered it for too long. A little extra water can be added during the simmering stage if it looks too thick.
If it’s soggy, ensure you thoroughly drain excess fat from the ground beef after browning. Also, ensure the water added with the taco seasoning is mostly evaporated during simmering to prevent a wet filling.
“My Tortillas are Tearing While Folding!”
Tearing often occurs if tortillas are cold or overfilled. Lightly warm your tortillas in the microwave for 15-20 seconds before folding; this makes them more pliable.
Also, stick to the recommended 1/2 cup of filling. An overloaded tortilla is much more likely to tear during the rolling process.
Your Hearty Beef & Cheese Wraps Questions Answered
Let’s address some common queries about making these delicious Hearty Beef & Cheese Wraps.
Can I use different ground meat?
Yes, absolutely! Ground turkey or ground chicken can be excellent substitutes for beef. Ensure they are cooked thoroughly and seasoned well, as they can be milder in flavor.
What other cheeses work well?
Besides cheddar and Monterey Jack, a Mexican blend cheese is a natural fit. Pepper Jack adds a spicy kick, while Colby Jack offers a mild and melty option. Feel free to use your favorite melty cheese combination.
Are these good for meal prep?
They are fantastic for meal prep! You can cook the beef filling in advance and store it. Or, assemble and freeze the uncooked wraps for quick cooking later. Cooked leftovers also reheat well in a skillet.
Can I bake them instead of pan-frying?
You can bake them, but the texture will be different. To bake, place assembled wraps on a baking sheet, seam-side down, and bake at 400°F (200°C) for 15-20 minutes, or until golden and heated through. While still delicious, they won’t achieve the same intense crispiness as pan-frying in a dry skillet.
Your New Favorite Hearty Beef & Cheese Wraps Await!
There’s immense satisfaction in creating a meal that’s both comforting and exciting, and these Hearty Beef & Cheese Wraps deliver on both fronts. The crispy, golden exterior combined with the rich, cheesy filling is a culinary experience you’ll want to revisit often.
Don’t just take my word for it; whip up a batch this week and discover the magic of a truly crispy wrap. I’d love to hear how these become a new go-to in your kitchen!
Hearty Beef & Cheese Wraps
Course: Main CourseCuisine: Mexican cuisineDifficulty: easy8
wraps20
minutes40
minutes60
minutesMexican cuisine
Ingredients
1 lb ground beef (80/20 lean recommended)
1 tablespoon olive oil (or other neutral cooking oil)
1 cup frozen corn, thawed and drained
1 packet (1 oz) taco seasoning mix
1/2 cup water
8 large flour tortillas (burrito size)
1.5 cups shredded cheddar cheese
1 cup shredded Monterey Jack cheese (or similar melty white cheese)
Sour cream or preferred dipping sauce, for serving (optional)
Directions
- In a large skillet, heat 1 tablespoon of olive oil over medium-high heat. Add the ground beef and cook, breaking it up with a spoon, until fully browned. Drain any excess fat.
- Stir in the taco seasoning and 1/2 cup water. Bring to a simmer and cook for 5-7 minutes, or until the liquid has mostly evaporated and the beef is well coated. Stir in the thawed corn. Remove from heat and set aside.
- Lay out a flour tortilla on a clean surface. Spoon about 1/2 cup of the beef and corn mixture onto the center of the tortilla. Sprinkle generously with a mix of cheddar and Monterey Jack cheeses.
- To fold, bring the bottom edge of the tortilla up over the filling, then fold in both sides. Roll tightly from the bottom up to create a compact wrap. Repeat with the remaining tortillas and filling.
- This is the crucial step for the crispy shell: Heat a large, dry non-stick skillet over medium-high heat. Once hot, place one or two wraps, seam-side down, in the skillet. Cook for 3-4 minutes per side, pressing down gently with a spatula to ensure full contact with the pan, until each side is deeply golden brown and crispy. The heat should be high enough to brown quickly but not burn, so adjust as needed.
- Serve immediately with sour cream or your favorite dipping sauce, if desired.
Notes
- The key to crispy wraps is cooking them seam-side down in a hot, dry non-stick skillet, pressing gently.
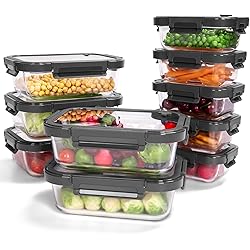
BOROHOUSE 5-Pack Borosilicate Glass Containers with Tempered Lids, 35.2oz/4.4 Cup Airtight Meal Prep Set, Microwave/Freezer Safe (Gray)
$45.99 (as of November 3, 2025 15:13 GMT +00:00 - More infoProduct prices and availability are accurate as of the date/time indicated and are subject to change. Any price and availability information displayed on [relevant Amazon Site(s), as applicable] at the time of purchase will apply to the purchase of this product.)
Ukeetap 10" Pro Chicken Shredder Tool Twist Large for Kitchen, BPA-Free Food-Safe Meat Grinder, Visible Chicken Breast Meat Shredder with Strong Anti-Slip Bottom & Ergonomic Handle, Black
$9.98 (as of November 3, 2025 15:13 GMT +00:00 - More infoProduct prices and availability are accurate as of the date/time indicated and are subject to change. Any price and availability information displayed on [relevant Amazon Site(s), as applicable] at the time of purchase will apply to the purchase of this product.)
Aopigavi Silicone Freezer Tray with Lid – 2-Cup Soup Freezer Container Molds, Large Ice Cube Trays for Freezing Soup, Sauce & Broth, Meal Prep & Food Storage – Oven & Dishwasher Safe, 2-Pack
$17.99 (as of November 3, 2025 15:13 GMT +00:00 - More infoProduct prices and availability are accurate as of the date/time indicated and are subject to change. Any price and availability information displayed on [relevant Amazon Site(s), as applicable] at the time of purchase will apply to the purchase of this product.)
Kitsure Dish Drying Rack - Multi-Functional Dish Rack for Kitchen Counter with Cutlery Holder, Rust-Proof Storage Solution with Rotatable, 18.3" x 12.0" x 5.5", Black
$19.99 (as of November 3, 2025 15:13 GMT +00:00 - More infoProduct prices and availability are accurate as of the date/time indicated and are subject to change. Any price and availability information displayed on [relevant Amazon Site(s), as applicable] at the time of purchase will apply to the purchase of this product.)