For years, I struggled to achieve that perfectly thick, robust texture in my chili; it always turned out disappointingly soupy. But then I discovered one simple, game-changing trick that transformed my approach to creating a truly satisfying Hearty Beef Chili. This recipe ensures a luscious, deeply flavorful bowl every single time, without the need for any artificial thickeners.
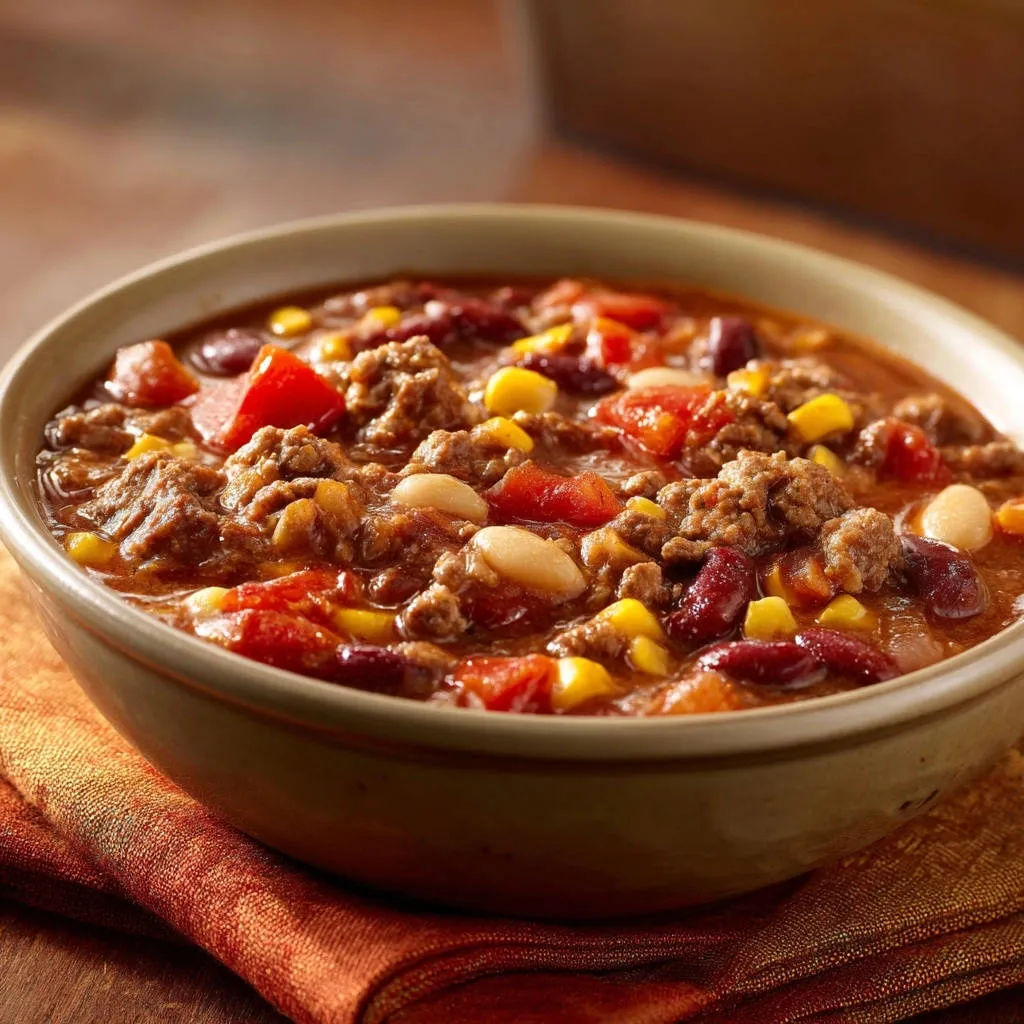
It’s the kind of comforting, rich Hearty Beef Chili that warms you from the inside out, perfect for chilly evenings or gathering with loved ones, and it’s surprisingly easy to master.
Say Goodbye to Watery Chili: Our Game-Changing Recipe
This isn’t just another chili recipe; it’s a guide to unlocking rich, natural thickness and depth of flavor without shortcuts. My method focuses on time-honored techniques that elevate humble ingredients into a truly unforgettable dish.
The “No Thickener Needed” Secret Revealed
The magic happens through a patient, uncovered simmer. This allows excess moisture to gently evaporate, naturally concentrating the rich flavors of the beef, tomatoes, and spices while achieving an incredibly thick, stew-like consistency. No flour, cornstarch, or other additives are required.
Why You’ll Crave This Cozy Classic
This Hearty Beef Chili recipe delivers on every front: it’s incredibly flavorful, satisfyingly hearty, and boasts a wonderfully rich texture. It’s perfect for meal prep, easily scalable for gatherings, and consistently garners rave reviews.
Gather Your Chili Essentials: Ingredients for Unmatched Flavor
Quality ingredients are the backbone of any great dish. Here’s what you’ll need to create your exceptional chili, along with a few expert insights.

The Hearty Foundation: Quality Ground Beef
Start with 1 pound of ground beef. I recommend a lean ground beef (80/20 or 85/15) for flavor, ensuring you drain the fat thoroughly after browning for a clean, non-greasy base.
Aromatic Boosters: Onion, Garlic & Toasted Spices
1 large onion, chopped: Provides a foundational sweetness and savory base as it caramelizes.
2 cloves garlic, minced: Adds pungent depth that is indispensable in a chili. Always mince fresh for the best flavor.
2 tablespoons chili powder, 1 tablespoon ground cumin, 1 teaspoon dried oregano: These spices are the heart of your chili’s flavor profile. Toasting them briefly enhances their aromatic qualities significantly.
Robust Fillers: Tomatoes, Beans & Sweet Corn
1 (28 ounce) can diced tomatoes, undrained: The tomatoes provide essential acidity and liquid, and their diced texture adds to the chili’s body.
1 (15 ounce) can kidney beans, rinsed and drained: Classic chili beans, offering a creamy texture and earthy flavor.
1 (15 ounce) can cannellini beans, rinsed and drained: These white beans contribute a buttery texture and mild flavor, complementing the kidney beans without overpowering them.
1 (15 ounce) can corn, drained: Sweet corn adds a touch of sweetness and bursts of vibrant color and texture.
The Liquid Gold: Beef Broth and Essential Seasonings
1 cup beef broth (or water): Beef broth provides a richer, more complex flavor foundation compared to water. Choose a low-sodium option to better control the final seasoning.
Salt and black pepper to taste: These essential seasonings bring all the flavors together. Always adjust them at the end of cooking for perfect balance.
Essential Kitchen Tools for Perfect Hearty Beef Chili
Having the right tools makes the cooking process smoother and more enjoyable. These are the basics you’ll need.
Your Trusted Pot or Dutch Oven
A large, heavy-bottomed pot or Dutch oven is crucial. Its even heat distribution prevents scorching and allows for consistent simmering, which is key to a perfectly thick chili.
Beyond the Basics: Prep & Serving Tools
A sturdy wooden spoon for stirring and breaking up ground beef.
A can opener for your canned ingredients.
A ladle for easy serving.
Measuring spoons and cups for accurate ingredient quantities.
Crafting Your Hearty Beef Chili: A Step-by-Step Culinary Journey
Follow these steps carefully to ensure your chili turns out rich, thick, and bursting with flavor.
Searing & Draining: Building a Clean Base
In your large pot or Dutch oven, heat 1 tablespoon of olive oil over medium heat. Add the ground beef and cook, using a spoon to break it into small pieces, until no pink remains.
This initial browning is crucial for developing flavor. Thoroughly drain any excess fat from the pot; this prevents your chili from becoming greasy and watery, ensuring a clean and robust base.
Layering Aromatics: Onions & Garlic
Add the chopped onion to the same pot and cook until it softens and becomes translucent, which usually takes about 5 to 7 minutes. This gentle cooking draws out the onion’s natural sweetness.
Stir in the minced garlic and cook for just another minute until it becomes fragrant. Be careful not to burn the garlic, as this can turn bitter.
The Spice Awakens: Toasting for Depth
Now, add the chili powder, ground cumin, and dried oregano to the pot. Cook for 1 minute, stirring constantly.
This step, often overlooked, is vital: toasting the spices in the hot oil awakens their essential oils, deepening their flavor and aroma, which will permeate the entire chili.
Combining the Core: Tomatoes, Beans & Broth
Pour in the undrained diced tomatoes, the rinsed and drained kidney beans, the rinsed and drained cannellini beans, and the drained corn. Stir these robust ingredients together.
Finally, add the beef broth, ensuring everything is well combined and submerged.
The Simmering Magic: Unlocking Richness and Thickness
Bring the chili to a gentle simmer. This is where the magic happens and the secret to a thick, flavorful Hearty Beef Chili is revealed.
Reduce the heat to low and let it simmer, uncovered, for at least 60 to 90 minutes, stirring occasionally. The open pot allows excess liquid to evaporate naturally, concentrating all the delicious flavors and thickening the chili beautifully without any artificial agents.
For an even richer, thicker consistency, simply let it simmer longer, checking periodically to ensure it doesn’t dry out too much.
Final Harmony: Seasoning and Serving
Once your chili has reached your desired thickness and flavor depth, taste and season with salt and black pepper as needed.
Serve your Hearty Beef Chili hot, garnished with your favorite toppings.
Chef’s Secrets & Pro Tips for Your Best Hearty Beef Chili
Elevate your chili game with these expert recommendations.
The Importance of a Thorough Fat Drain
After browning your ground beef, truly drain all the rendered fat. Leaving it in will result in a greasy chili and can prevent the flavors from melding properly, leading to a thinner, less appealing texture.
Don’t Rush the Simmer: Patience Pays Off
The 60-90 minute uncovered simmer is the cornerstone of this recipe’s success. This slow cooking time allows flavors to meld beautifully and the chili to thicken naturally through evaporation. Resisting the urge to cover it is key!
Customizing Your Heat Level
If you prefer more heat, consider adding a pinch of cayenne pepper, a diced jalapeño (seeded for mild, unseeded for more kick), or a dash of your favorite hot sauce during the last 30 minutes of simmering. For less heat, you can slightly reduce the chili powder.
Enhancing Flavor with a Touch of Acid
A small squeeze of fresh lime juice or a splash of apple cider vinegar (1-2 teaspoons) right before serving can brighten all the flavors. Acid acts as a counterbalance, making the chili taste even more vibrant and less heavy.
Batch Cooking & Freezing for Future Feasts
This Hearty Beef Chili is ideal for batch cooking. It freezes exceptionally well, making it perfect for quick weeknight meals. Simply divide into airtight containers once cooled.
Common Chili Conundrums Solved: Troubleshooting Your Recipe
Even seasoned cooks encounter challenges. Here’s how to tackle common chili problems.
Problem: My Chili is Still Too Thin!
Solution: Continue simmering uncovered. Patience is key. If you’re running out of time, you can remove about 1/2 cup of chili, mash some of the beans, and stir the mixture back into the pot. This provides a natural thickening agent without altering flavor.
Problem: My Chili Tastes Flat or Bland!
Solution: First, check the seasoning. Add more salt and pepper, tasting as you go. A pinch of sugar can balance acidity, and a touch of acid like lime juice or vinegar at the end can brighten flavors significantly.
Problem: The Meat is Greasy!
Solution: This usually means the fat wasn’t thoroughly drained after browning. To fix this, cool the chili, skim the solidified fat from the top, then reheat. For future batches, ensure you drain the beef completely.
Problem: The Beans Are Too Mushy!
Solution: This often happens from overcooking or stirring too aggressively. To avoid this, add canned beans later in the cooking process, perhaps in the last 30-45 minutes of simmering. For a current batch, there’s not much to do but embrace the softer texture.
Enjoying Your Creation: Serving, Storage & Make-Ahead Tips
Your perfectly cooked Hearty Beef Chili deserves the best presentation and handling.
Perfect Pairings: What to Serve with Your Hearty Beef Chili
Chili is incredibly versatile when it comes to serving. Classic toppings include shredded cheddar cheese, a dollop of sour cream, fresh chopped cilantro, or sliced green onions. For a delicious side, consider a warm piece of Jalapeno Cheddar Cornbread or a sweet and tender slice of Honey Cornbread.
Other popular additions include crushed tortilla chips, diced avocado, or even a side of fluffy white rice. Don’t be afraid to get creative with your toppings!
Keeping it Fresh: Storage & Reheating Best Practices
Leftover chili should be stored in an airtight container in the refrigerator for up to 3-4 days. To reheat, gently warm on the stovetop over medium-low heat, stirring occasionally, or use a microwave. You may need to add a splash of broth or water if it has thickened too much.
Make-Ahead Magic: Preparing Chili for Later
Chili is one of those dishes that often tastes even better the next day, as the flavors have more time to meld and deepen. This makes it an excellent choice for meal prepping or preparing in advance for parties. It also freezes beautifully for up to 3 months.
Your Hearty Beef Chili Questions Answered
Let’s address some common queries about this beloved dish.
Can I use ground turkey instead of beef?
Absolutely! Ground turkey is a great lean alternative. Just be sure to brown it thoroughly and season well, as turkey can sometimes be milder in flavor. You might need a little extra oil if it’s very lean.
What if I don’t have all the specified beans?
No problem at all! Chili is very forgiving. You can use any combination of beans you prefer, such as black beans, pinto beans, or Great Northern beans. Just ensure the total quantity remains similar for consistency.
Can I make this chili in a slow cooker?
Yes, you can! Brown the beef and sauté the aromatics and spices on the stovetop first for optimal flavor, then transfer everything to your slow cooker. Cook on low for 6-8 hours or on high for 3-4 hours. You’ll still want to leave the lid slightly ajar during the last hour or so to allow some evaporation and thickening.
Is it possible to make this recipe vegetarian?
While this recipe features beef, you can certainly adapt it. Omit the ground beef and use vegetable broth instead of beef broth. Add extra beans, lentils, or even plant-based ground “meat” crumbles for a satisfying vegetarian version. For more hearty options, consider our recipe for a Hearty Vegetable Stew, which can inspire similar rich, comforting flavors.
How long does Hearty Beef Chili last in the fridge or freezer?
Properly stored in an airtight container, Hearty Beef Chili will last for 3-4 days in the refrigerator. In the freezer, it can maintain its quality for up to 3 months. Thaw overnight in the fridge before reheating.
Ready to Dive In? Share Your Hearty Beef Chili Masterpiece!
Now that you’re armed with the secrets to perfectly rich and thick Hearty Beef Chili, I encourage you to try this recipe. Experience the comforting aroma and incredible flavor that will quickly make this a household favorite.
Don’t forget to share your creations and let me know your favorite toppings! Happy cooking!

Hearty Beef Chili
Course: Soups-StewsCuisine: American CuisineDifficulty: easy6
servings20
minutes1
hour60
minutesAmerican Cuisine
Ingredients
1 tablespoon olive oil
1 pound ground beef
1 large onion, chopped
2 cloves garlic, minced
2 tablespoons chili powder
1 tablespoon ground cumin
1 teaspoon dried oregano
1 (28 ounce) can diced tomatoes, undrained
1 (15 ounce) can kidney beans, rinsed and drained
1 (15 ounce) can cannellini beans, rinsed and drained
1 (15 ounce) can corn, drained
1 cup beef broth (or water)
Salt to taste
Black pepper to taste
Directions
- Heat olive oil in a large pot or Dutch oven over medium heat. Add the ground beef and cook, breaking it apart with a spoon, until no pink remains. Drain off any excess fat thoroughly. This initial step is key to a clean, non-greasy base that won’t contribute to a watery texture later.
- Add the chopped onion to the pot and cook until softened, about 5 to 7 minutes. Stir in the minced garlic and cook for another minute until fragrant.
- Add the chili powder, ground cumin, and dried oregano. Cook for 1 minute, stirring constantly, to toast the spices and deepen their flavor.
- Pour in the undrained diced tomatoes, rinsed and drained kidney beans, rinsed and drained cannellini beans, and drained corn. Stir in the beef broth.
- Bring the chili to a gentle simmer. Here’s the absolute secret to a thick, flavorful chili: reduce the heat to low and let it simmer, uncovered, for at least 60 to 90 minutes, stirring occasionally. Allowing it to simmer uncovered lets excess liquid evaporate naturally, concentrating the flavors and thickening the chili beautifully without needing any artificial thickeners. For an even richer, thicker consistency, simply let it simmer longer.
- Season the chili with salt and black pepper to taste before serving hot.
Notes
- Simmering uncovered for at least 60-90 minutes is key to evaporating excess liquid and thickening the chili naturally, concentrating flavors.