There’s nothing more disheartening than anticipating a tender, flavorful chicken breast, only to find it surprisingly dry and tough. We’ve all faced that culinary disappointment.
Through countless tests, I’ve perfected this Herb-Roasted Chicken Breast recipe, guaranteeing consistently juicy, tender results every single time.
This method isn’t just reliable; it’s a testament to simple techniques that unlock incredible flavor and moisture, making weeknight dinners or special occasions effortlessly delicious.
Unlock the Secret to Consistently Juicy Chicken Dinners
This specific Herb-Roasted Chicken Breast recipe transforms a common kitchen challenge into a triumph. Say goodbye to dry, overcooked poultry and welcome incredibly tender, flavor-packed chicken to your table.
It’s surprisingly simple, relying on a few key techniques that lock in moisture and build layers of delicious, aromatic flavor.
The true game-changer in achieving this consistent juiciness is a critical, often overlooked, resting period that ensures every bite is succulent.
The Flavor Foundation: Essential Ingredients
Crafting a truly exceptional dish begins with understanding your ingredients. Quality matters, and selecting the right components ensures a robust and satisfying flavor profile.
Each item plays a vital role in the texture, moisture, and aromatic depth of our Herb-Roasted Chicken Breast.
The Star: Boneless, Skinless Chicken Breasts
We use two large boneless, skinless chicken breasts, totaling about 1.5 pounds, as they are versatile and cook relatively quickly.
Choose good quality, ideally organic or pasture-raised, for the best flavor and texture. Patting them thoroughly dry with paper towels is the crucial first step for that perfect golden sear.
Aromatic Powerhouse: Dried Herbs & Spices
The combination of dried thyme, dried rosemary, garlic powder, onion powder, salt, and black pepper forms the core flavor profile.
Dried herbs are selected here for their concentrated flavor, which blooms beautifully when mixed with olive oil and exposed to heat. They provide a robust, earthy base that complements chicken perfectly.
Liquid Gold: Olive Oil & Chicken Broth
Olive oil acts as the binder for our herb rub, helping it adhere to the chicken and ensuring even flavor distribution. It also facilitates a beautiful sear, developing a rich crust.
Chicken broth, introduced to the skillet before roasting, adds a crucial layer of moisture and forms the base of the savory pan sauce. This broth infuses the chicken with additional flavor as it roasts.
Your Culinary Toolkit: Recommended Equipment
Having the right tools can make all the difference in achieving culinary success. These essential pieces of equipment ensure optimal results for your Herb-Roasted Chicken Breast.
The Right Skillet: An oven-safe skillet, such as a cast iron pan, is ideal. Its ability to retain and distribute heat evenly is crucial for a consistent sear on the stovetop and uniform roasting in the oven.
Precision Matters: An instant-read meat thermometer is non-negotiable for perfectly cooked chicken. It eliminates guesswork, ensuring your chicken reaches the ideal internal temperature without drying out.
Everyday Essentials: Don’t overlook the basics! You’ll need reliable paper towels for drying the chicken, a small mixing bowl for the herb rub, and a sturdy pair of tongs for safely handling hot chicken.
Master the Method: Step-by-Step Perfection
Follow these detailed steps carefully to achieve a consistently juicy and flavorful Herb-Roasted Chicken Breast that will impress every time.
Step 1: Preheat & Prep Your Chicken
Preheat your oven to 400°F (200°C). Thoroughly pat the chicken breasts dry on all sides with paper towels.
This is a critical step; removing surface moisture allows for superior searing, which develops a beautiful golden crust and locks in flavor.
Step 2: Crafting the Herb Rub
In a small bowl, combine the 2 tablespoons of olive oil, 1 tablespoon dried thyme, 1 tablespoon dried rosemary, 1 teaspoon garlic powder, 1/2 teaspoon onion powder, 1 teaspoon salt, and 1/2 teaspoon black pepper.
Mix these ingredients thoroughly until they form a thick, aromatic paste. This ensures an even distribution of flavor across the chicken.
Step 3: Sear for Golden Goodness
Generously rub the prepared herb mixture all over both sides of the chicken breasts, ensuring they are fully coated.
Heat an oven-safe skillet (like cast iron) over medium-high heat until it’s hot. Place the seasoned chicken breasts in the skillet and sear for 3 to 4 minutes per side until they develop a beautiful golden-brown crust.
This initial sear is vital for locking in moisture and building deep, rich flavor through the Maillard reaction.
Step 4: The Oven Roast & Temperature Check
Once seared, pour 1/2 cup of chicken broth into the skillet, around the chicken breasts. Immediately transfer the skillet to your preheated oven.
Roast for 15 to 20 minutes, or until an instant-read meat thermometer inserted into the thickest part of the breast registers 160°F (71°C). The key to juicy Herb-Roasted Chicken Breast is to avoid overcooking.
Step 5: The Critical Resting Period (Don’t Skip This!)
Remove the skillet from the oven. This next step is perhaps the most crucial for ultimate juiciness: loosely tent the chicken with foil and let it rest for at least 10 minutes.
During this resting period, the internal temperature will continue to rise to a safe 165°F (74°C) through carryover cooking. More importantly, the muscle fibers relax, allowing the juices to redistribute evenly throughout the meat instead of escaping when sliced.
Step 6: Slice, Serve, & Savor
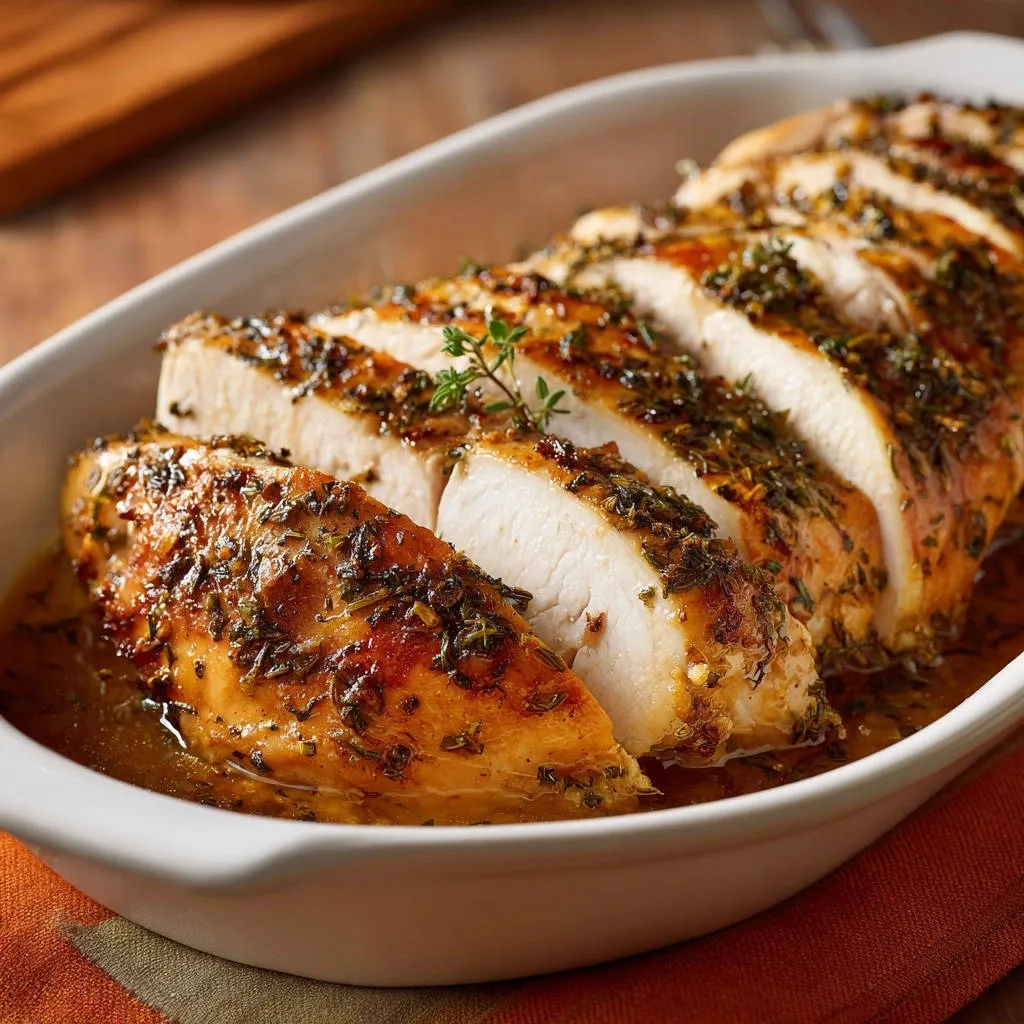
After the essential resting time, slice the Herb-Roasted Chicken Breast against the grain into thick, tender pieces. Arranging it on a serving dish.
Pour any savory pan juices remaining in the skillet over the sliced chicken, enhancing its flavor and moisture. Garnish with a fresh thyme sprig if desired, then serve immediately and enjoy your perfectly juicy chicken!
Elevate Your Plate: Expert Tips for Success
Beyond the steps, these insights will further enhance your Herb-Roasted Chicken Breast, ensuring flawless results every time.
The Importance of Patting Dry: Removing surface moisture is absolutely critical. A dry surface allows the chicken to sear properly, facilitating the Maillard reaction for a deep, golden crust and richer flavor, rather than steaming.
Why Sear? The Maillard Reaction Explained: Searing creates a flavorful crust through the Maillard reaction, a chemical process between amino acids and reducing sugars. This not only enhances taste but also forms a barrier that helps lock in internal moisture during roasting.
Never Overcook: Internal Temperature Guide: Always aim for an internal temperature of 160°F (71°C) when removing chicken from the oven. The carryover cooking during the resting period will bring it to the food-safe 165°F (74°C), ensuring maximum juiciness. A thermometer is your best friend here.
Fresh vs. Dried Herbs: A Flavor Comparison: While this recipe uses dried herbs for convenience and potency, you can substitute fresh. Use approximately three times the amount of fresh herbs (e.g., 3 tablespoons fresh thyme) as their flavor is less concentrated.
Experimenting with Marinades: To vary your Herb-Roasted Chicken Breast, consider quick marinades before the herb rub. A simple lemon-herb or garlic-parmesan marinade for 30 minutes can add another dimension of flavor while maintaining juiciness.
Troubleshooting Your Roast: Common Fixes
Even expert cooks encounter occasional hiccups. Here are solutions to common challenges when preparing Herb-Roasted Chicken Breast.
“My Chicken is Dry!”
The most common culprit for dry chicken is overcooking. Ensure you’re consistently using an instant-read thermometer and removing the chicken promptly at 160°F (71°C).
Equally vital is the resting period; it allows the juices to redistribute, preventing them from escaping immediately upon slicing. Do not skip or shorten this step!
“The Herbs Burned in the Skillet!”
If your herbs are burning, your skillet might be too hot during the initial sear. Ensure you’re cooking over medium-high heat, not blazing high.
Also, make sure the herbs are mixed thoroughly into a paste with the olive oil and well-adhered to the chicken, creating a protective layer and cooking evenly.
“Uneven Cooking & Temperature”
Unevenly cooked chicken breasts often result from varying thickness within the meat. Before seasoning, place chicken between plastic wrap and gently pound the thicker parts.
Pounding the breasts to a more uniform thickness ensures they cook evenly throughout, reaching the target temperature simultaneously.
Beyond the Main: Creative Serving & Pairing Ideas
This versatile Herb-Roasted Chicken Breast pairs beautifully with a wide array of sides, making it perfect for any occasion.
Classic Comfort Pairings
For a comforting meal, serve your juicy chicken alongside creamy mashed potatoes, tender roasted asparagus, or a fresh green salad with a light vinaigrette dressing.
The savory pan juices from the skillet are absolutely delicious drizzled generously over these complementary sides.
Light & Fresh Accompaniments
If you prefer a lighter plate, pair the Herb-Roasted Chicken Breast with fluffy quinoa, a vibrant mixed berry and spinach salad, or crisp steamed green beans tossed with a hint of lemon zest.
These options provide a refreshing contrast to the rich, herby flavor of the chicken.
Building a Complete Meal
Don’t let any leftovers go to waste! Diced Herb-Roasted Chicken Breast is fantastic in a flavorful chicken salad sandwich, tossed into pasta with a light sauce, or as a protein-packed topping for a Caesar salad for lunch the next day.
Planning Ahead: Storage & Reheating Smartly
Proper storage and reheating techniques ensure your Herb-Roasted Chicken Breast remains delicious for days, making it perfect for meal prep.
Storing Cooked Chicken
Allow the cooked chicken to cool completely to room temperature before storing it. Transfer the chicken to an airtight container and refrigerate for up to 3-4 days for optimal freshness.
Reheating for Optimal Juiciness
To reheat, thinly slice the chicken and gently warm it in a skillet with a splash of chicken broth over low heat, or in an oven preheated to 300°F (150°C), covered tightly with foil, until just heated through.
Avoid high heat or prolonged reheating, as this is the quickest way to dry out previously juicy chicken.
Freezing for Later
Cooked and sliced Herb-Roasted Chicken Breast can be frozen for future meals. Place the chicken in an airtight freezer-safe container or a heavy-duty freezer bag, removing as much air as possible, for up to 2-3 months.
Thaw the frozen chicken in the refrigerator overnight before gently reheating using the methods described above.
Your Burning Questions Answered: FAQs
Can I use bone-in chicken breasts for this recipe?
Yes, you absolutely can! Bone-in chicken breasts will typically require a longer cooking time in the oven, usually around 25-35 minutes. Always ensure they reach an internal temperature of 160°F (71°C) before resting, and adjust your initial searing time slightly as needed.
What if I don’t have an oven-safe skillet?
No problem! You can still achieve excellent results. Simply sear the chicken in a regular skillet on your stovetop until golden brown. Then, carefully transfer the seared chicken and the chicken broth to a baking dish or a foil-lined baking sheet to finish roasting in the oven.
Is it possible to prepare the herb rub in advance?
Yes, preparing the herb rub ahead of time is a great meal prep hack! You can mix all the herb and spice ingredients with the olive oil up to 2-3 days in advance. Store the prepared rub in an airtight container in the refrigerator until you’re ready to cook.
How long does the chicken need to rest?
A minimum of 10 minutes is truly crucial for the juices to effectively redistribute throughout the meat, guaranteeing a moist and tender Herb-Roasted Chicken Breast. For thicker or larger chicken pieces, extending this resting period to 15 minutes can yield even better results.
Ready to Impress? Your Next Delicious Meal Awaits!
You now possess all the knowledge and expert tips needed to craft consistently juicy and incredibly flavorful Herb-Roasted Chicken Breast, forever banishing dry chicken from your dinner table.
This recipe is more than just a meal; it’s an opportunity to build confidence in your kitchen skills and experience the joy of serving a dish everyone will truly savor.
I wholeheartedly encourage you to try this simple yet transformative method tonight. Please share your culinary triumphs and don’t forget to tag us with your perfectly roasted chicken creations!
Herb-Roasted Chicken Breast
Course: Main CourseCuisine: American CuisineDifficulty: easy2
servings15
minutes25
minutes55
minutesAmerican Cuisine
Ingredients
2 large boneless, skinless chicken breasts (about 1.5 pounds total)
2 tablespoons olive oil
1 tablespoon dried thyme
1 tablespoon dried rosemary
1 teaspoon garlic powder
1/2 teaspoon onion powder
1 teaspoon salt
1/2 teaspoon black pepper
1/2 cup chicken broth
1 fresh thyme sprig, for garnish
Directions
- Preheat your oven to 400 degrees Fahrenheit. Pat the chicken breasts thoroughly dry with paper towels. This is crucial for getting a nice golden crust.
- In a small bowl, combine the olive oil, dried thyme, dried rosemary, garlic powder, onion powder, salt, and black pepper. Mix well to form a thick paste.
- Generously rub the herb mixture all over both sides of the chicken breasts. Ensure they are fully coated.
- Heat an oven-safe skillet (like cast iron) over medium-high heat. Once hot, place the chicken breasts in the skillet. Sear for 3 to 4 minutes per side until beautifully golden brown. This initial sear helps lock in moisture.
- Pour the chicken broth into the skillet around the chicken breasts. Immediately transfer the skillet to the preheated oven.
- Roast for 15 to 20 minutes, or until an instant-read meat thermometer inserted into the thickest part of the breast reaches 160 degrees Fahrenheit. The key to juicy chicken is to not overcook it. It will continue to cook a bit after it leaves the oven.
- Remove the skillet from the oven. This next step is critical: Loosely tent the chicken with foil and let it rest for at least 10 minutes. Do not slice it yet! This resting period allows the juices to redistribute throughout the meat, ensuring every slice is incredibly tender and moist.
- After resting, slice the chicken breasts against the grain into thick pieces. Arrange them in a serving dish, pouring the pan juices from the skillet over the top. Garnish with a fresh thyme sprig if desired. Serve immediately and enjoy your perfectly juicy chicken!
Notes
- Don’t skip the crucial resting period for incredibly juicy and tender results.