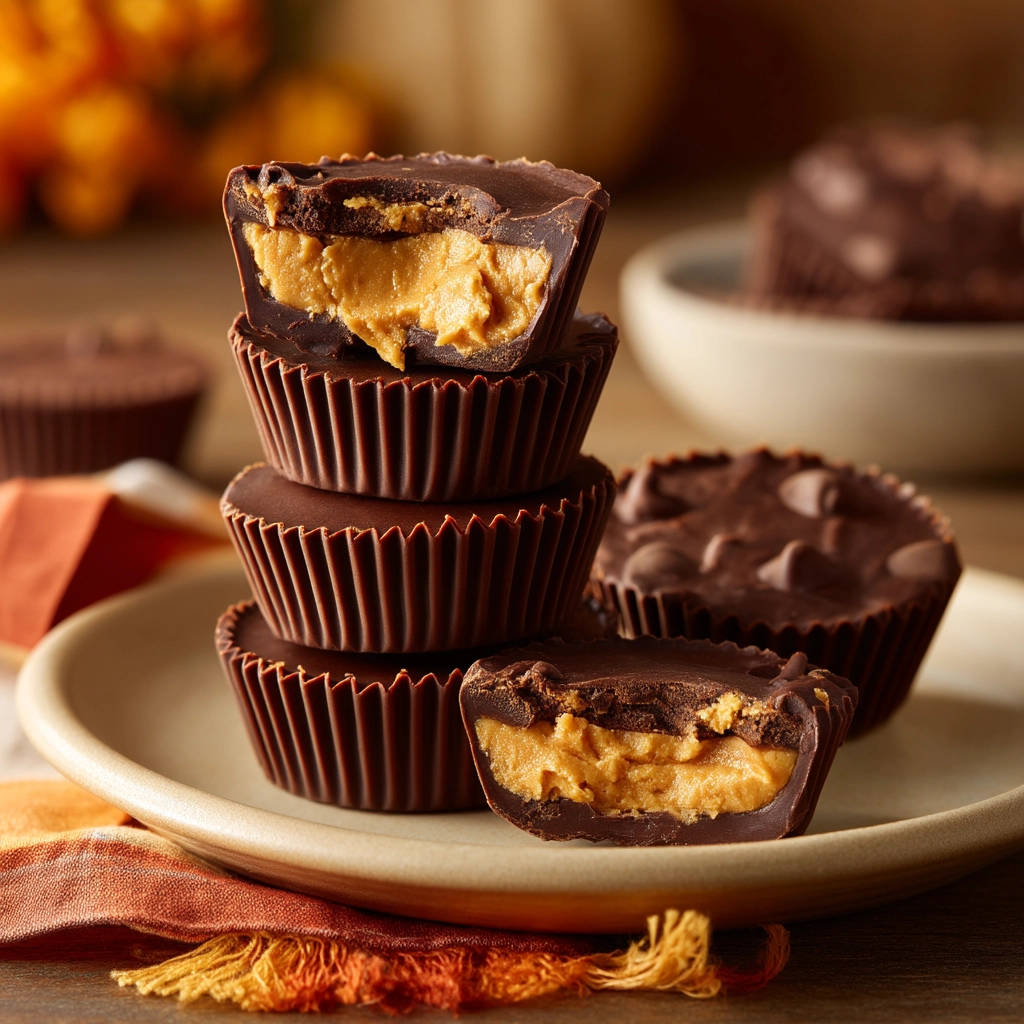
Is there anything more satisfying than biting into a perfectly made peanut butter cup? That creamy peanut butter filling nestled inside a rich chocolate shell is a classic combination for a reason. But let’s be honest, making them at home can sometimes be a bit… frustrating. Sticky messes, cracked chocolate, cups that refuse to release from the pan – we’ve all been there! That’s why I’m so excited to share this recipe for homemade peanut butter cups with a foolproof pan release method. Get ready for perfectly formed, delicious treats every single time!
Why You’ll Love This Homemade Peanut Butter Cups Recipe
These homemade peanut butter cups are a game-changer for so many reasons. Here’s what makes them a must-try:
- Foolproof Pan Release: Say goodbye to messy extractions! The secret ingredient (paper liners!) ensures effortless removal every time.
- Customizable: Easily adjust the sweetness and peanut butter flavor to your liking.
- Simple Ingredients: You probably already have most of these ingredients in your pantry.
- Fun to Make: This is a great recipe to get the kids involved in!
- Impressive Results: These homemade treats are way better than store-bought and make a fantastic gift.
Gathering Your Ingredients for Homemade Peanut Butter Cups
The magic of these peanut butter cups lies in the quality and balance of the ingredients. We’re aiming for a rich chocolate coating and a creamy, slightly sweet peanut butter filling that complements it perfectly. Each element plays a crucial role in achieving that classic peanut butter cup flavor and texture.
Here’s what you’ll need to create these delightful treats:
- Semi-Sweet Chocolate Chips: 1 cup. The foundation of our cups! I recommend using a good quality semi-sweet chocolate chip for the best flavor. The semi-sweet variety provides a nice balance between sweetness and bitterness, preventing the cups from becoming overly sugary. Consider using dark chocolate chips for a richer, more intense chocolate flavor if you prefer.
- Vegetable Oil: 1 tablespoon. This is our secret weapon for creating a smooth, meltable chocolate that’s easy to work with. The oil thins the chocolate slightly, giving it a beautiful shine and preventing it from seizing up.
- Creamy Peanut Butter: 1/2 cup. Opt for a smooth and creamy peanut butter for the best texture. Natural peanut butter works well, but be sure to stir it thoroughly before measuring to ensure even distribution of the oils.
- Powdered Sugar: 2 tablespoons. This adds sweetness and helps to bind the peanut butter filling. Powdered sugar dissolves easily, creating a smooth and creamy texture.
- Milk (Dairy or Non-Dairy): 1 tablespoon. A touch of milk adds moisture to the peanut butter filling, resulting in a softer, more pliable texture. Dairy or non-dairy milk can be used interchangeably, so choose your preference!
- Pinch of Salt: A small pinch of salt enhances the flavors of both the chocolate and peanut butter, creating a more well-rounded and delicious treat. Don’t skip it!
- Paper Cupcake Liners: 18. This is the secret to our foolproof pan release! These liners create a barrier between the peanut butter cups and the muffin tin, ensuring easy removal and preventing any sticking or crumbling.
Crafting Your Homemade Peanut Butter Cups: Step-by-Step
Making these peanut butter cups is easier than you think! Follow these simple steps for a batch of perfect, homemade treats. The key to success is patience and a little bit of freezing time.
- Prepare the Muffin Tin: Start by lining an 18-cup muffin tin with paper cupcake liners. This crucial step is the foundation of our foolproof pan release! The liners act as a barrier, preventing the peanut butter cups from sticking to the tin and ensuring easy removal later on.
- Melt the Chocolate: In a microwave-safe bowl, combine the chocolate chips and vegetable oil. Microwave in 30-second intervals, stirring in between, until completely melted and smooth. This ensures the chocolate doesn’t burn and becomes perfectly glossy. Make sure to stir well after each interval to distribute the heat evenly.
- Create the Chocolate Base: Spoon about 1 tablespoon of the melted chocolate into the bottom of each paper liner, spreading evenly to coat. This forms the solid chocolate base of your peanut butter cups.
- Chill the Chocolate Base: Place the muffin tin in the freezer for 10 minutes to allow the chocolate to harden. This will prevent the peanut butter filling from mixing with the chocolate and create a distinct layer.
- Prepare the Peanut Butter Filling: While the chocolate is hardening, prepare the peanut butter filling. In a separate bowl, combine the peanut butter, powdered sugar, milk, and salt. Mix until smooth and well combined. The filling should be thick but spreadable. If it’s too thick, add a tiny splash more milk.
- Add the Peanut Butter Layer: Remove the muffin tin from the freezer. Spoon about 1 tablespoon of the peanut butter mixture on top of the hardened chocolate in each liner. Gently press the peanut butter filling down to create an even layer.
- Top with Chocolate: Spoon the remaining melted chocolate over the peanut butter filling, spreading evenly to cover. Make sure the entire peanut butter layer is covered with chocolate for a perfectly sealed peanut butter cup.
- Final Freeze: Return the muffin tin to the freezer for at least 30 minutes, or until the peanut butter cups are completely firm. This final freeze is essential for setting the chocolate and peanut butter filling, making them easy to handle. You can even leave them in the freezer for longer, if desired.
- Release and Enjoy: To release the peanut butter cups, gently peel away the paper liners. This is where the foolproof pan release comes in: the paper liners do all the work! You’ll be left with perfectly formed, homemade peanut butter cups ready to be enjoyed.
Tips for Perfect Homemade Peanut Butter Cups Every Time
Want to take your peanut butter cup game to the next level? Here are some pro tips to ensure success:
- Use High-Quality Chocolate: The better the chocolate, the better the peanut butter cups! Splurge on a good quality brand for the most delicious results.
- Don’t Overheat the Chocolate: Overheating can cause the chocolate to seize up and become grainy. Microwave in short intervals and stir frequently to prevent burning.
- Adjust the Sweetness: If you prefer a less sweet peanut butter cup, reduce the amount of powdered sugar in the filling.
- Add a Crunchy Element: For a fun twist, add a sprinkle of chopped nuts (like peanuts or pecans) to the top of the chocolate before it sets.
- Storage: Store your homemade peanut butter cups in an airtight container in the refrigerator for up to a week, or in the freezer for up to a month.
What to Serve With Homemade Peanut Butter Cups
These homemade peanut butter cups are perfect on their own, but they also make a delightful addition to other desserts! Consider serving them alongside a scoop of vanilla ice cream or incorporating them into a decadent dessert board. They would also be the perfect addition to dessert shooters, similar to these easy caramel nut dessert jars, but with a chocolate and peanut butter twist! You can also cut them into pieces and fold them into brownies or cookies for a peanut butter chocolate explosion!
Your Homemade Peanut Butter Cups Questions Answered (FAQ)
Can I use a different type of chocolate?
Absolutely! Feel free to experiment with milk chocolate, dark chocolate, or even white chocolate. Just keep in mind that the sweetness level will vary depending on the type of chocolate you choose.
Can I use a different type of nut butter?
Yes! Almond butter, cashew butter, or even sunflower seed butter can be used as a substitute for peanut butter. The flavor will be different, but still delicious!
What if I don’t have paper cupcake liners?
While paper liners are highly recommended for easy removal, you can try greasing the muffin tin very well with butter or cooking spray. However, keep in mind that the peanut butter cups may be more difficult to remove and could potentially break.
Can I make these ahead of time?
Definitely! These peanut butter cups can be made several days in advance and stored in the refrigerator or freezer. They’re a great make-ahead dessert option for parties or gatherings.
Why is my chocolate grainy?
Grainy chocolate is usually caused by overheating. Make sure to microwave the chocolate in short intervals and stir frequently to prevent burning. Adding a tablespoon of vegetable oil also helps to keep the chocolate smooth and glossy.
And if you love chocolate and baking, check out this easy chocolate sheet cake recipe!
Enjoy Your Homemade Peanut Butter Cups!
There you have it – a foolproof recipe for homemade peanut butter cups that are guaranteed to impress! With this simple trick and a few basic ingredients, you can create perfectly formed, delicious treats every single time. So go ahead, indulge your sweet tooth and whip up a batch of these irresistible peanut butter cups today. Don’t forget to leave a comment below and let me know how they turned out. Happy baking!
Homemade Peanut Butter Cups (Foolproof Pan Release)

Ingredients
- 1 cup semi-sweet chocolate chips
- 1 tablespoon vegetable oil
- 1/2 cup creamy peanut butter
- 2 tablespoons powdered sugar
- 1 tablespoon milk (dairy or non-dairy)
- Pinch of salt
- 18 paper cupcake liners
Directions
- Prepare your muffin tin by placing a paper liner into each of 18 muffin cups.
- In a microwave-safe bowl, combine the chocolate chips and vegetable oil. Microwave in 30-second intervals, stirring in between, until completely melted and smooth.
- Spoon about 1 tablespoon of the melted chocolate into the bottom of each paper liner, spreading evenly to coat.
- Place the muffin tin in the freezer for 10 minutes to allow the chocolate to harden.
- While the chocolate is hardening, prepare the peanut butter filling. In a separate bowl, combine the peanut butter, powdered sugar, milk, and salt. Mix until smooth and well combined.
- Remove the muffin tin from the freezer. Spoon about 1 tablespoon of the peanut butter mixture on top of the hardened chocolate in each liner.
- Spoon the remaining melted chocolate over the peanut butter filling, spreading evenly to cover.
- Return the muffin tin to the freezer for at least 30 minutes, or until the peanut butter cups are completely firm.
- To release the peanut butter cups, gently peel away the paper liners. This is where the foolproof pan release comes in: the paper liners do all the work!