Making your own sushi rolls at home might seem like a daunting task, but trust me, it’s incredibly rewarding and much easier than you think! The key to fantastic homemade sushi is mastering the sushi rice – that perfectly seasoned, slightly sticky texture that holds everything together. This recipe provides a simple, foolproof method for achieving fluffy, flavorful sushi rice that will elevate your sushi-making game. Get ready to impress your friends and family with delicious, beautiful homemade sushi!
Why You’ll Love These Homemade Sushi Rolls
Here’s why this homemade sushi roll recipe is a guaranteed hit:
- Perfect Rice Texture: Say goodbye to mushy or hard rice. Our method ensures fluffy, perfectly seasoned grains.
- Customizable: Easily adapt the fillings to your liking. The possibilities are endless!
- Fun and Interactive: Sushi rolling is a great activity to do with friends or family.
- Healthier Than Takeout: Control your ingredients and portion sizes for a lighter, more nutritious meal.
- Impressive Presentation: Homemade sushi looks beautiful and tastes even better.
Gathering Your Ingredients for Homemade Sushi Rolls
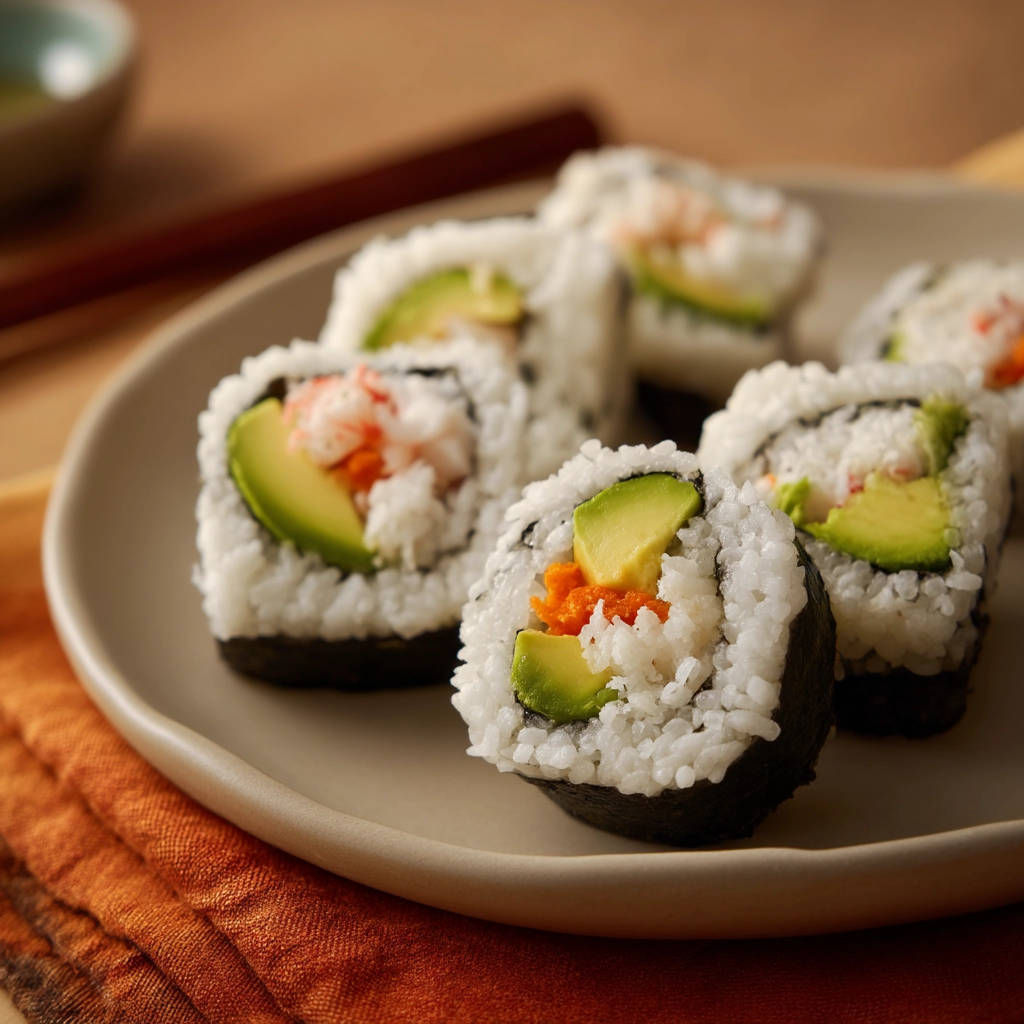
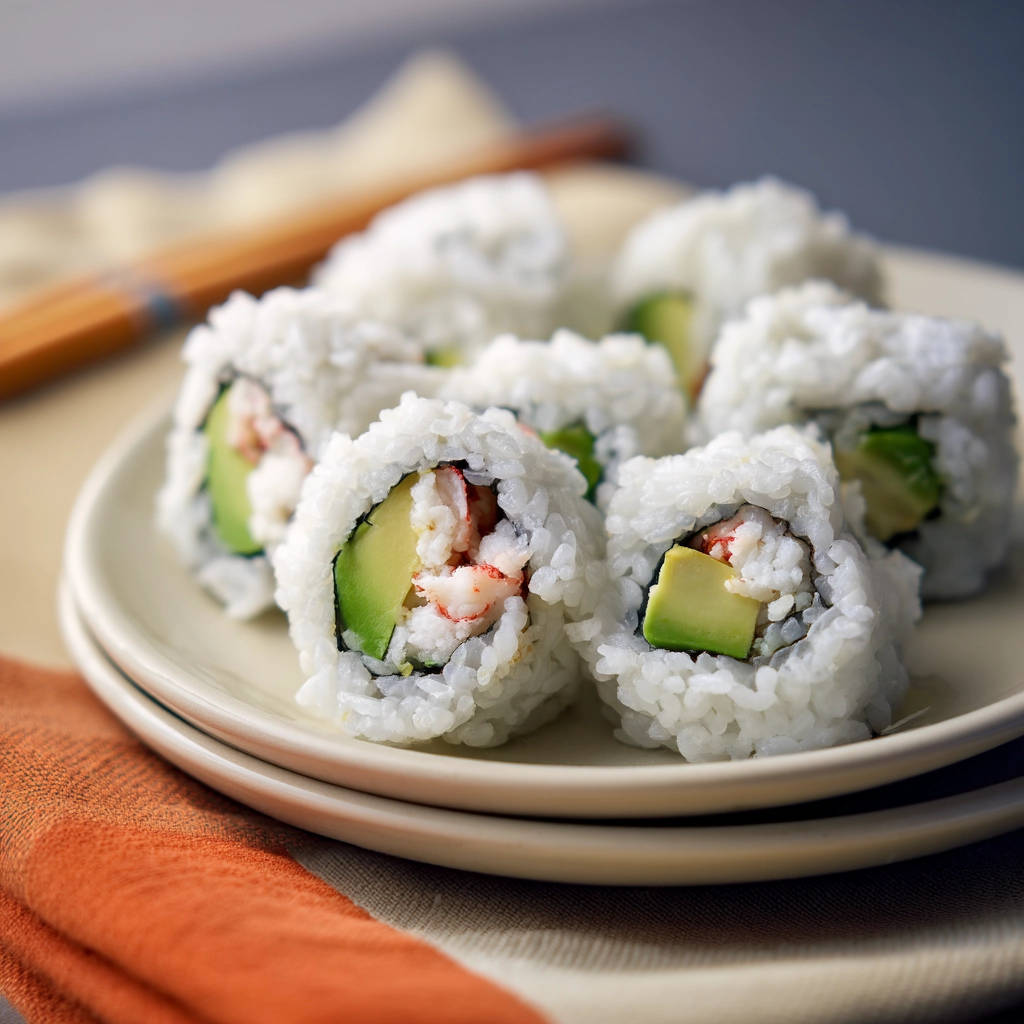
Let’s talk ingredients! The quality of your ingredients truly makes a difference in the final product. For this recipe, we’re focusing on classic flavors and textures that complement each other beautifully. We’ll be making delicious sushi rolls using perfectly cooked sushi rice, creamy avocado, and savory imitation crab. The slight sweetness of the carrot adds a nice contrast. The overall effect is a flavorful and satisfying bite.
Here’s what you’ll need:
- Sushi Rice: 1.5 cups. This is the foundation of our sushi, so choose a good-quality short-grain rice specifically labeled as “sushi rice.” It has the ideal starch content for achieving that signature sticky texture.
- Water: 2 cups. Essential for cooking the rice to perfection.
- Rice Vinegar: 1/4 cup. This is what gives sushi rice its distinctive tangy flavor. Be sure to use rice vinegar, not other types of vinegar.
- Sugar: 2 tablespoons. Balances the acidity of the vinegar and adds a touch of sweetness.
- Salt: 1 teaspoon. Enhances the flavors and helps to season the rice evenly.
- Nori Seaweed: 4 full-size sheets. These dried seaweed sheets provide the wrapper for our sushi rolls. Look for nori that’s dark green and slightly shiny.
- Imitation Crab Sticks: 6 sticks, shredded. A convenient and affordable filling option.
- Avocado: 1 ripe. Adds a creamy, rich texture to the rolls. Make sure your avocado is ripe but not too soft.
- Carrot: 1 medium, shredded. Provides a nice crunch and subtle sweetness.
Crafting Your Homemade Sushi Rolls: Step-by-Step
Now for the fun part: making the sushi! Don’t worry if it seems a little tricky at first – with a little practice, you’ll be rolling like a pro in no time. The most important thing is to take your time and enjoy the process. Let’s dive in!
- Rinse the Rice: Begin by placing the sushi rice in a colander. Rinse it thoroughly under cold running water until the water runs clear. This removes excess starch, preventing the rice from becoming too sticky. This usually takes a few minutes of rinsing and agitating the rice.
- Cook the Rice: Combine the rinsed rice and 2 cups of water in a medium saucepan. Bring the mixture to a boil over medium-high heat. Once boiling, reduce the heat to low, cover the saucepan tightly, and simmer for 15 minutes. After 15 minutes, remove the saucepan from the heat and let it stand, still covered, for another 10 minutes. It’s crucial not to lift the lid during this resting period, as it allows the rice to steam and fully absorb the remaining moisture.
- Prepare the Vinegar Mixture: While the rice is steaming, prepare the seasoning mixture. In a small saucepan, gently heat the rice vinegar, sugar, and salt over low heat. Stir continuously until the sugar and salt are completely dissolved. Be careful not to boil the mixture. Once dissolved, remove the saucepan from the heat and set it aside to cool slightly.
- Combine Rice and Vinegar: Once the rice has finished steaming and the vinegar mixture has cooled slightly, transfer the hot cooked rice to a wide, non-metallic bowl. A wooden or glass bowl works best. Pour the cooled vinegar mixture evenly over the rice.
- Mix the Rice: Using a rice paddle or a wooden spoon, gently slice and fold the vinegar mixture into the rice. The key here is to avoid mashing the rice grains. Use a slicing motion to separate the grains while gently incorporating the vinegar mixture. Continue slicing and folding until the vinegar mixture is fully incorporated and the rice looks glossy and slightly sticky.
- Cool the Rice: Spread the rice in a thin, even layer in the bowl and let it cool to room temperature. This step is crucial for achieving the right texture and making the rice easier to handle when rolling the sushi. You can speed up the cooling process by gently fanning the rice with a piece of cardboard or a fan.
- Prepare the Rolling Station: Place a sheet of nori on a bamboo sushi rolling mat. The shiny side of the nori should face down. While a bamboo mat isn’t strictly necessary, it makes the rolling process much easier and helps to create a tighter, more uniform roll.
- Add the Rice: Lightly wet your hands with water. This prevents the rice from sticking to your hands. Take a handful of the cooled sushi rice and spread a thin, even layer over the nori sheet, leaving about a 1-inch border clear at the top edge. This border is important for sealing the roll later.
- Add the Fillings: Arrange the shredded crab, avocado slices, and shredded carrot in a line horizontally across the bottom third of the rice-covered nori. Be careful not to overfill the roll, as this can make it difficult to roll tightly.
- Roll the Sushi: Using the bamboo mat, lift the edge of the nori closest to you and roll it up and over the filling, tucking it in tightly. Continue rolling forward, applying gentle, even pressure with the mat to keep the roll tight and compact.
- Seal the Roll: Once the roll is complete, moisten the clear top edge of the nori border with a little water. This will help to seal the roll and prevent it from unraveling.
- Repeat: Repeat the rolling process with the remaining nori, rice, and fillings.
- Cut and Serve: Use a sharp knife, moistened with water, to cut each roll into 6-8 pieces. Re-moisten the knife between cuts for clean slices. Arrange the sushi rolls on a plate and serve immediately.
Tips for Perfect Homemade Sushi Rolls Every Time
Want to take your sushi-making skills to the next level? Here are some pro tips to help you achieve sushi perfection:
- Use High-Quality Ingredients: As mentioned earlier, the quality of your ingredients makes a big difference. Invest in good-quality sushi rice, fresh avocado, and flavorful nori seaweed.
- Don’t Overcook the Rice: Overcooked rice will be mushy, while undercooked rice will be too hard. Follow the cooking instructions carefully for perfectly textured rice.
- Cool the Rice Completely: Cooling the rice to room temperature is essential for easy handling. Warm rice will be too sticky and difficult to work with.
- Wet Your Hands: Keep a bowl of water nearby and wet your hands frequently to prevent the rice from sticking.
- Roll Tightly: Use the bamboo mat to apply even pressure while rolling the sushi. A tightly rolled sushi will hold its shape better and be easier to cut.
- Use a Sharp Knife: A sharp knife is essential for clean cuts. Moisten the knife with water between cuts to prevent the rice from sticking.
- Experiment with Fillings: Don’t be afraid to get creative with your fillings! Try adding other vegetables, or different types of seafood.
What to Serve With Homemade Sushi Rolls
Homemade sushi rolls are delicious on their own, but they’re even better when served with complementary sides and sauces. Consider offering some of the following:
- Soy Sauce: A classic accompaniment for dipping sushi.
- Wasabi: Adds a spicy kick.
- Pickled Ginger (Gari): Cleanses the palate between bites.
- Edamame: Steamed soybeans in the pod.
- Seaweed Salad: A refreshing and flavorful side dish.
- Consider starting your meal with a simple side dish, such as a golden vegetable rice pilaf for a complete and balanced meal.
Your Homemade Sushi Rolls Questions Answered (FAQ)
Can I make sushi rice in a rice cooker?
Yes, you can definitely make sushi rice in a rice cooker! Use the same ratio of rice to water (1.5 cups rice to 2 cups water) and follow your rice cooker’s instructions. Once the rice is cooked, proceed with the vinegar seasoning process as described in the recipe. The benefit of using the stovetop method, however, is that you have more precise control over the simmering process.
What if I don’t have rice vinegar?
While rice vinegar is essential for authentic sushi rice flavor, you can substitute it in a pinch. White vinegar mixed with a touch of honey can work as a substitute, although the flavor profile will be slightly different. But for the best results, using actual rice vinegar is highly recommended.
How long does homemade sushi last?
Homemade sushi is best consumed immediately. However, if you have leftovers, you can store them in an airtight container in the refrigerator for up to 24 hours. Keep in mind that the rice may harden slightly, and the nori may become soggy over time. For optimal taste and texture, it’s best to make only as much sushi as you plan to eat in one sitting.
Can I use brown rice for sushi?
While traditional sushi is made with white sushi rice, you can certainly experiment with brown rice for a healthier option. Brown rice will have a nuttier flavor and a slightly chewier texture. You may need to adjust the cooking time and water ratio slightly to achieve the desired consistency. Be sure to rinse the brown rice thoroughly before cooking.
Enjoy Your Homemade Sushi Rolls!
There you have it – a simple and delicious recipe for homemade sushi rolls that will impress your friends and family! With a little practice, you’ll be a sushi-rolling master in no time. Don’t be afraid to experiment with different fillings and create your own signature sushi rolls. Now, grab your ingredients and get rolling! If you enjoyed this recipe, please leave a comment and let me know what you think. And be sure to share your sushi creations on social media! Happy rolling!