Oh, friends, let me tell you about the quest for the perfect chocolate cake. For years, I battled dry, crumbly results that left me reaching for a glass of milk just to get through a slice. You dream of that rich, tender crumb, that deep cocoa flavor, but sometimes, it just doesn’t deliver. It was a frustrating journey, filled with trial and error, until I stumbled upon a simple technique that changed my chocolate cake game forever.
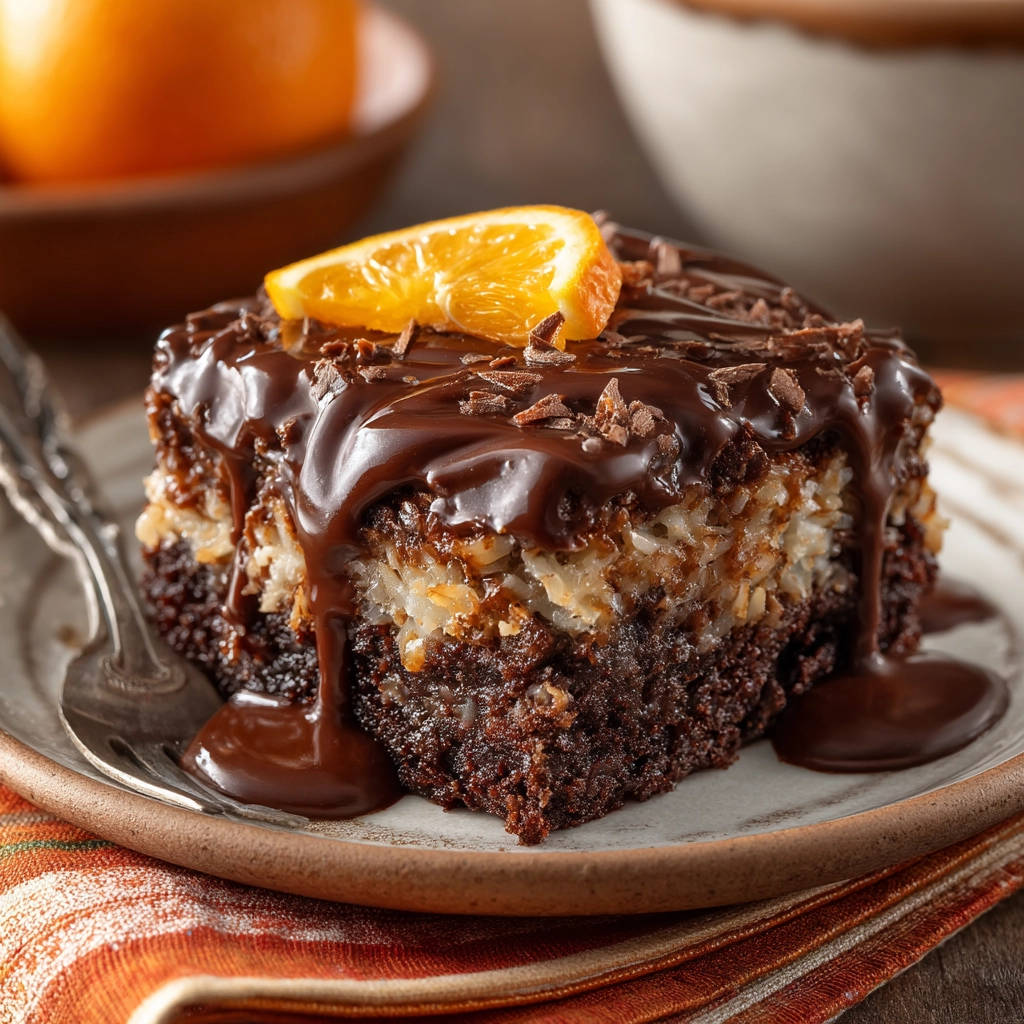
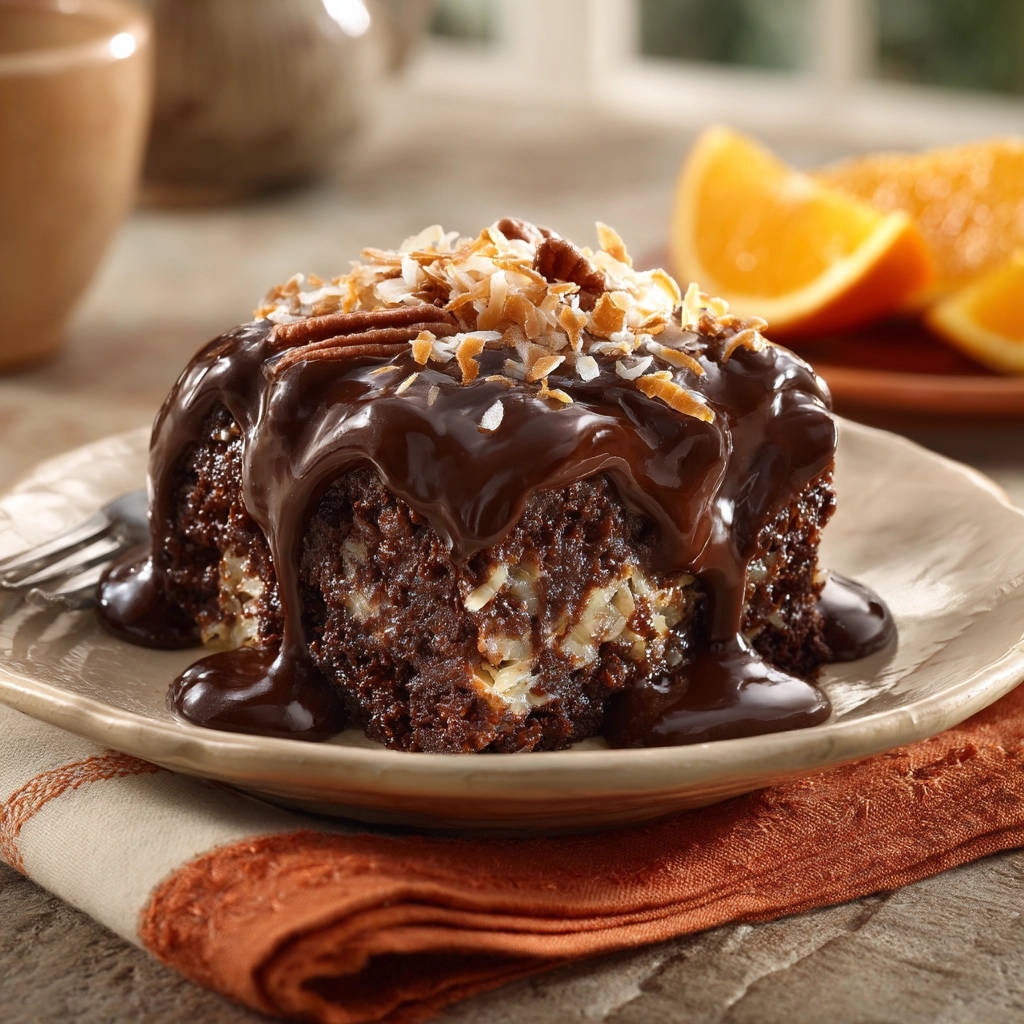
This incredible Chocolate Coconut Orange Cake is the culmination of that journey. It’s not just a chocolate cake; it’s a symphony of flavors featuring moist chocolate sponge, a sweet, creamy coconut filling, and a luscious chocolate ganache, all kissed with the bright, zesty notes of orange. And thanks to that little trick I discovered, it stays incredibly moist for days!
Forget everything you thought you knew about dry chocolate cakes. This recipe is a game-changer, promising a decadent dessert experience that will have everyone asking for seconds (and maybe thirds!). Get ready to bake the most delightful Chocolate Coconut Orange Cake you’ve ever tasted.
Reasons This Chocolate Coconut Orange Cake is a Keeper
What makes this particular cake so special? It’s more than just the combination of classic flavors. Here are just a few reasons why this Chocolate Coconut Orange Cake will become your new favorite:
- Unbeatable Moisture: That secret ingredient ensures a ridiculously moist crumb that won’t dry out easily.
- Flavor Harmony: The pairing of rich chocolate, sweet coconut, and bright orange is simply divine – a tropical twist on a classic.
- Beautiful Layers: The distinct layers of cake, creamy filling, and smooth ganache create a stunning presentation.
- Approachable Baking: While it has layers, the steps are straightforward and easy to follow, even for novice bakers.
- Crowd-Pleasing Appeal: This cake is always a hit at parties, potlucks, or just a simple family dessert night.
Once you try a bite, you’ll understand the magic. It’s the kind of cake that feels special but is surprisingly easy to make.
Gathering Your Ingredients for Chocolate Coconut Orange Cake
Ready to bake? Let’s talk about the wonderful ingredients that come together to create this moist masterpiece. Each component plays a crucial role in building the layers of flavor and texture in our Chocolate Coconut Orange Cake.
For the star of the show, the cake itself, we’re using a combination of pantry staples that yield a tender, chocolatey crumb. All-purpose flour provides structure, while granulated sugar ensures sweetness and also contributes to moisture. Unsweetened cocoa powder gives us that deep chocolate flavor – choose a good quality one for the best results. The leavening agents, baking soda and baking powder, work together to give the cake its lift, and a touch of salt balances the sweetness.
Now, for the wet ingredients that bring richness and help with moisture: large eggs bind everything together. Buttermilk (or a quick homemade version using milk and vinegar) is acidic, reacting with the baking soda to tenderize the cake and add tang. Vegetable oil contributes a lovely richness and helps keep the cake moist. Pure vanilla extract enhances all the other flavors. And here’s the magic ingredient for that incredible moisture: a cup of hot brewed coffee or hot water. The hot liquid blooms the cocoa, deepening the chocolate flavor, and creates a thinner batter which results in a super moist cake!
The luscious coconut filling is where the tropical sweetness comes in. We start with melted unsalted butter for richness, then add evaporated milk and granulated sugar to create a sweet, condensed base. Egg yolks thicken the mixture beautifully, giving it a creamy texture. More vanilla extract ties the flavors together, and finally, plenty of shredded sweetened coconut provides that essential texture and taste. Sweetened coconut holds its shape and texture wonderfully in this filling.
To top it all off, we have a classic, glossy chocolate ganache. This requires just two simple ingredients: bittersweet or semisweet chocolate, finely chopped so it melts smoothly, and heavy cream, which provides the richness needed to create a pourable, decadent topping.
And for the final flourish, some simple garnishes: fresh orange zest or delicate shaved chocolate, and bright, juicy orange slices.
Here’s a quick list of everything you’ll need:
For the Cake:
- 1 and 3/4 cups all-purpose flour
- 2 cups granulated sugar
- 3/4 cup unsweetened cocoa powder
- 1 and 1/2 teaspoons baking soda
- 1 teaspoon baking powder
- 1 teaspoon salt
- 2 large eggs
- 1 cup buttermilk (or 1 cup milk + 1 tablespoon white vinegar, let sit 5 mins)
- 1/2 cup vegetable oil
- 2 teaspoons vanilla extract
- 1 cup hot brewed coffee or hot water
For the Coconut Filling:
- 1/2 cup unsalted butter, melted
- 1 (12 ounce) can evaporated milk
- 1 and 1/2 cups granulated sugar
- 2 large egg yolks
- 1 teaspoon vanilla extract
- 3 cups shredded sweetened coconut
For the Chocolate Ganache:
- 8 ounces bittersweet or semisweet chocolate, finely chopped
- 1 cup heavy cream
For Garnish:
- Orange zest or shaved chocolate
- Orange slices
Crafting Your Chocolate Coconut Orange Cake: Step-by-Step
Now that we have all our wonderful ingredients ready, let’s get baking! This recipe is broken down into three main parts: the cake, the coconut filling, and the chocolate ganache. Don’t be intimidated by the layers; each step is simple and builds upon the last to create something truly spectacular.
- Prepare for Baking: Start by preheating your oven to 350 degrees F (175 degrees C). This is a crucial first step for even baking. Take a 9×13 inch baking pan and give it a good grease and flouring. This ensures your beautiful cake won of sticking to the pan when it’s time to serve. Shake out any excess flour.
- Mix the Dry Cake Ingredients: In a large mixing bowl, gather your dry cake ingredients: the flour, granulated sugar, unsweetened cocoa powder, baking soda, baking powder, and salt. Give them a good whisk together. This step isn’t just about combining; it aerates the mixture and ensures the leavening and salt are evenly distributed throughout the batter.
- Combine Wet and Dry (Almost!): Add the large eggs, buttermilk (or your milk/vinegar mixture), vegetable oil, and vanilla extract to the bowl with the dry ingredients. Using a mixer on medium speed, beat the ingredients together just until they are combined. Be careful not to overmix at this stage; you want everything incorporated, but don’t develop the gluten too much.
- Introduce the Hot Liquid (The Moisture Trick!): This is the key moment for a truly moist chocolate cake! With your mixer running on low speed, slowly and carefully pour in the hot brewed coffee or hot water. Pouring it in gradually while mixing allows it to fully incorporate without splashing. Don’t be alarmed – the batter will become quite thin. This is exactly what you want! The hot liquid helps the cocoa bloom, enhancing the chocolate flavor, and the thin consistency contributes significantly to the cake’s moist texture.
- Bake the Cake: Pour the prepared, thin batter into your greased and floured 9×13 inch pan. Pop it into the preheated oven and bake for about 30 to 35 minutes. You’ll know it’s done when a wooden skewer or toothpick inserted into the center comes out clean, with no wet batter attached (a few moist crumbs are okay!). Once baked, remove the cake from the oven and place the pan on a wire rack to cool in the pan for about 15 minutes.
- Prepare the Coconut Filling: While the cake is beginning its cooling process, turn your attention to the coconut filling. In a medium saucepan, combine the melted unsalted butter, evaporated milk, granulated sugar, and the two large egg yolks. Place this saucepan over medium heat. Now comes the stirring! You need to stir this mixture constantly to prevent the egg yolks from scrambling and the bottom from burning. Keep stirring for about 8 to 10 minutes, or until the mixture has thickened noticeably. It should coat the back of a spoon. Remove the saucepan from the heat and stir in the vanilla extract and the shredded sweetened coconut. Give it a good mix so the coconut is fully coated in the creamy base.
- Layer the Filling: The cake should still be warm after its initial cooling time. Carefully pour the warm coconut filling evenly over the warm cake while it’s still in the pan. Spread it gently to cover the entire surface. Let the filling set slightly while you move on to the final layer.
- Make the Chocolate Ganache: For that luxurious chocolate topping, get your finely chopped bittersweet or semisweet chocolate into a heatproof bowl. In a small saucepan, heat the heavy cream over medium heat. Watch it closely; you want it to just begin to simmer around the edges, but not boil vigorously. Once it reaches that point, pour the hot cream directly over the chopped chocolate in the bowl. Resist the urge to stir immediately! Let it stand undisturbed for about 5 minutes. This gives the hot cream time to melt the chocolate. After 5 minutes, gently whisk the mixture starting from the center and working outwards. It will magically transform into a smooth, glossy, decadent ganache.
- Add the Ganache Layer: The coconut layer should be slightly set now. Pour the warm chocolate ganache over the coconut layer in the pan. Use an offset spatula or the back of a spoon to gently spread the ganache, ensuring it covers the entire top surface. Let some of it drip enticingly down the sides of the cake for that perfect look.
- Garnish and Set: Now for the finishing touches! If desired, sprinkle fresh orange zest over the ganache, add some elegant shaved chocolate, or arrange bright orange slices on top. Allow the ganache to set slightly before you dive in and slice this gorgeous Chocolate Coconut Orange Cake for serving. This setting time helps the layers hold their shape when cut.
There you have it! A multi-layered, moist, and absolutely delicious cake ready to impress. The aroma filling your kitchen right now is just a preview of the incredible taste experience awaiting you.
Tips for Perfect Chocolate Coconut Orange Cake Every Time
Even with a reliable recipe, a few extra tips can elevate your baking from good to absolutely amazing. Here are some insights to help you achieve perfection with your Chocolate Coconut Orange Cake:
- Ingredient Temperature Matters: Ensure your eggs and buttermilk (or milk) are at room temperature before starting. Room temperature ingredients emulsify better, leading to a smoother, more even batter and a better rise.
- Don’t Overmix the Batter: Once the wet ingredients are combined with the dry (before the hot liquid), mix only until just combined. Overmixing develops gluten, which can result in a tougher cake. The hot liquid step requires mixing, but keep it on low speed.
- Hot Liquid is Key: Using hot liquid is non-negotiable for that amazing moist texture and deep chocolate flavor. Make sure your coffee or water is freshly heated.
- Coffee vs. Water: Using hot brewed coffee instead of hot water will subtly enhance the chocolate flavor without making the cake taste like coffee. If you don’t like coffee, hot water works perfectly well!
- Coconut Filling Thickness: When cooking the coconut filling, stir constantly and watch for it to thicken. It won’t be as thick as pudding right off the heat, but it should visibly thicken as it cooks. It will continue to set as it cools on the cake.
- Finely Chop Your Chocolate: For the ganache, taking the time to finely chop your chocolate helps it melt quickly and evenly when the hot cream is poured over it, resulting in a smooth ganache with no stubborn lumps.
- Patience with Ganache: Don’t rush the ganache. Letting the hot cream sit on the chocolate for 5 minutes before whisking is important. It allows the residual heat to work its magic.
- Cooling Time: Allow the cake to cool in the pan on a wire rack for the recommended time (15 minutes) before adding the warm filling. This gives the cake a little time to firm up but is still warm enough for the filling to meld slightly into the top layer, adding more moisture.
- Storage: Store any leftover Chocolate Coconut Orange Cake in an airtight container at room temperature for 2-3 days, or in the refrigerator for up to 5 days. The moisture trick helps it last longer!
- Freezing: You can freeze individual slices or the entire cake (without garnish) tightly wrapped in plastic wrap and then foil for up to 2-3 months. Thaw in the refrigerator overnight before serving.
Following these simple tips will help ensure your Chocolate Coconut Orange Cake turns out perfectly moist, flavorful, and stunning every single time you bake it.
Variations to Try
While this Chocolate Coconut Orange Cake is perfect as is, feel free to get creative! For a slightly different chocolate twist, you could explore recipes for a deep dark chocolate layer cake or even a quick chocolate fudge mug cake if you’re short on time but craving chocolate.
If you want to lean more into the orange flavor, you could add a teaspoon of orange extract to the cake batter along with the vanilla, or even finely grate some orange zest directly into the batter before baking.
Prefer a different topping? While the ganache is divine, a simple cream cheese frosting infused with a little orange zest would also be delightful. Or, for something lighter, a whipped cream topping sprinkled with toasted coconut.
Serving Suggestions for Chocolate Coconut Orange Cake
This Chocolate Coconut Orange Cake is rich and decadent enough to be served entirely on its own. A simple slice is a complete dessert experience.
However, if you want to make it even more special, consider serving it with a scoop of high-quality vanilla bean ice cream or a dollop of freshly whipped cream. The cool, creamy texture pairs wonderfully with the moist cake and sweet coconut filling.
For a touch of elegance, serve slices on pretty dessert plates, garnished with a fresh orange slice, a sprig of mint, or an extra sprinkle of orange zest.
This cake is perfect for special occasions like birthdays, holidays, or dinner parties, but it’s also easy enough to whip up for a weekend treat. It pairs nicely with a hot cup of coffee or tea.
Your Chocolate Coconut Orange Cake Questions Answered (FAQ)
Got questions about baking this delightful Chocolate Coconut Orange Cake? Here are some answers to common queries that might come up:
Can I use fresh orange juice instead of hot coffee or water in the cake batter?
While fresh orange juice would add lovely flavor, its acidity and sugar content are different from coffee or water. The hot liquid serves a specific chemical purpose in this recipe, helping the cocoa bloom and creating a very thin batter that bakes up incredibly moist. Substituting orange juice for the hot liquid might affect the cake’s texture and rise. You can add orange flavor with zest or extract, as mentioned in the variations section, without altering the liquid ratio.
Why is my cake batter so thin after adding the hot liquid?
Don’t worry, that’s completely normal and actually desired! The thin batter is a result of adding the hot liquid, which helps create that super moist crumb structure this recipe is known for. It might seem counterintuitive, but trust the process.
My coconut filling seems thin. Will it thicken?
The coconut filling should thicken on the stovetop after cooking and stirring for 8-10 minutes. It won’t be extremely thick, but it should coat the back of a spoon. It will continue to set and firm up as it cools on top of the warm cake in the pan.
Can I make this cake gluten-free?
While this specific recipe uses all-purpose flour, you could likely adapt it using a gluten-free all-purpose flour blend. Look for a blend that contains xanthan gum for structure. Baking times might vary slightly, so keep a close eye on the cake during baking. This technique for moist chocolate cake works well with many flour types.
How can I get smooth ganache?
The key to smooth ganache is using finely chopped chocolate and allowing the hot cream to sit on it for a few minutes before you start whisking. This gives the heat time to melt the chocolate thoroughly. Start whisking gently in the center, and the mixture should come together beautifully into a smooth, glossy consistency.
Can I make the ganache ahead of time?
You can make the ganache ahead of time. Let it cool completely, then cover and refrigerate. When you’re ready to use it, gently reheat it in a microwave in 15-second intervals, stirring between each, or over a double boiler until it’s pourable again. Don’t overheat it!
My cake stuck to the pan. What went wrong?
Ensuring your 9×13 inch pan is properly greased and floured is crucial. Use solid shortening or butter to coat the pan thoroughly, getting into the corners, then add a few tablespoons of flour and shake it around to coat all the greased surfaces. Tap out any excess flour. Using baking spray that contains flour is also effective.
Enjoy Your Homemade Chocolate Coconut Orange Cake!
Baking this Chocolate Coconut Orange Cake is such a rewarding experience. From the rich aroma that fills your kitchen to the incredibly moist texture and the perfect harmony of chocolate, coconut, and orange flavors in every bite, it’s a true delight.
This recipe was born from a desire to banish dry chocolate cakes forever, and I truly believe it delivers on that promise. The simple addition of hot liquid makes all the difference, resulting in a cake that is tender, flavorful, and stays moist for days.
Whether you’re baking it for a special occasion or just because you deserve a treat, this cake is sure to become a cherished recipe in your collection. Give it a try, and prepare to be amazed by the moisture and incredible flavor combination.
If you bake this cake, please leave a comment below and let me know how it turned out! Your feedback helps other bakers, and I always love hearing about your kitchen successes. Happy Baking!
Chocolate Coconut Orange Cake

Ingredients
- For the Cake:
- 1 and 3/4 cups all-purpose flour
- 2 cups granulated sugar
- 3/4 cup unsweetened cocoa powder
- 1 and 1/2 teaspoons baking soda
- 1 teaspoon baking powder
- 1 teaspoon salt
- 2 large eggs
- 1 cup buttermilk or milk mixed with 1 tablespoon white vinegar
- 1/2 cup vegetable oil
- 2 teaspoons vanilla extract
- 1 cup hot brewed coffee or hot water
- For the Coconut Filling:
- 1/2 cup unsalted butter, melted
- 1 (12 ounce) can evaporated milk
- 1 and 1/2 cups granulated sugar
- 2 large egg yolks
- 1 teaspoon vanilla extract
- 3 cups shredded sweetened coconut
- For the Chocolate Ganache:
- 8 ounces bittersweet or semisweet chocolate, finely chopped
- 1 cup heavy cream
- For Garnish:
- Orange zest or shaved chocolate
- Orange slices
Directions
- Preheat oven to 350 degrees F (175 degrees C). Grease and flour a 9×13 inch baking pan.
- For the cake: In a large bowl, whisk together flour, sugar, cocoa powder, baking soda, baking powder, and salt. Add the eggs, buttermilk, oil, and vanilla extract. Beat on medium speed until just combined.
- Here is the key to moist cake: Carefully pour the hot coffee or hot water into the batter while mixing on low speed until fully incorporated. The batter will be thin, this is correct.
- Pour the batter into the prepared pan and bake for 30 to 35 minutes, or until a wooden skewer inserted into the center comes out clean. Let the cake cool in the pan on a wire rack for about 15 minutes.
- For the coconut filling: While the cake cools slightly, in a medium saucepan, combine melted butter, evaporated milk, sugar, and egg yolks. Cook over medium heat, stirring constantly, until thickened, about 8 to 10 minutes. Remove from heat and stir in vanilla extract and shredded coconut.
- Pour the warm coconut filling evenly over the warm cake in the pan. Let it set slightly while you make the ganache.
- For the chocolate ganache: Place the chopped chocolate in a heatproof bowl. Heat the heavy cream in a small saucepan over medium heat until it just begins to simmer around the edges. Pour the hot cream over the chopped chocolate. Let stand for 5 minutes, then whisk gently until smooth and glossy.
- Pour the warm ganache over the coconut layer, spreading it gently to cover the top and letting it drip down the sides.
- Garnish the cake with orange zest, shaved chocolate, and orange slices if desired. Allow the ganache to set slightly before cutting and serving.