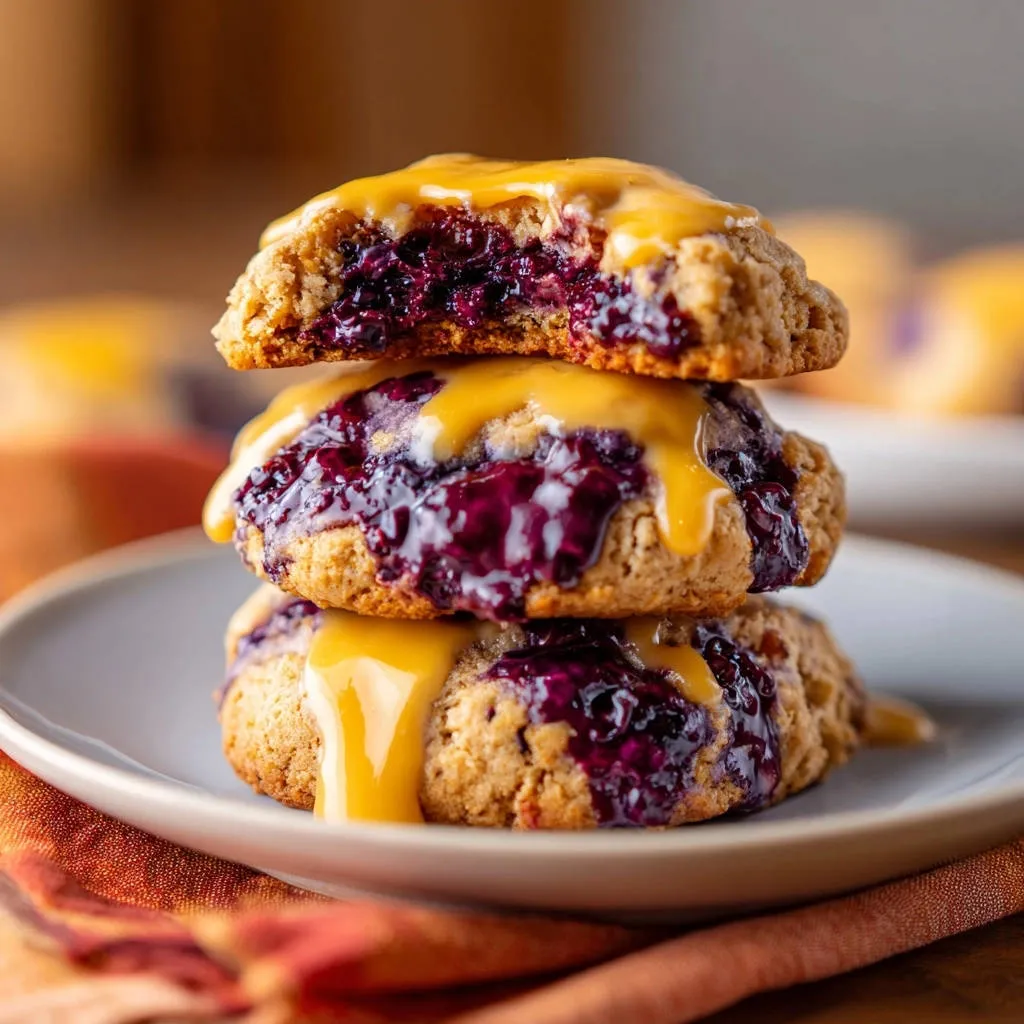
There’s nothing quite like biting into a tender, buttery cookie with a burst of vibrant fruit jam, but achieving that perfect, non-runny center in Jammy Berry Thumbprints can feel like a culinary mystery. I’ve certainly faced the frustration of a seeping, watery mess. After many batches and refinements, I’ve cracked the code to making these classic jammy berry thumbprint cookies consistently perfect, with a truly set, luscious filling and an irresistibly soft base.
Why This Jammy Berry Thumbprints Recipe is a Game-Changer
This recipe isn’t just another cookie recipe; it’s designed to deliver perfection every time. It addresses common baking frustrations, ensuring your efforts yield a delightful result.
The “No Runny Filling” Breakthrough
The biggest challenge with thumbprint cookies is often a runny jam. This recipe uniquely solves that with a crucial chilling step for the berry filling, ensuring it stays beautifully contained and sets perfectly during baking.
Irresistibly Tender Cookie Base
You’ll discover a cookie base that’s never dense or crumbly. It has a delicate, melt-in-your-mouth texture that perfectly complements the sweet fruit filling.
Quick & Rewarding Baking Project
Despite their impressive appearance and flawless execution, these jammy berry thumbprints are surprisingly accessible. They offer a rewarding baking experience without requiring excessive time or complicated techniques.
Tools for Thumbprint Cookie Success
Having the right equipment ensures a smooth and enjoyable baking process. Gathering these essentials before you begin will set you up for success.

Kitchen Essentials for Baking Bliss
You’ll need standard mixing bowls in various sizes for combining ingredients. Accurate measuring cups and spoons are crucial for precise ingredient ratios, guaranteeing the desired texture and flavor.
A sturdy whisk is essential for dry ingredients and preparing the cornstarch slurry. A reliable spatula will help scrape down bowls and ensure everything is thoroughly combined.
Specialized Gear for Perfect Indentations
An electric mixer, either a hand mixer or a stand mixer, is highly recommended for creaming butter and sugar until light and fluffy. This step is key to a tender cookie texture.
Parchment paper is invaluable for lining baking sheets. It prevents sticking and makes for easy cleanup. A wire cooling rack is necessary for allowing the cookies to cool completely and evenly, preventing sogginess.
The Heart of the Cookie: Essential Ingredients Unveiled
Each ingredient in this jammy berry thumbprint cookie recipe plays a vital role. Understanding their function helps ensure you select and handle them correctly for the best results.
For the Tender Cookie Dough
All-purpose flour provides the structure for your cookies. Baking powder ensures a slight lift, while salt balances the sweetness and enhances flavor.
Unsalted butter, softened to room temperature, is crucial for creaming properly, which incorporates air for a tender crumb. Granulated sugar provides sweetness and contributes to the cookie’s delicate texture.
A large egg binds the ingredients and adds moisture, contributing to richness. Pure vanilla extract infuses the dough with warmth and classic cookie flavor.
Crafting the Vibrant Berry Filling
Mixed berries, whether fresh or frozen, provide the star flavor. You can use blueberries, raspberries, blackberries, or a mix, adding a beautiful tart-sweet counterpoint.
Granulated sugar sweetens the berries, while lemon juice brightens their flavor. Cornstarch, whisked with water to form a slurry, is the unsung hero here.
It acts as a thickening agent, ensuring the berry filling sets into a beautiful, non-runny jam during baking.
The Finishing Touch: Simple Glaze
Powdered sugar forms the base of the simple, elegant glaze. Its fine texture creates a smooth finish.
Milk (or extra lemon juice for a tangier glaze) is added incrementally to achieve the perfect drizzling consistency. The glaze adds a final touch of sweetness and visual appeal.
Your Path to Jammy Berry Thumbprints Perfection: A Detailed Guide
Step 1: Master the Berry Filling (The Secret Weapon)
In a small saucepan, combine your mixed berries, 2 tablespoons of granulated sugar, and lemon juice. Cook this mixture over medium heat, gently mashing the berries as they soften.
This process takes about 5-7 minutes, allowing the berries to break down and release their beautiful juices. Meanwhile, prepare your cornstarch slurry by whisking cornstarch and water until perfectly smooth in a separate small bowl.
Pour the cornstarch slurry into the simmering berries, stirring constantly. Continue to cook for 1-2 minutes until the mixture thickens considerably; it should nicely coat the back of a spoon. This thickening is crucial for the “no runny filling” guarantee.
Immediately transfer the thickened berry filling to a small bowl to halt the cooking process. Allow it to cool completely at room temperature, then refrigerate for at least 30 minutes. This vital chilling step is what prevents the filling from becoming watery and seeping out during baking, ensuring a perfectly set, jammy consistency.
Step 2: Crafting the Silky Cookie Dough
In a medium bowl, whisk together the dry ingredients: all-purpose flour, baking powder, and salt. This ensures they are evenly distributed.
In a large bowl, use an electric mixer to cream together the softened unsalted butter and ½ cup of granulated sugar. Beat them until the mixture is light and fluffy, usually taking a few minutes, which incorporates air for a tender cookie.
Beat in the large egg and vanilla extract until they are fully combined into the butter mixture. Gradually add the whisked dry ingredients to the wet ingredients, mixing on low speed until they are just combined.
Do not overmix! Overmixing develops gluten, leading to a tough, dry cookie. Stop mixing as soon as no streaks of flour remain.
Step 3: Forming and Indenting for Success
Preheat your oven to 350 degrees F (175 degrees C) to ensure it’s at the correct temperature when your cookies are ready. Line a baking sheet with parchment paper; this prevents sticking and aids in easy removal.
Scoop rounded tablespoons of the cookie dough and roll each into a smooth ball between your palms. Place them about 2 inches apart on the prepared baking sheet, allowing space for slight spreading.
Using your thumb or the back of a rounded teaspoon, gently make an indentation in the center of each cookie ball. Aim for an indentation that is deep enough to hold the jam but not so deep that it goes through to the bottom.
Step 4: The Bake: Achieving Golden Perfection
Carefully spoon about ½ to 1 teaspoon of the thoroughly chilled berry filling into each indentation. Be mindful not to overfill, as this can still cause the jam to bubble over.
Bake the cookies for 12-15 minutes, or until their edges are lightly golden. The filling should appear bubbly and visibly set, indicating it has cooked through and thickened further.
Remove the cookies from the oven and let them cool on the baking sheet for 5 minutes. This allows them to firm up slightly before you attempt to move them.
After 5 minutes, carefully transfer the cookies to a wire rack. Allow them to cool completely before proceeding to the glazing step.
Step 5: The Grand Finale: Glaze and Serve
While your Jammy Berry Thumbprints cool, prepare the simple glaze. In a small bowl, whisk together the powdered sugar and 2 tablespoons of milk (or lemon juice for a zingier finish).
Add more liquid, drop by drop, until you achieve a smooth, pourable consistency. You want it thick enough to coat but thin enough to drizzle elegantly.
Once the cookies are completely cool, drizzle the glaze artistically over them. Drizzling over cooled cookies prevents the glaze from melting and ensures a beautiful, set finish.
Chef’s Secrets: Elevate Your Jammy Berry Thumbprints Game
Beyond the basic steps, these expert tips will help you achieve truly outstanding fruit-filled cookies every time.
The Importance of Chilling: Dough & Filling
Chilling your berry filling thoroughly is the most critical step for preventing a runny center. The cold helps the cornstarch set firmly. Additionally, if your cookie dough feels too soft or sticky, a brief chill (15-20 minutes) can prevent excessive spreading during baking, maintaining their distinct shape.
Don’t Overmix for Tender Texture
Once you add the flour to the wet ingredients, mix only until just combined. Overmixing develops gluten, which can make your cookies tough and chewy instead of wonderfully tender. A light hand here makes all the difference.
Perfect Indentations Every Time
For uniform indentations, use the back of a rounded measuring spoon (like a ½ teaspoon) rather than your thumb. If the dough is sticky, lightly flour the spoon or your thumb to prevent it from sticking to the dough and pulling it apart.
Cooling for Optimal Glazing
Patience is key for glazing. Ensure your thumbprint cookies are completely cool before drizzling. Applying glaze to warm cookies will cause it to melt and absorb, resulting in a less appealing, messy finish.
Creative Jam Swaps & Flavor Variations
While mixed berries are delightful, feel free to experiment! Try apricot, fig, or even a spicy pepper jam for a unique twist. You could also add a pinch of cinnamon or a hint of almond extract to the cookie dough itself for extra depth of flavor. If you enjoy experimenting with fruit desserts, you might also love these Perfect Rhubarb Crumble Cookies.
Troubleshooting Your Thumbprints: Common Hurdles Solved
Even seasoned bakers encounter hiccups. Here are solutions to common issues when making homemade cookies like these.
Why is My Filling Runny After Baking?
The most common culprit is insufficient chilling of the berry filling. Ensure it’s completely cooled and then chilled in the refrigerator for at least 30 minutes (or even longer) before filling the cookies. Also, double-check that you used the correct amount of cornstarch and cooked it until the mixture was noticeably thick, not just warm.
My Cookies Spread Too Much!
This can happen if your butter was too soft, or if you didn’t measure your flour accurately. Ensure your butter is softened but still cool to the touch, not greasy or melted. Chilling the formed cookie dough balls for 15-20 minutes before baking can also help them hold their shape better.
Cookies Are Dry or Crumbly
Dry, crumbly cookies are typically a sign of overbaking or overmixing the dough. Bake only until the edges are lightly golden, not dark. Also, remember to mix the dry and wet ingredients only until just combined to avoid developing too much gluten.
Glaze is Too Thick or Thin
Adjusting glaze consistency is simple. If it’s too thick, add more milk or lemon juice, one teaspoon at a time, whisking well after each addition. If it’s too thin, sift in a tablespoon or two more of powdered sugar until you reach the desired pourable texture.
Serving, Storing & Making Ahead: Maximizing Your Jammy Berry Enjoyment
These delicious fruit-filled cookies are versatile and perfect for many occasions. Knowing how to store and prepare them in advance is key.
Elegant Serving Suggestions
Serve these berry cookies as a delightful treat with afternoon tea or coffee. They make a beautiful addition to any dessert platter, holiday gathering, or cookie exchange. For a special touch, dust them with a little extra powdered sugar just before serving.
Optimal Storage for Freshness
Store your glazed Jammy Berry Thumbprints in an airtight container at room temperature for up to 3-4 days. For longer storage, refrigerate them, though the glaze might slightly soften. Always ensure they are completely cool before storing to prevent condensation.
Can You Make Them Ahead? (Yes!)
Absolutely! You can prepare the berry filling up to 3 days in advance and store it chilled in the refrigerator. The cookie dough can also be made ahead, wrapped tightly, and refrigerated for up to 2 days, or frozen for up to a month. For more make-ahead cookie inspiration, check out our recipe for Classic Shortbread Fingers.
Your Jammy Berry Thumbprints Questions Answered
Here are some frequently asked questions to help you master these delightful treats.
Can I Use Frozen Berries?
Yes, absolutely! The recipe specifically calls for fresh or frozen mixed berries, making it flexible for any time of year. There’s no need to thaw frozen berries before adding them to the saucepan for the filling; they will break down as they cook.
What If I Don’t Have Cornstarch?
If cornstarch isn’t available, you can substitute it with arrowroot powder or tapioca starch. Use the same quantity for both of these alternatives. They will achieve a similar thickening effect for your berry filling.
Can I Make These Gluten-Free?
Yes, you can often adapt this recipe to be gluten-free. Use a 1:1 gluten-free all-purpose flour blend that contains xanthan gum. Be aware that the texture might be slightly different, potentially a bit more delicate, so handle the dough gently.
How Long Do They Last?
When stored properly in an airtight container at room temperature, these jammy berry thumbprint cookies will stay fresh and delicious for about 3-4 days. If refrigerated, they can last up to a week, but the cookie texture might firm up slightly.
Can I Freeze Jammy Berry Thumbprints?
Yes, both baked and unbaked Jammy Berry Thumbprints freeze well. For unbaked dough, form the balls and indent, then freeze on a baking sheet before transferring to a freezer bag. Bake from frozen, adding a few extra minutes to the baking time. Baked cookies can be frozen (un-glazed) in an airtight container for up to 2-3 months. Thaw at room temperature and glaze before serving.
Ready to Impress? Share Your Jammy Berry Thumbprints Masterpiece!
Now that you have all the secrets to perfect Jammy Berry Thumbprints, it’s your turn to create some kitchen magic. This recipe promises not just delicious cookies, but also the confidence of a perfectly set, vibrant jam filling every time. Whip up a batch for your next gathering, a quiet afternoon treat, or simply to enjoy the reward of masterful baking.
We’d love to see your creations! Share your beautiful berry thumbprint cookies with us and let us know which berry combination you found most delightful.
Jammy Berry Thumbprints
Course: DessertCuisine: American CuisineDifficulty: easy4
18-24 cookies45
minutes12
minutes60
minutesAmerican Cuisine
Ingredients
For the Cookies:
1 ½ cups all-purpose flour
½ teaspoon baking powder
¼ teaspoon salt
½ cup (1 stick) unsalted butter, softened
½ cup granulated sugar
1 large egg
1 teaspoon vanilla extract
For the Berry Filling:
1 cup mixed berries (fresh or frozen, e.g., blueberries, blackberries, raspberries)
2 tablespoons granulated sugar
1 tablespoon cornstarch
1 tablespoon water
1 teaspoon lemon juice
For the Glaze:
1 cup powdered sugar
2-3 tablespoons milk (or lemon juice)
Directions
- Prepare the Berry Filling (The Secret to No Runny Filling!): In a small saucepan, combine the mixed berries, 2 tablespoons granulated sugar, and lemon juice. Cook over medium heat, mashing the berries slightly, until they start to break down and release their juices (about 5-7 minutes). In a small bowl, whisk together the cornstarch and water until smooth to create a slurry. Pour the cornstarch slurry into the simmering berries, stirring constantly. Continue to cook, stirring, for 1-2 minutes until the mixture thickens considerably and coats the back of a spoon. Remove from heat and transfer the berry filling to a small bowl. Let it cool completely to room temperature, then chill in the refrigerator for at least 30 minutes. This crucial step prevents the filling from becoming watery during baking and helps it set into a beautiful jammy consistency.
- Make the Cookie Dough: In a medium bowl, whisk together the flour, baking powder, and salt. In a large bowl, using an electric mixer, cream together the softened butter and ½ cup granulated sugar until light and fluffy. Beat in the egg and vanilla extract until well combined. Gradually add the dry ingredients to the wet ingredients, mixing on low speed until just combined. Do not overmix.
- Form the Cookies: Preheat your oven to 350 degrees F (175 degrees C). Line a baking sheet with parchment paper. Scoop rounded tablespoons of cookie dough and roll them into smooth balls. Place them about 2 inches apart on the prepared baking sheet. Using your thumb or the back of a rounded teaspoon, gently make an indentation in the center of each cookie ball.
- Fill and Bake: Carefully spoon about ½ to 1 teaspoon of the chilled berry filling into each indentation. Be mindful not to overfill. Bake for 12-15 minutes, or until the edges of the cookies are lightly golden. The filling should be bubbly and set. Remove from the oven and let the cookies cool on the baking sheet for 5 minutes before transferring them to a wire rack to cool completely.
- Prepare and Drizzle Glaze: While the cookies cool, prepare the glaze. In a small bowl, whisk together the powdered sugar and milk (or lemon juice), starting with 2 tablespoons of liquid and adding more drop by drop until you reach a smooth, pourable consistency. Drizzle the glaze over the cooled cookies just before serving. Enjoy your perfectly jammy, bursting-with-flavor thumbprint cookies!
Notes
- Chilling the berry filling thoroughly is crucial for preventing a runny center during baking.