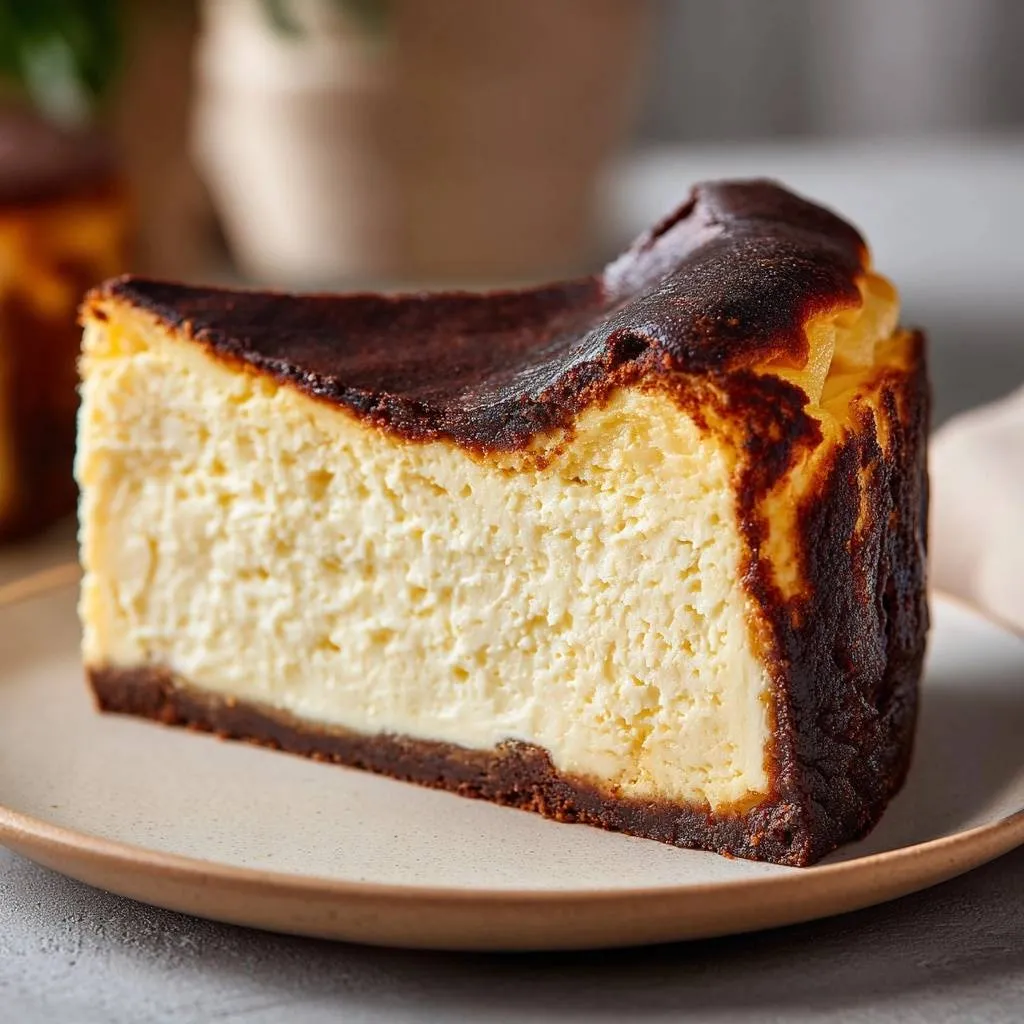
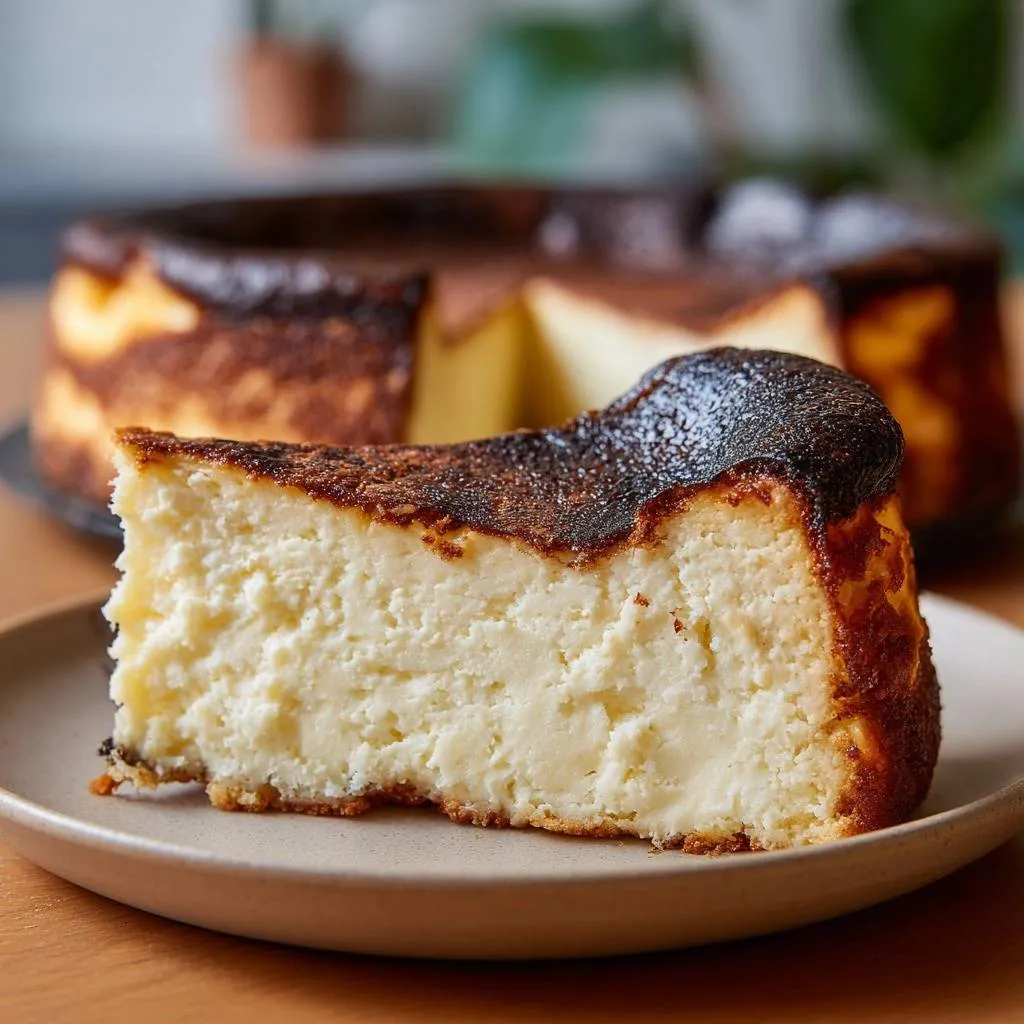
Picture this: a Japanese burnt cheesecake with that dramatic charred top, pulling away from the parchment in rustic ruffles, and a creamy, jiggly center that melts on your tongue. You’ve seen it go viral, but cracks ruin the magic for so many home bakers. This recipe nails it every time, delivering that signature char without the heartbreak.
Why does it work? Room temperature ingredients blend into a silky batter that sets evenly under high heat. However, most folks grab cold stuff from the fridge, leading to lumps and splits. In addition, the gradual cool-down prevents the temperature shock that causes those pesky cracks.
Here’s the pro tip that seals the deal: everything at room temp ensures perfect emulsification. Beat on low speed only, and tap the pan five times before baking. You’ll get that deep char and custardy core without a single flaw.
Signature Charred Crust Foundation
Graham Cracker Crumbs Role
Graham cracker crumbs form the sturdy base in this Japanese burnt cheesecake. You need 2 cups for solid structure that stays crisp under the heavy filling. They absorb just enough moisture without turning soggy.
In authentic Japanese versions, folks often use digestive biscuits for a finer texture. However, graham crumbs give a slightly sweeter, nuttier vibe that pairs perfectly. Grind them fine for a smooth press, or leave coarse for subtle crunch.
Melted Butter Binding Power
Melted unsalted butter, about 1/2 cup, binds everything in the crust. It emulsifies with the crumbs, creating a crisp edge that contrasts the creamy top. Use melted over softened because it coats evenly without pockets.
For a dairy-free Japanese burnt cheesecake, swap in coconut oil. It holds up well but adds a faint tropical note. Either way, press firmly for that satisfying snap.
Sugar’s Subtle Sweetening
Two tablespoons of granulated sugar sweeten the crust lightly and help it caramelize during the bake. At 400°F for 10 minutes, it turns golden and fragrant. Therefore, it sets a firm foundation.
Try brown sugar for deeper molasses hints in variations. It works great but watch for quicker browning. Keep it subtle so the cheesecake’s tang shines through.
Room-Temperature Filling Mastery
Cream Cheese Softening Secrets
Start with 32 ounces of cream cheese softened to room temperature. This prevents lumps that mar the smooth texture of Japanese burnt cheesecake. Cold blocks won’t blend right, leading to graininess.
Leave it out for 2 hours, or cut into cubes for faster softening. Skip the microwave; it risks curdling. Full-fat Philadelphia gives the creamiest results every time.
Sugar Integration Technique
Beat 1 1/2 cups granulated sugar into the cream cheese on low for just 1 minute. You’ll get a lump-free base. High speed whips in air, which expands then collapses, cracking your Japanese burnt cheesecake.
Scrape the bowl often. The mix turns velvety pale, signaling it’s ready. Patience here pays off big.
Eggs Added Sequentially
Add 5 large room-temp eggs one by one, beating low after each. This emulsifies them into a custardy batter for Japanese burnt cheesecake. Room temp prevents seizing the mixture.
Scrape down the sides midway. You’ll see it thicken slightly but stay pourable. Overmixing toughens it, so go gentle.
Heavy Cream Pourable Flow
Mix in 2 cups room-temp heavy cream next. Its high fat content creates that iconic jiggle in the center. The batter thins to a pourable consistency, flowing smoothly over the crust.
Half-and-half works in a pinch but sets firmer. Stick to heavy cream for the lushest texture. It transforms everything into silk.
Flour and Vanilla Finish
Sift in 1/4 cup all-purpose flour and 2 teaspoons vanilla extract last. The flour stabilizes without weighing down the rise. Vanilla adds warm aroma that blooms during baking.
Mix on low for 1 minute until silky. Sifting avoids lumps for flawless Japanese burnt cheesecake. Taste the batter; it hints at the final glory.
Science of Charred Japanese Burnt Cheesecake
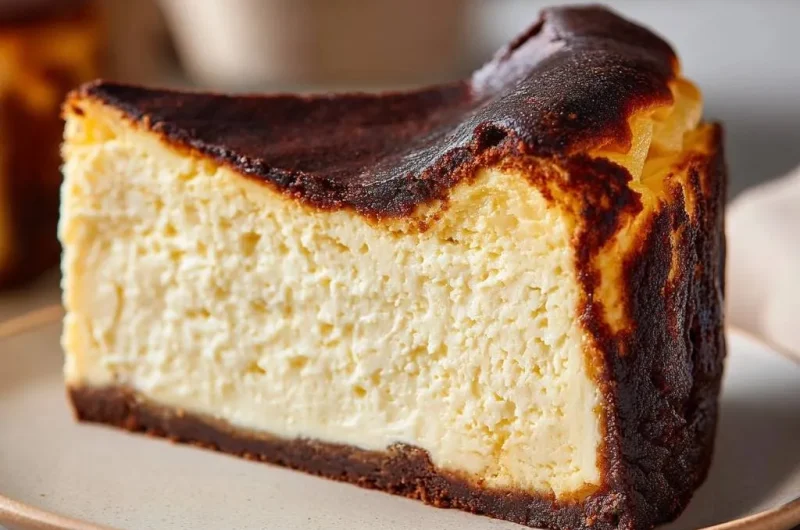
The magic happens at 400°F through the Maillard reaction, browning sugars and proteins for those black spots on top. Flour gelatinizes, eggs and cream cheese coagulate, forming a creamy core. High heat puffs the edges while the center stays jiggly like Jell-O.
Crack prevention relies on thermodynamics. Sudden cooling contracts the top faster than the base, splitting it. Therefore, our gradual method lets it settle evenly. This delivers perfect Japanese burnt cheesecake every time.
Pro tip: tap the pan five times post-pour. Air bubbles escape, reducing steam pockets that burst into cracks. Watch the oven through the light; the char builds fast.
High-Heat Puffing Dynamics
In 55 to 65 minutes, edges puff dramatically and brown. Oven steam from the batter drives the rise in Japanese burnt cheesecake. It creates that rugged, airy look.
Don’t peek too much; heat loss stalls it. The center should jiggle freely when shaken.
Gradual Cooling Chemistry
Turn off the oven and crack the door 4 inches for 1 hour. This slow cool avoids thermal shock, preventing cracks in Japanese burnt cheesecake. Water baths fail here; they steam too gently for char.
Proteins set gradually, locking in creaminess. Patience rewards you with perfection.
Springform Pan Parchment Prep
Grease a 9-inch springform pan, then line with two overlapping parchment sheets. Let edges rise 2 inches above the rim. This allows easy release and promotes the charred ruffle on Japanese burnt cheesecake.
Pushing into corners seals leaks. Foil works as backup but parchment breathes better for crust crispness. Crumple it first for easy molding.
Pro tip: overhang prevents sticking post-bake. It lifts the cheesecake effortlessly.
Corner-Pushing Precision
Push parchment firmly into corners after greasing. This maintains crust integrity and stops batter seepage in Japanese burnt cheesecake. A tight fit ensures even baking.
No gaps mean no soggy spots. Take your time here.
Baking and Cooling Phases
Pre-Bake Crust Setting
Bake the crust at 400°F for 10 minutes until set and fragrant. Cool it slightly before pouring filling. This prevents melting and oil separation.
About 5 minutes on the rack does it. You’ll smell sweet graham goodness.
Air Bubble Release Taps
After pouring batter, tap the pan firmly on the counter 5 times. Bubbles rise and pop, slashing crack risk in Japanese burnt cheesecake. Physics at work: pressure forces air out.
Do it gently to avoid splashing. Smooth surface incoming.
Char Development Timing
Bake 55 to 65 minutes for black spots and Jell-O jiggle. Adjust up 5 minutes at high altitude. Ovens vary, so check at 55.
Edges pull away; that’s your cue.
Oven-Off Gradual Descent
Crack oven door 4 inches, cool undisturbed 1 hour. Then room temp on rack for 2 hours, fridge overnight uncovered. Run a knife around edges before releasing.
This sequence firms it perfectly. Slice chilled for clean cuts.
Avoiding Japanese Burnt Cheesecake Pitfalls
Top pitfalls: cold ingredients cause lumps, high-speed mixing traps air for cracks, skipping taps leaves bubbles, abrupt cooling shocks it, underbaking leaves it runny. Fixes build in science.
Visual cues matter: deep char top, puffed edges, jiggle center. Therefore, trust the shake test over time. Your Japanese burnt cheesecake thrives on these details.
Overmixing Air Traps
Stick to low speed only. Excess air expands in heat then deflates, cracking the top. Smooth batter wins.
Sudden Temp Shock Cracks
Follow the cooling protocol exactly. Rapid fridge transfer contracts unevenly. Gradual descent keeps it intact.
Japanese Burnt Cheesecake Origins
It started as Basque burnt cheesecake at La Viña in Spain, then exploded in Japan around 2018 Tokyo cafes. Chefs ditched water baths for high-heat char and parchment ruffles. No precise edges; rustic rules.
Japanese tweaks emphasize creaminess with minimal flour. Matcha versions add green tea earthiness. This adaptation went viral for its forgiving, bold style.
Storage and Make-Ahead Guide
Store Japanese burnt cheesecake uncovered in the fridge up to 5 days. The chill firms it without drying. For freezing, slice and wrap portions tightly; lasts 2 months.
Thaw overnight in fridge for peak texture. Avoid refreezing. Make ahead; flavors deepen day two.
Perfect Japanese Burnt Cheesecake Pairings
Fresh berries cut the richness with tart pops. Citrus compote adds bright zing. Earl Grey tea balances the cream with subtle bergamot.
Seasonal fruits like peaches in summer synergize sweetly. Keep pairings light to let the char shine.
Troubleshooting Japanese Burnt Cheesecake Issues
Cracks Despite Cooling
Often overbaked edges or drafty ovens. Bake to jiggle, insulate door if needed. Next time, check 5 minutes early.
Pale Top No Char
Calibrate oven; broil 1-2 minutes last if safe. Position rack higher. Char builds quick at true 400°F.
Soggy Crust Fixes
Seal parchment tighter, bake crust longer. Blind bake with foil over if extra cautious. Crisp returns.
Grainy Texture Rescue
Cold ingredients or unsifted flour. Strain batter through sieve next time. Room temp smooths it out.
Japanese Burnt Cheesecake FAQ
Why Room Temperature Ingredients?
Room temp cream cheese, eggs, and cream emulsify evenly, preventing lumps, separation, or cracks in Japanese burnt cheesecake. Cold items shock the mix, causing uneven setting. Soften safely by leaving out 1-2 hours or in a warm bowl of water. This yields silky batter that bakes flawlessly.
Can I Use Low-Fat Cream?
No, low-fat cream ruins the jiggle and creaminess. Fat stabilizes the structure under high heat. Stick to full-fat heavy cream or full-fat alternatives like full whipping cream for authentic texture.
Freezes Well?
Yes, slice and wrap tightly in plastic then foil; freezes up to 2 months. Thaw in fridge overnight. Texture stays creamy; serve chilled. Avoid freezing whole to prevent sogginess.
Gluten-Free Adaptation?
Use gluten-free graham-style crumbs for crust and swap flour for 2 tbsp cornstarch or potato starch. Batter stays pourable. Results mimic the original jiggle in Japanese burnt cheesecake perfectly.
Why No Water Bath?
High-heat char needs dry oven for puff and Maillard browning in Japanese burnt cheesecake. Water baths steam gently, preventing the signature black top and rustic rise. Parchment handles moisture fine.
Japanese Burnt Cheesecake
Course: DessertCuisine: JapaneseDifficulty: easy12
servings30
minutes1
hour5
minutes420
Minutes450
kcalJapanese
Ingredients
Crust:
2 cups graham cracker crumbs
1/2 cup unsalted butter, melted
2 tablespoons granulated sugar
Filling:
32 ounces cream cheese, softened to room temperature
1 1/2 cups granulated sugar
5 large eggs, at room temperature
2 cups heavy cream, at room temperature
1/4 cup all-purpose flour
2 teaspoons vanilla extract
Directions
- Preheat oven to 400 degrees F. Grease a 9-inch springform pan, then line bottom and sides with two overlapping sheets of parchment paper, pushing into corners and letting edges extend 2 inches above rim for easy release and char development.
- Make crust: Mix graham cracker crumbs, melted butter, and sugar. Press firmly into bottom of pan. Bake 10 minutes until set. Cool slightly.
- Make filling: In a large bowl, beat softened cream cheese and sugar on low speed until smooth, about 1 minute. Avoid high speed to prevent incorporating too much air, which leads to cracks.
- Add eggs one at a time, beating on low just until combined after each. Scrape bowl as needed.
- Mix in heavy cream, flour, and vanilla on low until fully incorporated and silky, about 1 minute. Batter will be thin and pourable.
- Pour filling over crust. Tap pan firmly on counter 5 times to release air bubbles, reducing crack risk.
- Bake at 400 degrees F for 55 to 65 minutes until top is deeply charred black in spots and center jiggles like Jell-O when shaken. Edges will puff and brown.
- Turn off oven. Crack oven door 4 inches and let cheesecake cool inside undisturbed for 1 hour. This gradual cooling prevents sudden contraction and cracks.
- Remove from oven. Cool to room temperature on wire rack (about 2 hours). Refrigerate uncovered 4 hours or overnight.
- Run knife around edges, release springform. Slice and serve chilled. Stores 5 days in fridge.
Notes
- Use room temperature ingredients for smooth batter. Gradual cooling in the oven prevents cracks. Stores 5 days in fridge.