
Ah, Key Lime Pie. That glorious combination of tangy citrus and sweet, fluffy meringue, all nestled in a buttery crust. It’s a taste of sunshine! But if you’ve ever spent time crafting a beautiful meringue pie, only to watch those pristine white peaks start “weeping,” leaving sad little puddles of sugary liquid around the base, you know the heartbreak. It used to happen to me constantly, especially with my classic Key Lime Pie! That frustrating watery layer felt inevitable.
I was determined to conquer the weeping meringue. After much trial and error, testing different techniques, and a few less-than-perfect pies, I finally discovered a simple yet incredibly effective trick. This method ensures your meringue stays tall, proud, and perfectly stable, holding its shape without shedding a single sugary tear. It’s a game-changer for anyone who loves meringue-topped pies!
This recipe brings together that perfectly tart, creamy key lime filling with a meringue so stable, you’ll wonder how you ever baked without this technique. Say goodbye to sad, weepy meringue and hello to showstopping Key Lime Pie!
Why You Need This Weep-Free Key Lime Pie Recipe
Beyond solving the universal problem of meringue weep, this Key Lime Pie recipe is a winner for so many reasons. It’s a classic dessert that balances bright, tart flavors with luxurious sweetness.
- No More Tears: The central benefit, of course! The specific method for preparing the meringue eliminates the weeping issue that plagues many home bakers.
- Perfect Texture Balance: You get the smooth, creamy, slightly firm lime filling contrasting beautifully with the light, airy, slightly chewy (or crisp, depending on browning) meringue.
- Vibrant Flavor: The fresh lime juice delivers that signature zesty punch that makes Key Lime Pie so refreshing and addictive.
- Showstopping Presentation: With a stable meringue, you can create gorgeous swirls and peaks that hold their shape, making your pie look as incredible as it tastes.
Whether you’re a seasoned baker or tackling your first meringue pie, this guide gives you the tools and the secret weapon to achieve perfection.
Gathering Your Ingredients for Your Perfect Key Lime Pie
Making this Key Lime Pie requires just a few key players, but the quality and preparation of each ingredient make a real difference in the final result. Think of it like building a flavorful symphony – each part contributes to the overall harmony.
We start with the foundation:
- Pre-baked 9-inch Pie Crust: This saves time and ensures the crust is properly cooked before the filling goes in. You can use a store-bought graham cracker crust for convenience, or if you prefer a flaky pastry, make your own and pre-bake it until golden. Just make sure it’s cool enough to handle before adding the filling.
Next, the heart of the pie – the tangy, sweet filling:
- 1 can (14 ounces) Sweetened Condensed Milk: This magical ingredient does double duty, providing both sweetness and the necessary structure for the filling. It reacts with the acidity of the lime juice to thicken beautifully as it bakes. Make sure it’s sweetened condensed milk, not evaporated milk!
- 4 Large Egg Yolks: The yolks contribute richness and help set the filling to that perfectly creamy consistency. Separate them carefully from the whites, as any trace of yolk in the whites will prevent your meringue from whipping up properly.
- 1/2 cup Fresh Key Lime Juice (or regular lime juice): Fresh is non-negotiable for the brightest, most authentic Key Lime Pie flavor. While Key limes are traditional and offer a unique floral aroma and tartness, regular lime juice (from Persian limes) works perfectly well and is often easier to find. Just make sure it’s freshly squeezed!
And finally, the star of the show – the stable meringue:
- 4 Large Egg Whites: Saved from separating the yolks for the filling! Ensure they are completely free of any yolk. Room temperature egg whites whip up to a greater volume, though the heating step in this recipe mitigates the need for them to be precisely at room temp beforehand.
- 1 cup Granulated Sugar: The sugar sweetens the meringue and, crucially in our weep-proof method, helps stabilize the egg white structure.
- 1/4 teaspoon Cream of Tartar (optional): This acidic powder helps stabilize the egg foam, making it less likely to collapse and easier to achieve stiff peaks. While optional with our heated meringue technique, it provides extra insurance.
Don’t forget the optional, but lovely, garnishes:
- Lime slices and fresh mint leaves: These add a touch of fresh color and aroma, enhancing the visual appeal and hinting at the vibrant flavors within.
Having all your ingredients measured and ready before you start (this is called “mise en place”) makes the process much smoother!
Crafting the Dream: Making Your Key Lime Pie
Ready to bake? This process involves two main parts: making and baking the filling, and then preparing and adding the perfect meringue. Follow these steps closely for the best results.
- Get Your Oven Ready: Begin by preheating your oven to 350°F (175°C). This ensures the oven is at the correct temperature from the moment the pie goes in, which is important for the filling to set correctly.
- Mix the Sunshine Filling: In a medium bowl, grab your whisk. Combine the entire can of sweetened condensed milk, the four egg yolks, and the fresh lime juice. Whisk everything together until you have a mixture that is uniformly combined and you’ll notice it starts to thicken ever so slightly. This thickening is the lime juice reacting with the condensed milk, a classic quick-set trick! Once combined, pour this vibrant, tangy filling directly into your pre-baked pie crust.
- Bake the Filling: Carefully place the pie with the filling into your preheated oven. Bake for 15 to 20 minutes. You’re looking for the filling to be mostly set around the edges, but still have a slight wobble or softness right in the center. This ensures the filling is cooked through but remains creamy. Remove the pie from the oven and place it on a wire rack. Let it cool slightly while you prepare the meringue. This slight cooling is important, but you want the pie filling to still be warm when the meringue goes on, as this helps the meringue “set” onto the filling and prevents shrinkage at the edges.
- Prepare the Meringue with the Magic Trick: This step is the absolute key to preventing weeping! Set up a double boiler. You’ll need a heatproof bowl (glass or metal works well) that fits snugly over a pot of simmering water, making sure the bottom of the bowl does not touch the water. In this heatproof bowl, combine your four egg whites and the cup of granulated sugar. Place the bowl over the simmering water. Now, grab a whisk and whisk constantly. Keep whisking until you can no longer feel any sugar granules when you rub a tiny bit of the mixture between your fingers, and the mixture is warm to the touch, reaching about 160°F (70°C) on an instant-read thermometer. This process does two wonderful things: it fully dissolves the sugar, which is crucial for a stable meringue structure, and it safely pasteurizes the egg whites.
- Whip the Meringue: Carefully remove the heatproof bowl from the pot of simmering water. If you’re using it, add the cream of tartar now. Using an electric mixer (a stand mixer is ideal, but a hand mixer works too), start beating the egg white mixture on high speed. You’ll beat it for quite a while, typically between 5 to 10 minutes. Watch as the mixture transforms from a foamy liquid into a thick, bright white, glossy cloud. You’re looking for stiff peaks – when you lift the beaters, the meringue should stand straight up and hold its shape firmly. Don’t under-beat!
- Top the Warm Pie: As soon as your meringue is ready (stiff, glossy peaks!), immediately scoop or spoon it onto the warm Key Lime Pie filling. Spread the meringue right to the edges of the crust, ensuring you seal it completely all around. This thorough sealing helps prevent the meringue from shrinking away from the crust as it cools and is another important factor in avoiding weeping. Get creative! Use the back of a spoon or a spatula to create beautiful swirls and peaks on top.
- Brown the Meringue: Now for that beautiful golden finish! You have two options:
- Oven Method: Place the pie back into the preheated oven for 5 to 10 minutes. Keep a close eye on it! The peaks will turn a lovely golden brown.
- Kitchen Torch Method: This gives you more control over the browning and is much faster. Use a kitchen torch to carefully brown the peaks of the meringue to your desired shade. This method is quicker and prevents any potential over-baking of the filling.
Either way, brown it just until the tips are golden.
- Cool and Chill Patiently: This is perhaps the hardest part – waiting! Let the pie cool completely at room temperature for at least 2 to 3 hours. Do NOT rush this or put a hot pie directly into the fridge. Cooling slowly at room temperature allows the filling and meringue to set properly. After it’s cooled to room temperature, transfer the pie to the refrigerator. Chill it for at least 4 hours before slicing and serving. Chilling is essential for the filling to firm up completely and helps maintain the meringue’s stability.
My Secret Trick: How to Stop Weepy Meringue
Let’s circle back to the real magic here, because mastering meringue can feel like unlocking a baking superpower! The technique described in step 4 – heating the egg whites and sugar over a double boiler before whipping – is borrowed from Italian meringue principles and makes all the difference.
Why does this work to prevent weeping? Traditional meringue (French meringue) is simply raw egg whites whipped with sugar. If the sugar isn’t perfectly dissolved or if the humidity is high, the sugar crystals can attract moisture from the air and the egg whites, leading to those dreaded sugary puddles.
By heating the egg whites and sugar to 160°F (70°C):
- You Fully Dissolve the Sugar: The heat ensures every single sugar crystal is dissolved into the egg whites, creating a smooth, stable syrup. This prevents sugar from weeping out later.
- You Partially Cook the Egg Whites: While not fully cooked like a boiled meringue, gently heating the mixture starts to coagulate the egg white proteins. This initial cooking creates a stronger, more stable protein structure that can hold air better and is less likely to break down and release liquid.
- It’s Safer: Heating to 160°F (70°C) also pasteurizes the egg whites, which is an added bonus for food safety.
This method creates what’s sometimes called a “Swiss” meringue (or the base for Italian meringue if hot syrup is poured in). The resulting meringue is incredibly stable, smooth, and less prone to shrinkage and weeping. It takes a few extra minutes upfront, but the payoff is a perfect meringue every single time. If you enjoy experimenting with different types of meringue or creamy desserts, you might also be interested in techniques used for creamy baked cheesecake or even lighter treats like a refreshing strawberry trifle.
Tips for Success & Delicious Variations
Even with the weep-proof trick, a few general baking tips can ensure your Key Lime Pie turns out perfectly:
- Egg Temperature Matters (Still): While the heating step helps, separating cold eggs is easier and less messy. Once separated, let the whites sit for 20-30 minutes before heating if time allows, though the heating step is the most critical factor for stability. Ensure your bowl and whisk are impeccably clean and grease-free – any fat residue will prevent the whites from whipping.
- Don’t Skip the Cooling Time: I know the wait is tough, but letting the pie cool completely at room temperature and then chilling it thoroughly in the refrigerator is essential for both the filling and the meringue to set properly. Patience is rewarded with clean slices!
- Humidity is the Enemy: Meringue is notoriously sensitive to humidity. Try to make this pie on a dry day if possible. High humidity can still cause even stable meringues to soften slightly.
- Crust Options: While a graham cracker crust is classic, a buttery shortcrust pastry is also delicious. If using a pastry crust, ensure it’s fully blind-baked and cooled before adding the filling to prevent a soggy bottom. Mastering pie crusts is a valuable skill, and techniques for avoiding sogginess can be applied to many pies, including something like an ultimate anti-soggy bottom apple pie.
- Flavor Boost: For an extra punch of citrus, you can add a teaspoon of lime zest to the filling mixture.
- Garnish Creatively: Beyond lime slices and mint, consider adding a sprinkle of toasted coconut flakes or a dusting of powdered sugar (just before serving!).
Serving Your Sunshine Slice
Serving Key Lime Pie is straightforward. Once it’s fully chilled, use a sharp knife to slice it. Running the knife under hot water and wiping it clean between slices can help you get neat cuts, especially through the meringue. A slice of this pie is a perfect ending to any meal, offering a bright, refreshing counterpoint to richer dishes. It’s particularly lovely after seafood or grilled meals.
Your Key Lime Pie Questions Answered (FAQ)
Got questions about making this delightful pie? Here are some common ones:
Why did my meringue weep in the past?
Traditional meringues often weep because the sugar wasn’t fully dissolved, or the egg whites weren’t cooked. The sugar crystals can attract moisture, leading to syrupy puddles. The heat-treating method in this recipe solves both of these issues by dissolving the sugar completely and creating a more stable protein structure.
Can I use bottled lime juice instead of fresh?
While technically you can use bottled juice, the flavor will not be as bright, fresh, or nuanced as using freshly squeezed limes. Key lime flavor is particularly delicate, and bottled versions often have preservatives or can taste slightly metallic. For the best Key Lime Pie experience, fresh juice is highly recommended.
Do I really need Key limes?
Authentically, yes! But good quality Persian lime juice (the common green limes found in most grocery stores) makes a delicious pie that most people won’t distinguish from a “true” Key lime pie. Key limes are smaller, yellower when ripe, and have a slightly different aroma and tartness, but regular limes are a perfectly acceptable substitute.
Can I make this pie ahead of time?
Yes, you can! The pie needs significant cooling and chilling time anyway. You can make the pie (bake filling, add and brown meringue) a day in advance. Ensure it cools completely at room temperature before refrigerating. Store it loosely covered in the refrigerator. For best meringue appearance, it’s ideal to serve it within 24-48 hours of adding the meringue, as even stable meringues can eventually be affected by prolonged refrigeration or humidity.
How do I store leftover Key Lime Pie?
Store any leftover slices (if there are any!) loosely covered in the refrigerator. A pie saver or a dome lid is ideal to prevent the meringue from getting smushed and to minimize exposure to moisture. It’s best eaten within a few days.
My meringue isn’t getting stiff peaks! What went wrong?
The most common culprits are even tiny traces of egg yolk or grease (from your bowl or whisk) in the egg whites. Ensure your equipment is spotless. Also, under-beating is a possibility; keep whipping on high speed until those peaks are truly stiff and glossy. Make sure you also heated the mixture sufficiently to dissolve the sugar.
Time to Bake!
Armed with this simple yet powerful technique, you’re ready to make a Key Lime Pie that will impress everyone who tries it. That tart, creamy filling capped with gorgeous, stable meringue is a truly satisfying achievement. No more puddles, just perfect slices of sunshine.
Give this recipe a try and say goodbye to weepy meringue forever! I can’t wait to hear how yours turns out. Leave a comment below and let me know your favorite part of this classic dessert!
Key Lime Pie

Ingredients
- 1 pre-baked 9-inch pie crust
- 1 can (14 ounces) sweetened condensed milk
- 4 large egg yolks
- 1/2 cup fresh key lime juice (or regular lime juice)
- 4 large egg whites
- 1 cup granulated sugar
- 1/4 teaspoon cream of tartar (optional, helps stabilize meringue)
- Lime slices and fresh mint leaves for garnish (optional)
Directions
- Preheat oven to 350F (175C).
- In a medium bowl, whisk together the sweetened condensed milk, egg yolks, and lime juice until well combined and slightly thickened. Pour the filling into the pre-baked pie crust.
- Bake the pie for 15-20 minutes, or until the filling is set around the edges but slightly soft in the center. Remove from oven and let cool slightly while you prepare the meringue.
- This is the trick to prevent weeping meringue: Combine the egg whites and granulated sugar in a heatproof bowl set over a pot of simmering water (make sure the bottom of the bowl doesn’t touch the water). Whisk constantly until the sugar is completely dissolved and the mixture is warm to the touch (about 160F / 70C). This pasteurizes the egg whites and dissolves the sugar fully, creating a much more stable meringue structure.
- Carefully remove the bowl from the heat. Add the cream of tartar (if using). Using an electric mixer, beat the egg white mixture on high speed until stiff, glossy peaks form. This will take 5-10 minutes.
- Immediately spread the meringue over the warm pie filling, making sure to seal the meringue completely to the crust all around the edges. This helps prevent shrinkage and weeping. Create decorative swirls and peaks with a spoon or spatula.
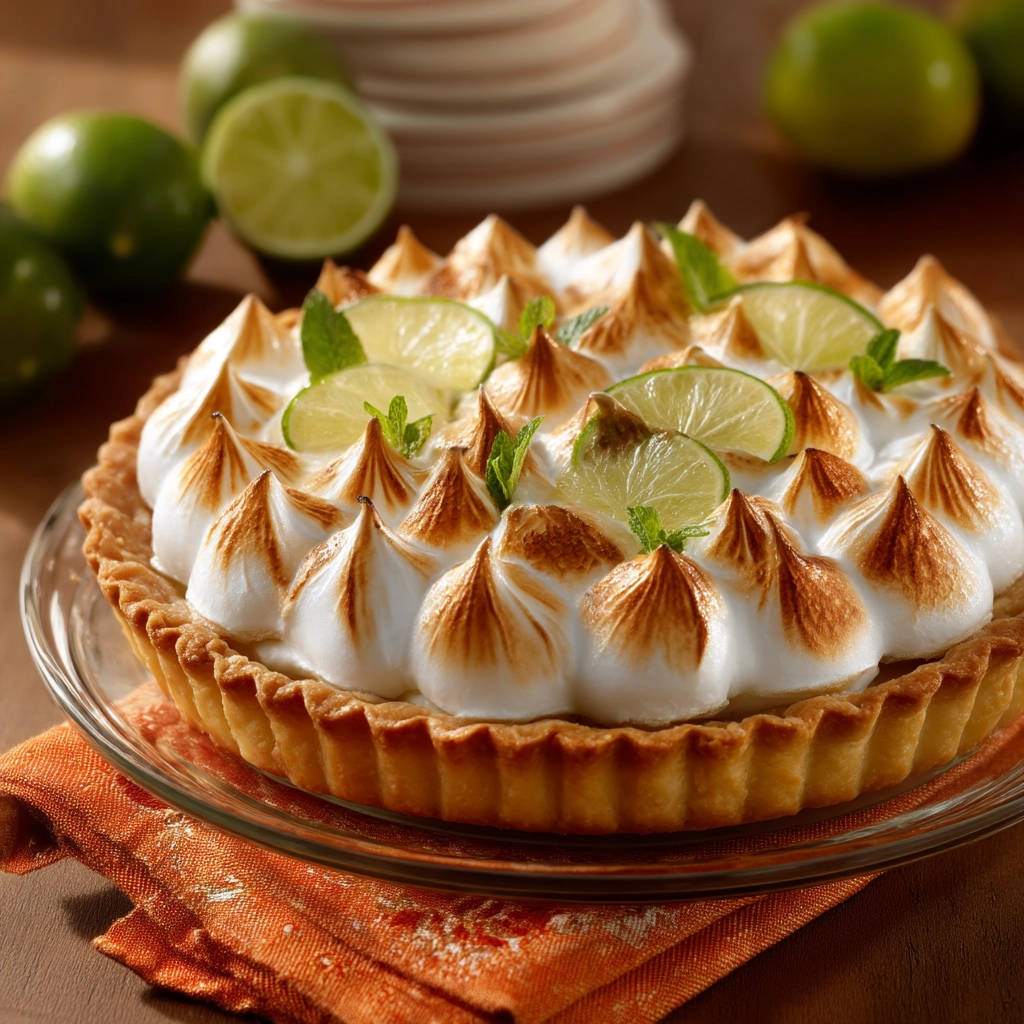
- To brown the meringue, you can place the pie back in the oven for 5-10 minutes until lightly golden on the peaks, or use a kitchen torch for quicker, more controlled browning as shown in the image.
- Let the pie cool completely at room temperature for at least 2-3 hours before refrigerating. Chill for at least 4 hours before slicing. Garnish with lime slices and mint, if desired. Storing it in the refrigerator after cooling will also help keep the meringue stable.