
Oh, friends. Let’s talk about dessert disasters. You spend time layering up something beautiful, anticipating that perfect bite, only to discover the bottom crust has turned into a sad, mushy disappointment. I’ve been there! So many gorgeous layered desserts have fallen victim to the dreaded soggy bottom, leaving me feeling defeated.
But guess what? I finally cracked the code, and it involves the most glorious ingredient combination known to humankind: peanut butter and chocolate! This isn’t just any treat; this is the Layered Peanut Butter Chocolate Dream – and it comes with a simple, game-changing trick to ensure your graham cracker crust stays crisp, exactly as it should.
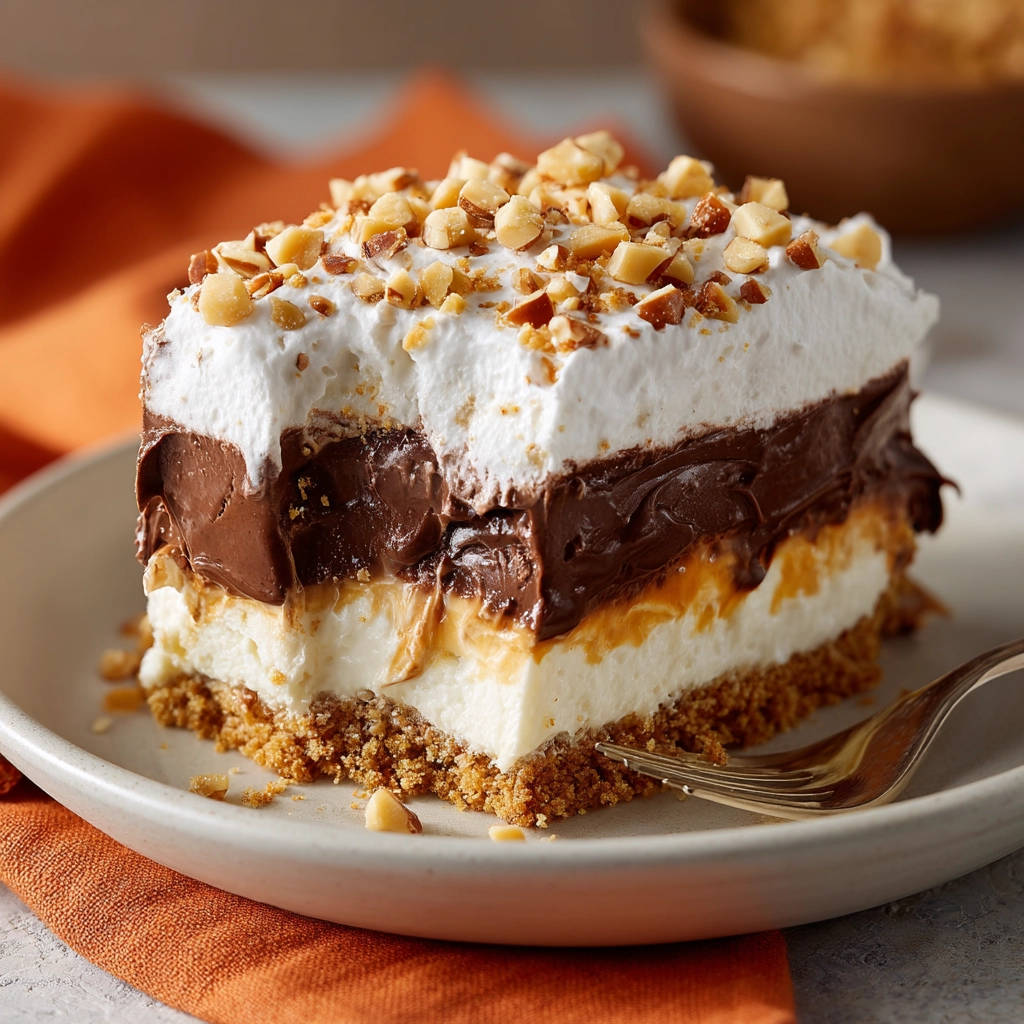
Say goodbye to soggy crusts forever. This recipe guarantees layers of creamy, chocolatey, peanut buttery bliss with a satisfyingly firm foundation every single time. It’s a no-bake marvel that’s easy to assemble but impressive enough for any gathering. Get ready to make dessert dreams come true!
Why You’ll Fall Head Over Heels for This Dessert
Beyond the promise of a crisp crust, there are so many reasons this Layered Peanut Butter Chocolate Dream will become a regular in your dessert rotation:
- It’s No-Bake: Perfect for warm weather, holidays, or when you just don’t feel like turning on the oven. Easy peasy!
- The Flavor Combo is Iconic: Peanut butter and chocolate are a match made in heaven. This dessert delivers on that classic pairing in multiple delightful textures.
- Foolproof Crust: Seriously, the anti-soggy secret works! You get that satisfying crunch with every spoonful.
- Easy Assembly: While there are layers, none are complicated. It’s mostly mixing, spreading, and chilling.
- Crowd Pleaser: Who doesn’t love peanut butter and chocolate? This dessert disappears fast at potlucks, parties, and family dinners.
- Make Ahead Friendly: It actually needs to chill, making it ideal for preparing in advance.
Gathering Your Ingredients for Layers of Dreamy Bliss
Part of the magic of this Layered Peanut Butter Chocolate Dream lies in its accessibility. You won’t need obscure ingredients, just pantry staples and a few fresh items from the dairy aisle. The key is selecting quality components that build those distinct, delicious layers. Let’s walk through what you’ll need and why each part is important.
For our perfectly crisp foundation, we start with:
- Graham Cracker Crumbs: About 1 ½ cups, which is roughly equivalent to 10 full graham cracker sheets. You can buy pre-crushed crumbs for convenience, or easily crush your own in a food processor or by placing them in a bag and crushing with a rolling pin. Freshly crushed tends to have a slightly better texture.
- Unsalted Butter: ½ cup, melted. Butter is essential for binding the graham cracker crumbs together, creating a cohesive crust that holds its shape once chilled. Using unsalted butter gives you control over the saltiness, allowing the other flavors to shine.
- Granulated Sugar (Optional): ¼ cup. Adding a little sugar to the crust enhances the sweetness and helps with browning slightly if you were baking it, but in a no-bake crust like this, it primarily adds a touch more sweetness to balance the rich layers above. It’s optional, so feel free to omit if you prefer a less sweet crust.
Now for the star of our anti-soggy strategy, and the first layer of creamy, nutty goodness:
- Smooth Peanut Butter: ½ cup. This is the secret ingredient! Melted gently, it creates a thin, impermeable layer over the graham cracker crust. This barrier prevents moisture from the subsequent creamy layers from seeping into the crust and making it soggy. Smooth peanut butter works best for achieving an even, thin spread.
Next, the rich, tangy cream cheese layer:
- Cream Cheese: 8 ounces, softened. Make sure your cream cheese is fully softened to room temperature before you start mixing. This is crucial for achieving a smooth, lump-free texture in this layer.
- Powdered Sugar: 1 cup. Also known as confectioners’ sugar, this sweetens the cream cheese layer and dissolves easily, ensuring a silky-smooth consistency.
- Vanilla Extract: 1 teaspoon. Pure vanilla extract adds a lovely warmth and depth of flavor that complements both the peanut butter and chocolate layers.
- Whipped Topping: 1 container (8 ounces), divided. A store-bought whipped topping like Cool Whip adds lightness and airiness to both the cream cheese layer (using half the container) and serves as the final topping (using the remaining half). It provides stability that homemade whipped cream sometimes lacks in layered desserts.
And, of course, the decadent chocolate layer:
- Instant Chocolate Pudding Mix: 1 package (3.9 ounces). Using instant pudding mix is a quick way to get a thick, flavorful chocolate layer that sets up beautifully without needing to cook anything. Make sure it’s instant, not cook-and-serve.
- Cold Milk: 2 cups. Cold milk is essential for activating the setting agents in instant pudding mix. Using very cold milk helps it thicken properly and quickly.
Finally, the essential finishing touches for texture and extra flavor:
- Chopped Roasted Peanuts: ½ cup. These add a fantastic crunch and reinforce the peanut butter flavor in a delightful way. Roasted peanuts have a deeper, nuttier taste.
- Mini Chocolate Chips: ¼ cup. A sprinkle of mini chocolate chips on top is the perfect visual cue and adds little pockets of intense chocolate flavor and texture.
Crafting Your Layered Peanut Butter Chocolate Dream: Step-by-Step Sweet Success
Ready to build this masterpiece? Don’t be intimidated by the layers; each step is simple and straightforward. Follow these steps, and you’ll be well on your way to dessert nirvana. Remember to read through everything before you begin!
Prepare the Graham Cracker Base: Start by getting your pan ready. A standard 9×13 inch baking pan is perfect for this recipe, yielding ample squares. In a medium-sized mixing bowl, combine your graham cracker crumbs, the ½ cup of melted unsalted butter, and the optional ¼ cup of granulated sugar, if you’re using it. Stir everything together with a fork or spoon until the crumbs are evenly moistened by the butter. The mixture should resemble wet sand. Pour this mixture into the bottom of your prepared pan. Now, and this is important for a good crust, press the crumbs down firmly and evenly. You can use the bottom of a glass or a flat measuring cup to really compact the crumbs into the bottom of the pan. This creates a solid base for the layers to rest on.
Apply the Anti-Soggy Secret Layer: This is the key to your success! Take your ½ cup of smooth peanut butter and melt it gently. You can do this in a microwave-safe bowl in 20-30 second intervals, stirring between each, until it’s smooth and easily spreadable, but not hot. Alternatively, use a small saucepan over very low heat, stirring constantly. Once melted to a spreadable consistency, carefully pour or spoon it over the pressed graham cracker crust. Using an offset spatula or the back of a spoon, gently spread the melted peanut butter into a thin, even layer covering the entire crust right up to the edges. This layer acts as a protective shield, creating a barrier that prevents moisture from the upper layers from softening your crisp crust. It’s a simple step, but utterly essential!
Assemble the Cream Cheese Layer: In a large mixing bowl, use an electric mixer (handheld or stand mixer) to beat the softened 8 ounces of cream cheese and 1 cup of powdered sugar together until the mixture is completely smooth and free of lumps. Scrape down the sides of the bowl as needed. Next, add ½ cup of the whipped topping and the 1 teaspoon of vanilla extract. Gently fold these in with a spatula until just combined. Be careful not to overmix at this stage, as you want to keep the airy texture from the whipped topping. Spread this creamy, dreamy mixture evenly over the peanut butter layer in the pan. Take your time to get it smooth.
Prepare and Add the Chocolate Pudding Layer: In a separate bowl, whisk together the 3.9 ounce package of instant chocolate pudding mix and the 2 cups of cold milk. Whisk vigorously for about 2 minutes, until the mixture starts to thicken significantly. Don’t worry if it seems a bit loose at first, it will firm up. Let the mixture stand for 5 minutes; this allows the pudding to set further and reach its final consistency. Once thickened, carefully pour and spread the chocolate pudding layer evenly over the cream cheese layer. An offset spatula works well here to gently smooth it out without disturbing the layer beneath.
Top with Whipped Cream: Take the remaining whipped topping from the container. Spoon or spread this evenly over the chocolate pudding layer, covering it completely. You can make it smooth and flat or create gentle swirls with the back of a spoon for a more decorative finish.
Add the Final Touches: Sprinkle the ½ cup of chopped roasted peanuts and the ¼ cup of mini chocolate chips evenly over the top whipped topping layer. These additions provide visual appeal, a delightful textural contrast, and extra bursts of flavor.
Chill Time is Essential: This dessert requires significant chilling time for the layers to set up properly and for the flavors to meld. Cover the baking pan tightly with plastic wrap or aluminum foil. Refrigerate for at least 4 hours. For the best results, especially for clean slicing and maximum firmness, chilling it overnight is highly recommended.
Slice and Serve: Once thoroughly chilled and set, the dessert is ready! Use a sharp knife to cut it into squares. For the cleanest cuts, you can dip the knife in hot water and wipe it clean between slices. Serve the Layered Peanut Butter Chocolate Dream chilled. Get ready for happy sighs and requests for the recipe!
Tips for Perfect Layered Peanut Butter Chocolate Dream Every Time
Making this dessert is quite simple, but a few tips can elevate it from great to absolutely perfect:
- Room Temperature Cream Cheese: I cannot stress this enough! Cold cream cheese is impossible to beat smooth and will leave you with frustrating lumps in your creamy layer. Take it out of the fridge at least an hour or two before you plan to mix.
- Gentle Peanut Butter Melting: When melting the peanut butter for the crust barrier, use low heat or short bursts in the microwave. You want it spreadable, not hot or separated. Overheating can change its texture and effectiveness.
- Press the Crust Firmly: A well-compacted crust holds its shape better and provides a solid base for the peanut butter barrier and subsequent layers. Don’t be shy with the pressing!
- Cold Milk for Pudding: Ensure your milk is as cold as possible. This helps the instant pudding set up quickly and correctly.
- Chill, Chill, Chill!: Resist the urge to cut into it too soon. The minimum 4 hours is okay, but overnight chilling makes a world of difference in firmness and flavor integration.
- Clean Slices: As mentioned in the steps, dipping your knife in hot water and wiping it clean between cuts makes slicing this layered beauty much easier and results in prettier squares.
Delicious Variations to Try
Want to mix things up? This recipe is forgiving and lends itself well to variations (just remember, no alcohol or pork!):
- Different Pudding Flavors: While chocolate is classic, you could try vanilla, butterscotch, or even white chocolate pudding for a different twist.
- Cookie Crust: Instead of graham crackers, try crushing other cookies like chocolate wafers, peanut butter cookies, or even Funfetti cookies for a playful base.
- Alternate Toppings: Drizzle with melted chocolate or caramel, sprinkle with chopped peanut butter cups, mini marshmallows, or even flaky sea salt for a sweet and salty kick. If you’re a caramel fan, you might also enjoy our Chocolate Caramel Pecan Cookies.
- Nut-Free Version: For those with nut allergies, substitute sunflower seed butter for peanut butter and use pretzels or crushed cookies without nuts for the crust. Omit the peanuts on top and use extra chocolate chips or crushed pretzels.
Your Layered Peanut Butter Chocolate Dream Questions Answered (FAQ)
Got questions? You’re not alone! Here are some common inquiries about making this delightful layered dessert.
Is there a specific type of peanut butter I should use for the barrier layer?
Yes, smooth, processed peanut butter (like Jif or Skippy) works best for the anti-soggy layer. Natural peanut butters can sometimes separate when melted, making it harder to create that even, thin barrier. For the creampie filling layer itself, you can be more flexible if substituting, but for the crust barrier, stick with smooth.
Can I use homemade whipped cream instead of store-bought whipped topping?
You can, but be aware that homemade whipped cream can be less stable and might not hold up quite as firmly over time compared to stabilized whipped topping. If you use homemade, make sure it’s whipped to stiff peaks, and the dessert might be best enjoyed within 24-36 hours.
Why did my crust still turn out soggy?
There are a few potential culprits. Ensure you pressed the graham cracker crust down very firmly to create a dense base. Most importantly, make sure you applied the melted peanut butter layer evenly, covering the entire crust. Any gaps can allow moisture through. Finally, ensure the dessert is chilled for the full recommended time, preferably overnight, to allow all the layers to set properly.
How long does this dessert last in the refrigerator?
Properly covered, this Layered Peanut Butter Chocolate Dream will last for 3-4 days in the refrigerator. The crust should remain crisp thanks to the peanut butter barrier.
Can I freeze this dessert?
While you can freeze it, the texture of the cream cheese and whipped topping layers might change slightly upon thawing. It’s definitely best enjoyed fresh and chilled from the refrigerator.
What size pan is best for this recipe?
A 9×13 inch baking pan is ideal for the quantities listed in this recipe. It creates the perfect thickness for the layers.
Can I make mini versions?
Absolutely! You could assemble this in individual parfait glasses or even muffin tins lined with paper liners (press crust into bottom, layer, then chill). The chilling time might be slightly reduced for smaller portions.
Enjoy Your Homemade Layered Peanut Butter Chocolate Dream!
There you have it! Your new go-to recipe for a spectacular, easy, no-bake dessert that celebrates the magical combination of peanut butter and chocolate, all while keeping that graham cracker crust delightfully crisp. No more soggy bottoms, just pure, layered perfection.
Whether you’re making it for a holiday, a casual get-together, or just because you deserve a treat, this Layered Peanut Butter Chocolate Dream is guaranteed to impress. Give it a try, and prepare for rave reviews!
Did you make this dessert? I’d love to hear about it! Leave a comment below and let me know how it turned out and if you tried any fun variations. Happy baking (or rather, non-baking)!
Layered Peanut Butter Chocolate Dream

Ingredients
- 1 1/2 cups graham cracker crumbs (about 10 full sheets)
- 1/2 cup melted unsalted butter
- 1/4 cup granulated sugar (optional, for crust)
- 1/2 cup smooth peanut butter, melted slightly for spreading
- 8 ounces cream cheese, softened
- 1 cup powdered sugar
- 1 teaspoon vanilla extract
- 1 container (8 ounces) whipped topping, divided
- 1 package (3.9 ounces) instant chocolate pudding mix
- 2 cups cold milk
- 1/2 cup chopped roasted peanuts, for topping
- 1/4 cup mini chocolate chips, for topping
Directions
- In a medium bowl, combine graham cracker crumbs, melted butter, and sugar (if using). Press firmly into the bottom of a 9×13 inch baking pan.
- The Anti-Soggy Secret: Melt the 1/2 cup peanut butter gently until spreadable. Carefully spread a thin, even layer of melted peanut butter over the pressed graham cracker crust. This creates a barrier that protects the crust from the moisture in the layers above.
- In a large bowl, beat the softened cream cheese and powdered sugar until smooth. Stir in 1/2 cup of the whipped topping and the vanilla extract until well combined. Spread this mixture evenly over the peanut butter layer in the pan.
- In another bowl, whisk together the instant chocolate pudding mix and cold milk until thickened. Let stand for 5 minutes. Pour and spread the chocolate pudding layer evenly over the cream cheese layer.
- Spread the remaining whipped topping over the chocolate pudding layer.
- Sprinkle the chopped peanuts and mini chocolate chips over the top.
- Cover and refrigerate for at least 4 hours, or preferably overnight, to allow the layers to set completely.
- Cut into squares and serve chilled.