Have you ever experienced the disappointment of a dry, crumbly lemon cake? I certainly have, countless times! After years of experimentation, I finally cracked the code to consistently baking a lemon cake that’s not just moist, but incredibly tender and bursting with bright, zesty flavor, every single time.
This recipe, with its simple yet game-changing secret, transforms ordinary lemon cake into an unforgettable dessert, perfect for any occasion. Prepare to impress everyone with this delightfully moist and flavorful creation.
Why This Lemon Cake Stands Out: Beyond Basic Baking
This isn’t just another lemon cake recipe; it’s a masterclass in achieving unparalleled moisture and vibrant flavor. My unique approach tackles common baking frustrations head-on, ensuring a truly exceptional result.
The Game-Changing Secret to Endless Moisture
The magic of this lemon cake lies in a simple syrup, poured over the warm cake straight from the oven. This crucial step allows the cake to fully absorb the liquid, locking in moisture and preventing any dryness.
It creates an unbelievably tender crumb that stays fresh for days. Say goodbye to dry, crumbly cakes forever!
A Burst of Bright, Zesty Flavor in Every Bite
We maximize lemon flavor by incorporating both fresh lemon zest and juice directly into the cake batter. The zesty lemon syrup then amplifies this citrusy goodness, creating layers of flavor.
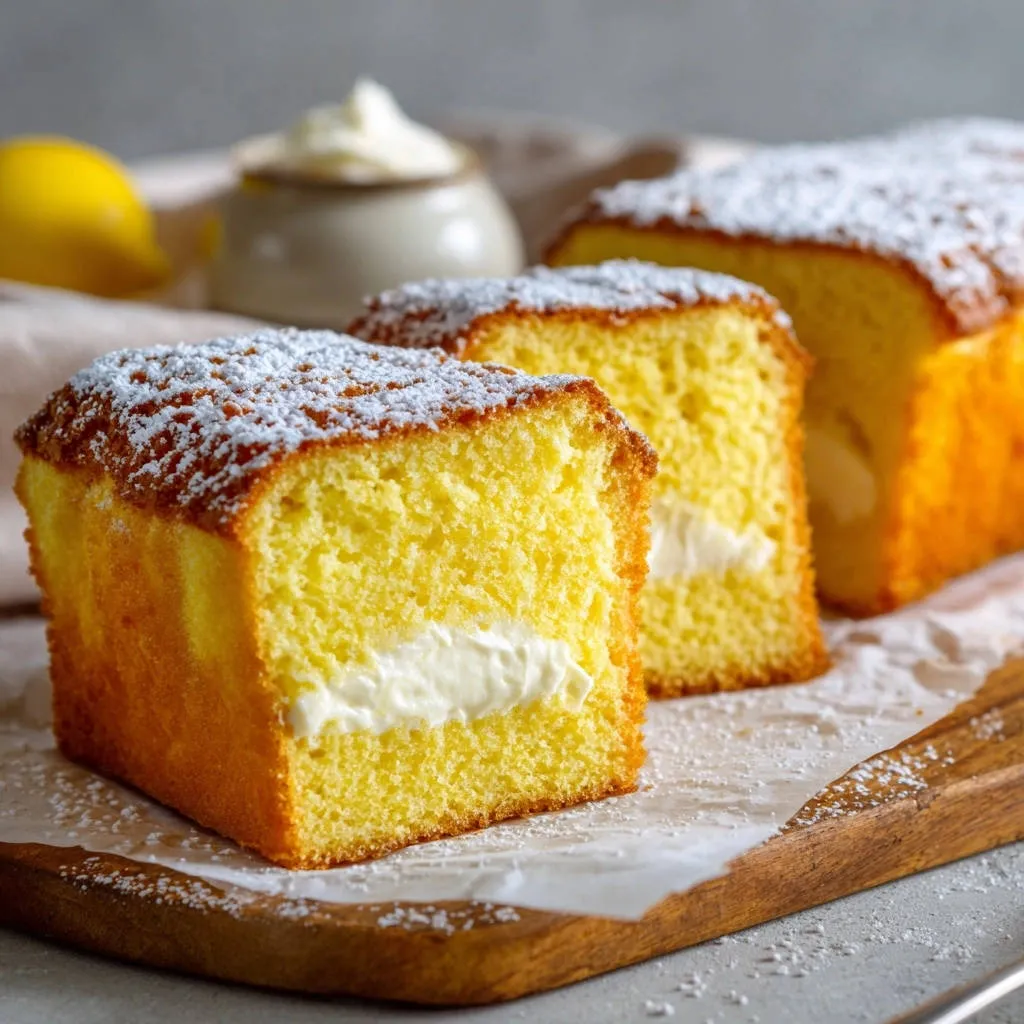
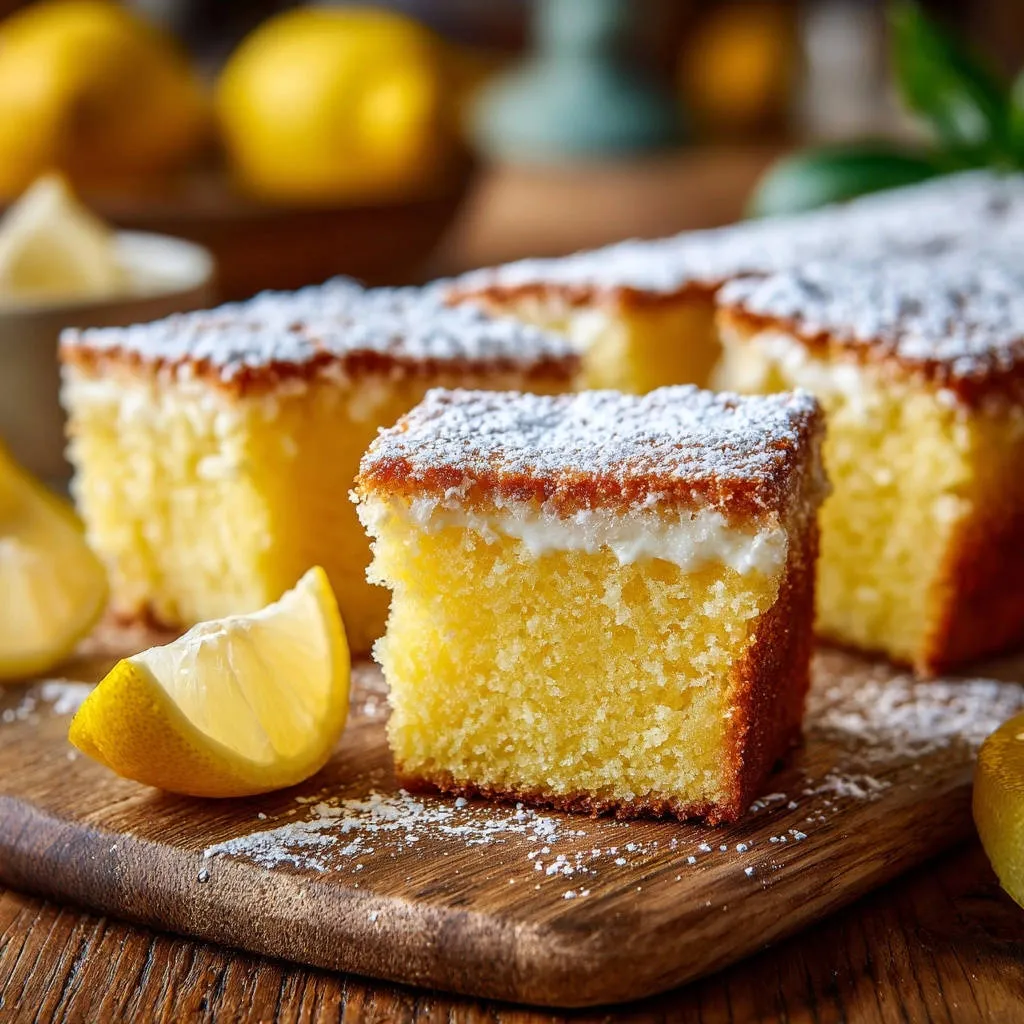
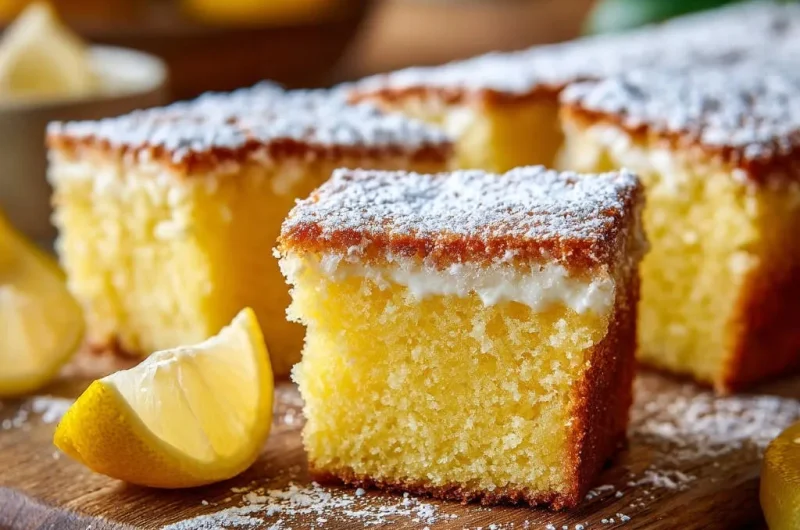
Finally, a bright lemon glaze provides a delightful tart finish, making every bite a refreshing experience. This ensures a truly vibrant and authentic lemon taste throughout.
Simple Steps, Consistently Stunning Results
Despite its gourmet taste and texture, this lemon cake recipe is surprisingly straightforward. I’ve broken down each step to be clear and easy to follow, making it achievable for bakers of all skill levels.
You’ll achieve professional-level results with minimal fuss, building confidence in your baking journey. It’s a foolproof method for a consistently stunning lemon cake.
Gathering Your Ingredients for Zesty Bliss
High-quality ingredients are the foundation of any great bake, especially for this exquisite lemon cake. Here’s a closer look at what you’ll need and why each component is essential.
Foundation of Flavor: Dry Essentials
All-purpose flour: Provides the necessary structure for the cake, ensuring it holds its shape while remaining tender. Sifting it can also help achieve a lighter crumb.
Baking powder: This leavening agent creates air bubbles, giving the cake its beautiful rise and airy texture. Proper measurement is crucial for success.
Salt: A small amount of salt balances the sweetness and enhances all the other flavors in the cake. It brings out the vibrant lemon notes beautifully.
The Moisture Makers: Dairy & Fats
Unsalted butter, softened: Butter adds richness, flavor, and contributes significantly to the cake’s tender crumb. Softened butter creams easily with sugar, incorporating air for a light texture.
Large eggs: Eggs provide structure, moisture, and help bind the ingredients together. They also contribute to the cake’s beautiful golden color.
Buttermilk: Buttermilk reacts with the baking powder to create a super tender crumb. Its slight acidity also adds a subtle tang that complements the lemon perfectly.
Unlocking Pure Lemon Vibrancy
Fresh lemon zest: The zest contains essential oils that deliver intense, aromatic lemon flavor without adding excess liquid. Always opt for fresh over dried for maximum impact.
Fresh lemon juice: Used in the cake, syrup, and glaze, fresh lemon juice provides the bright, tart, and refreshing notes. Bottled juice simply cannot compare in flavor intensity.
Syrup & Glaze Perfection
Granulated sugar (for syrup): Dissolves into the warm lemon juice to create the magical moistening syrup. It adds sweetness and helps the syrup penetrate the cake.
Powdered sugar (for topping): Creates a smooth, pourable glaze that sets beautifully. Its fine texture ensures a lump-free topping.
Milk (for topping): Helps achieve the ideal consistency for the lemon glaze. You can adjust the amount slightly to make it thicker or thinner to your preference.
Essential Tools for Your Lemon Cake Adventure
Having the right tools ready makes the baking process smooth and enjoyable. These are the essentials for creating your perfect lemon cake:
8×8 Inch Square Baking Pan: Ensures proper cake thickness and even baking for this specific recipe. It’s the ideal size for achieving the moist interior.
Mixing Bowls & Whisk: Necessary for thoroughly combining both dry and wet ingredients separately before combining them. A good whisk ensures no lumps.
Small Saucepan: Crucial for preparing the warm lemon syrup that imbues the cake with its signature moisture. It allows for gentle heating and dissolving of sugar.
Skewer or Toothpick: Essential for creating the strategic holes to allow maximum syrup absorption – this is the core secret for ultimate moistness!
Wire Cooling Rack: Allows air circulation around the cake, ensuring uniform cooling. This prevents condensation from making the bottom soggy and helps the cake set properly.
Your Step-by-Step Guide to Lemon Cake Perfection
Follow these detailed steps to create a lemon cake that’s truly a delight for the senses. Each instruction is designed to guide you to moist, flavorful perfection.
Prepare Your Baking Environment: Preheat your oven to 350°F (175°C). Thoroughly grease and flour an 8×8 inch square baking pan.
Proper pan preparation is absolutely key to preventing sticking and ensuring an easy release of your beautifully baked lemon cake.
Whisk Dry Ingredients: In a medium bowl, combine the all-purpose flour, baking powder, and salt. Whisk them together thoroughly to ensure all leavening agents are evenly distributed, then set aside.
This step ensures that your cake will rise uniformly and have a consistent texture.
Cream Butter and Sugar: In a large bowl, using an electric mixer, cream together the softened unsalted butter and 1 cup of granulated sugar until the mixture is light and fluffy, about 2-3 minutes.
Proper creaming incorporates air, which is vital for contributing to the cake’s light and tender texture.
Incorporate Eggs: Beat in the large eggs one at a time, mixing well after each addition until fully incorporated. Scrape down the sides of the bowl as needed to ensure everything is combined.
Adding eggs gradually helps maintain the emulsified butter-sugar mixture, preventing it from curdling.
Combine Liquid Elements: In a small separate bowl, whisk together the buttermilk, lemon zest, and 1/4 cup fresh lemon juice.
This ensures the wet ingredients are ready to be seamlessly integrated into your batter, allowing for quick mixing later.
Alternating Wet and Dry: Gradually add the dry ingredients to the wet ingredients, alternating with the buttermilk mixture, beginning and ending with the dry ingredients. Mix only until just combined.
Avoid overmixing; this is crucial for a tender crumb. Stop mixing as soon as no dry streaks remain to prevent developing tough gluten.
Fill and Level: Pour the prepared batter into your greased and floured 8×8 inch pan and spread it evenly with a spatula.
An even batter layer promotes uniform baking, ensuring your lemon cake cooks through consistently.
Bake to Golden Perfection: Bake for 30-35 minutes, or until a wooden skewer or toothpick inserted into the center comes out clean.
Overbaking can lead to a dry cake, so start checking for doneness at the 30-minute mark to ensure a perfectly moist result.
Simmer the Syrup: While the cake bakes, prepare the lemon syrup. In a small saucepan, combine 1/4 cup granulated sugar, 1/4 cup fresh lemon juice, and 2 tablespoons of water. Heat over medium heat, stirring until the sugar completely dissolves, then remove from heat.
The syrup’s warmth is important for maximum absorption later, as it helps the cake’s pores open up.
The Moisture Secret: Poke & Pour: Immediately after taking the hot cake out of the oven, use a skewer or toothpick to poke holes all over the top, almost to the bottom. Slowly and evenly pour the warm lemon syrup over the warm cake, ensuring it’s well distributed over the entire surface.
This is the vital step for achieving that signature moist texture! Don’t rush this part; let the cake truly soak it in.
Soak & Cool: Let the cake soak up the syrup for about 15-20 minutes in the pan. After soaking, let it cool completely in the pan on a wire rack.
Patience here allows the cake to fully absorb the syrup and set, creating that amazing moistness.
Whip Up the Topping: Once the cake is completely cool, prepare the topping. In a small bowl, whisk together the powdered sugar, 2 tablespoons fresh lemon juice, and milk until smooth and pourable.
Adjust consistency by adding a tiny bit more milk or powdered sugar if needed, aiming for a thick but flowing glaze.
Glaze Your Masterpiece: Pour or spread the topping evenly over the cooled lemon cake.
Ensure the cake is fully cool to prevent the glaze from melting and becoming transparent, ensuring a beautiful white finish.
Final Flourish & Serve: Just before serving, dust with additional powdered sugar if desired for an elegant look. Cut into squares and serve with fresh lemon wedges for an extra burst of freshness.
Enjoy your unbelievably moist and flavorful lemon cake!
Chef’s Secrets: Elevate Your Lemon Cake Game
Unlock even greater success with these expert tips, refined over countless batches of baking. These insights will help you achieve a truly show-stopping lemon cake every time.
Mind the Overmixing: Gently combine wet and dry ingredients just until no streaks of flour remain. Overmixing develops gluten, leading to a tough, rubbery cake instead of a light, tender one.
Room Temperature Rules: Ensure your butter and eggs are at room temperature before you begin. They emulsify better with sugar, creating a smoother, more uniform batter and a finer crumb in the finished cake.
Fresh Lemon is Non-Negotiable: Always use fresh lemons for both zest and juice. Bottled juice lacks the vibrant, aromatic punch and bright acidity essential for a truly exceptional lemon cake.
Be Generous with the Poking: Don’t be shy when poking holes! The more holes you make (without going all the way through to the bottom), the more surface area for the cake to absorb the flavorful syrup, maximizing moisture.
Warm Cake, Warm Syrup: The synergy of a warm cake and warm syrup is crucial for optimal absorption. The cake’s pores are open immediately after baking, allowing maximum absorption of that incredible moistening syrup.
Patience for the Glaze: Ensure your cake is completely cooled before applying the glaze. Applying it to a warm cake will result in a messy, runny glaze that won’t set properly or look appealing.
Troubleshooting Common Lemon Cake Conundrums
Even experienced bakers face challenges. Here are solutions to common issues you might encounter, ensuring your lemon cake always turns out perfect.
Why Did My Lemon Cake Turn Out Dry?
A dry lemon cake is often a sign of overbaking. Ensure you’re checking for doneness at the earliest recommended time, typically with a toothpick test. Additionally, ensure you’ve generously poked holes and poured the warm syrup over the warm cake immediately after baking, as this is the primary moisture-locking step.
My Cake Crumbled When I Sliced It. What Went Wrong?
Crumbling can occur if the cake was overmixed, leading to a tough texture that falls apart easily. It can also happen if you try to slice the cake before it has completely cooled and set, especially after it has absorbed the syrup. Always allow ample cooling time.
The Lemon Glaze is Too Thin or Too Thick. How Do I Fix It?
If your glaze is too thin, gradually whisk in more powdered sugar, one tablespoon at a time, until you reach the desired consistency. If it’s too thick, add a tiny bit more lemon juice or milk, a teaspoon at a time, until it’s perfectly pourable. Small adjustments make a big difference.
My Lemon Cake Sank in the Middle. Help!
A sunken cake often indicates it was either underbaked, leading to a weak structure, or the oven door was opened too early during baking, causing a sudden temperature drop. Ensure your oven temperature is accurate and resist the urge to open the door until at least 25 minutes into baking. Overmixing can also contribute to sinking.
Storing, Serving, and Savoring Your Lemon Cake
Once your beautiful lemon cake is baked and glazed, knowing how to properly store and serve it will ensure every slice is as delightful as the first. Here’s how to make the most of your masterpiece.
Ideal Storage for Peak Freshness
To keep your lemon cake incredibly moist, store it tightly covered with plastic wrap or in an airtight container at room temperature for up to 3 days. For longer storage, you can refrigerate it for up to a week, but let it come to room temperature before serving for the best texture.
Can I Make This Lemon Cake Ahead of Time?
Absolutely! This lemon cake is fantastic made a day in advance, as the syrup has even more time to fully infuse the cake with moisture and flavor. You can bake and syrup the cake, cool it completely, then cover and store it, applying the glaze just before serving for the freshest look.
Delightful Serving Suggestions & Pairings
While this lemon cake is perfect on its own, it also pairs wonderfully with fresh berries like raspberries or blueberries. A dollop of lightly sweetened whipped cream or a scoop of vanilla bean ice cream also adds a touch of indulgence. For a beautiful dessert platter, consider serving it alongside a batch of easy sugar cookie bars or a classic fruit crumble.
Lemon Cake FAQs: Your Questions Answered
Got more questions about this zesty delight? Here are some common inquiries to help you master your lemon cake baking.
Can I use bottled lemon juice instead of fresh?
While you technically can use bottled lemon juice, I strongly recommend using fresh lemons for both the zest and juice. Fresh lemons provide a brighter, more vibrant, and authentic flavor that simply cannot be replicated by bottled varieties. The difference in taste is truly remarkable.
What if I don’t have buttermilk for this recipe?
No buttermilk? No problem! You can easily make a substitute. For every 1/2 cup of buttermilk, measure 1/2 cup of regular milk (dairy or non-dairy), remove 1 tablespoon, and then stir in 1 tablespoon of fresh lemon juice or white vinegar. Let it sit for 5-10 minutes until it slightly curdles before using.
Can I bake this Lemon Cake in a different pan size?
Yes, you can, but baking times will need to be adjusted. If using a 9×13 inch pan, the cake will be thinner and bake faster (around 20-25 minutes). For smaller loaf pans or muffin tins, reduce baking time significantly. For a more elaborate dessert, you could even explore turning this into a stunning lemon layer cake with appropriate adjustments.
Is this Lemon Cake suitable for freezing?
Yes, this lemon cake freezes beautifully! For best results, freeze the cake without the glaze. Wrap the cooled, syruped cake tightly in plastic wrap, then in foil. It can be frozen for up to 2-3 months. Thaw in the refrigerator overnight, then apply the fresh glaze just before serving.
How long does this homemade lemon cake stay fresh?
Thanks to the incredible lemon syrup soak, this homemade lemon cake stays wonderfully moist and fresh for about 2-3 days at room temperature when stored in an airtight container. If refrigerated, it will last up to a week, though bringing it to room temperature before serving enhances its texture and flavor.
Ready to Impress? Share Your Lemon Cake Masterpiece!
Now that you hold the secret to the most unbelievably moist and flavorful lemon cake, it’s time to bring that zesty bliss to your kitchen. The joy of baking this cake is only surpassed by the pleasure of sharing it with loved ones.
Whether for a special gathering, a casual coffee break, or just a treat for yourself, this lemon cake recipe is sure to become a cherished favorite. Don’t stop here, keep exploring new flavors and textures, perhaps even try something like refreshing strawberry lemon bars next!
Lemon Cake
Course: DessertCuisine: American CuisineDifficulty: easy9
servings25
minutes35
minutes60
minutesAmerican Cuisine
Ingredients
For the Cake:
1 and 1/2 cups all-purpose flour
2 teaspoons baking powder
1/4 teaspoon salt
1 cup granulated sugar
1/2 cup unsalted butter softened
2 large eggs
1/2 cup buttermilk
Zest of 2 lemons
1/4 cup fresh lemon juice
For the Lemon Syrup:
1/4 cup granulated sugar
1/4 cup fresh lemon juice
2 tablespoons water
For the Topping:
1 cup powdered sugar
2 tablespoons fresh lemon juice
1 tablespoon milk
For Serving:
Powdered sugar for dusting
Lemon wedges
Directions
- Preheat your oven to 350 degrees F (175 degrees C). Grease and flour an 8×8 inch square baking pan.
- In a medium bowl, whisk together the flour, baking powder, and salt. Set aside.
- In a large bowl, cream together the softened butter and 1 cup granulated sugar until light and fluffy.
- Beat in the eggs one at a time, mixing well after each addition.
- In a small bowl, combine the buttermilk, lemon zest, and 1/4 cup lemon juice.
- Gradually add the dry ingredients to the wet ingredients, alternating with the buttermilk mixture, beginning and ending with the dry ingredients. Mix until just combined, being careful not to overmix.
- Pour the batter into the prepared pan and spread evenly.
- Bake for 30-35 minutes, or until a toothpick inserted into the center comes out clean.
- While the cake is baking, prepare the lemon syrup. In a small saucepan, combine the 1/4 cup sugar, 1/4 cup lemon juice, and water. Heat over medium heat, stirring until the sugar dissolves completely. Remove from heat.
- Once the cake is out of the oven, immediately poke holes all over the top using a skewer or toothpick. This is the secret to locking in moisture!
- Slowly and evenly pour the warm lemon syrup over the warm cake. Let the cake soak up the syrup for about 15-20 minutes.
- Let the cake cool completely in the pan on a wire rack.
- Once the cake is cool, make the topping. In a small bowl, whisk together the powdered sugar, 2 tablespoons lemon juice, and milk until smooth and pourable.
- Pour or spread the topping over the cooled cake.
- Dust with additional powdered sugar just before serving. Cut into squares and serve with fresh lemon wedges.
Notes
- Immediately poke holes in warm cake for maximum moisture absorption. Allow ample time for cooling before glazing.