There’s nothing quite like a slice of perfectly moist, incredibly zesty Lemon Loaf to brighten any day. For years, I chased that elusive light texture, often ending up with a denser loaf than I dreamed of, but I’ve finally perfected the method.
This isn’t just another Lemon Loaf recipe; it’s the culmination of countless test batches, designed to deliver a consistently soft, melt-in-your-mouth crumb every single time. Get ready for a burst of sunshine that truly captures the essence of lemon in every bite.
The Lemon Loaf Secret: Unlocking Unbelievable Fluffiness
Have you ever baked a lemon loaf that tasted great but felt a little too heavy? That common frustration stems from a few key elements, often linked to how ingredients are handled and combined.
This recipe distinguishes itself by focusing on techniques that guarantee an airy, tender texture, rather than a dense, rubbery one. Its unique selling points are a consistently soft crumb, vibrant citrus flavor, and an undeniable melt-in-your-mouth quality.
The “cracked code” to this superior texture lies in understanding aeration and, crucially, avoiding a common baking pitfall: overmixing. We’ll dive into exactly how to achieve this lightness in the step-by-step guide.
Gather Your Zesty Arsenal: Essential Lemon Loaf Ingredients
Pantry Staples for the Loaf Base
All-purpose flour forms the structural backbone of your loaf, while baking powder provides the essential lift, creating that coveted airy texture. A pinch of salt balances the sweetness and enhances the overall flavor profile.
Unsalted butter and granulated sugar, when creamed together, are crucial for incorporating air into the batter, a foundational step for a light loaf. Softened butter ensures a smooth, even blend.
Using room temperature eggs and milk allows them to emulsify seamlessly with the butter and sugar mixture. This creates a cohesive batter, preventing curdling and contributing to a uniform, tender crumb.
The Citrus Stars: Fresh Lemon Juice and Zest
Fresh lemon juice delivers a bright, tart tang that defines a true Lemon Loaf, offering a depth of flavor unmatched by bottled alternatives. The zest, packed with aromatic oils, infuses every bite with intense, natural lemon fragrance.
To maximize juice, roll your lemons firmly on the counter before slicing. For zest, use a microplane to finely grate only the bright yellow part, avoiding the bitter white pith underneath.
Crafting the Dazzling Glaze
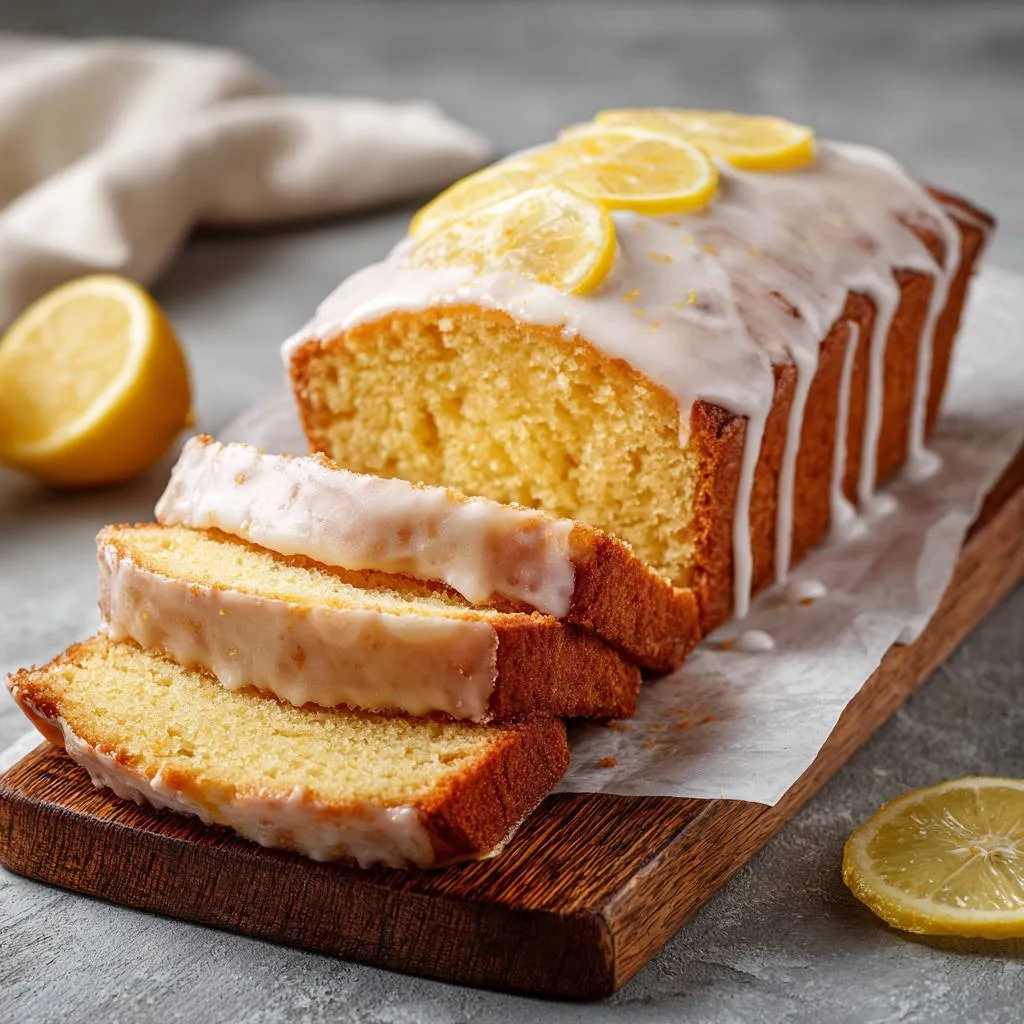
The simple glaze, a blend of powdered sugar and fresh lemon juice, isn’t just for looks; it adds another layer of zesty brightness and seals in moisture. This sugary, tart coating is the perfect complement to the rich loaf.
Thin lemon slices make a beautiful, optional garnish, adding visual appeal and a fresh citrus aroma to your finished Lemon Loaf.
Essential Tools for Your Loaf-Baking Success
Loaf Pan: A standard 9×5 inch loaf pan is ideal for this recipe, ensuring the perfect loaf shape and consistent baking. Properly greasing and flouring, or lining with parchment paper, prevents sticking.
Electric Mixer: An electric mixer, whether stand or hand-held, is highly beneficial for creaming the butter and sugar effectively. It whips air into the mixture, which is vital for a light and fluffy loaf.
Mixing Bowls: You’ll need both a medium bowl for dry ingredients and a large bowl for the wet mixture, facilitating organized and efficient preparation.
Whisk: A whisk is essential for evenly combining your dry ingredients and for effortlessly mixing the simple, pourable glaze.
Wire Rack: Cooling the loaf completely on a wire rack is crucial. This allows air circulation on all sides, preventing a soggy bottom and ensuring the loaf maintains its structure.
Wooden Skewer or Toothpick: This small tool is indispensable for accurately testing the doneness of your loaf, ensuring it’s baked through without being dry.
Baking Brilliance: Step-by-Step Lemon Loaf Mastery
This comprehensive section guides the reader through each stage of baking, from preparation to glazing, with crucial insights for success. Pay close attention to the subtle nuances that make all the difference.
- Prepare Your Pan & Preheat Oven:
Start by preheating your oven to a precise 350°F (175°C). Next, meticulously prepare your 9×5 inch loaf pan, either by greasing and flouring it thoroughly or lining it with parchment paper that overhangs the sides.
This critical first step ensures your loaf bakes evenly and releases effortlessly after cooling.
- Whisk Dry Ingredients:
In a medium bowl, whisk together the all-purpose flour, baking powder, and salt. Whisking ensures these ingredients are evenly distributed, which is vital for a consistent rise and crumb throughout your Lemon Loaf.
- Cream Butter and Sugar to Fluffy Perfection:
Using an electric mixer in a large bowl, cream the softened unsalted butter and granulated sugar together on medium-high speed. Continue beating for about 3-5 minutes until the mixture becomes visibly light and fluffy.
This is your initial, and arguably most important, step for incorporating ample air into the batter, setting the foundation for an incredibly fluffy Lemon Loaf.
- Incorporate Eggs, One at a Time:
Beat in the large eggs, one at a time, ensuring each egg is fully incorporated into the butter-sugar mixture before adding the next. Remember to scrape down the sides and bottom of the bowl as needed.
Adding eggs gradually helps maintain the air you’ve built up and ensures a smooth, homogenous batter.
- Combine Wet Ingredients:
In a separate small bowl or liquid measuring cup, whisk together the milk and the 1/4 cup of fresh lemon juice. Combining them separately ensures even distribution of liquids and prevents any potential curdling when added to the batter.
- The Alternating Addition (The Key to Texture!):
Now for the most critical step for that light, tender crumb! With your mixer on a low speed, alternately add the dry ingredients and the wet ingredients to the butter mixture, always beginning and ending with the dry.
Add about one-third of the dry ingredients, mixing just until streaks disappear. Then add half of the milk/lemon juice mixture, again mixing only until just combined. Repeat with another third of the dry, then the remaining wet, and finish with the last third of the dry ingredients.
- The Golden Rule: Do NOT Overmix!
Crucially, after each addition in the previous step, mix only until the ingredients are just combined. Overmixing at this stage is the enemy of a fluffy loaf, as it develops gluten, which leads to a tough, dense texture.
A few small lumps in the batter are perfectly fine and indicate you haven’t overmixed. Finally, gently fold in the fresh lemon zest with a spatula, ensuring its vibrant aromatic oils are perfectly distributed.
- Bake Until Golden:
Carefully pour your perfectly prepared batter into the prepared loaf pan and gently smooth the top with a spatula. Bake for 50-60 minutes, or until a wooden skewer inserted directly into the center comes out completely clean.
This clean skewer test confirms your Lemon Loaf is fully baked through and ready to emerge golden brown and fragrant from the oven.
- Cooling Protocol:
Allow the baked loaf to cool in the pan for 10 minutes; this brief resting period helps it firm up before handling. Then, carefully invert it onto a wire rack and allow it to cool completely.
It’s absolutely essential that the loaf is entirely cool before glazing to prevent the glaze from melting into the cake rather than forming a beautiful, opaque coating.
- Prepare and Apply the Zesty Glaze:
While your Lemon Loaf cools, prepare the simple yet sensational glaze. In a small bowl, whisk together the powdered sugar and fresh lemon juice until it’s smooth and lump-free.
Adjust the lemon juice as needed to reach your desired pourable consistency – it should be thick enough to cling to the loaf but thin enough to drizzle. Once the loaf is completely cool, pour the glaze evenly over the top, allowing it to drip attractively down the sides. Garnish with thin lemon slices if desired for an extra touch of elegance. You might also enjoy a slice with a beautiful Classic Lemon Cake for another citrusy treat!
Elevate Your Bake: Expert Tips for Your Lemon Loaf
Unlock an even better Lemon Loaf with these seasoned baker’s tips, ensuring your zesty creation is nothing short of perfection.
Room Temperature Rules: Always ensure cold ingredients like butter, eggs, and milk are at room temperature. This allows them to emulsify properly, creating a smoother, more homogeneous batter that results in a tender, well-textured loaf.
Zesting for Maximum Aroma: When zesting lemons, always use a microplane and only remove the bright yellow outer layer. The white pith underneath is quite bitter and will detract from the fresh, vibrant lemon flavor.
Perfect Glaze Consistency: If your glaze appears too thick, add a few drops of lemon juice at a time, whisking well after each addition until it reaches a pourable but opaque consistency. Conversely, if it’s too runny, gradually whisk in a tablespoon of powdered sugar until it thickens appropriately.
The Power of Parchment: Lining your loaf pan with parchment paper, especially with overhangs, is a game-changer. This simple step makes it incredibly easy to lift the cooled Lemon Loaf cleanly out of the pan without any sticking or damage.
Patience in Cooling: It’s tempting to glaze a warm loaf, but resist the urge! Applying glaze to a warm loaf will cause it to melt immediately and run off, leaving you with a less appealing, barely glazed finish. Complete cooling ensures a beautiful, set glaze.
Troubleshooting Your Loaf: Common Baking Challenges Solved
Why is My Lemon Loaf Dense?
The most common culprit for a dense Lemon Loaf is overmixing the batter, especially after you’ve added the dry ingredients. Excessive mixing develops gluten, which creates a tough, chewy texture rather than the desired light and airy crumb. Remember to mix only until the ingredients are just combined.
Another contributing factor to a dense loaf can be using ingredients that aren’t at room temperature. Cold butter and eggs don’t emulsify properly, leading to a less cohesive batter and a heavier final product.
My Loaf Sank in the Middle!
A sunken middle most often indicates that your Lemon Loaf was underbaked. The center collapses as it cools because its structure hasn’t fully set. Always ensure a wooden skewer inserted into the deepest part of the loaf comes out completely clean.
Opening the oven door frequently during baking can cause significant temperature drops, which can also contribute to a loaf sinking. Try to peek as little as possible, especially during the first two-thirds of the baking time.
Glaze Too Runny or Too Thick?
If your Lemon Loaf glaze is too runny, the solution is simple: gradually whisk in additional powdered sugar, one tablespoon at a time, until it reaches your desired pourable yet opaque consistency.
Conversely, if the glaze is too thick, add a quarter teaspoon of fresh lemon juice at a time. Whisk thoroughly after each small addition until it becomes smooth and easily poured over the loaf without being transparent.
Serving & Storing Your Zesty Creation
Ideal Serving Suggestions
This vibrant Lemon Loaf is perfect on its own, offering a delightful burst of citrus with every bite. It pairs beautifully with a warm cup of coffee or a comforting cup of tea for an afternoon treat or breakfast indulgence.
For a touch of elegance, serve slices with a dollop of freshly whipped cream, a spoonful of crème fraîche, or a medley of fresh berries like raspberries or blueberries. It’s a fantastic addition to any brunch spread or dessert table.
Keeping Your Loaf Fresh
To maintain its freshness and delightful texture, store your glazed Lemon Loaf at room temperature in an airtight container. It will remain wonderfully fresh for up to 3-4 days, with the glaze helping to seal in moisture.
If you live in a particularly warm climate or wish to extend its shelf life further, refrigeration is an option, though it might slightly firm up the texture of the crumb. Bring it to room temperature before serving for the best experience.
Can You Freeze Lemon Loaf?
Absolutely, Lemon Loaf freezes exceptionally well! For optimal results, freeze the unglazed loaf. Wrap it tightly first in plastic wrap, then in a layer of aluminum foil, to protect it from freezer burn.
It can be stored in the freezer for up to 2-3 months. When ready to enjoy, thaw the loaf at room temperature, then prepare and apply the fresh glaze just before serving to ensure that bright, zesty finish.
Your Lemon Loaf Questions Answered
Can I Use Bottled Lemon Juice?
While fresh lemon juice is highly recommended for its vibrant, bright flavor and superior aroma in this Lemon Loaf, you can certainly use bottled lemon juice if fresh is unavailable. However, be prepared for a slightly less intense and nuanced lemon flavor in the finished product.
What If I Don’t Have a Loaf Pan?
No loaf pan? No problem! You can easily adapt this Lemon Loaf recipe. The batter will bake well in an 8×8 inch square pan; simply reduce the baking time to approximately 30-40 minutes. Alternatively, you can make individual cupcakes, baking them for about 20-25 minutes. Always test for doneness with a wooden skewer.
Can I Make This Lemon Loaf Gluten-Free?
Yes, you can absolutely make this delicious Lemon Loaf gluten-free. Substitute the all-purpose flour with a 1:1 gluten-free baking flour blend that specifically contains xanthan gum. While the texture might have a slight variation, it will still be a wonderfully zesty and enjoyable treat.
Is There a Dairy-Free Alternative for the Milk?
Absolutely! For a dairy-free Lemon Loaf, you can seamlessly substitute regular milk with unsweetened almond milk, soy milk, or oat milk. These alternatives work wonderfully as a direct 1:1 replacement, and the loaf’s texture should remain quite similar, ensuring it’s still beautifully moist and tender.
Ready to Bake? Share Your Lemon Loaf Masterpiece!
Now that you’re equipped with all the insights and secrets to creating a truly light, fluffy, and incredibly zesty Lemon Loaf, it’s time to preheat your oven and experience the pure joy of baking this delightful treat.
Whether you’re making it for a special gathering, a relaxed weekend brunch, or simply to brighten an ordinary day, this recipe promises to deliver a refreshing burst of sunshine with every perfect slice.
We’d love to see your baking triumphs! Don’t forget to share photos of your beautiful Lemon Loaf creations with us online. Your success in the kitchen brings a smile to ours!
Lemon Loaf
Course: DessertCuisine: American CuisineDifficulty: easy1
loaf (approx. 10-12 slices)20
minutes50
minutesAmerican Cuisine
Ingredients
1 and 1/2 cups all-purpose flour
1 teaspoon baking powder
1/4 teaspoon salt
1/2 cup unsalted butter, softened
1 cup granulated sugar
2 large eggs, at room temperature
1/2 cup milk, at room temperature
1/4 cup fresh lemon juice (from about 1-2 lemons)
1 tablespoon lemon zest (from about 1-2 lemons)
For the Glaze:
1 and 1/2 cups powdered sugar
3-4 tablespoons fresh lemon juice (or more for desired consistency)
Thin lemon slices, for garnish (optional)
Directions
- Preheat your oven to 350°F (175°C). Grease and flour a 9×5 inch loaf pan, or line with parchment paper.
- In a medium bowl, whisk together the flour, baking powder, and salt. Set aside.
- In a large bowl, using an electric mixer, cream the softened butter and granulated sugar together on medium-high speed until light and fluffy, about 3-5 minutes. This is your first step to a fluffy loaf: really get some air in there!
- Beat in the eggs one at a time, mixing well after each addition until fully incorporated. Scrape down the sides of the bowl as needed.
- In a separate small bowl or liquid measuring cup, combine the milk and 1/4 cup lemon juice.
- Now for the key: With the mixer on low speed, alternately add the dry ingredients and the wet ingredients to the butter mixture, beginning and ending with the dry ingredients. Add about one-third of the dry ingredients, mix just until combined, then add half of the milk/lemon juice mixture, mix just until combined. Repeat with another third of dry, then the remaining wet, and finish with the last third of dry.
- Crucially, mix only until just combined after each addition. Do not overmix! Overmixing develops gluten, which makes your loaf tough and dense. A few small lumps are perfectly fine. Fold in the lemon zest gently with a spatula.
- Pour the batter into your prepared loaf pan and smooth the top.
- Bake for 50-60 minutes, or until a wooden skewer inserted into the center comes out clean.
- Let the loaf cool in the pan for 10 minutes, then carefully invert it onto a wire rack to cool completely.
- While the loaf cools, prepare the glaze: In a small bowl, whisk together the powdered sugar and lemon juice until smooth. Adjust lemon juice as needed to reach desired pourable consistency.
- Once the loaf is completely cool, pour the glaze evenly over the top, letting it drip down the sides. Garnish with fresh lemon slices if desired. Slice and enjoy your perfectly fluffy lemon loaf!
Notes
- Do not overmix the batter to ensure a light and fluffy texture.