
There is nothing quite like the first bite of a street taco where the spices are bold and the shell has that perfect, slight resistance. However, most home cooks struggle with the dreaded “taco blowout,” where the tortilla turns into a soggy, disintegrating mess before you even finish the first one. This usually happens because the moisture from the meat and toppings migrates directly into a cold or steamed tortilla.
The secret to a professional-grade taco lies in the “Anti-Soggy Shell Secret,” a dry-sear technique that creates a moisture-resistant barrier on the corn. By dehydrating the surface of the tortilla just enough to give it a crisp “skin,” you ensure it stays intact from the first bite to the last. This method, combined with a high-heat blackening technique, transforms simple ingredients into a high-end street food experience.
Expertise in blackening comes down to temperature control and patience. You aren’t just cooking the chicken; you are creating a dark, flavorful crust through the Maillard reaction. The secret is using a high-smoke point oil and a very hot cast-iron skillet to ensure the spices bloom and char without the meat drying out or sticking to the pan.
The Anatomy of a Perfect Street Taco
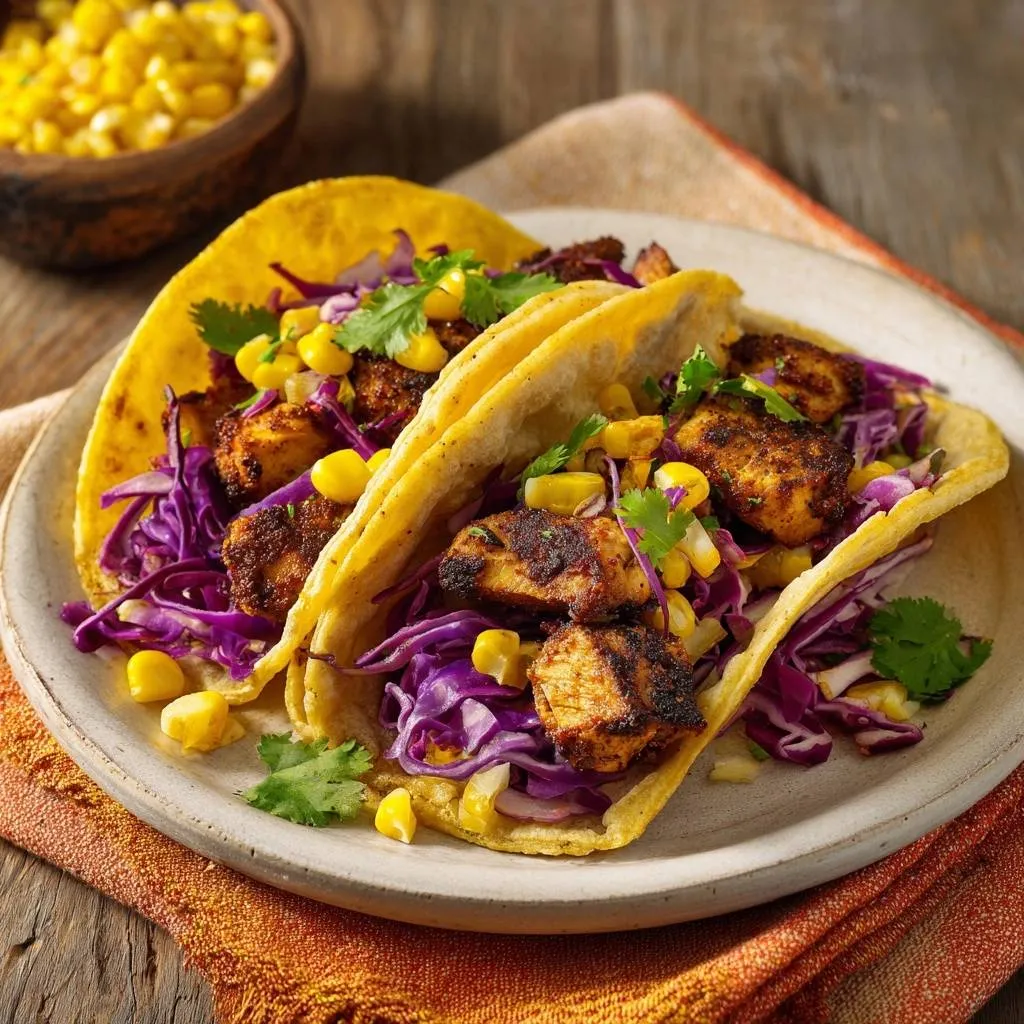
A true street taco is a study in minimalism and balance, standing in stark contrast to the oversized, cheese-laden versions often found in fast-food chains. It relies on a small, four-inch corn vessel that is easy to hold in one hand. The beauty of this dish is the interplay between the smoky, charred protein and the bright, acidic crunch of the garnishes.
In this recipe, we focus on three specific pillars: the blackened chicken, the crisp cabbage slaw, and the toasted corn tortilla. Blackening is a technique that fuses Cajun spice profiles with Mexican street food culture. It provides a deep, earthy heat that pairs beautifully with the natural sweetness of corn and the sharp zest of fresh lime.
Essential Components for Blackened Chicken Street Tacos
Quality starts with the chicken breast, which we cut into small 1/2-inch cubes. This size is intentional because it maximizes the surface area for the spices to cling to. When the cubes are small, you get a higher ratio of flavorful crust to juicy meat in every single bite.
Choosing the right oil is equally critical for success. You must use a high-smoke point oil like avocado or vegetable oil. Avoid olive oil or butter for the searing stage, as they will burn and turn bitter at the temperatures required to achieve a true blackened finish.
The Blackened Spice Profile Breakdown
The seasoning blend is a powerhouse of flavor featuring smoked paprika, garlic powder, onion powder, dried oregano, cayenne, black pepper, and salt. The smoked paprika provides the base color and a deep wood-fired aroma. Meanwhile, the cayenne adds a targeted heat that lingers on the back of the palate.
When these spices hit the hot oil in the pan, they undergo a transformation. The sugars in the paprika caramelize, and the oils in the dried herbs bloom, creating a savory “crust” that seals in the chicken’s natural juices. This layer of spice acts as a protective shield, keeping the lean breast meat tender.
Selecting the Right Corn Tortillas
Yellow corn tortillas are the gold standard for this recipe because they have a sturdier structure and a more pronounced nutty flavor than white corn. Flour tortillas are generally too soft and porous for this specific moisture-resistant technique. They tend to soak up juices like a sponge, which leads to the structural failure we are trying to avoid.
Look for tortillas that feel pliable in the package rather than stiff or brittle. Freshness matters because a fresh tortilla contains just enough internal moisture to “puff” when it hits the hot skillet. That puffing action is the sign that the internal steam is cooking the starch, making the shell both flexible and strong.
The Science of the High-Heat Sear
To achieve a perfect blackening, your skillet must be “slightly smoking” before the chicken ever touches the surface. This intense heat triggers the Maillard reaction almost instantly. If the pan is too cool, the chicken will release its juices and simmer in them, resulting in grey, rubbery meat instead of a dark, crispy crust.
The most important rule is the “undisturbed sear.” Once you drop the chicken into the pan, do not move it for at least two minutes. Moving the meat too early tears the developing crust and prevents the protein from releasing naturally from the pan. When the crust is properly formed, the chicken will lift away from the cast iron with zero resistance.
Step-by-Step: Preparing the Blackened Protein
Start by tossing your cubed chicken in a bowl with the spices and one tablespoon of oil. This pre-coating step is vital because it ensures the seasoning is evenly distributed and fully adhered to the meat. It also prevents the spices from flying around the kitchen or burning instantly when they hit the dry pan.
Work in batches if your skillet isn’t large enough to hold the chicken in a single, spaced-out layer. Crowding the pan is the fastest way to drop the temperature and ruin the sear. You want to see a dark, mahogany-colored crust develop on the first side before flipping the pieces to finish the cooking process.
The Anti-Soggy Secret: Dry-Searing Tortillas
After the chicken is cooked, wipe your skillet clean with a paper towel. Place a dry tortilla directly onto the hot, ungreased surface. This step is the core of the moisture-resistant barrier. You are essentially flash-dehydrating the outer layer of the corn, which creates a toasted “skin” that liquids cannot easily penetrate.
Watch for the tortilla to puff slightly and develop distinct charred brown spots within 30 to 45 seconds. Flip it and repeat on the other side. This heat treatment makes the tortilla smell like toasted popcorn and gives it the strength to hold heavy fillings without tearing. Keep the finished tortillas wrapped in a clean cloth towel to maintain their heat and flexibility.
Strategic Assembly for Maximum Crunch
The order in which you build your taco is just as important as how you cook the ingredients. We use the “Cabbage Barrier” theory to protect the shell. By placing a generous bed of shredded red cabbage down first, you create a physical shield between the hot, juicy chicken and the toasted tortilla.
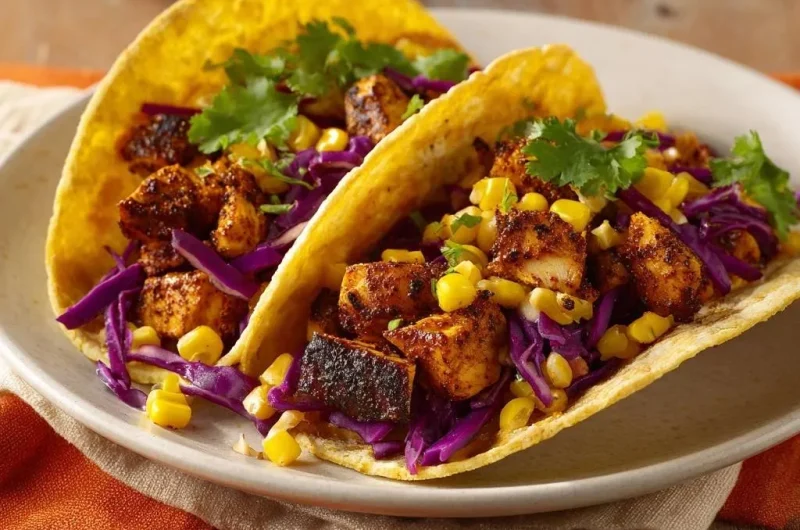
The waxy surface of the cabbage is naturally water-repellent, which keeps the chicken juices from soaking into the corn. Top the cabbage with the blackened chicken and sweet corn. Finally, add whole cilantro leaves. Using whole leaves instead of chopped cilantro provides a more concentrated burst of freshness and a better visual appeal.
Troubleshooting Common Taco Failures
If your chicken turns out dry, it is likely because the cubes were cut too small or the heat was too low, leading to a longer cook time. Aim for consistent 1/2-inch cubes and ensure the pan is screaming hot. If your tortillas become too brittle and crack when folded, they were likely left on the heat too long. You can briefly mist them with a tiny bit of water and re-warm them to restore flexibility.
Another common mistake is assembling the tacos too far in advance. Even with the cabbage barrier, the laws of physics will eventually win. For the best experience, let the chicken rest for two minutes after cooking so the juices can redistribute, then assemble and serve immediately. This resting period prevents a “juice flood” from hitting the plate the moment you take a bite.
Flavor Variations and Ingredient Swaps
If you prefer a milder flavor, you can easily swap the cayenne pepper for extra smoked paprika or a touch of mild chili powder. For those who love acidity, adding thin slices of radish or pickled red onions can provide a sharp contrast to the smoky chicken. These additions offer a bright “pop” without introducing the excess moisture that tomatoes or salsa might bring.
While we use sweet corn for its crunch and sugar, you could also use charred scallions or even a few crumbles of salty cotija cheese. However, keep the garnishes simple. The goal is to highlight the blackened seasoning and the texture of the toasted tortilla, not to bury them under too many toppings.
What to Serve with Street Tacos
Since blackened chicken has a bold, spicy profile, it is best to pair these tacos with cooling side dishes. A crisp cucumber salad with a light vinegar dressing or a side of lime-infused white rice works perfectly. These sides cleanse the palate between bites and balance the heat of the cayenne.
For beverages, look for something tart or creamy. A cold glass of hibiscus tea (Jamaica) offers a floral acidity that cuts through the spice. Alternatively, a glass of horchata provides a creamy, cinnamon-scented sweetness that acts as a fire extinguisher for the spicy blackened crust. Both options enhance the street-food vibe of the meal.
Expert Tips for High-Volume Cooking
If you are hosting a taco night for a large group, preparation is your best friend. Shred the cabbage and prep the corn and cilantro hours in advance. You can even pre-mix the blackened seasoning and store it in a jar. This allows you to focus entirely on the high-heat searing when your guests arrive.
To keep a large stack of dry-seared tortillas warm, place them in a basket lined with a thick cloth towel and cover them tightly. The residual heat will keep them pliable for up to 20 minutes. Cook the chicken in the largest skillet you own, or use two pans simultaneously to ensure everyone gets their tacos while the meat is hot and the shells are crisp.
Frequently Asked Questions
Can I use chicken thighs instead of breasts?
Yes, chicken thighs are a great alternative because they have a higher fat content, making them very difficult to overcook. However, thighs require a slightly longer sear to properly render that fat. If you use thighs, make sure to trim any excess skin or large fat deposits so the blackened seasoning can make direct contact with the meat for the best crust.
How do I store and reheat leftovers?
You should always store the components separately in airtight containers in the refrigerator for up to three days. Never store assembled tacos, as they will become soggy overnight. To reheat, toss the chicken in a hot, dry skillet for 2 minutes to re-crisp the edges. Re-sear fresh tortillas rather than reheating the old ones for the best texture.
What if I don’t have a cast-iron skillet?
A heavy stainless steel skillet is the next best option because it can handle high heat and promotes good browning. However, avoid using non-stick pans for blackening. The extremely high temperatures required for this technique can damage the non-stick coating and release unpleasant fumes. If you must use non-stick, keep the heat at a medium setting and accept a slightly less charred crust.
Is there a shortcut for the blackened seasoning?
You can certainly use a store-bought blackened or Cajun seasoning blend to save time. However, be very careful with the salt content. Many pre-made mixes list salt as the first ingredient. If using a store-bought version, taste it first and consider skipping the additional salt called for in the recipe to avoid over-seasoning the chicken.
Why is my chicken sticking to the pan?
Chicken usually sticks for two reasons: the pan wasn’t hot enough when the meat was added, or you are trying to flip it too soon. When the protein in the chicken hits a hot enough surface, it undergoes a physical change that eventually causes it to “release” from the metal. If you feel resistance when trying to flip a piece, leave it alone for another 30 seconds and try again.
Blackened Chicken Street Tacos
Course: Main CourseCuisine: Mexican-AmericanDifficulty: easy4
servings15
minutes10
minutes25
Minutes345
kcalMexican-American
Ingredients
1 pound chicken breast, cut into small 1/2-inch cubes
2 tablespoons blackened seasoning (smoked paprika, garlic powder, onion powder, dried oregano, cayenne, black pepper, and salt)
3 tablespoons high-smoke point oil (avocado or vegetable oil), divided
8 small corn tortillas
2 cups shredded red cabbage
1 cup sweet corn kernels (fresh or canned/drained)
1/2 cup fresh cilantro leaves, whole
1 lime, cut into wedges
Directions
- In a medium bowl, toss the cubed chicken with the blackened seasoning and 1 tablespoon of oil. Ensure every piece is heavily coated; the oil helps the spices adhere and prevents the lean breast meat from drying out during the high-heat sear.
- Heat a large cast-iron skillet over medium-high heat until it is very hot and slightly smoking. Add 1 tablespoon of oil to the pan.
- Add the chicken in a single layer. Do not crowd the pan (work in batches if necessary). Let the chicken sear undisturbed for 2-3 minutes to develop a dark, charred crust. Flip and cook for another 2 minutes until cooked through. Remove chicken from the pan and set aside.
- Wipe the skillet clean with a paper towel. This is the secret step: Place a dry tortilla directly onto the hot skillet for 30-45 seconds per side. You are looking for the tortilla to puff slightly and develop distinct charred brown spots. This heat treatment dehydrates the surface of the corn, creating a crisp “skin” that prevents the cabbage and chicken juices from soaking through.
- Immediately assemble the tacos while the shells are hot and stiff. Layer a generous bed of shredded red cabbage first; the cabbage acts as a secondary physical moisture barrier between the meat and the shell.
- Top the cabbage with the blackened chicken cubes and the sweet corn kernels.
- Garnish with whole fresh cilantro leaves and serve immediately with lime wedges to squeeze over the top, which cuts through the smoky heat of the blackened crust.
Notes
- The secret to preventing soggy tacos is dry-searing the tortillas for 30-45 seconds per side to create a moisture-resistant skin, and layering the cabbage before the meat to act as a physical barrier.