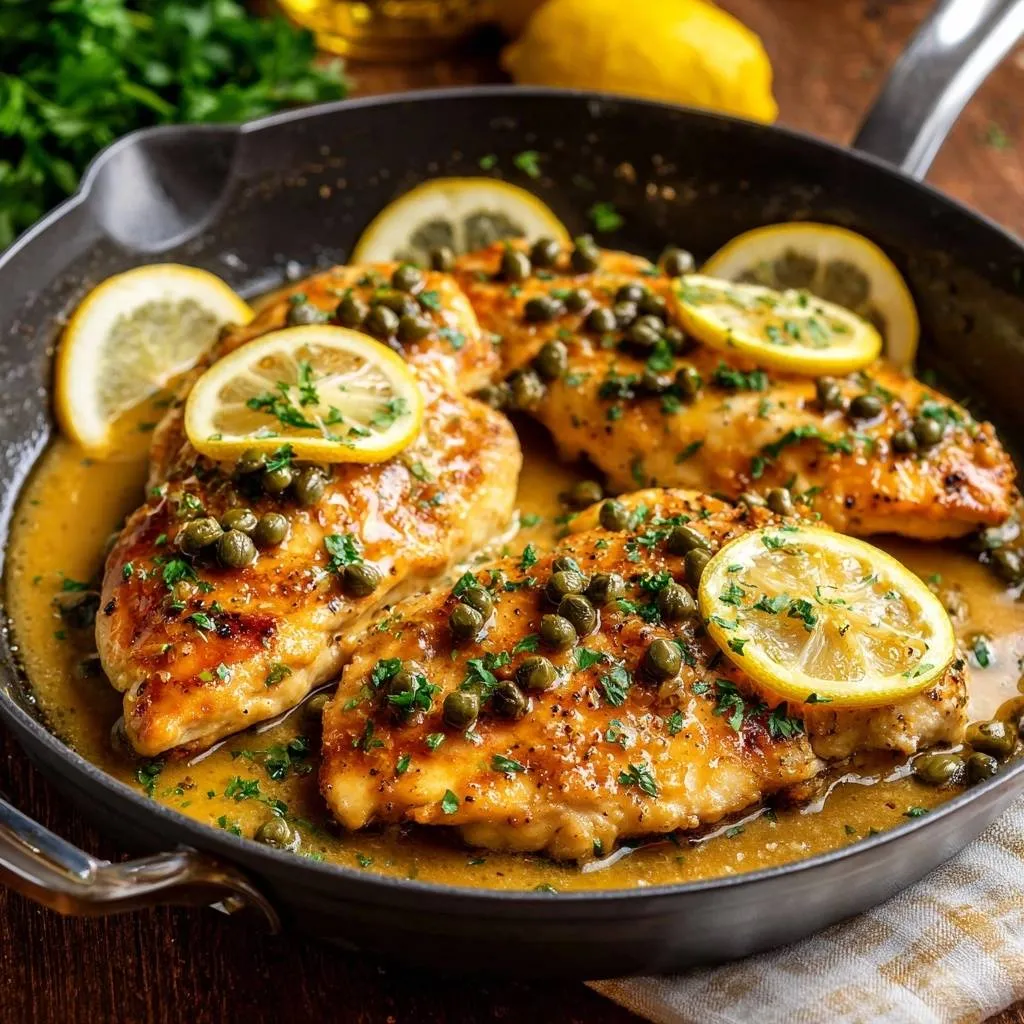
Most home cooks struggle with a watery, thin sauce that pools at the bottom of the plate instead of clinging to the chicken. You’ve likely experienced that disappointing moment when your beautiful golden cutlets sit in a puddle of lemon-flavored broth. A professional-grade Piccata should be vibrant and punchy, featuring a sauce so silky it coats the back of a spoon like liquid gold.
The secret to a restaurant-quality finish isn’t a hidden ingredient; it’s all about the emulsion. By using the residual flour from the chicken and a specific butter-whisking technique, you can create a glossy, stable sauce every single time. This Italian-American staple relies on the perfect balance of salty capers, bright citrus, and rich fats to create a meal that feels fancy but takes less than thirty minutes.
I’ve found that the biggest mistake people make is rushing the reduction phase. If you don’t let the liquids simmer down, the flavors stay muted and the texture remains thin. You need that concentration to build a foundation for the butter to grab onto. Let’s dive into the mechanics of how to fix these common issues and get that perfect, velvety finish.
The Anatomy of a Non-Watery Piccata Sauce
To achieve a sauce that actually stays on your fork, you have to understand the science of the “fond.” Those little brown bits stuck to the bottom of your pan after searing the chicken are concentrated flavor bombs. When you pour in your liquids, these bits dissolve, adding depth and a natural amber color to your base.
The flour used for dredging the chicken plays a dual role here. As the chicken sears, some of that starch stays behind in the oil and butter. When you deglaze the pan, that starch acts as a secondary thickener. It’s a built-in safety net that helps bind the chicken broth and lemon juice together before you even add the final fats.
Reducing the liquid by half is a non-negotiable step for flavor concentration. If you skip this, your sauce will taste like acidic water. As the water evaporates, the sugars and proteins concentrate, turning the liquid into a light syrup. This syrupy consistency is exactly what you need to support a stable emulsion later on.
The Role of Cold Butter Emulsification
The “Beurre Monté” technique is the ultimate chef’s trick for a luxurious finish. By whisking cold, cubed butter into a hot liquid off the heat, you are suspending milk solids and fats within the sauce. This creates a thick, creamy texture without the need for heavy creams or cornstarch slurries.
Temperature control is everything during this final stage. If you keep the pan over high heat while adding the butter, the emulsion will break, leaving you with a greasy mess. Removing the pan from the burner ensures the butter melts slowly enough to bond with the lemon-caper base, resulting in a shimmering, unified sauce.
Essential Components for Classic Lemon Caper Chicken Piccata
Quality ingredients make a massive difference in a dish with so few components. I always recommend using low-sodium chicken broth because the capers and salt in the dredging flour provide plenty of seasoning. Using full-sodium broth often results in a dish that is aggressively salty once the sauce reduces.
Fresh lemon juice is mandatory here; the bottled stuff has a metallic aftertaste that ruins the brightness of the dish. You want that hit of fresh acidity to cut through the richness of the butter. For the coating, all-purpose flour is the superior choice because it creates a fine, even crust that browns beautifully without becoming too heavy or doughy.
Don’t forget the parsley at the very end. It isn’t just a garnish; it adds a necessary earthy freshness that balances the briny capers. Use flat-leaf Italian parsley if you can find it, as it has a more robust flavor and a better texture than the curly variety.
Selecting and Preparing the Poultry
Uniformity is the key to juicy chicken. You must pound your chicken breasts to a consistent 1/2-inch thickness using a meat mallet or a heavy skillet. This ensures that every part of the cutlet cooks at the same rate, preventing the thin edges from drying out while the center finishes.
When the chicken is an even thickness, the flour coating reaches a perfect golden brown at the exact moment the meat hits its safe internal temperature. This prevents you from having to choose between a soggy crust or overcooked, rubbery meat. It also provides more surface area for that delicious sauce to cling to.
Capers: The Briny Heart of the Dish
Capers provide the signature “pop” of salt and vinegar that defines a Piccata. I prefer “non-pareil” capers, which are the smaller variety. They are more delicate in texture and distribute more evenly throughout the sauce than the larger, pea-sized versions.
Always drain your capers before adding them to the pan. If you find them too salty, give them a quick rinse under cold water. This allows you to control the seasoning of the sauce more precisely. Adding them toward the end of the simmering process keeps them firm and prevents them from turning mushy.
Step-by-Step: Achieving the Perfect Golden Sear
Before the chicken even touches the pan, make sure your oil and butter are ready. You are looking for a “shimmering” pan where the butter foam has subsided but hasn’t turned brown yet. This high heat is vital for an instant sear that locks in moisture and crisps the flour coating.
The combination of olive oil and butter is a classic technique for a reason. Olive oil has a higher smoke point, which prevents the butter from burning, while the butter provides that essential nutty flavor and aids in browning. It’s the best of both worlds for a pan-fry.
Avoid the temptation to overcrowd the skillet. If you put too much meat in at once, the temperature of the pan drops and the chicken will steam in its own juices instead of searing. Cook in batches if necessary to ensure each piece has enough space to develop a deep, golden-brown crust.
Deglazing and Building the Lemon-Caper Base
Once the chicken is out of the pan, the real work begins. Pour in your broth, lemon juice, and extra liquid while the pan is still hot. Use a wooden spoon to vigorously scrape the bottom of the skillet. You’ll see the liquid turn a rich tan color as it picks up the toasted flour and chicken drippings.
Keep the heat high during this phase. You want to see active bubbling as the liquid reduces. Watch the bubbles; as the sauce thickens, the bubbles will become larger and pop more slowly. This is your visual cue that the water has evaporated and the flavors are concentrated.
When the liquid has reduced by about half, it should look slightly syrupy. This is when you add your lemon slices and capers. Simmering the lemon rounds for a minute softens the rind and releases a bit of essential oil into the sauce, adding an extra layer of citrus aroma.
The Finishing Touch: Mounting the Sauce
This is the moment where the magic happens. Take the pan completely off the heat. If the pan is too hot, the butter will just melt into oil. You want it to emulsify. Drop in your cold, cubed butter one or two pieces at a time, whisking or swirling the pan constantly.
As you whisk, you’ll notice the sauce transforming from a clear, dark liquid into an opaque, creamy, and pale gold sauce. This is the “Beurre Monté” coming to life. It should look rich and glossy. If you dip a spoon in, the sauce should coat it smoothly without immediately running off.
Once all the butter is incorporated, slide the chicken back into the pan. Turn the cutlets once to ensure they are fully bathed in the emulsion. The starch from the crust will bond with the sauce, creating a unified dish that looks like it came straight out of a professional kitchen.
Troubleshooting Common Piccata Pitfalls
If your coating is falling off the chicken, it’s usually because the meat was too wet before dredging or you moved it too soon in the pan. Always pat the chicken dry with paper towels before pressing it into the flour. Once it hits the oil, leave it alone until a crust forms; poking it too early tears the delicate skin.
Sometimes the sauce can turn out a bit too sour if your lemons were particularly acidic. Don’t panic! You can balance this easily by whisking in an extra tablespoon of butter or a tiny pinch of sugar. The fat and sweetness will mellow out the sharp citrus notes without dulling the flavor.
If your sauce separates into a greasy puddle, it means the pan was too hot when you added the butter. You can often fix a broken emulsion by adding a teaspoon of warm water or broth and whisking vigorously off the heat. This helps the fats and liquids re-bind into a smooth texture.
Optimal Side Dishes for Lemon-Caper Sauces
You want a side dish that acts as a sponge for that incredible sauce. Angel hair pasta or linguine are traditional choices because the thin strands catch the capers and coat easily in the butter. If you want something heartier, creamy polenta or mashed potatoes provide a neutral, velvety base that complements the acidity.
For a lighter option, roasted fingerling potatoes or a simple crusty baguette are perfect for mopping up every last drop. The crunch of the bread provides a great textural contrast to the tender chicken and silky sauce. It’s almost a crime to let any of that emulsion go to waste!
To balance the richness, I love serving this with a bitter or bright green vegetable. Sautéed broccolini with garlic or a simple arugula salad with a light vinaigrette works beautifully. The slight bitterness of the greens cuts through the buttery sauce and refreshes your palate between bites.
Expert Tips for Advanced Flavor Profiles
If you want to add more aromatic depth, try sautéing a finely minced shallot or a clove of smashed garlic in the pan for thirty seconds before you deglaze with the broth. This adds a subtle savory backbone that makes the sauce taste even more complex.
For those who prefer a richer, more decadent version, you can stir in a splash of heavy cream right before you start the butter emulsification. This creates a “Piccata Cream” that is exceptionally smooth and slightly more stable than the traditional version. It’s a great variation for a special dinner party.
Always taste your sauce before adding the chicken back in. Because the capers and broth vary in saltiness, you might need a final crack of black pepper or a tiny pinch of salt. Adjusting the seasoning at the very end ensures the flavors are perfectly balanced and vibrant.
Frequently Asked Questions
Can I make this without wine?
Yes, you can easily substitute the white wine with an equal amount of chicken broth. To maintain that necessary acidic “bite” that wine usually provides, add a teaspoon of white wine vinegar or an extra squeeze of lemon juice to the broth before pouring it into the pan.
How do I reheat leftovers without the sauce breaking?
Reheating Piccata can be tricky because the butter emulsion tends to separate in the microwave. The best way is to use a small skillet over low heat. Add a teaspoon of water or broth to the pan to help loosen the sauce, then gently warm the chicken through until the sauce becomes creamy again.
Can I use chicken thighs instead of breasts?
Absolutely! Chicken thighs are more forgiving and stay very juicy. However, they usually take a few minutes longer to cook than pounded breasts. Make sure to trim any excess fat and pound them slightly so they have an even thickness for consistent searing.
Why is my chicken rubbery?
Rubbery chicken is almost always a result of overcooking. Because the cutlets are thin, they only need about 3 to 4 minutes per side. If you leave them in the pan too long, the proteins tighten up and become tough. Pounding the meat also helps break down fibers, making the final result much more tender.
Can I freeze Chicken Piccata?
I don’t recommend freezing the finished dish because the delicate butter sauce will completely break and lose its texture upon thawing. However, you can freeze the pounded, uncooked chicken breasts. For the best experience, this dish is truly meant to be eaten fresh while the sauce is at its peak glossiness.
What kind of pan is best for this recipe?
A large stainless steel or cast iron skillet is ideal. These materials are excellent for creating a “fond” on the bottom of the pan, which is essential for the sauce. Non-stick pans are easier to clean, but they don’t allow the chicken to develop that deep, flavorful crust as effectively as traditional metal pans.
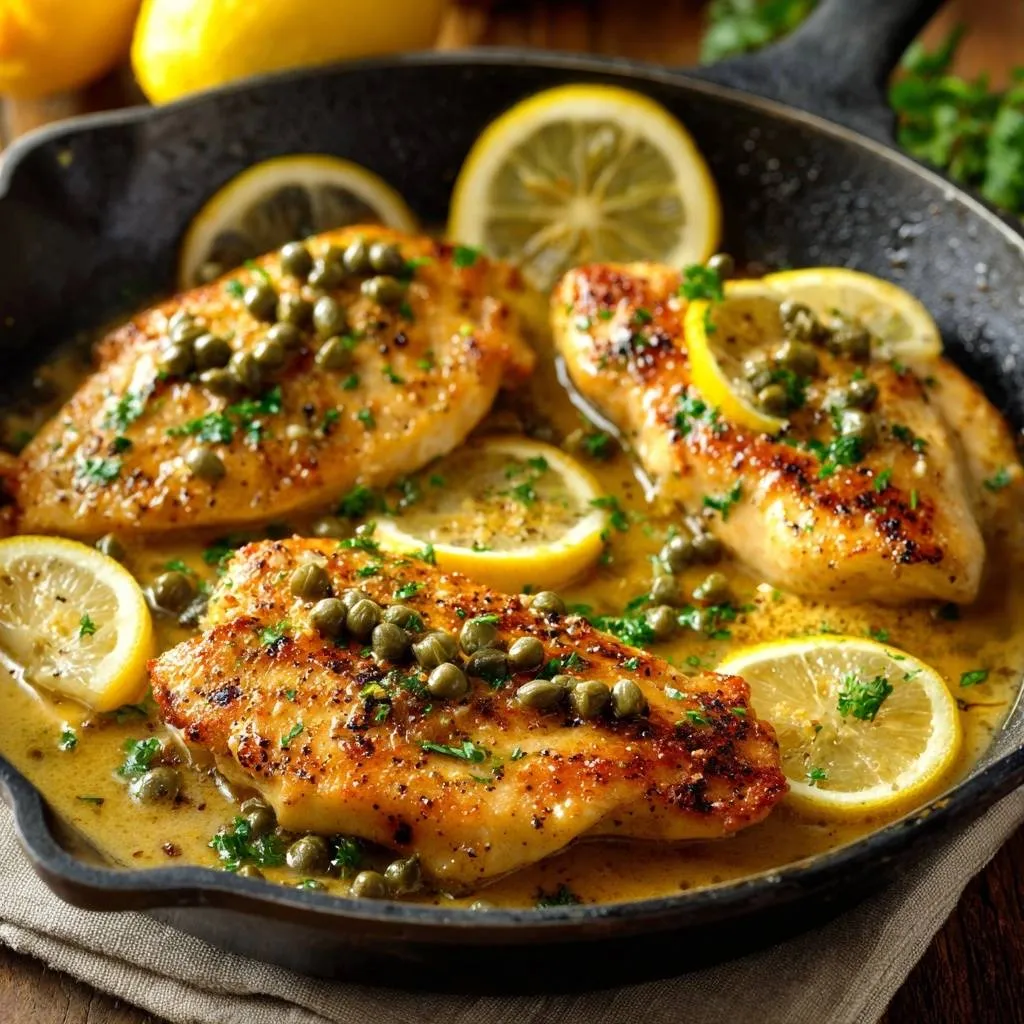
Classic Lemon Caper Chicken Piccata
Course: Main CourseCuisine: Italian-AmericanDifficulty: easy4
servings10
minutes15
minutes25
Minutes420
kcalItalian-American
Ingredients
4 boneless skinless chicken breasts, pounded to 1/2-inch thickness
1/2 cup all-purpose flour
1 teaspoon salt
1/2 teaspoon black pepper
2 tablespoons olive oil
2 tablespoons unsalted butter (for frying)
1/2 cup low-sodium chicken broth
1/4 cup dry white wine (or extra broth)
1/4 cup fresh lemon juice
3 tablespoons capers, drained
4 tablespoons cold unsalted butter, cubed (for the sauce)
1 lemon, thinly sliced into rounds
2 tablespoons fresh parsley, chopped
Directions
- Mix the flour, salt, and pepper in a shallow dish. Dredge each chicken breast in the flour, pressing firmly so the flour adheres, then shaking off the excess. This starch coating is vital as it protects the meat and provides the base needed to thicken your sauce later.
- Heat the olive oil and the first 2 tablespoons of butter in a large skillet over medium-high heat. Once the butter foam subsides and the pan is shimmering, add the chicken. Cook for 3 to 4 minutes per side until deep golden brown and cooked through. Remove chicken to a plate and tent loosely with foil.
- To solve the watery sauce problem, do not wipe out the pan. The leftover flour and fat in the pan are essential. Pour in the chicken broth, white wine, and lemon juice. Use a wooden spoon to vigorously scrape up the brown bits (fond) from the bottom.
- Bring the liquid to a boil and let it reduce by half over high heat until it begins to look slightly syrupy. Add the capers and lemon slices, simmering for 1 minute.
- Here is the fix for a perfect consistency: Turn off the heat and remove the pan from the burner entirely. Whisk in the cold, cubed butter one piece at a time, moving constantly. This creates a “beurre monté”-a thick, creamy emulsion that stays bonded and glossy rather than separating into a greasy puddle.
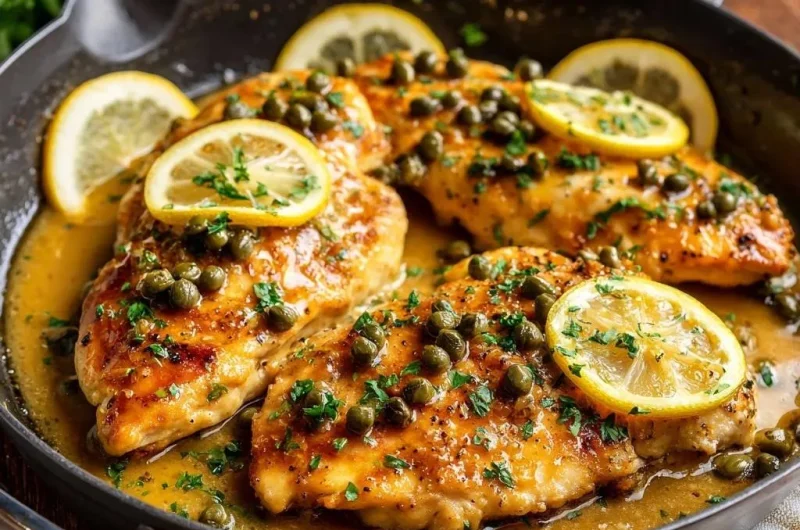
- Place the chicken back into the skillet, turning once to coat. Spoon the thick sauce and capers over the top. Garnish with fresh parsley and serve immediately while the sauce is at its peak thickness.
Notes
- To ensure a thick sauce, always remove the pan from the heat before whisking in the cold butter to create a stable emulsion.