
Most home cooks have faced the disappointment of a side dish that looks more like a gray, sticky paste than a vibrant meal. You want individual grains of rice that feel distinct on the tongue, yet you crave that decadent, molten cheese coating. When rice turns gummy, it’s usually because the surface starch has turned into a thick glue, trapping moisture and ruining the mouthfeel.
This Creamy Cheesy Garlic Rice solves that frustration by using a specific technical approach to grain management. Instead of just boiling the rice, we treat it with a combination of rinsing and fat-sealing. The result is a texture that feels luxurious and rich, but never heavy or clumping. It’s the kind of side dish that steals the spotlight from the main course because every bite offers a perfect snap followed by a creamy finish.
The secret to this success lies in the “matte white” transition during the sauté phase. By toasting the rice in butter before adding any liquid, you’re essentially waterproofing the exterior of each grain. This prevents the rice from over-hydrating and bursting, which is the primary cause of that dreaded mushy texture. Once you master this simple sear, you’ll never go back to the standard boiling method again.
The Science of Starch: Why Rice Becomes Gummy
To understand why rice fails, you have to look at the two types of starch found in the grain: amylose and amylopectin. Long-grain rice is high in amylose, which helps the grains stay separate and fluffy. However, during the milling process, a fine powder of starch is left on the surface of the rice. When this powder hits boiling water, it gelatinizes instantly, creating a sticky “web” that bonds the grains together into a clump.
If you don’t address this surface starch, your rice will always be gummy, regardless of how much cheese you add. In fact, adding cheese to poorly cooked rice often makes the problem worse, as the fats mix with the starch to create a heavy, thick paste. By removing that exterior starch and then sealing the grain with heat, you ensure the cheese sauce sits on top of the rice rather than soaking into a soggy core.
The Role of the Rinse
The two-minute rinse is the most non-negotiable part of this process. When you first run water over your rice, you’ll notice it looks milky or cloudy; that’s the excess starch washing away. You need to keep the water running and toss the grains with your fingers until that water is crystal clear. This physical removal of starch molecules is what guarantees a clean, professional mouthfeel where every grain stands on its own.

Toasting Grains for Structural Integrity
After rinsing, we use the “pilaf method” by sautéing the rice in butter. This isn’t just for flavor; it’s a structural necessity. As the rice toasts, the heat and fat create a protective barrier around each grain. You’ll see the rice change from a translucent, glassy look to a solid, matte white. This barrier slows down the water absorption, allowing the rice to cook through without the outside becoming over-saturated and mushy.
Essential Components for Creamy Cheesy Garlic Rice
Quality ingredients are the backbone of this dish because there are so few of them. Since the rice is the star, using a high-quality long-grain variety is essential. Furthermore, the type of fat and liquid you choose will dictate whether the final result is flat or deeply savory. Always use unsalted butter so you can control the seasoning yourself, especially since the broth and cheese both bring their own salt to the party.
Selecting the Right Grain: Jasmine vs. Basmati
For this recipe, you want a long-grain white rice like Jasmine or Basmati. Jasmine rice offers a slightly floral aroma and a soft, buttery texture that pairs beautifully with garlic. Basmati is even longer and firmer, which is great if you prefer a very distinct “snap” to your rice. Avoid short-grain varieties like Arborio or sushi rice; these are designed to be sticky and will turn this dish into a heavy porridge rather than a fluffy side.
The Case for Freshly Grated Sharp Cheddar
It’s tempting to grab a bag of pre-shredded cheese, but those products are coated in potato starch or cellulose to keep them from clumping in the bag. These anti-caking agents prevent the cheese from melting into a smooth, silky layer. For that true “molten” effect, buy a block of sharp cheddar and grate it yourself. The natural fats in fresh cheese will emulsify much better with the steam from the rice, creating a superior creaminess.
Liquid Gold: Using Low-Sodium Chicken Broth
Cooking rice in plain water is a missed opportunity for flavor. Using chicken broth infuses the grain with a savory depth that water simply can’t provide. However, always reach for the low-sodium version. Between the salt in the cheese and the salt used to season the rice, a full-sodium broth can quickly make the dish inedible. Low-sodium broth gives you the “umami” boost while keeping the seasoning balanced and bright.
Step-by-Step: Executing the Perfect Fluffy Texture
Success in the kitchen often comes down to timing and temperature control. This recipe moves quickly in the beginning, so have your garlic minced and your broth measured before you turn on the stove. Once the lid goes on the pot, the process becomes a waiting game where patience is your best tool. Following these phases ensures the rice is cooked evenly from the bottom of the pot to the top.
Phase 1: The Butter and Garlic Infusion
Start by melting your butter over medium heat until it begins to foam. Add your minced garlic and the rinsed rice immediately. You want to hear a gentle sizzle, not a harsh pop. Stir constantly for about 3 to 4 minutes. The goal is to perfume the butter with garlic and toast the rice until it looks like white chalk. Be careful not to brown the garlic; if it turns dark brown or black, it will taste bitter and ruin the delicate flavor of the cheese.
Phase 2: The Absorption and Simmer Phase
Once you add the broth and hit a boil, drop the heat to the lowest setting and cover the pot. This is the “no-peeking” phase. Every time you lift the lid, you release the steam that is essential for cooking the rice. This drops the internal temperature and messes with the liquid-to-rice ratio. Trust the timer for 15 minutes. The tight-fitting lid creates a pressurized environment that forces moisture into the center of each grain evenly.
Phase 3: The Carry-Over Steam Rest
When the timer goes off, move the pot off the hot burner but do not open it yet. Let it sit for 5 minutes. This rest period allows the moisture to redistribute. During the active simmer, the bottom grains are often wetter than the top. Resting ensures that every grain reaches the same level of tenderness. After 5 minutes, use a fork to gently lift and fluff the rice, which releases the final burst of steam and prevents clumping.
The “No-Stir” Technique for Molten Cheese Layers
The biggest mistake people make is stirring the cheese into the rice while it’s still on the heat. High, direct heat can cause the cheese to “break,” meaning the fat separates from the solids, leaving you with oily rice and rubbery clumps of cheese. Instead, use the residual steam to do the work for you. This gentle melting process preserves the integrity of the cheese and creates a velvety texture.
Transfer your fluffed, hot rice to a serving bowl and immediately pile the freshly grated cheddar on top. Cover the bowl with a large plate or a lid for just 60 seconds. The trapped steam will melt the cheese into a thick, glowing blanket. When you finally scoop into it, the cheese will stretch and swirl naturally into the rice without you having to overwork the grains, keeping the texture light and airy.
Troubleshooting Common Rice Texture Issues
If your rice comes out too crunchy or hard, don’t panic. This usually happens if the lid wasn’t tight enough or the heat was a bit too high, causing the liquid to evaporate too fast. To fix it, sprinkle two tablespoons of water over the rice, put the lid back on, and let it steam on the lowest heat for another 3 minutes. This “mini-steam” session usually softens the grains right up without making them mushy.
On the flip side, if the rice looks too wet when you open the lid, the best fix is to spread it out on a large baking sheet for a few minutes. The increased surface area allows the excess moisture to evaporate quickly into the air. If your garlic tastes bitter, it likely scorched during the sauté phase. Next time, try adding the garlic one minute after the rice has already started to toast to give it a shorter window of direct heat.
Flavor Variations and Ingredient Swaps
While sharp cheddar is the classic choice, you can easily swap the flavor profile. For a more sophisticated, nutty taste, try using shredded Gruyère or Swiss cheese. If you want something with a bit of a kick, Pepper Jack cheese adds a nice heat that complements the garlic perfectly. You can also stir in a pinch of red pepper flakes or some smoked paprika during the toasting phase to add color and warmth.
If you find raw garlic too pungent, you can use roasted garlic instead. Simply mash 4 or 5 cloves of roasted garlic into the butter before adding the rice. This creates a much mellower, sweeter flavor profile. For a fresh finish, swap the dried parsley for chopped fresh chives or scallions. The oniony bite of the chives cuts through the richness of the cheese and brightens the whole dish.
Optimal Pairings for Cheesy Garlic Rice
This rice is quite rich, so it pairs best with proteins that have a bit of acidity or a clean, roasted flavor. A lemon-herb roasted chicken is a perfect partner, as the citrus cuts through the heavy cheddar. It also works beautifully alongside seared beef tips or a simple grilled steak. The savory garlic notes in the rice enhance the natural flavors of the meat without competing for attention.
To balance the meal, serve a crisp green salad with a sharp vinaigrette on the side. The acidity of a balsamic or apple cider vinegar dressing provides a necessary contrast to the creamy, salty rice. Avoid serving this with other heavy, cream-based sides like mashed potatoes or creamed corn. You want the textures on the plate to vary, so something crunchy like roasted broccoli or sautéed green beans is an excellent choice.
Expert Tips for Storage and Reheating
Rice dries out quickly in the fridge because the starches undergo a process called retrogradation, where they harden as they cool. To store leftovers, put them in an airtight container as soon as they reach room temperature. This keeps the moisture locked in. It will stay fresh for up to three days, but the cheese will firm up, so you’ll need to be careful when reheating to bring back that creamy texture.
When you’re ready to eat it again, use the “ice cube trick.” Place the rice in a microwave-safe bowl and put a single ice cube on top of the rice. Cover the bowl with a damp paper towel and microwave for one minute. The ice cube won’t melt completely, but it will create a localized steam chamber that re-hydrates the rice and remelts the cheese perfectly. Discard the remaining ice and fluff the rice before serving.
How do I store leftover cheesy rice and can I freeze it?
Store your leftovers in an airtight container in the refrigerator for up to 3 days. While you can technically freeze cooked rice, I don’t recommend it for this specific cheesy version. The cheese sauce can become grainy and separate when thawed and reheated, losing that signature silky texture. For the best experience, eat it fresh or within a few days of cooking.
Why did my rice turn out sticky and clumped together?
Sticky rice is almost always caused by skipping the rinsing step or not toasting the rice long enough. If you don’t wash away the surface starch, it creates a glue-like coating. Additionally, if you stir the rice too much while it’s simmering, you break the grains and release more starch. Next time, ensure the water runs completely clear during the rinse and keep the lid closed until the cooking time is fully up.
Can I use brown rice instead of white rice for this recipe?
You can use brown rice, but you’ll need to adjust the liquid and time significantly. Brown rice requires about 2 cups of liquid for every 1 cup of rice and takes 40 to 45 minutes to cook. Because brown rice has a chewy bran layer, it won’t ever be quite as “creamy” as white rice, but the garlic and cheese flavors still work well. Be sure to still rinse and toast the grains to help with the texture.
What can I use if I don’t have chicken broth?
If you don’t have chicken broth, vegetable broth is an excellent 1:1 substitute. If you only have water, you’ll need to increase the salt by about 1/4 teaspoon and perhaps add a bit more butter or a pinch of onion powder to make up for the lost flavor. Avoid using beef broth, as the flavor is too heavy and will overpower the delicate garlic and cheddar.
Why is my cheese oily instead of creamy?
This usually happens if the cheese gets too hot or if you used pre-shredded cheese from a bag. High heat causes the fat in the cheese to separate from the protein. To prevent this, always use the “no-stir” method described in the recipe. By letting the residual steam melt the cheese off the heat, you keep the emulsion stable, resulting in a smooth, creamy coating rather than an oily mess.
Can I add vegetables like broccoli or peas to this rice?
Yes, you can easily add small vegetables. For peas, stir them in at the very end when you fluff the rice; the residual heat will warm them through perfectly. For broccoli, chop it into very small florets and add them to the pot for the last 5 minutes of the simmering phase. This allows the broccoli to steam right on top of the rice without requiring an extra pan.
Creamy Cheesy Garlic Rice
Course: Side DishCuisine: AmericanDifficulty: easy4
servings5
minutes25
minutes30
MinutesAmerican
Ingredients
1.5 cups long-grain white rice (such as Jasmine or Basmati)
2.5 cups low-sodium chicken broth
2 tablespoons unsalted butter
3 cloves garlic, minced
1.5 cups shredded sharp cheddar cheese (freshly grated for better melting)
1/2 teaspoon cracked black pepper
1/4 teaspoon salt
Optional: Dried parsley for garnish
Directions
- The most critical step to prevent gumminess is rinsing. Place your raw rice in a fine-mesh strainer and run cold water over it for at least 2 minutes, tossing with your hands, until the water runs perfectly clear. Drain thoroughly.
- In a medium saucepan, melt the butter over medium heat. Add the minced garlic and the drained rice. Sauté the rice in the butter for 3 to 4 minutes. You are looking for the grains to turn from translucent to a bright, matte white. This toasting step creates a protective barrier that prevents the rice from over-absorbing liquid and getting mushy.
- Pour in the chicken broth and add the salt. Bring the mixture to a rolling boil.
- Once boiling, turn the heat to the lowest possible setting and cover the pot with a tight-fitting lid. Do not lift the lid. Simmer for 15 minutes.
- Remove the pot from the heat and let it sit, covered, for 5 minutes. This allows the steam to finish cooking the grains evenly and ensures they stay separate.
- Remove the lid and fluff the rice gently with a fork.
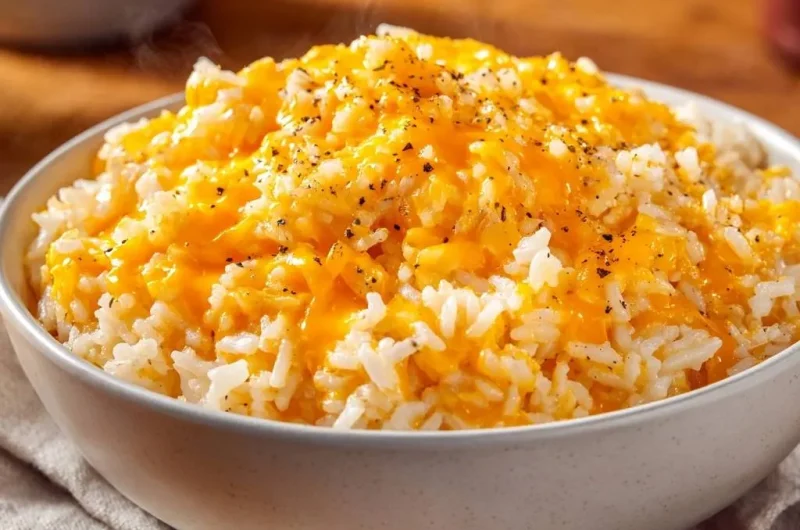
- To achieve the visual result in the image: Transfer the hot rice to a serving bowl. Immediately sprinkle the shredded cheddar cheese and cracked black pepper over the top. Do not stir. Cover the bowl with a large plate or lid for 60 seconds to allow the residual steam to melt the cheese into a thick, molten layer over the individual grains.
- Garnish with parsley and serve immediately, scooping from the bottom to get a mix of fluffy rice and melted cheese in every bite.
Notes
- Rinsing the rice for 2 minutes until the water runs clear is the most critical step to prevent gumminess. Freshly grated cheese is recommended for superior melting compared to pre-shredded varieties.