
We’ve all been there. You sit down to a beautiful plate of pasta, only to find a thin, watery puddle collecting at the bottom of the bowl by the third bite. It’s frustrating because you used the best ingredients, yet the sauce just won’t cling to the noodles. This happens when the fats and liquids in your sauce refuse to play nice, leaving you with a broken mess instead of a velvety coating.
The secret to a restaurant-grade emulsion isn’t a fancy tool or a secret ingredient; it’s all about the science of the “Skyscraper” build. By layering your flavors and using specific thickening techniques, you can create a sauce that is garlic-forward, incredibly rich, and brightened with a hit of fresh lemon. It’s a dish that feels heavy on luxury but light on the palate, provided you master the bond between the cream and the pasta.
I’ve found that the absolute biggest mistake home cooks make is tossing out the pasta water too early. That cloudy, starchy liquid is the “glue” that holds your entire dinner together. If you want that glossy, thick finish that looks like it came out of a professional kitchen, you have to treat that water like liquid gold. Let’s dive into how we make that happen.
The Science of a Non-Separating Cream Sauce
Creating a stable cream sauce is essentially an exercise in chemistry. When you mix heavy cream, butter, and parmesan cheese, you are trying to keep fats suspended in a water-based liquid. If the heat is too high or the ingredients are added too quickly, the proteins in the cheese (casein) will clump together, and the fats will leak out, resulting in a greasy, grainy texture.
Heat management is your best friend here. You want a gentle simmer, never a rolling boil, once the dairy enters the pan. High heat causes the water in the cream to evaporate too fast, which stresses the emulsion. By keeping the temperature moderate, you allow the milk solids to stay hydrated and smooth. This ensures the sauce remains a cohesive unit rather than a collection of separated oils.
Furthermore, the addition of parmesan cheese introduces more protein and fat. If you use the stuff from a green can, the added cellulose (anti-clumping agents) will prevent it from melting into the sauce properly. Freshly grated cheese, however, contains natural emulsifiers that actually help thicken the sauce as it melts. It’s a delicate balance, but once you see the sauce turn into a shimmering, thick coat, you’ll know you’ve nailed the science.
Why Starchy Pasta Water is Liquid Gold
When tortellini boils, it releases amylose starch into the water. This starch is a powerful thickening agent that acts as a physical bridge between the fats in your butter and cream and the liquids like lemon juice. Without it, the sauce often sits on top of the pasta; with it, the sauce becomes part of the pasta.
By reserving half a cup of this water, you have a “fixer” on standby. If your sauce looks a bit too tight or starts to break, a splash of this starchy liquid will pull it back together. It creates a creamy tension that allows the sauce to defy gravity and stick to the smooth surface of the shrimp and the crevices of the tortellini.
Essential Components for Creamy Garlic Shrimp Tortellini
Quality ingredients are the backbone of this dish. For the shrimp, I always recommend the 16/20 size (which means 16 to 20 shrimp per pound). These are large enough to get a beautiful sear without overcooking in the center. Buying them “peeled and deveined” is a massive time-saver, but do make sure the tails are off if you want a seamless eating experience.
The parmesan cheese is the most critical variable. Please, skip the pre-shredded bags. Those are coated in potato starch or cellulose to keep the shreds from sticking together in the bag, but that same coating will make your sauce gritty. Buy a wedge of Parmigiano-Reggiano and grate it yourself on the finest holes of your grater. It will melt into the cream like a dream.
Fresh garlic is another non-negotiable. Pre-minced garlic in a jar has a metallic, acidic aftertaste that can overwhelm the delicate cream. Four large cloves of fresh garlic, finely minced, will provide a sweet, aromatic punch that builds the foundation of the entire flavor profile. When combined with fresh parsley and lemon, these simple components create a complex, high-end taste.
Selecting the Right Tortellini: Fresh vs. Frozen
Refrigerated “fresh” tortellini is my top choice for this recipe because it has a tender, supple texture and cooks in just a few minutes. It absorbs the sauce much better than the dried, shelf-stable versions. If you use frozen tortellini, don’t thaw it first; just drop it straight into the boiling water, but keep an eye on the clock so it doesn’t get mushy.
Cheese-filled tortellini works best here because it complements the parmesan in the sauce. Meat-filled versions can sometimes compete with the flavor of the shrimp. The goal is for the pasta to be a vessel for the garlic cream, so a mild ricotta or three-cheese blend is usually the most harmonious choice.
The Role of High-Fat Dairy in Emulsification
You might be tempted to swap the heavy cream for half-and-half or whole milk to save on calories, but I’d advise against it for this specific technique. Heavy cream has a high fat content that makes it much more stable when exposed to heat and the acidity of lemon juice. Lower-fat dairies are prone to curdling the moment the lemon hits the pan.
The fat in the cream also provides the “mouthfeel” that defines a luxury pasta dish. It coats the tongue and carries the flavors of the garlic and red pepper flakes. Because we are reducing the cream, it naturally thickens into a sturdy sauce that won’t run off your fork, which is exactly what we want for a “never watery” result.
Pre-Cook Prep: Drying and Seasoning the Shrimp
If you want that gorgeous, golden-brown crust on your shrimp, you have to get rid of the moisture. Shrimp are naturally watery, and if they go into the pan damp, they will steam instead of sear. I lay mine out on a double layer of paper towels and pat the tops until they are bone-dry. It’s a small step that makes a huge difference in the final texture.
Once dry, season them immediately with salt, black pepper, and a generous pinch of red pepper flakes. The salt helps draw out any remaining surface moisture, while the pepper flakes start to bloom the moment they hit the hot butter. This ensures the seasoning is cooked into the shrimp rather than just sitting on the surface of the sauce later on.
Step-by-Step: Searing Shrimp and Building the Base
Start by getting your butter to the “foaming” stage. This is when the water in the butter has evaporated, and the milk solids are just starting to toast. Drop your shrimp in a single layer. If you crowd the pan, the temperature will drop, and you’ll lose that Maillard reaction—the chemical process that creates that savory, browned crust.
Sear them for about two minutes per side. You’re looking for them to turn opaque and take on a slight “C” shape. Don’t let them curl into a tight “O,” or they’ll be rubbery. Once they look perfect, pull them out of the pan. We’ll add them back at the very end so they stay tender and juicy while we build the rest of the sauce.
Deglazing the Skillet with Garlic and Butter
After removing the shrimp, you’ll see little brown bits stuck to the bottom of the skillet. That is “fond,” and it is packed with concentrated shrimp flavor. Add your remaining butter and the minced garlic right on top of it. As the garlic softens, use a wooden spoon to scrape those bits up so they dissolve into the butter.
Be careful here; garlic burns in a heartbeat. You only need about 60 seconds until it smells amazing and looks translucent. If the garlic turns dark brown or black, it will taste bitter and ruin the cream sauce. If that happens, it’s better to wipe the pan and start the garlic step over than to proceed with a bitter base.
The Reduction Phase: Thickening the Garlic Cream
Now, pour in your heavy cream. This is the reduction phase, where we let the water evaporate to naturally thicken the sauce. Bring it to a gentle simmer. You’ll see small bubbles dancing around the edges of the pan. Let it go for about 4 to 5 minutes, stirring occasionally to ensure it doesn’t scorch on the bottom.
You are looking for a “nappe” consistency. This is a fancy chef term that just means the sauce is thick enough to coat the back of a spoon. If you run your finger through the sauce on the spoon and the line stays clean, you’ve reached the perfect thickness. It should look rich and ivory-colored at this stage.
Integrating the Parmesan and Lemon Juice
Turn the heat down to low before adding the cheese. Whisk in the freshly grated parmesan in small handfuls. By adding it slowly to low heat, you ensure it melts completely into the cream without clumping. Once the cheese is in, whisk in the lemon juice. The acidity will cut through the richness of the dairy and make the whole dish pop.
If the sauce looks a little too thick after the cheese melts, don’t panic. This is where your reserved pasta water comes in. Add it one tablespoon at a time, whisking constantly. The starch will keep the sauce smooth and glossy while thinning it out to your desired consistency. It should look like liquid velvet at this point.
The Marriage: Combining Pasta, Shrimp, and Sauce
Instead of just pouring the sauce over the pasta, we are going to use the “Pasta Risotto” method. Toss your slightly undercooked tortellini directly into the skillet with the sauce. Because the pasta isn’t quite finished, it will act like a sponge, soaking up the garlic cream into its outer layers. This creates a cohesive dish where the pasta and sauce are one.
Stir gently for about two minutes. You’ll see the sauce tighten up even more as the pasta finishes cooking. In the last 30 seconds, fold the seared shrimp back into the pan. We just want to warm them through without overcooking them. This final “marriage” of ingredients ensures every bite is perfectly balanced and hot.
Troubleshooting Common Sauce Consistency Issues
If your sauce ends up too thin, the simplest fix is a bit more time. Let it simmer on low for another minute or two, but be careful not to overcook the tortellini. Alternatively, a small extra handful of parmesan can help tighten things up. Just remember that the sauce will continue to thicken as it cools slightly on the plate.
If the sauce “breaks” and looks oily, it usually means the heat was too high. You can often save it by adding a splash of warm heavy cream and whisking vigorously off the heat. The fresh fats in the new cream can help re-emulsify the separated oils. If it’s grainy, it’s likely due to pre-shredded cheese, and unfortunately, that’s hard to fix—just a lesson for next time!
Flavor Variations and Ingredient Swaps
This recipe is a fantastic canvas for other flavors. If you want a pop of color and a tangy bite, try adding a quarter cup of chopped sun-dried tomatoes during the garlic sauté. Or, if you want to sneak in some greens, toss in two handfuls of fresh baby spinach right at the end; the heat of the sauce will wilt it in seconds.
For those who aren’t fans of shrimp, this sauce works beautifully with sea scallops or even chunks of firm white fish like halibut. If you want to keep it vegetarian, simply omit the seafood and add roasted mushrooms or asparagus. The garlic-parmesan base is incredibly versatile and pairs well with almost any protein or vegetable.
What to Serve with Garlic Shrimp Tortellini
Since this is a very rich, decadent dish, you want side dishes that offer a crisp, acidic contrast. A simple arugula salad with a sharp lemon-balsamic vinaigrette is perfect. The peppery bite of the arugula cuts right through the heavy cream, refreshing your palate between bites of pasta.
Roasted vegetables are another great option. Think thin stalks of asparagus roasted with a bit of olive oil and sea salt, or charred broccolini with a squeeze of lemon. You want something with a bit of “crunch” to balance out the soft, pillowy texture of the tortellini. Avoid heavy, buttery sides, as the main dish already has plenty of richness to go around.
Expert Tips for Reheating and Storage
Cream sauces are notoriously finicky when it comes to leftovers. If you just pop this in the microwave, the sauce will almost certainly break, leaving you with oily pasta. Instead, reheat it in a small skillet over low heat. Add a splash of water or a tablespoon of milk to help loosen the sauce and restore the emulsion as it warms up.
I strongly advise against freezing this dish. The delicate cell structure of the tortellini tends to get grainy when frozen and thawed, and the cream sauce will likely separate into a curdled mess. This is a dish that is truly at its peak the moment it’s made. If you do have leftovers, keep them in an airtight container in the fridge for no more than two days.
Frequently Asked Questions
Can I use pre-minced garlic from a jar?
You can, but I wouldn’t recommend it for this specific dish. Jarred garlic is often preserved in citric acid, which gives it a sour, metallic taste. Since garlic is a primary flavor here, using fresh cloves will give you a much sweeter, more mellow aromatic profile that complements the cream perfectly.
Why did my sauce turn out grainy?
Graininess usually happens for two reasons: using pre-shredded cheese or using heat that is too high. Pre-shredded cheese is coated in starch that doesn’t melt smoothly. Also, if the sauce boils after the cheese is added, the proteins can clump together. Always use freshly grated cheese and keep the heat on low during that step.
Can I make this dairy-free?
You can substitute the heavy cream with full-fat canned coconut milk or a cashew-based cream. However, keep in mind that coconut milk will add a slight tropical flavor. For the parmesan, use a high-quality nutritional yeast or a vegan parmesan alternative, but the texture will be slightly different than the traditional version.
How do I know when the shrimp is perfectly cooked?
Watch the shape and color. Perfectly cooked shrimp will turn opaque and form a gentle “C” shape. If they curl up into a tight “O” or a circle, they are overcooked and will likely be tough or rubbery. Removing them from the pan early and adding them back at the end is the best way to prevent this.
Is it possible to use dried tortellini?
Yes, you can use dried tortellini, but you’ll need to adjust the cook time significantly. Dried pasta takes much longer to reach al dente. Make sure you still pull it out of the water two minutes early so it can finish cooking in the sauce, and be extra diligent about saving that starchy pasta water!
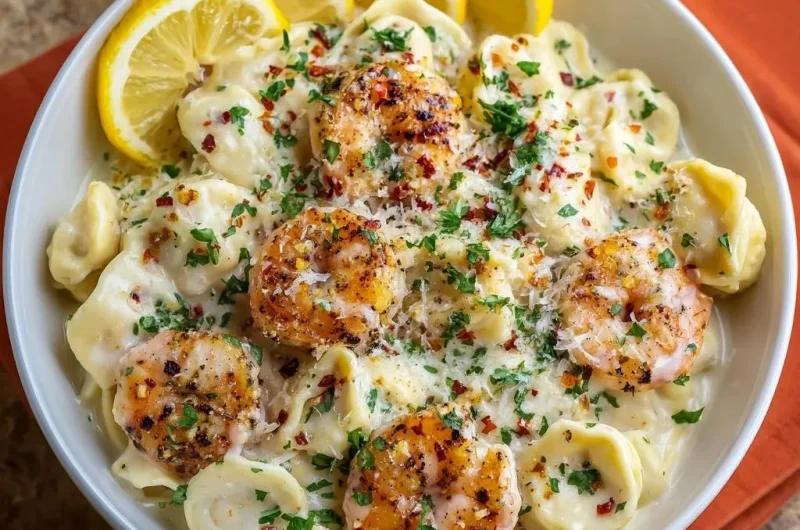
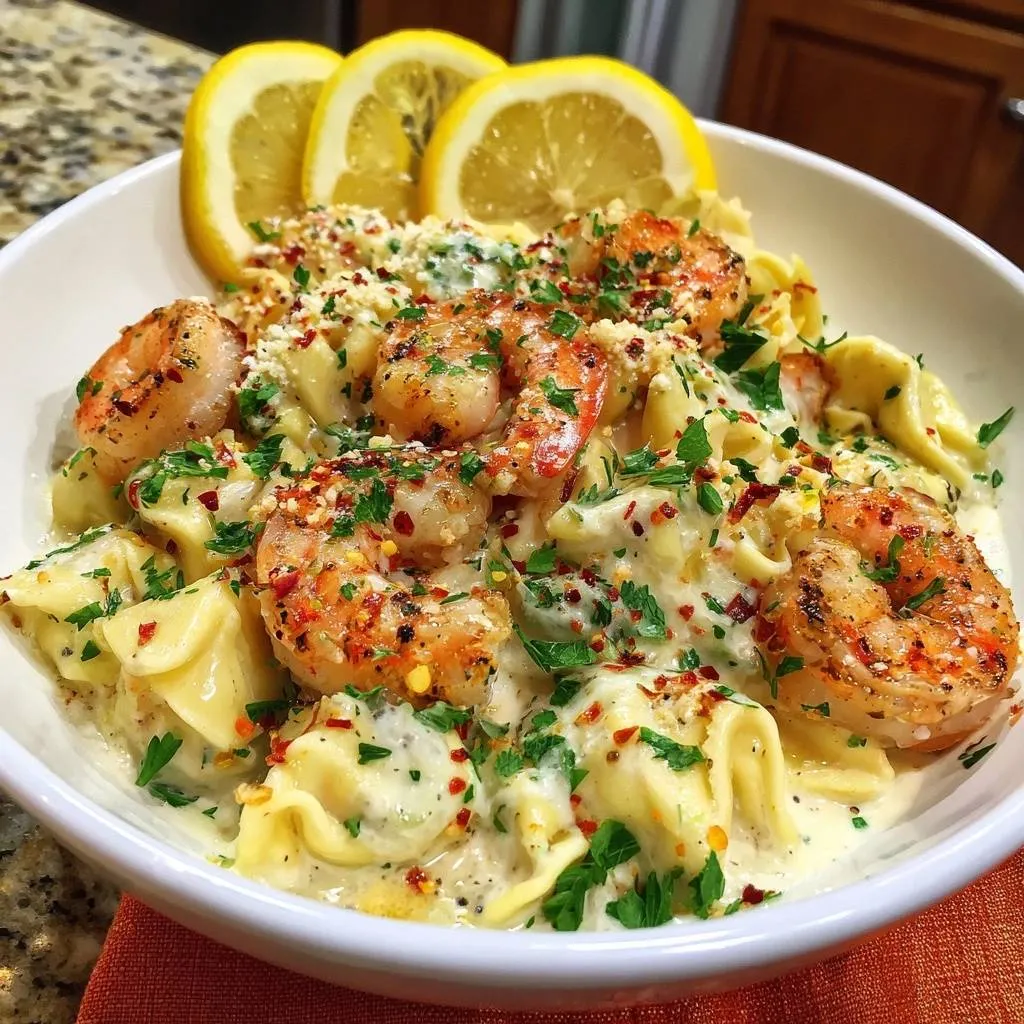
Creamy Garlic Shrimp Tortellini
Course: Main CourseCuisine: Italian-AmericanDifficulty: easy4
servings10
minutes15
minutes25
MinutesItalian-American
Ingredients
1 pound cheese tortellini
1 pound large shrimp, peeled and deveined
3 tablespoons butter, divided
4 cloves garlic, minced
1.5 cups heavy cream
3/4 cup freshly grated parmesan cheese (plus extra for garnish)
1 teaspoon red pepper flakes
2 tablespoons fresh parsley, chopped
1 lemon, half sliced into rounds and half juiced
Salt and black pepper to taste
Directions
- Bring a large pot of salted water to a boil. Cook the tortellini for 2 minutes less than the package directions (it should be slightly firm). Important: Before draining, scoop out 1/2 cup of the starchy pasta water and set it aside. This is the key to preventing a watery sauce.
- While the pasta cooks, pat the shrimp completely dry with paper towels. Season with salt, pepper, and a pinch of red pepper flakes.
- Melt 1 tablespoon of butter in a large skillet over medium-high heat. Once the butter is foaming, add the shrimp in a single layer. Sear for 2 minutes per side until they have a golden-brown crust and are opaque. Remove shrimp from the pan and set aside.
- Lower the skillet heat to medium. Add the remaining 2 tablespoons of butter and the minced garlic. Sauté for 1 minute until fragrant, scraping up any browned bits from the shrimp.
- Pour in the heavy cream and bring to a gentle simmer. Let the cream reduce for 4 to 5 minutes until it begins to thicken naturally.
- Turn the heat to low and whisk in the 3/4 cup of parmesan cheese and 1 tablespoon of lemon juice until smooth. If the sauce becomes too thick, whisk in the reserved pasta water one tablespoon at a time. The starch in that water acts as a bridge between the fats and the liquids, ensuring the sauce stays creamy and never breaks.
- Toss the undercooked tortellini into the sauce. Stir gently for 2 minutes to allow the pasta to finish cooking and absorb the sauce. Fold the seared shrimp back in during the last 30 seconds just to warm through.
- Garnish heavily with fresh parsley, additional grated parmesan, red pepper flakes, and the lemon slices as shown in the image. Serve immediately while the emulsion is at its peak.
Notes
- The key to preventing a watery sauce is reserving 1/2 cup of starchy pasta water and undercooking the tortellini by 2 minutes so it finishes cooking directly in the sauce.