Most of us have been there: you pull a beautiful gratin out of the oven, only to find a watery, orange soup lurking beneath the top layer of cheese. It’s a common heartbreak because sweet potatoes are notorious for releasing massive amounts of moisture as they cook. Instead of a velvety sauce that clings to every bite, you end up with a soggy mess that slides right off your fork.
The secret to perfect Creamy Scalloped Sweet Potatoes lies in structural integrity and moisture control. We aren’t making a sugary mash here; we’re building a “skyscraper” of perfectly tender, distinct slices held together by a rich, savory glaze. By focusing on a few professional techniques, you can achieve that elusive balance of a crispy, golden top and a center that’s creamy but never mushy.
I’ve found that the real game-changer is a quick par-roasting step before the potatoes ever touch the cream. This “flashes off” the surface water and starts the starch conversion early, ensuring your sauce stays thick and emulsified. If you’ve struggled with broken sauces or watery vegetables in the past, this method is going to be your new best friend in the kitchen.
The Science of the Anti-Soggy Sweet Potato
Sweet potatoes have a completely different cellular makeup than your standard Russet or Yukon Gold. They contain a high concentration of amylase enzymes, which break down starches into sugars as the potato heats up. While this creates that signature sweetness we love, it also releases a significant amount of internal water that can thin out your cream sauce.
When you bake raw sweet potato slices directly in liquid, that water has nowhere to go but into your sauce. This often causes the heavy cream to “break” or separate, leaving you with oily droplets and a thin, milky liquid at the bottom of the pan. By applying high heat to the slices on a flat baking sheet first, you effectively evaporate that excess moisture before it can ruin your gratin.
Furthermore, this initial blast of heat triggers a starch conversion that makes the exterior of the potato slightly tacky. This tackiness is actually a good thing! It acts as a natural thickener, helping the cream and cheese bind to the surface of each slice. You’ll notice the difference the moment you take your first bite; the sauce feels like a rich velvet coating rather than a runny soup.
Why Par-Roasting Beats Raw Slicing
Traditional recipes tell you to layer raw slices and bake them for an hour, but that’s a recipe for disaster. Raw slices leach water slowly, which prevents the cream from reducing properly. However, when you par-roast, you’re essentially “sealing” the potato. You’ll know they’re ready when the slices look slightly matte and feel flexible but not quite soft enough to eat.
Visually, a perfectly par-roasted slice will have lost its raw, shiny sheen. It shouldn’t be browned yet—save that for the final bake—but it should look “set.” This extra ten minutes in the oven saves you from the disappointment of a broken emulsion later on, giving you a professional-grade result every single time.
Essential Components for Creamy Scalloped Sweet Potatoes
Quality ingredients are the backbone of this dish, especially since the flavor profile is so focused. I always recommend using heavy cream with at least 36% milkfat. This high fat content provides the stability needed to withstand the oven’s heat without curdling, especially when mixed with the natural acids in the potatoes.
Fresh thyme and nutmeg are the non-negotiable aromatics here. Nutmeg has a chemical affinity for dairy; it cuts through the richness and highlights the earthy sweetness of the potatoes. Meanwhile, fresh thyme adds a woody, floral note that prevents the dish from feeling too heavy. If you use dried herbs, you’ll lose that bright, top-note finish that makes this recipe stand out.
Don’t skimp on the garlic, either. We aren’t just tossing it in raw; we’re infusing it into the warm dairy. This ensures the garlic flavor is mellow and evenly distributed throughout the entire dish. It prevents those “hot spots” of pungent, raw garlic that can sometimes ruin a delicate gratin.
Selecting the Right Sweet Potato Variety
Not all sweet potatoes are created equal when it comes to baking. For this recipe, look for Covington or Jewel varieties. These have a classic orange flesh and a relatively consistent moisture content. They hold their shape beautifully even after being sliced thin and baked twice.
Garnet sweet potatoes are another excellent choice because of their deep purple-red skin and vibrant interior. They tend to be a bit more moist, so the par-roasting step is even more critical if you choose these. Avoid the white-fleshed varieties for this specific dish, as they can be a bit too starchy and crumbly for a traditional scalloped presentation.
The Role of High-Fat Dairy and Aromatics
Using a mix of heavy cream and whole milk creates the perfect texture—rich but not cloying. If you use only milk, the sauce will be too thin; if you use only cream, it can become overly heavy. The 1.5 to 0.5 ratio we use here is the “sweet spot” for a sauce that coats the back of a spoon.
Simmering the garlic and thyme in the dairy before it hits the pan is a classic chef’s trick. This infusion process softens the garlic’s bite and ensures the thyme’s essential oils are fully integrated. Therefore, every single layer of your gratin will have a consistent, sophisticated flavor rather than just the top layer.
Step-by-Step: Preparing the Foundation
Precision is your best friend when prepping the potatoes. You want to aim for 1/8 inch rounds. If the slices are too thick, they won’t soften at the same rate as the sauce reduces; if they’re too thin, they’ll dissolve into mush. I highly recommend using a mandoline to get that perfect, uniform thickness.
Once your slices are ready, don’t forget to grease your baking dish generously with butter. This isn’t just about preventing the potatoes from sticking. As the gratin bakes, the butter on the bottom and sides browns slightly, adding a nutty, toasted flavor to the edges of the potatoes. It’s these small details that build layers of flavor.
Executing the Moisture-Lock Technique
Preheat your oven to 400°F and grab two large baking sheets. Arrange the slices in a single layer, making sure they aren’t overlapping too much. If you crowd the pan, the potatoes will steam instead of roasting, which defeats the whole purpose of “flashing off” the moisture.
Roast them for about 8 to 10 minutes. You’ll notice the kitchen starts to smell slightly sweet, and the potatoes will look “tacky” to the touch. They should be pliable but still have some resistance. This step is the secret weapon that guarantees a thick, luscious sauce in the final dish.
Assembling the Layers for Maximum Texture
Now comes the fun part: the assembly. Start with a layer of potatoes, then a sprinkle of Gruyère or sharp white cheddar. Gruyère is my top pick because it melts into a silky consistency and has a salty, nutty punch that balances the sweet potatoes perfectly. Repeat this for the second layer.
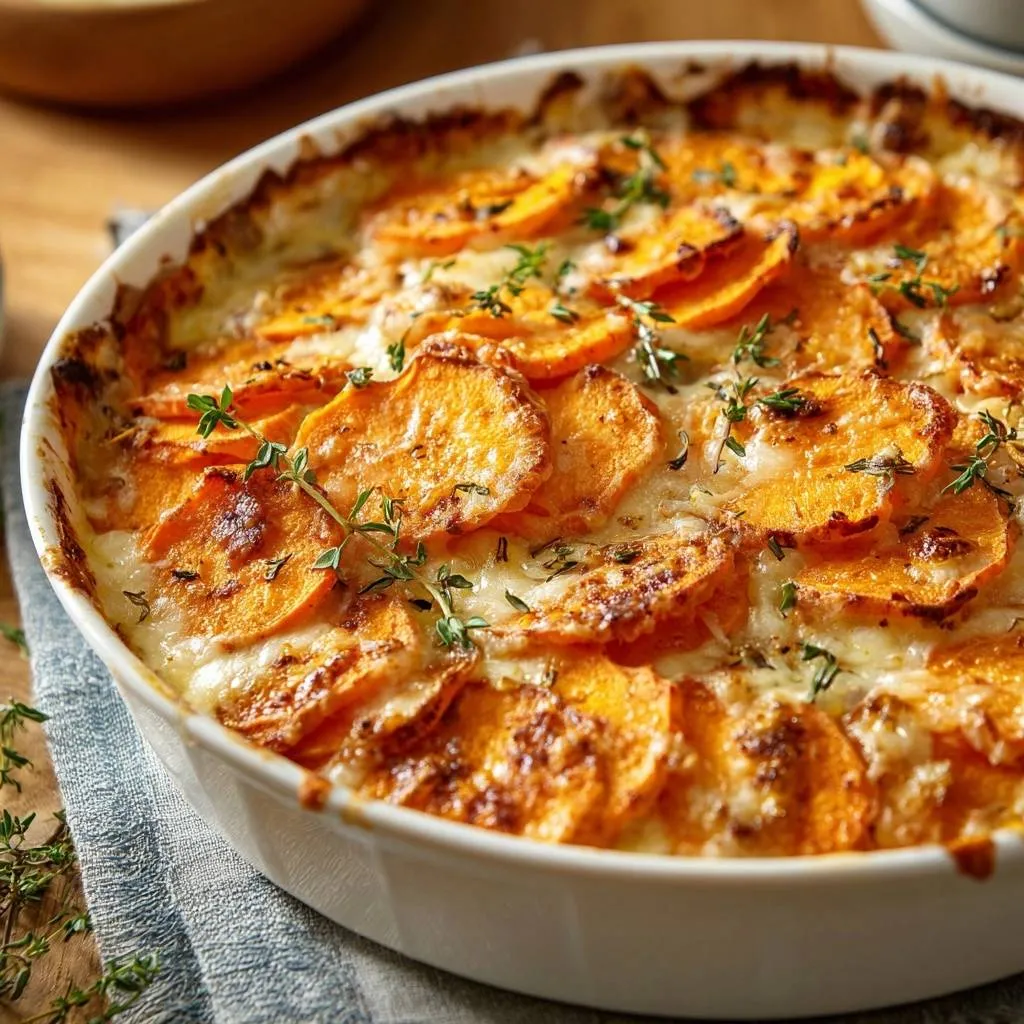
For the final top layer, use a “shingling” technique. Overlap the slices tightly in a circular or diagonal pattern. This creates more surface area for the cheese to cling to and allows the edges of the potatoes to poke out. Those exposed edges will become wonderfully crispy and caramelized in the oven, providing a great textural contrast.
The Two-Stage Baking Process
We bake this in two distinct stages to control the texture. First, cover the dish tightly with foil for 20 minutes. This creates a small steam chamber that ensures the starches in the center of the potatoes are fully hydrated and tender. Without the foil, the top would burn before the middle is cooked through.
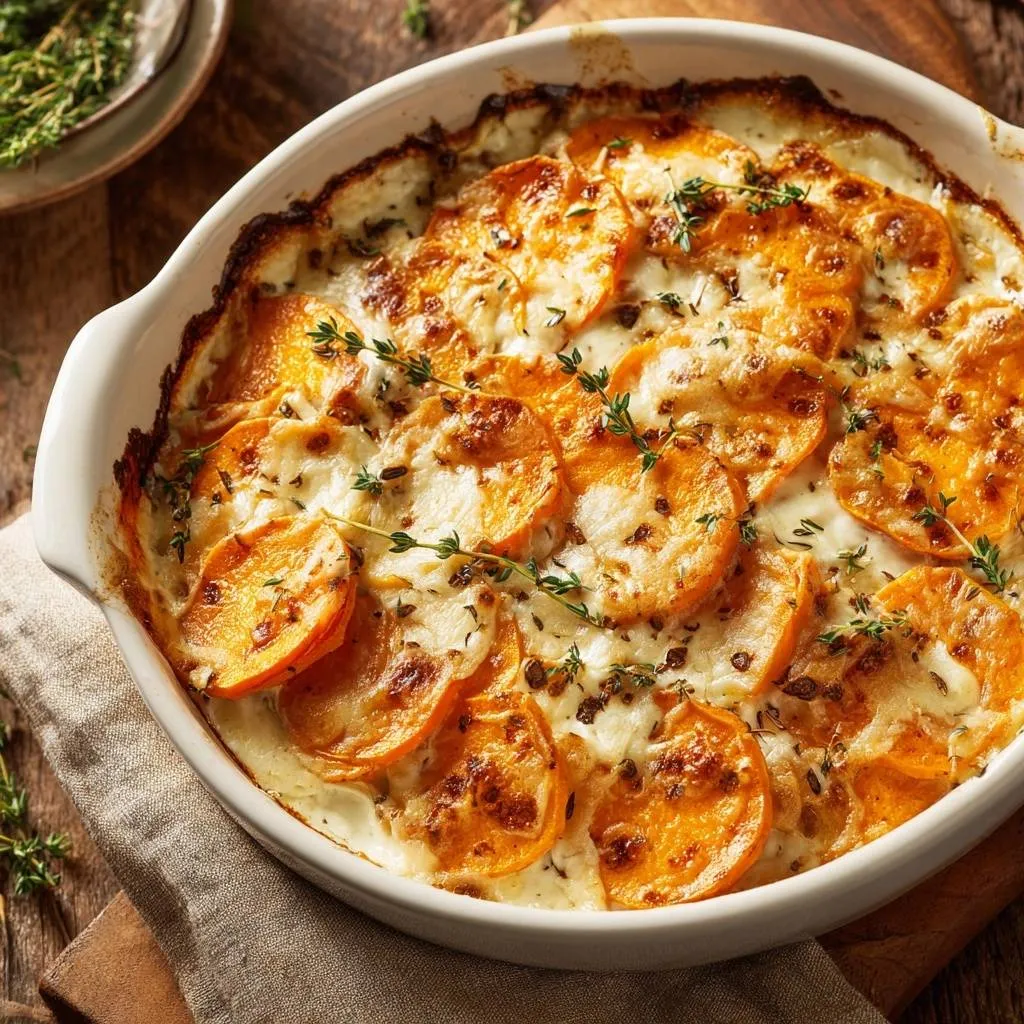
After 20 minutes, remove the foil and add the remaining cheese. Now, the oven’s dry heat can go to work. The cream will begin to reduce and thicken into a glaze, while the cheese bubbles and browns. You’re looking for a deep golden color and a sauce that is bubbling lazily around the edges.
Troubleshooting Common Gratin Issues
If you notice your cream looks like it’s beginning to separate or “break,” don’t panic. This usually happens if the oven is too hot or if you used low-fat dairy. You can often fix this by gently pressing down on the potatoes with a spatula to re-incorporate the fats, or by adding a tiny splash of cold cream to the edges.
To check for doneness, insert a paring knife into the center. It should slide in with zero resistance. If the top is browning too quickly but the center is still firm, simply tent a piece of foil loosely over the top. This protects the cheese while allowing the heat to continue penetrating the middle of the dish.
Flavor Variations and Dairy-Free Swaps
If you want to change things up, try swapping the Gruyère for an aged Manchego or even a bit of smoked Gouda for a campfire vibe. A pinch of smoked paprika added to the cream infusion can also add a lovely depth. For a bit of crunch, you could even add some toasted pecans to the final cheese layer.
For a dairy-free version, use full-fat coconut milk combined with a bit of cashew cream for thickness. Skip the cheese or use a high-quality plant-based melt. The coconut milk actually pairs beautifully with the natural flavor of sweet potatoes, though you may want to increase the salt and garlic to balance the coconut’s sweetness.
Make-Ahead Strategies and Storage
You can easily prep this dish 24 hours in advance. Simply follow the steps up until the final bake, cover it tightly, and keep it in the fridge. Because we par-roasted the potatoes, they won’t oxidize and turn gray like raw potatoes would. When you’re ready to eat, just add about 10 minutes to the covered baking time.
Leftovers store beautifully in an airtight container for up to 3 days. To reheat, use the oven rather than the microwave. A 350°F oven for 15 minutes will help the sauce regain its creamy texture without making the dish oily. I don’t recommend freezing this, as the dairy can become grainy once thawed.
Pairing Suggestions for a Balanced Table
Since this dish is quite rich and sweet, it pairs best with savory, salty main courses. Roasted chicken with plenty of herbs or a slow-braised lamb shank are fantastic options. The acidity in a lemon-herb roasted chicken helps cut through the heavy cream and cheese.
For a vegetarian feast, serve this alongside roasted portobello mushrooms or a bitter green salad with a sharp vinaigrette. Avoid serving it with other sweet sides like glazed carrots. You want the sweet potatoes to be the star of the show, balanced by earthy and bright flavors elsewhere on the plate.
Expert Tips for the Perfect Set
The most important step of this entire recipe happens after you take it out of the oven. You must let the dish rest for at least 15 minutes. I know it’s tempting to dive in while it’s bubbling, but the sauce needs time to “set.” As it cools slightly, the starches and fats bind together into a thick glaze.
If you cut into it too early, the sauce will run all over the plate. After 15 minutes, you’ll be able to cut clean, beautiful portions that hold their shape. Finish with a few more fresh thyme leaves for a pop of color and a hit of fresh aroma. Your patience will be rewarded with the best sweet potato dish you’ve ever tasted!
Frequently Asked Questions
How do I store leftovers and can I freeze this dish?
Store any leftovers in an airtight container in the refrigerator for up to 3 days. When reheating, use the oven at 350°F to maintain the creamy texture. I do not recommend freezing this dish; the cream and sweet potatoes both change texture significantly when frozen and thawed, often resulting in a grainy, separated sauce.
Why did my cream sauce separate or look oily?
This usually happens for two reasons: using low-fat dairy or the oven being too hot. High-fat heavy cream is much more stable. If the sauce breaks, it means the fat has separated from the liquid. To prevent this, ensure you are using heavy cream and that you’ve par-roasted the potatoes to remove excess water which often triggers separation.
Can I use white potatoes instead of sweet potatoes?
Yes, you can use Yukon Gold potatoes with this same method. However, Yukon Golds have more starch and less water than sweet potatoes, so you might find the sauce becomes even thicker. You can skip the par-roasting for white potatoes if you’re in a rush, but it still helps with texture!
What is the best substitute for Gruyère cheese?
If you can’t find Gruyère, a sharp white cheddar is the best alternative. It provides a similar bite and melts well. Other good options include Emmental, Fontina, or even a mild Provolone mixed with a bit of Parmesan for saltiness. Avoid pre-shredded cheeses if possible, as they contain anti-clumping agents that can make the sauce gritty.
My potatoes are still hard after the recommended baking time. What happened?
This usually occurs if the potato slices were cut thicker than 1/8 inch or if the baking dish was too deep and crowded. If they are still firm, cover the dish back up with foil and bake for another 10-15 minutes. The steam trapped under the foil is what truly softens the potato starch.
Can I use dried thyme instead of fresh?
You can, but use only about one-third of the amount since dried herbs are more concentrated. However, fresh thyme provides a much brighter, cleaner flavor that cuts through the richness of the cream. If you must use dried, add it to the cream while it simmers so the heat can rehydrate the herbs and release their oils.
Creamy Scalloped Sweet Potatoes
Course: Side DishCuisine: AmericanDifficulty: easy6
servings15
minutes50
minutes65
MinutesAmerican
Ingredients
3 large sweet potatoes, peeled and sliced into 1/8 inch rounds
1.5 cups heavy cream
1/2 cup whole milk
2 cloves garlic, minced
1 tablespoon fresh thyme leaves (plus extra sprigs for garnish)
1.5 cups shredded Gruyère or sharp white cheddar cheese
1/2 teaspoon salt
1/4 teaspoon black pepper
1/4 teaspoon ground nutmeg
2 tablespoons butter
Directions
- Preheat your oven to 400°F (200°C). Grease a deep 9×13 inch baking dish or a large oval gratin dish with the butter.
- The Secret to the Anti-Soggy Bottom: Arrange your sliced sweet potatoes on two large baking sheets in a single layer. Roast them for 8-10 minutes. This “flashes off” excess surface moisture and begins the starch conversion, preventing the final sauce from becoming watery.
- While potatoes roast, combine the heavy cream, milk, minced garlic, salt, pepper, nutmeg, and half of the fresh thyme in a small saucepan. Heat over medium until just simmering, then remove from heat. This infuses the cream and prevents it from breaking in the oven.
- Layer one-third of the par-roasted sweet potatoes into the prepared baking dish. Sprinkle with 1/2 cup of the shredded cheese. Repeat with a second layer of potatoes and another 1/2 cup of cheese.
- Arrange the final layer of sweet potatoes in a decorative overlapping pattern (as seen in the image). Pour the warm cream mixture evenly over the top. The liquid should come about 3/4 of the way up the sides of the potatoes.
- Cover the dish tightly with foil. Bake for 20 minutes.
- Remove the foil. Sprinkle the remaining 1/2 cup of cheese and the rest of the thyme leaves over the top.
- Return to the oven, uncovered, for another 20-25 minutes until the cream has thickened, the potatoes are fork-tender, and the top is golden brown with crispy edges.
- The Set: Let the dish rest for 10-15 minutes before serving. This is crucial; it allows the starches to fully bind the cream into a velvety glaze that clings to the slices. Garnish with fresh thyme sprigs before serving.
Notes
- The 10-15 minute resting period after baking is crucial for the starches to bind the cream into a glaze. Par-roasting the slices for 8-10 minutes is the secret step to prevent a watery sauce.