Most people hear “whole wheat pancakes” and immediately think of heavy, leaden pucks that sit in your stomach like a brick. It’s a common frustration because you want the hearty nutrition of whole grains without sacrificing that cloud-like texture we all crave on a Saturday morning. If you’ve ever flipped a pancake only to find it’s gummy in the middle and flat as a crepe, you aren’t alone.
The secret to fixing this isn’t adding more flour or changing your pan; it’s all about the “Non-Dense Muffin Trick.” This method treats your pancake batter like a delicate muffin mix, focusing on minimal agitation and maximum aeration. When you get it right, you’ll see a tall, airy lift and a beautiful cinnamon-speckled crumb that perfectly absorbs every drop of maple syrup.
I’ve found that the real key to success lies in the resting period. You might be tempted to pour the batter onto the griddle immediately, but giving it just five minutes allows the whole wheat bran to hydrate. This simple pause transforms a gritty batter into a smooth, cohesive mixture that rises beautifully the moment it hits the heat. Oh man, the way these smell when the cinnamon hits the warm butter is absolutely incredible!
The Chemistry of Aeration in Whole Wheat Batters
Whole grain flour is naturally heavier than its white, processed counterparts because it contains the entire grain kernel, including the bran and germ. These components act like tiny shards of glass that can physically pop the air bubbles created by your leavening agents. This is exactly why whole wheat baked goods often feel dense and unappealingly heavy.
To overcome this structural challenge, we use a high-ratio leavening strategy. By increasing the amount of baking powder and adding baking soda, we create a massive initial surge of carbon dioxide. This extra “oomph” is necessary to lift the weight of the bran, ensuring the pancakes stay tall and light rather than collapsing under their own nutritional density.
Why Baking Soda and Buttermilk are Non-Negotiable
The relationship between baking soda and buttermilk is the primary engine for the “Non-Dense” result. Baking soda is a base that requires an acid to react, and the lactic acid in buttermilk provides the perfect spark. The moment they meet, they create an immediate chemical reaction that fills the batter with tiny air pockets.
If you don’t have buttermilk in the fridge, don’t worry! You can easily create a substitute by mixing one cup of milk with a tablespoon of lemon juice. Let it sit for a few minutes until it curdles slightly. This acidity is crucial because, without it, the baking soda won’t activate, and you’ll end up with flat, soapy-tasting pancakes.
The Hydration Phase: Why Resting the Batter Matters
Whole wheat flour is much thirstier than white flour, but it takes longer to drink up the liquid. This is why a 5 to 8-minute rest is a mandatory step in this recipe. During this time, the bran and germ soften as they absorb the buttermilk and egg mixture.
This hydration phase prevents a gritty mouthfeel and ensures a uniform rise across the entire batch. You’ll actually see the batter change before your eyes; it will grow thicker and more stable as the leavening agents continue to work. Skipping this step usually results in pancakes that spread too thin and have a tough, sandy texture.
Essential Components for Fluffy Whole Grain Banana Pancakes
Every ingredient in this stack serves a specific purpose to ensure you get that “Better Than Takeout” quality at home. Using large eggs is vital because they provide the protein structure needed to hold those air bubbles in place. If your eggs are too small, the pancakes might lack the strength to stay fluffy once they cool.
Melted butter is another game-changer compared to using standard vegetable oil. Butter contains a small amount of water and milk solids which contribute to a more tender, cake-like crumb. Make sure your butter is slightly cooled before adding it to the wet ingredients so you don’t accidentally scramble the egg!
Selecting and Prepping the Perfect Banana Topping
Unlike many recipes that mash the fruit directly into the batter, this version uses thick banana rounds as a topping. Mashing bananas adds a lot of moisture and weight, which can often lead to a gummy, undercooked center in whole wheat recipes. By slicing them, you preserve the pancake’s structural integrity while still getting that sweet fruit flavor.
Look for bananas that are yellow with plenty of brown spots. These are at their peak sweetness and have a soft texture that melts slightly when placed on the hot pancake. If the bananas are too green, they’ll be starchy and won’t provide that delicious contrast to the warm cinnamon batter.
The Role of Warm Spices and Aromatics
We use a generous 1.5 teaspoons of ground cinnamon, but the trick is in the division. One teaspoon goes into the dry mix to flavor the pancake from the inside out. This creates a deep, warm base that complements the earthy notes of the whole wheat flour.
The remaining half-teaspoon is reserved for dusting the fresh banana slices at the very end. This provides an immediate aromatic hit the second the plate hits the table. Combined with a splash of high-quality vanilla extract, these pancakes smell like a high-end bakery before you even take the first bite.
Step-by-Step: Executing the Non-Dense Muffin Trick
Success with this recipe comes down to how you handle the batter. You want to be firm but gentle, ensuring everything is mixed without overworking the flour. Follow these phases to ensure your stack is the fluffiest it can possibly be.
Phase 1: Aerating the Dry Base
Start by whisking your whole wheat flour, sugar, baking powder, baking soda, salt, and the first portion of cinnamon in a large bowl. You aren’t just mixing here; you’re aerating. Whisking breaks up any clumps and ensures the leavening agents are perfectly distributed.
If the baking powder isn’t evenly spread, you’ll end up with “tunnels” or large, uneven holes in some pancakes while others stay flat. Take an extra thirty seconds to make sure the mixture looks uniform and light before you even think about touching the wet ingredients.
Phase 2: The Gentle Fold Technique
This is the core of the “Muffin Trick.” Pour your wet ingredients into the center of the dry well and use a wide spatula to gently fold them together. Do not use a whisk for this part! Use a sweeping motion, lifting the flour from the bottom and folding it over the liquid.
Stop the very second the last streak of white flour disappears. The batter should look thick, lumpy, and honestly, a little bit ugly. If you stir until it’s perfectly smooth, you’ve developed too much gluten. That’s the “over-mixing trap” that leads to rubbery, tough pancakes that won’t rise.
Phase 3: Griddle Temperature and Timing
Heat your skillet over medium-low heat. Whole grains contain more natural sugars and fiber, meaning they can burn on the outside before the middle is cooked if the heat is too high. A lower, slower heat allows the pancake to rise fully and cook through to a springy center.
Watch for the visual cues: you’ll see large bubbles form on the surface that stay open rather than filling back in. The edges should look dry and set. When you flip, do it in one confident motion. Don’t press down on the pancake with your spatula! You worked hard for those air bubbles; don’t squash them now.
Troubleshooting Common Whole Grain Texture Issues
If your pancakes aren’t turning out quite right, it’s usually a matter of heat or handling. A gummy center often means the griddle was too hot, searing the outside while the interior stayed raw. Try lowering the flame and giving them an extra minute on the first side.
If they are coming out flat, check the freshness of your baking powder. Whole wheat needs that chemical lift more than white flour does. Also, ensure you aren’t letting the batter sit for *too* long—more than 15 minutes and the bubbles will start to dissipate, leaving you with a much denser final product.
Preventing the “Rubber” Texture
The rubbery texture is almost always a result of over-mixing. When you stir the batter vigorously, you create a strong gluten network. While that’s great for chewy bread, it’s the enemy of a fluffy pancake. Remember: lumps are your friend! If the batter looks like it needs five more stirs, it’s probably perfect.
Managing Heat for a Golden-Brown Finish
Butter has a relatively low smoke point, so it can turn acrid if the pan gets too hot. Between batches, use a paper towel to carefully wipe out any browned butter bits before adding a fresh pat. This keeps every pancake tasting sweet and buttery rather than burnt and bitter.
Flavor Variations and Nutritional Swaps
You can easily customize these without ruining the delicate chemistry. Adding a handful of toasted walnuts or pecans to the batter provides a fantastic crunch that plays well with the soft bananas. If you want to swap the sugar, you can use a tablespoon of honey or maple syrup in the wet ingredients.
Keep in mind that liquid sweeteners will cause the pancakes to brown faster due to the Maillard reaction. You might need to drop the heat even further to ensure they don’t get too dark. For a boost of fiber, you can also swap out 1/4 cup of the flour for ground flaxseed or hemp hearts.
Make-Ahead Strategies and Storage Solutions
These pancakes are fantastic for busy mornings because they hold up surprisingly well. If you’re cooking for one, go ahead and make the full batch. You can store leftovers in an airtight container in the refrigerator for up to three days. Just make sure they are completely cool before you seal the lid to prevent sogginess.
Freezing for Weekday Convenience
For longer storage, use the “flash freeze” method. Place the cooked pancakes in a single layer on a baking sheet and freeze for an hour. Once they are firm, toss them into a freezer bag. This prevents them from sticking together in one giant frozen block.
When you’re ready to eat, skip the microwave, which can make whole wheat get a bit gummy. Instead, pop them into a toaster or a 350°F oven for a few minutes. This restores that slightly crisp exterior and keeps the “fluffy” integrity intact for a quick, high-quality breakfast.
Expert Tips for a Professional Presentation
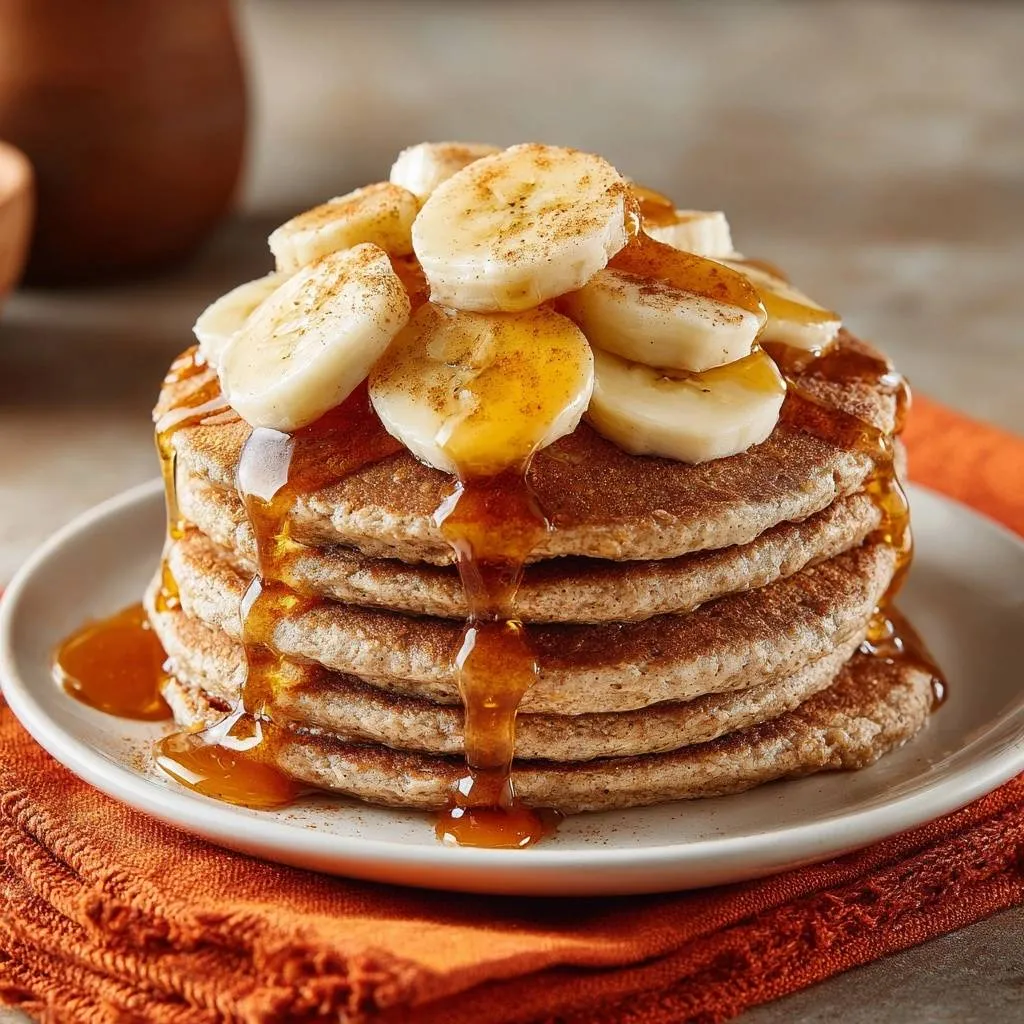
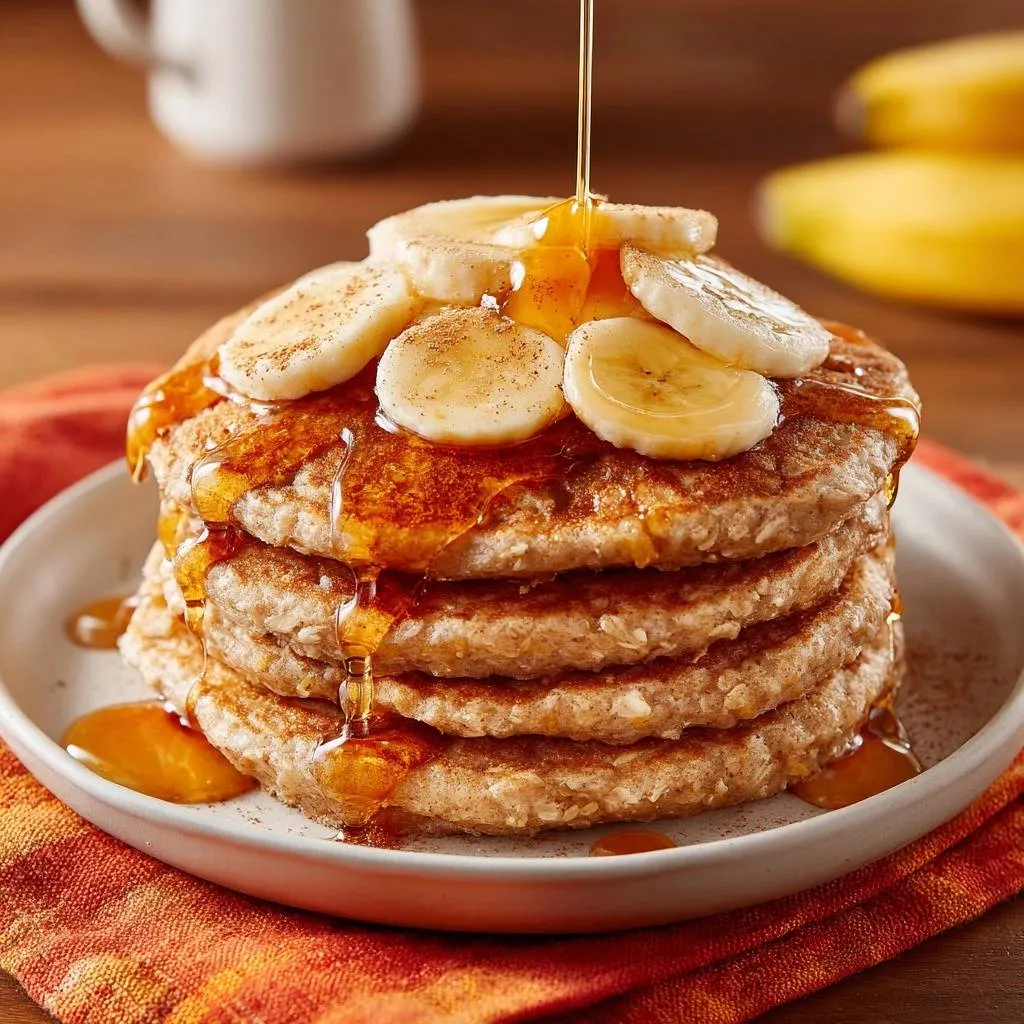
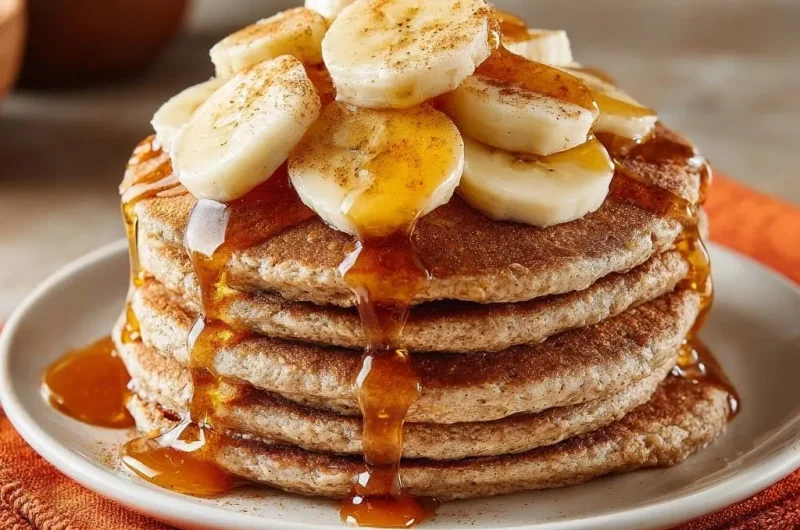
To get that “Skyscraper” look, stack five pancakes high on the plate. This height helps retain heat in the center of the stack. Layer your fresh banana rounds generously on the top and between a few layers if you’re feeling indulgent. It looks so much more appetizing than just tossing them on the side!
Finish with a “heavy pour” of maple syrup, starting from the center so it cascades down the sides in thick ribbons. A final dusting of that reserved cinnamon provides a beautiful visual contrast against the pale bananas. It’s a simple touch that makes a home-cooked meal feel like a five-star brunch experience.
Frequently Asked Questions
Can I use almond milk instead of buttermilk?
Yes, you can use almond milk or any other plant-based milk, but you must add an acid to it. Mix 1.25 cups of almond milk with 1 tablespoon of lemon juice or apple cider vinegar and let it sit for 5 minutes. This acidity is required to react with the baking soda to create the lift needed for whole grain flour.
Why are my pancakes raw in the middle but brown outside?
This usually happens because the griddle temperature is too high. Whole wheat flour is denser and takes longer to cook through than white flour. Lower your heat to medium-low. This allows the pancake to rise and cook the center thoroughly without burning the exterior sugars and butter.
Is it possible to use 100% Oat Flour instead?
You can, but the texture will change significantly. Oat flour lacks the gluten found in whole wheat, which provides the “stretch” for air bubbles. Your pancakes will be very tender but much more fragile and may not rise as high. If using oat flour, let the batter rest for a full 10 minutes to prevent a mushy center.
How do I keep the first batch warm while finishing the rest?
Set your oven to 200°F and place a wire rack on a baking sheet inside. As you finish each batch, place the pancakes in a single layer on the rack. Avoid stacking them on a plate in the oven, as the steam will trapped between them and make the bottom pancakes soggy and flat.
Can I mash the bananas into the batter instead?
Mashing the bananas directly into the batter adds significant moisture and weight. If you choose to do this, reduce the buttermilk by about 2 tablespoons and be prepared for a denser, moister pancake. The “Non-Dense Muffin Trick” works best with the sliced topping method to ensure maximum fluffiness.
Fluffy Whole Grain Banana Pancakes
Course: BreakfastCuisine: AmericanDifficulty: easy4
servings10
minutes15
minutes25
MinutesAmerican
Ingredients
1.5 cups whole wheat flour
2 tablespoons sugar
1 tablespoon baking powder
1/2 teaspoon baking soda (essential for lift with whole grains)
1/2 teaspoon salt
1.5 teaspoons ground cinnamon (divided)
1.25 cups buttermilk (or milk with 1 tablespoon lemon juice)
1 large egg
3 tablespoons melted butter (slightly cooled)
1 teaspoon vanilla extract
2 ripe bananas, sliced into thick rounds
Maple syrup for serving
Directions
- In a large bowl, whisk together the whole wheat flour, sugar, baking powder, baking soda, salt, and 1 teaspoon of the cinnamon. Ensure the leavening agents are perfectly distributed to prevent uneven rising.
- In a separate medium bowl, whisk the buttermilk, egg, melted butter, and vanilla until fully combined.
- To execute the Non-Dense Muffin Trick, pour the wet ingredients into the dry ingredients. Use a spatula to gently fold the mixture together. Stop as soon as the flour streaks disappear. The batter should be thick and lumpy; over-mixing will result in a flat, rubbery pancake.
- Let the batter rest for 5 to 8 minutes. This allows the whole wheat flour to hydrate and the baking soda to react with the buttermilk, creating the air pockets visible in the stack.
- Heat a non-stick griddle or heavy-bottomed skillet over medium-low heat. Lightly grease with a small amount of butter.
- Pour 1/4 cup of batter onto the griddle for each pancake. Do not flatten them with the spatula. Cook until large bubbles form on the surface and the edges look dry and set, about 3 minutes.
- Flip carefully and cook for another 1 to 2 minutes until the underside is golden brown and the center is springy.
- Stack five pancakes high on a plate. Top generously with the fresh banana slices. Dust the top of the bananas with the remaining 1/2 teaspoon of cinnamon and finish with a heavy pour of maple syrup so it cascades down the sides as shown in the image.
Notes
- The secret is the ‘Non-Dense Muffin Trick’: fold the batter until just combined and let it rest for 5-8 minutes to allow the flour to hydrate and the leavening agents to react.