Most people treat mushrooms like an afterthought, tossing them into a lukewarm pan where they slowly weep liquid and turn into rubbery, gray sponges. It’s a culinary tragedy because, when handled correctly, the humble mushroom transforms into a savory powerhouse with a texture that rivals a good steak. The goal here isn’t just to cook them; it’s to manage moisture and maximize caramelization through intense, dry heat.
You’ve probably noticed that restaurant mushrooms have a deep, mahogany crust and a firm bite that pops when you chew. That’s not luck. It’s the result of high-heat roasting that evaporates water the second it leaves the mushroom’s surface. By moving the cooking process from the stovetop to a scorching oven, you can prepare large batches that stay plump and juicy rather than swimming in a puddle of their own juices.
The real secret to this recipe lies in the timing of your aromatics. If you toss garlic and butter in at the start, the 425°F heat will incinerate the garlic bits and scorch the butter solids before the mushrooms even begin to brown. I’ve found that adding the garlic butter during the final five minutes is the only way to get that rich, toasted flavor without a hint of bitterness. It’s a small tweak that makes a massive difference in the final dish.
The Science of Moisture and Mushroom Cell Walls
Mushrooms are biological wonders, consisting of roughly 90% water held together by a structural polymer called chitin. Unlike the cellulose found in most vegetables, chitin is remarkably heat-stable, which is why it’s actually quite difficult to overcook a mushroom. However, that high water content is your biggest enemy when you’re chasing a meaty mouthfeel. If your oven temperature is too low, the water seeps out slowly, effectively steaming the mushroom in its own vapor.
Therefore, we use a high temperature of 425°F to trigger a rapid transformation. At this heat, the water evaporates almost instantly as it’s released, allowing the exterior to undergo the Maillard reaction. This chemical reaction between amino acids and reducing sugars is what creates those complex, savory flavors we crave. Without that intense heat, you’ll never break down the tough chitin walls enough to achieve that tender, concentrated umami bite.
In addition, the high heat causes the air pockets within the mushroom to collapse, which densifies the texture. You’ll see them shrink significantly on the pan, but don’t let that alarm you. That shrinkage is actually a visual cue that the flavor is concentrating. You’re essentially trading excess water for intense, buttery goodness, resulting in a finished product that feels substantial and satisfying on the palate.
Essential Components for Garlic Butter Roasted Mushrooms
For the best results, I always reach for Cremini or Baby Bella mushrooms over the standard white button variety. Creminis are simply more mature versions of white mushrooms, meaning they’ve had more time to develop a deeper, earthier flavor and a firmer structure. They hold up much better under the intense heat of the oven and provide a more “meaty” experience that stands up to the bold garlic butter.
The choice of fat is equally critical for success. We start with olive oil because it has a higher smoke point than butter, allowing us to achieve that initial sear without the fat breaking down or smoking out your kitchen. Butter is reserved for the finish because its milk solids provide that luxurious, nutty flavor that defines the dish. Using unsalted butter is a pro move here, as it gives you total control over the final salt levels.
Lastly, never underestimate the power of fresh garlic. The pre-minced stuff in a jar has a harsh, acidic aftertaste that can ruin the delicate earthiness of the mushrooms. Finely mincing fresh cloves ensures the garlic mellows into a sweet, fragrant coating during its short stint in the oven. A pinch of dried thyme adds a subtle, floral backbone that ties the woodsy mushrooms and rich butter together perfectly.
Selecting and Cleaning Your Mushrooms
There’s an old kitchen myth that you should never wash mushrooms because they act like sponges. While they do absorb a tiny bit of water, a quick rinse under cold water is perfectly fine as long as you dry them immediately. I prefer to use a damp paper towel to wipe away any visible dirt, which keeps them as dry as possible before they hit the oil.
Once they’re clean, trim the very ends of the stems. You don’t need to remove the whole stem—just the woody, dried-out tip. Keeping the mushrooms whole or halved (if they’re massive) ensures they cook at an even rate and maintain a juicy interior while the outside gets that beautiful, dark crust.
The Role of High-Smoke Point Fats
Starting with olive oil is a strategic move for texture. Because butter contains water and milk solids, it begins to sputter and burn at temperatures above 350°F. Since we’re roasting at 425°F, starting with butter would result in a bitter, blackened mess before the mushrooms are even halfway done.
The olive oil coats the mushrooms evenly, acting as a heat conductor that helps the oven’s energy penetrate the chitin walls. This facilitates a clean sear. By the time we add the butter later, the mushrooms have already released most of their moisture, allowing the butter to foam up and create a rich emulsion with the remaining juices.
Step-by-Step: Achieving the Perfect Sear
Achieving restaurant-quality results requires a bit of technical finesse. We break the process down into three distinct phases to ensure the mushrooms are cooked through, the texture is firm, and the aromatics are perfectly toasted. It’s all about managing the heat and the timing of your ingredients.
Phase 1: The Pre-Heated Sheet Pan Method
The most common mistake people make is putting cold vegetables on a cold pan and sticking them in the oven. Instead, place your empty, rimmed baking sheet in the oven while it preheats to 425°F. This creates a “thermal shock” effect the moment the mushrooms touch the metal.
When you hear that sizzle as the mushrooms hit the hot pan, you know you’re doing it right. This immediate contact heat starts the searing process instantly, preventing the mushrooms from sitting in a pool of their own cold liquid. It’s the same principle as searing a steak in a hot cast-iron skillet.
Phase 2: The Initial 15-Minute Roast
During this first phase, the mushrooms should be tossed only in olive oil, salt, and pepper. Spread them out so they aren’t touching; if the pan is crowded, the moisture escaping from one mushroom will steam the one next to it. You want plenty of air circulation to whisk that steam away.
After about 15 minutes, you’ll see the mushrooms have shrunken and the bottoms should be a deep, golden brown. They might look a little “naked” at this stage, but this is exactly where you want them. They are now primed to soak up the garlic butter like a sponge without becoming soggy.
Phase 3: The Garlic Butter Infusion
Now comes the flavor bomb. Whisk your minced garlic and dried thyme into the melted butter and pour it over the hot mushrooms. Toss them quickly right on the pan using a spatula, ensuring every mushroom is glistening with that golden mixture.
Slide the tray back into the oven for just five more minutes. This is the “Goldilocks zone” where the garlic loses its raw bite and becomes fragrant and sweet, but doesn’t stay in long enough to turn brown and acrid. The butter will foam up and create a glossy sauce that clings to the roasted skins.
Troubleshooting Rubbery or Soggy Results
If your mushrooms come out soggy, the culprit is almost always overcrowding. If you’re doubling the recipe, use two separate baking sheets. It’s better to have a mostly empty pan than one where the mushrooms are huddled together. Space is the secret ingredient for crispiness.
Another common issue is a weak oven. If your oven isn’t truly hitting 425°F, the mushrooms will leak water faster than it can evaporate. Use an oven thermometer to verify your settings. If you still find them a bit wet, try roasting them for an extra five minutes in the first phase before adding the butter.
Finally, make sure you aren’t washing the mushrooms right before they go into the oven. If they are still damp when you toss them in oil, that surface moisture will turn to steam immediately. Pat them bone-dry with a kitchen towel after cleaning to ensure the oil can actually adhere to the surface and start the browning process.
Flavor Variations and Herb Substitutions
While garlic and thyme are a classic pairing, you can easily pivot this recipe to suit different cuisines. For an earthier, more autumnal vibe, swap the thyme for chopped fresh rosemary. If you want a bit of a kick, a teaspoon of red pepper flakes added to the butter mixture provides a lovely heat that cuts through the richness.
If you’re looking for a bit of brightness, a tiny splash of balsamic vinegar or a squeeze of fresh lemon juice right before serving can wake up the flavors. Just be sure to add any acidic components at the very end so they don’t interfere with the roasting process. Fresh chives or tarragon also make excellent substitutes for parsley if you want a different herbal profile.
Optimal Pairings for Roasted Mushrooms
These mushrooms are an umami-packed side dish that complements almost any protein. They are particularly incredible alongside a roasted chicken or a thick ribeye steak, where the garlic butter drippings can mingle with the meat juices. The concentrated flavor also makes them a great topper for creamy polenta or mashed potatoes.
For a lighter meal, you can toss these roasted beauties into a bowl of warm quinoa or farro. The mushrooms provide enough “meatiness” to make a grain bowl feel like a full feast. They also work wonders as a topping for a simple crusty bread, acting as a sophisticated version of mushrooms on toast.
Storage and Reheating for Best Texture
Store any leftovers in an airtight container in the refrigerator for up to three days. However, be aware that mushrooms will naturally release a bit more moisture as they sit, so they won’t be quite as firm the next day. I strongly advise against freezing them, as the ice crystals will rupture the cell walls and turn them into mush upon thawing.
When it comes to reheating, avoid the microwave at all costs. The microwave will make them rubbery and tough. Instead, pop them back into a toaster oven or an air fryer at 350°F for about 5 minutes. This helps the butter crisp back up and restores that wonderful, meaty texture you worked so hard to achieve.
Expert Tips for Restaurant-Quality Results
One of the best tips I can give is to keep the mushrooms whole. Sliced mushrooms have more surface area to leak water, which makes them much harder to roast without getting soggy. Whole mushrooms maintain a juicy center that contrasts beautifully with the roasted exterior.
Always use a rimmed baking sheet. As the mushrooms roast, they will release some juices before they evaporate, and a flat cookie sheet might allow that hot oil and butter to drip into your oven. A heavy-duty, light-colored aluminum pan is best for even heat distribution and preventing the bottoms from burning too quickly.
Finally, always add your fresh parsley off-heat. Fresh herbs are delicate and will lose their bright, peppery flavor and vibrant green color if they spend too much time in the oven. Tossing them with the hot mushrooms right before serving allows the residual heat to release their aroma without wilting them into oblivion.
How do I prevent the garlic from burning?
The key is the “late addition” technique. Garlic contains natural sugars that burn very quickly at 425°F. By waiting until the final five minutes of roasting, you ensure the garlic only reaches a temperature where it becomes fragrant and soft. If you notice your oven runs particularly hot, you can even turn the oven off and let the residual heat of the pan cook the garlic for the last few minutes.
Can I use large Portobello mushrooms instead?
Yes, you can use Portobellos, but you’ll need to make a few adjustments. First, use a spoon to scrape out the dark gills on the underside, as these will release a lot of black liquid that can make the dish look muddy. Cut the caps into thick, one-inch slices or chunks. Because they are denser, they may need an extra 5 to 10 minutes of initial roasting time before you add the garlic butter.
Why are my mushrooms shrinking so much?
Don’t worry, shrinkage is actually a sign of success! Since mushrooms are mostly water, losing volume means you’ve successfully evaporated that moisture and concentrated the flavor. A mushroom that hasn’t shrunken is a mushroom that is still full of bland water. You’re looking for that concentrated, shriveled appearance because it indicates a dense, meaty texture and intense umami taste.
Is it necessary to use unsalted butter?
While you can use salted butter, unsalted is preferred for better seasoning control. Different brands of butter have varying salt levels, which can make the final dish unpredictable. By using unsalted butter, you can season the mushrooms perfectly with sea salt at the beginning and know exactly how the final product will taste. If you only have salted butter on hand, simply reduce the added sea salt by half.

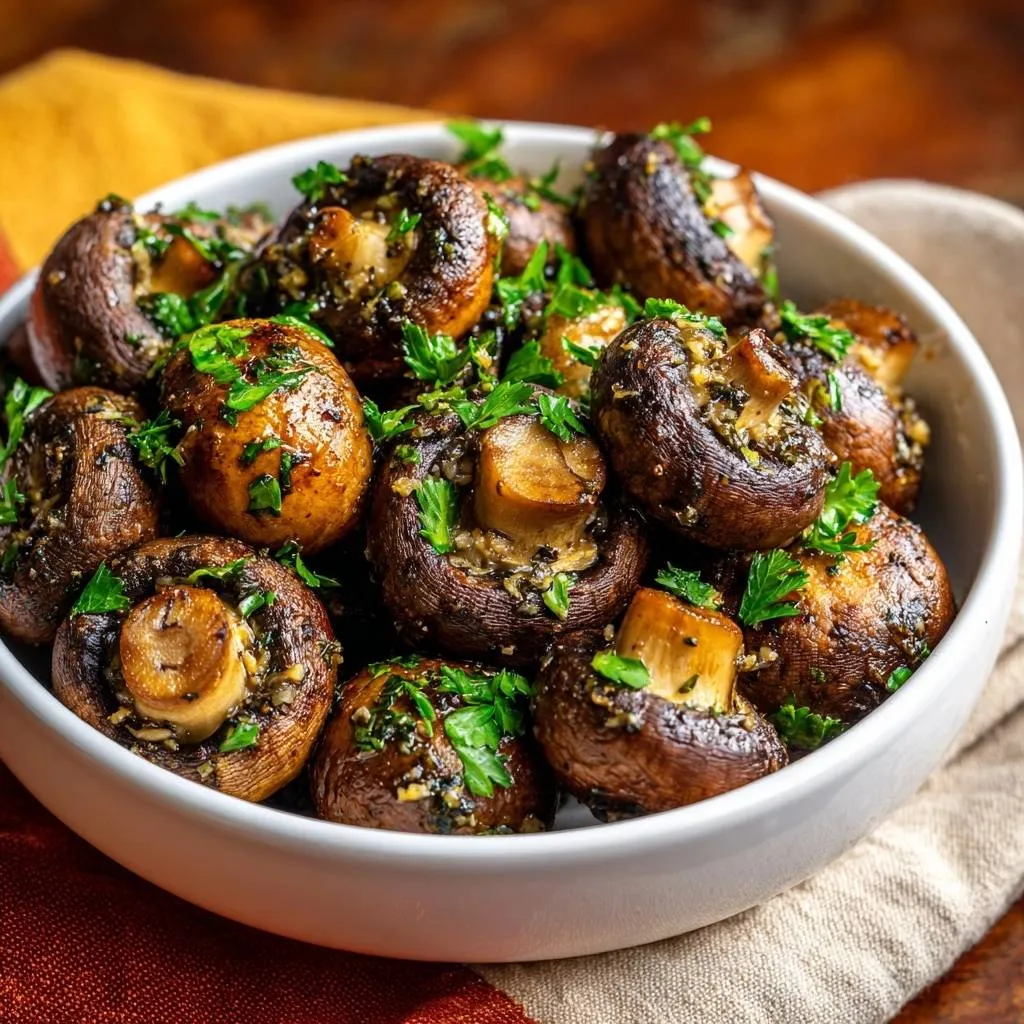
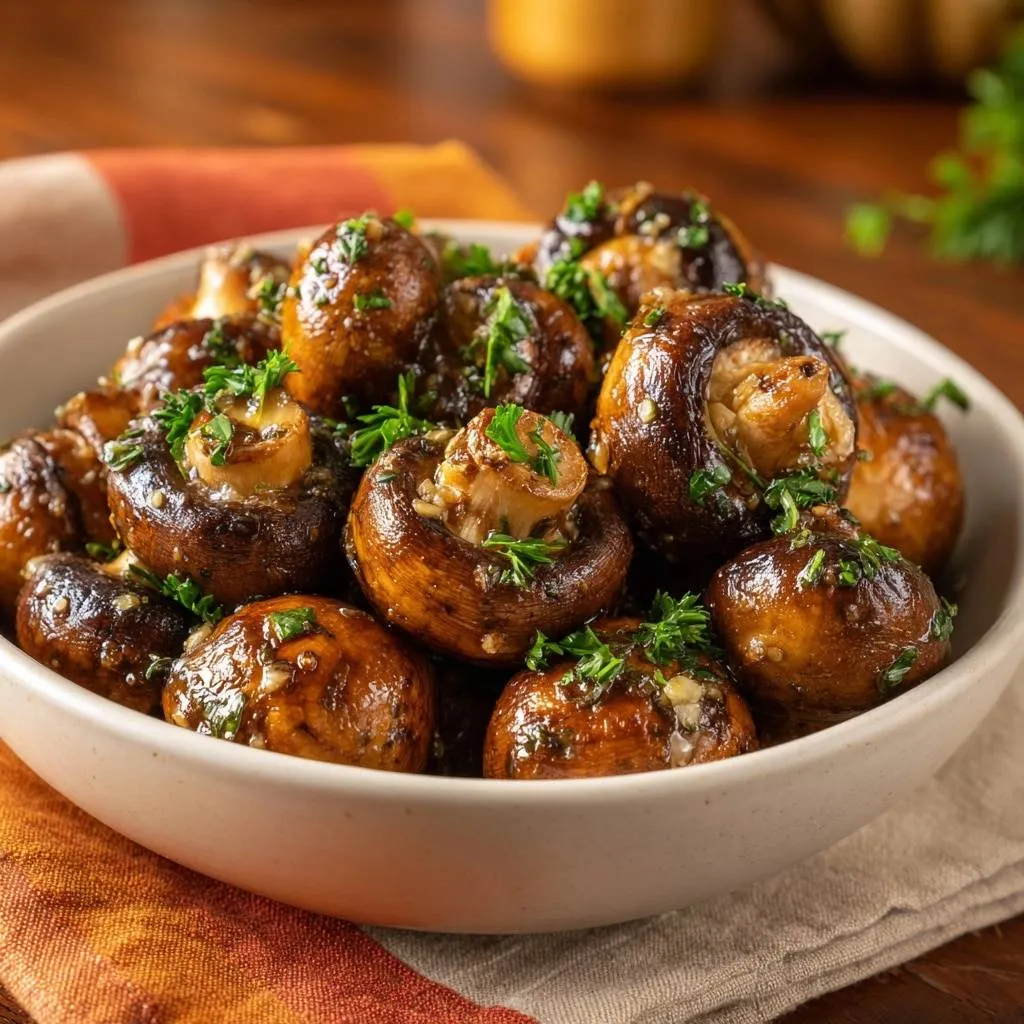
Garlic Butter Roasted Mushrooms
Course: Side DishCuisine: AmericanDifficulty: easy4
servings10
minutes20
minutes30
Minutes145
kcalAmerican
Ingredients
1 pound baby bella or cremini mushrooms, cleaned and stems trimmed
2 tablespoons olive oil (for roasting)
3 tablespoons unsalted butter, melted
6 cloves garlic, finely minced
1/2 teaspoon sea salt
1/2 teaspoon cracked black pepper
1/4 teaspoon dried thyme
3 tablespoons fresh Italian parsley, roughly chopped
Directions
- Preheat your oven to 425°F (220°C). Place a large rimmed baking sheet inside the oven while it heats. A scorching hot surface is essential to evaporate moisture instantly and prevent sponginess.
- In a large bowl, toss the whole mushrooms with the 2 tablespoons of olive oil, salt, and pepper. Do not add the butter or garlic yet, as the high heat required for searing will burn the milk solids in the butter and the minced garlic.
- Carefully pull the hot baking sheet from the oven. Spread the mushrooms out in a single layer, ensuring they are not crowding each other. Space is key; if they touch, they will steam rather than roast.
- Roast for 15 minutes. While the mushrooms roast, whisk together the melted butter, minced garlic, and dried thyme in a small bowl.
- Remove the tray from the oven. Pour the garlic butter mixture over the mushrooms and toss them directly on the pan to coat.
- Return the tray to the oven for an additional 5 minutes. This allows the garlic to mellow and the butter to foam and coat the mushrooms without burning.
- Remove from the oven. The mushrooms should be deeply browned and slightly shrunken with a concentrated flavor. Immediately toss with the fresh chopped parsley. Serve hot.
Notes
- Preheating the baking sheet is essential to evaporate moisture instantly. Do not add garlic and butter until the final 5 minutes of roasting to prevent burning.