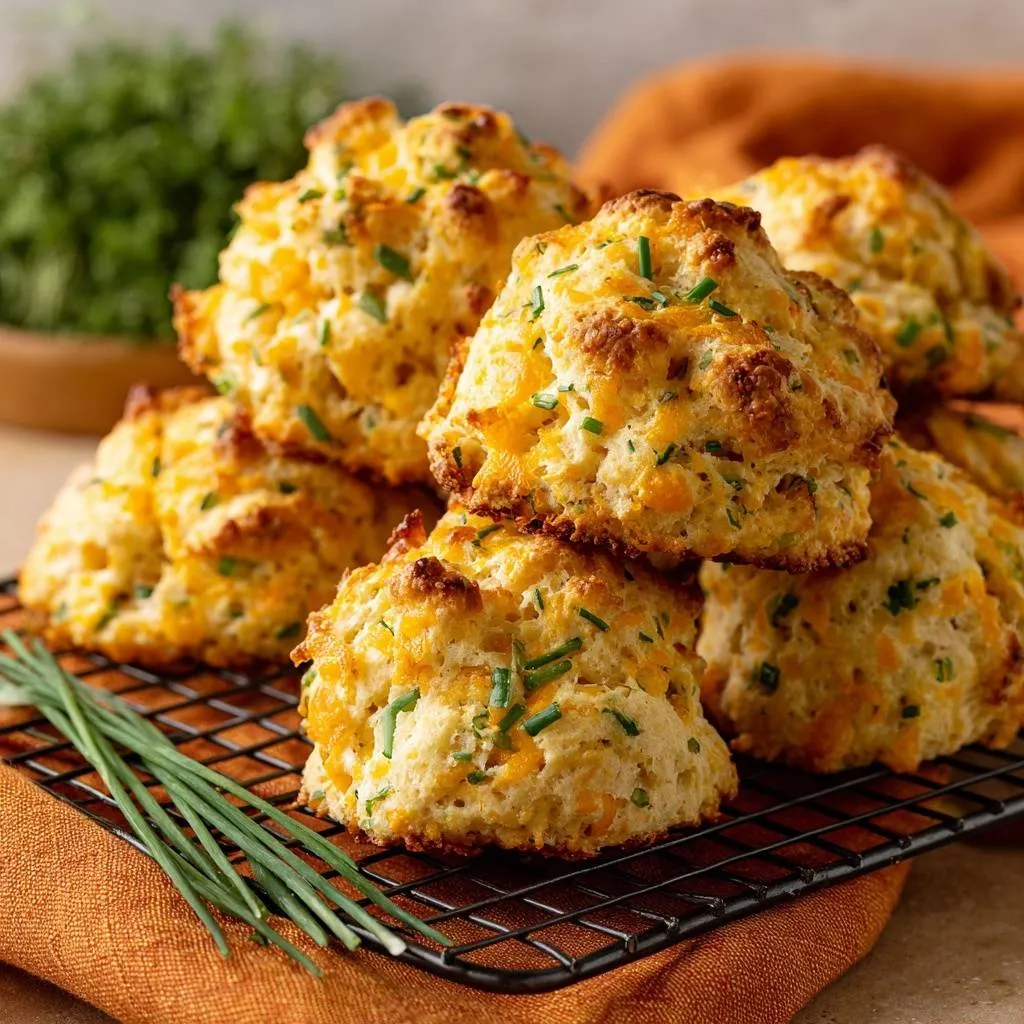
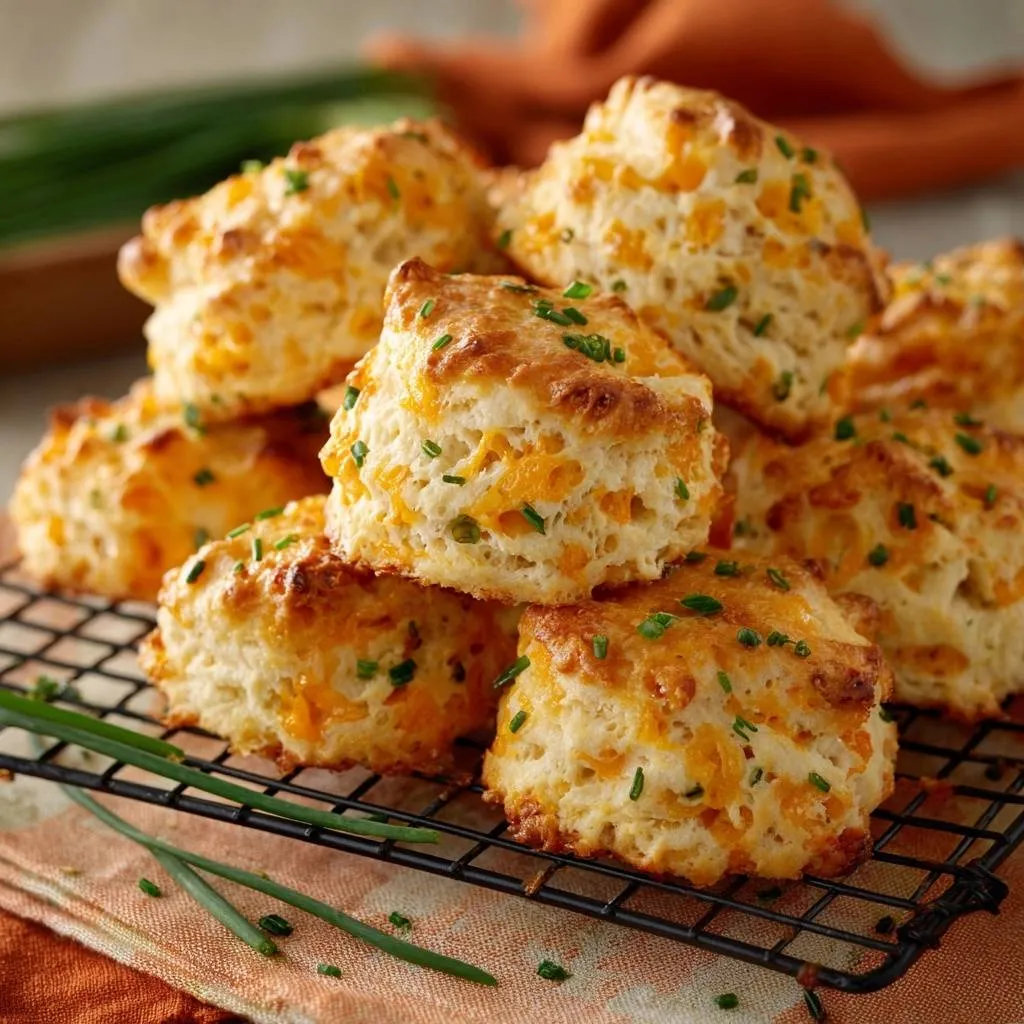
Imagine pulling a tray of biscuits out of the oven that actually crackle when you touch them. You break one open, and a cloud of steam carries the scent of sharp cheddar and toasted garlic straight to your nose. The exterior is a landscape of golden, craggy peaks, while the inside remains impossibly light and airy. This isn’t a bakery dream; it’s the result of mastering the “Anti-Soggy Bottom” method for the perfect drop biscuit.
Most people settle for drop biscuits that are greasy on the bottom and gummy in the middle because they treat the dough too delicately. While these are much faster than traditional rolled biscuits, they require smart thermal management to reach their full potential. We’re looking for a specific contrast between a rugged, crunchy crust and a soft, buttery crumb that doesn’t collapse under its own weight.
The secret to this professional texture lies in the temperature of your equipment and the way you handle the fats. By using a preheated baking sheet and specific folding techniques, you ensure the biscuit sears the moment it hits the pan. This prevents the butter from leaking out and creates a structural foundation that stays crisp long after the biscuits leave the oven.
The Science of the Preheated Baking Sheet
When you place cold dough onto a room-temperature pan, the butter begins to melt slowly as the oven climbs back to temperature. This slow melt often leads to “spreading,” where the biscuit loses its height and the fat pools at the base, creating a heavy, oily bottom. However, using a preheated 450°F surface changes the thermodynamics entirely.
The immediate hit of intense heat creates an instant sear on the bottom of the dough, much like searing a steak in a hot cast-iron skillet. This thermal shock evaporates the moisture in the butter rapidly, pushing the dough upward rather than outward. Therefore, you get a taller biscuit with a distinct, toasted base that can support the weight of the melted cheddar without becoming a soggy mess.
Essential Components for Garlic Cheddar Chive Drop Biscuits
All-purpose flour serves as the backbone of this recipe because it provides enough protein for structure without making the biscuit chewy like bread flour. We use a full tablespoon of baking powder to ensure a massive lift, which is necessary to counteract the weight of the heavy cheese. This chemical leavening creates the tiny air bubbles that make the interior feel like a cloud.
Flavor balance is equally important, so we use garlic powder in the dry mix for a consistent, savory base. However, we save the garlic salt for the very end. This allows you to control the sodium levels perfectly, ensuring the biscuit itself isn’t overly salty while still giving you that punch of flavor on the surface where your taste buds hit first.
Why Cold Buttermilk and Butter are Non-Negotiable
The “Steam Expansion” principle is the golden rule of biscuit making. When cold chunks of butter hit a hot oven, they release steam, which creates those sought-after air pockets. If your butter is even slightly warm, it simply emulsifies into the flour, resulting in a dense, greasy puck instead of a light biscuit.
Similarly, cold buttermilk is vital because its acidity reacts with the baking powder to trigger the rising process. The thick consistency of buttermilk also helps hold the shaggy dough together without requiring excessive mixing. If you don’t have buttermilk, you can curd milk with a splash of lemon juice, but the real deal provides a tang that cuts through the richness of the cheddar.
Selecting the Right Sharp Cheddar and Fresh Chives
For the best results, you should always hand-grate your cheese using a thick shred. Pre-shredded cheese is coated in cellulose or potato starch to keep it from clumping in the bag, which unfortunately prevents it from melting smoothly into the dough. A hand-grated sharp cheddar provides pockets of gooey fat that bond beautifully with the flour.
Fresh chives are another non-negotiable element for high-quality biscuits. Dried chives often lose their aromatic oils and end up tasting like hay once baked at high temperatures. Fresh chives provide a bright, onion-like pop and a vibrant green color that contrasts beautifully with the golden-brown crust.
Step-by-Step: Achieving the Perfect Craggy Texture
The most common mistake in biscuit making is over-mixing the dough. Once you add the buttermilk, you should only fold the mixture until a “shaggy dough” forms. This means you should still see some lumps and perhaps a tiny bit of stray flour; it should not look like a smooth, uniform bread dough.
Over-mixing develops gluten, which is great for pizza but terrible for biscuits. If you work the dough too much, the biscuits will turn out tough and rubbery. You want a lumpy, cohesive mass that looks a bit messy. This lack of uniformity is actually what creates the different textures in the finished product.
The Flour-Coating Technique for Cheese Pockets
Before you add any liquid, make sure to toss your shredded cheddar and chives directly into the dry flour and butter mixture. This simple step coats every piece of cheese in a thin layer of flour. This creates a protective barrier that keeps the cheese fat contained within the biscuit structure.
Without this coating, the cheese tends to melt and leak out of the dough, which contributes to that greasy bottom we are trying to avoid. By coating the cheese, you ensure that when it melts, it stays put, creating little “pockets” of flavor throughout the crumb.
Dropping the Dough: Why Rough Edges Matter
When you drop the dough onto the hot baking sheet, resist the urge to smooth out the tops or shape them into perfect circles. Those rough edges, crags, and peaks are your best friends. They increase the surface area of the biscuit, which leads to more browning through the Maillard reaction.
Those jagged bits become the crispiest, most flavorful parts of the biscuit. If you smooth them over, you lose that wonderful crunch. Think of it as creating a mountain range of texture where the peaks get extra crispy while the valleys stay soft and tender.
Thermal Precision: Baking for Golden Results
Baking at 450°F might seem high, but a high-heat, short-duration bake is the only way to get that professional finish. This temperature ensures the outside sets and browns before the inside has a chance to dry out. It’s a race against time to lock in the moisture while crisping the exterior.
Keep a close eye on the oven during the last few minutes. You are looking for the peaks to turn a deep mahogany brown and the cheese pockets to be bubbling and slightly crisp at the edges. If the biscuits look pale, they likely won’t have that satisfying crunch when you bite into them.
The Finishing Touch: Garlic Chive Butter Glaze
The moment those biscuits come out of the oven, they are at their most absorbent. You want to brush them with the melted garlic-chive butter immediately. The residual heat pulls the butter into all the nooks and crannies, while the garlic salt adheres to the surface for an instant flavor hit.
This glaze doesn’t just add flavor; it also adds a beautiful sheen that makes the biscuits look like they came from a high-end bistro. The fresh chives in the glaze provide a final hit of herbal freshness that balances the heavy, savory notes of the cheddar and garlic.
Troubleshooting Common Biscuit Failures
If your biscuits spread too much and look like flat pancakes, your butter was likely too warm or your oven wasn’t fully preheated. Always keep your butter in the fridge until the very second you need to cut it into the flour. If your kitchen is hot, you can even chill your flour bowl before starting.
A dense or tough texture almost always points back to over-mixing the buttermilk. Remember, “just combined” means exactly that. If you see a few streaks of flour, that’s better than a perfectly smooth dough. If the bottoms are greasy, you likely skipped the preheated pan step or used pre-shredded cheese with too much added oil.
Lastly, if your biscuits are pale despite baking for the full time, your oven might be running cool. It’s worth using an oven thermometer to check. Also, check the expiration date on your baking powder; if it’s old, the biscuits won’t rise, and they won’t brown properly either.
Optimal Pairings for Savory Cheddar Biscuits
While these are incredible on their own, they truly shine when paired with hearty, liquid-based meals. They are the perfect companion for a thick beef stew or a creamy tomato basil soup, as the craggy exterior is designed to soak up broth without falling apart. The garlic and chive profile also makes them a natural fit for roasted chicken or pot roast.
You can even use them as a topping for a savory cobbler or pot pie. Simply drop the dough mounds directly onto your hot filling and bake as directed. The bottom of the biscuit will steam and stay dumpling-like, while the top gets that signature cheddar crust. They also make a killer base for a breakfast sandwich with a fried egg.
Storage, Reheating, and Make-Ahead Strategies
Because of the high cheese and butter content, these biscuits are best enjoyed fresh. However, you can store leftovers in an airtight container at room temperature for up to 48 hours. To restore that “just-baked” crunch, avoid the microwave at all costs, as it will make the dough rubbery and tough.
Instead, reheat them in a 350°F oven or a toaster oven for about 5 minutes. This recrisps the exterior while warming the center. For a make-ahead option, you can scoop the raw dough onto a tray and freeze the mounds. Once solid, transfer them to a freezer bag. You can bake them straight from frozen; just add 3-5 minutes to the baking time.
Expert Tips for Garlic Cheddar Chive Drop Biscuits
To ensure your baking powder is still active, drop a half-teaspoon into a small bowl of hot water. If it bubbles vigorously, you’re good to go. If it just sits there, toss it and buy a fresh tin. This simple test can save you from a batch of flat, heavy biscuits.
Using a spring-loaded ice cream scoop is a pro move for drop biscuits. It ensures every biscuit is the exact same size, which means they will all finish baking at the same time. This prevents the smaller ones from burning while the larger ones stay raw in the middle.
If you find that your oven runs very hot on the bottom and burns the base of your biscuits, try the “double pan” trick. Place your preheated baking sheet on top of a second, cold baking sheet when you put the biscuits in the oven. This creates a small air gap that insulates the bottom just enough to prevent burning while still allowing for a crisp sear.
How should I store leftover biscuits?
Store your biscuits in an airtight container at room temperature for up to 2 days. If you need to keep them longer, they freeze beautifully for up to 3 months. To freeze, wrap each biscuit individually in plastic wrap and then place them in a heavy-duty freezer bag. Do not store them in the refrigerator, as the cold air can actually cause the starch to crystallize and make the biscuits taste stale faster.
Why did my biscuits turn out flat and spread across the pan?
This usually happens for two reasons: warm ingredients or a cold oven. If the butter isn’t cold when it hits the oven, it melts immediately instead of creating steam. Similarly, if you don’t preheat your baking sheet, the dough sits and softens rather than searing and rising. Always ensure your buttermilk and butter are chilled, and your oven has reached the full 450°F before you start scooping.
Can I use a different type of cheese or herb?
Absolutely! While sharp cheddar and chives are a classic combo, you can swap them out easily. Smoked gouda or pepper jack work wonderfully for a different flavor profile. For herbs, fresh rosemary or thyme are great substitutes, though you should use about half the amount since they are more potent than chives. Just ensure you stick to the “thick shred” rule for whatever cheese you choose.
What is the best way to reheat these without them getting hard?
The oven is your best friend for reheating. Place the biscuits on a baking sheet and heat them at 350°F for 5 to 7 minutes. This method revives the crispy exterior and melts the cheese pockets again. If you use a microwave, the moisture in the biscuit will turn to steam and then quickly evaporate, leaving you with a rock-hard biscuit once it cools down even slightly.
Can I make the dough ahead of time?
You shouldn’t mix the wet and dry ingredients until you are ready to bake, as the baking powder starts reacting the moment it hits the buttermilk. However, you can mix the dry ingredients and cut in the butter ahead of time. Keep that “crumb” mixture in the fridge for up to 24 hours. When you’re ready for fresh biscuits, just fold in the cheese, chives, and buttermilk and head straight to the oven.

Garlic Cheddar Chive Drop Biscuits
Course: Side DishCuisine: AmericanDifficulty: easy10
biscuits10
minutes15
minutes25
Minutes210
kcalAmerican
Ingredients
2 cups all-purpose flour
1 tablespoon baking powder
1 teaspoon garlic powder
1/2 teaspoon salt
1/2 cup (1 stick) cold unsalted butter, cubed
1 1/2 cups shredded sharp cheddar cheese (thickly shredded for visual pockets)
1/3 cup fresh chives, finely chopped
1 cup cold buttermilk
2 tablespoons melted butter
1/4 teaspoon garlic salt (for finishing)
Directions
- Preheat your oven to 450°F (230°C). Place a heavy-duty rimmed baking sheet inside the oven while it heats. This is the critical step to prevent soggy bottoms; the immediate hit of heat sears the base of the dough instantly.
- In a large bowl, whisk together the flour, baking powder, garlic powder, and salt.
- Use a pastry cutter or two forks to work the cold cubed butter into the flour until it resembles coarse crumbs with some pea-sized chunks remaining. Do not overwork; visible bits of butter create the steam needed for a craggy, lifted texture.
- Gently toss the shredded cheddar and 3/4 of the chopped chives into the dry mix. Coating the cheese in flour before adding liquid prevents the fat from leaking out and making the biscuit base greasy.
- Pour in the cold buttermilk. Use a spatula to fold the mixture just until a shaggy dough forms and no dry flour streaks remain. Over-mixing leads to tough, dense biscuits.
- Carefully remove the hot baking sheet from the oven. Working quickly, line it with parchment paper.
- Use a large spoon or a 1/3-cup measuring scoop to drop mounds of dough onto the hot sheet, spaced 2 inches apart. Do not smooth the tops; the crags are what create the golden, crispy peaks shown in the image.
- Bake for 12 to 15 minutes until the tops are deeply golden brown and the cheese pockets are bubbling and crisp.
- Combine the melted butter with the garlic salt and the remaining fresh chives. Brush the tops of the hot biscuits immediately upon removal from the oven. Serve warm.
Notes
- The secret to preventing soggy bottoms is preheating the baking sheet. Coating the cheese in the flour mixture before adding buttermilk prevents the fat from leaking and making the base greasy.