We’ve all been there. You’re craving a vibrant, savory stir fry, but you end up with a plate of grey, rubbery chicken and broccoli that’s turned into a soggy, water-logged mess. It’s frustrating when the flavors are bland and the textures are even worse. Most home cooks struggle with moisture control, leading to a “stewed” effect rather than a true high-heat sear.
The secret to restaurant-quality Garlic Ginger Chicken and Broccoli lies in the “Skyscraper” approach. This method focuses on building layers of flavor while strictly managing moisture at every stage. By using a specific “Steam-Sear” technique, we lock in the vibrant green of the vegetables and the juicy tenderness of the meat. You’ll finally get that glossy sauce that clings to every bite instead of pooling sadly at the bottom of your bowl.
I’ve found that the real magic happens when you balance the aromatics correctly. This recipe uses a high ratio of fresh garlic and ginger to create a deep, punchy profile without needing MSG. The trick is in the cornstarch coating on the chicken. It creates a protective barrier that keeps the meat succulent while providing the base for a thick, professional glaze. Let’s get into how you can master this in your own kitchen.
The Anatomy of a Perfect Stir Fry: Essential Components
Success starts with your choice of protein. I always recommend chicken breast for this specific dish because its lean structure responds beautifully to high-heat searing. When you cut the chicken into uniform 1-inch cubes, you ensure every piece cooks at the exact same rate. This prevents the smaller bits from drying out while the larger ones stay raw in the middle.
The aromatics are the heartbeat of the dish. You must use fresh garlic and ginger here. Jarred versions often sit in citric acid or oil, which alters their pH and prevents them from caramelizing properly in the pan. Fresh ginger provides a sharp, peppery heat that cuts through the richness of the soy sauce, while fresh garlic adds that essential savory depth.
Selecting the Right Broccoli and Aromatics
When shopping for broccoli, look for tight, dark green florets. If the heads look yellow or the stems feel woody and hollow, the broccoli is past its prime and will likely turn mushy. I prefer cutting the florets into medium, bite-sized pieces so they have enough surface area to catch the sauce but aren’t so large that the stems stay raw.
For the onion, a standard white onion is your best bet. It has a sharper bite than a yellow onion, which provides a necessary contrast to the sweetness of the honey. When you mince your ginger, try to get it as fine as possible. Mincing creates tiny bursts of flavor, whereas a paste can sometimes disappear into the sauce without providing that signature ginger “zing.”
The Pantry Staples for a Glossy Glaze
Oyster sauce is the “secret weapon” for that deep, mahogany color you see in high-end Chinese restaurants. It provides an intense umami hit that soy sauce alone can’t achieve. Don’t worry, it doesn’t taste like seafood; it just adds a savory, salty complexity that rounds out the entire flavor profile.
Cornstarch plays a dual role in this recipe. First, it acts as a “velveting” agent for the chicken. Second, it serves as the thickener for the sauce. When the cornstarch in the sauce hits the hot pan, it gelatinizes, turning a thin liquid into a translucent, glossy glaze. This ensures the flavor actually sticks to the food rather than sliding off.
The Science of Velveting: Why We Coat the Chicken
If you’ve ever wondered why restaurant chicken is so much softer than what you make at home, the answer is velveting. By tossing the chicken cubes in cornstarch before they hit the oil, you’re creating a physical shield. This thin layer of starch protects the delicate muscle fibers from the aggressive heat of the pan, preventing them from tightening up and becoming rubbery.
As the chicken cooks, the starch hydrates and forms a micro-crust. This crust isn’t just for texture; it acts like a sponge. When you finally add the sauce, that starchy coating soaks up the liquid, bonding the flavor directly to the meat. Without this step, the chicken often sheds its natural juices, leaving you with dry meat and a watery sauce.
Furthermore, this technique helps with browning. The starch sugars caramelize quickly, giving you those beautiful golden edges in just a few minutes. It’s the difference between “boiled” looking chicken and a professional sear. Just make sure to shake off any excess starch so you don’t end up with gummy clumps in the pan.
Step-by-Step: Preparing the Garlic Ginger Chicken and Broccoli
Stir-frying is a fast-paced game. Once the heat is on, you won’t have time to chop a single clove of garlic. This is why “Mise en Place”—having everything prepped and ready—is mandatory. Have your chicken coated, your sauce whisked, and your vegetables chopped in separate bowls before you even touch the stove.
The actual cooking time is less than 15 minutes. Because we are working with high heat, the goal is rapid transformation. You want to hear a constant sizzle. If the pan goes quiet, you’ve lost your heat, and the food will begin to steam. Keep your ingredients moving and your heat high for the best results.
Phase 1: The High-Heat Vegetable Flash-Steam
We start with the broccoli and onions. Heat one tablespoon of oil until it’s shimmering. Toss in the veggies and stir-fry for just a minute to get some char on the edges. Now, here is the pro move: add two tablespoons of water and immediately slap a lid on the pan. This creates a burst of steam that cooks the interior of the broccoli in seconds.
After about 90 seconds, pull the lid off. The broccoli should be a stunning, vibrant green. It should still have a “snap” when you bite into it. Immediately remove the vegetables from the pan. If you leave them in while you cook the chicken, they will overcook and turn into a dull, olive-drab mush.
Phase 2: Achieving the Maillard Reaction on Chicken
Wipe your pan completely dry. This is vital because any leftover water from the broccoli will prevent the chicken from searing. Add the remaining oil and wait until it’s nearly smoking. Lay the chicken in a single layer. Now, the hardest part: don’t touch it. Let it sit undisturbed for a full three minutes.
This patience allows the Maillard reaction to occur, creating a deep golden crust. If you move the meat too early, it will stick to the pan and tear. Once that crust has formed, the chicken will naturally release from the surface. Flip the pieces and cook for another two minutes until they are opaque and firm to the touch.
Phase 3: Emulsifying the Garlic Ginger Glaze
Give your sauce mixture a quick whisk to incorporate any cornstarch that settled at the bottom. Pour it directly over the hot chicken. You’ll see it start to bubble and thicken almost instantly. Cornstarch activates at roughly 175°F, so as soon as it hits that boiling point, it will transform from a cloudy liquid into a clear, dark glaze.
Keep stirring constantly during this phase. You want the sauce to emulsify with the oil and chicken juices. If you stop stirring, the honey in the sauce might scorch against the bottom of the pan. Once the sauce is thick enough to coat the back of a spoon, you’re ready for the final assembly.
Troubleshooting Common Stir Fry Pitfalls
The most common complaint is a watery sauce. This usually happens because the broccoli wasn’t drained well or the pan was overcrowded. If you put too much food in the pan at once, the temperature drops, and the ingredients release their moisture instead of searing. Cook in batches if your pan isn’t large enough to hold everything in a single layer.
Heat management is also key. On an electric stove, you often need to keep the dial on “High” the entire time because the burners don’t recover heat as quickly as gas. If your sauce gets too thick too fast, simply whisk in a tablespoon of water or broth to loosen it up. If it’s too salty, a tiny extra squeeze of honey can help balance the flavors.
Equipment Essentials: Wok vs. Cast Iron Skillet
A carbon steel wok is the traditional choice because its thin walls allow for instant temperature changes. However, many home stoves don’t produce enough concentrated heat to properly utilize a wok’s shape. In these cases, a heavy cast iron or stainless steel skillet is actually superior. These pans retain a massive amount of heat, which helps maintain that crucial sear when you add cold ingredients.
Avoid using non-stick pans for this recipe if possible. Non-stick coatings aren’t designed for the extreme high heat required for a proper stir fry. You won’t get the same golden crust on the chicken, and you risk damaging the pan’s surface. A well-seasoned cast iron skillet will give you that “breath of the wok” flavor even on a standard kitchen range.
Flavor Variations and Dietary Adaptations
While chicken breast is classic, you can easily swap it for boneless, skinless chicken thighs. Thighs have a higher fat content, making them even more forgiving and flavorful, though they may take an extra minute or two to cook through. For a gluten-free version, use Tamari instead of soy sauce and ensure your oyster sauce is certified gluten-free.
If you want to add some heat, toss in a teaspoon of red pepper flakes or a dollop of chili crisp when you add the garlic and ginger to the sauce. You can also swap the broccoli for snap peas or bell peppers. Just remember to adjust the “steam” time based on the density of the vegetable you choose.
Optimal Pairings for a Balanced Meal
White jasmine rice is the gold standard pairing here. Its floral aroma and soft texture are the perfect canvas for the bold garlic and ginger glaze. If you want something heartier, brown rice adds a lovely nuttiness, though it requires a longer cooking time. For those watching carbs, cauliflower rice works surprisingly well since it soaks up the extra sauce beautifully.
The sauce is quite potent, so you don’t need to season your rice. Let the glaze do the heavy lifting. If you’re feeling adventurous, try serving this over rice noodles. The glossy sauce coats the noodles perfectly, creating a dish that feels more like a lo mein but with the crispness of a fresh stir fry.
Make Ahead Strategies and Storage Logistics
If you want to prep this for a busy weeknight, you can chop the chicken and vegetables up to 24 hours in advance. Store them in separate airtight containers. You can even whisk the sauce together and keep it in a jar in the fridge. When you’re ready to eat, the actual cooking will only take you about 12 minutes.
Leftovers should be stored in an airtight container in the refrigerator for up to three days. Be aware that the broccoli will lose its “snap” as it sits in the sauce, becoming softer over time. I don’t recommend freezing this dish; the cell structure of the broccoli breaks down when frozen, resulting in a very mushy texture once thawed.
Expert Tips for Maximum Aromatics
To get the most out of your flavors, use the “Last Minute Aromatics” rule. Toasted sesame oil has a very low smoke point and its flavor compounds are highly volatile. If you cook with it at high heat, the flavor disappears. Instead, drizzle it over the dish right before you take it off the heat. This preserves that rich, nutty aroma that defines great stir fry.
Another tip is to use a microplane for your ginger. This creates a fine pulp that distributes evenly throughout the sauce, ensuring you don’t bite into a large, woody chunk of ginger. It also releases more of the ginger’s natural juices, which intensifies the overall “zing” of the glaze.
The Role of Garlic in High-Heat Cooking
Garlic is delicate. If you toss minced garlic into a smoking hot, dry pan, it will burn in less than ten seconds. Burnt garlic is incredibly bitter and can ruin the entire batch. This is why I recommend whisking the garlic directly into the sauce mixture. The liquid protects the garlic from the direct heat of the pan, allowing it to cook gently and release its sweetness as the sauce thickens.
Maximizing Ginger’s Pungency
Ginger’s flavor changes depending on how you prep it. Grating it with a microplane gives you the most pungency because it breaks down the fibers and releases the oils. If you prefer a milder flavor, you can matchstick the ginger (julienne), which provides a more subtle heat. Always peel your ginger first—the back of a spoon is the easiest tool for scraping off the skin without wasting any of the root.
How do I keep the chicken from sticking to the pan?
The most important factor is the temperature of the pan. You need the oil to be shimmering and near its smoke point before adding the chicken. Once the chicken is in, do not try to move it for at least 2-3 minutes. The meat will naturally release from the pan once a proper crust has formed. If you try to flip it too early, the proteins will still be bonded to the metal, causing it to tear.
Can I use frozen broccoli for this recipe?
You can, but the texture will be significantly different. Frozen broccoli is blanched before freezing, which means it’s already partially cooked. It also contains a lot of internal moisture. If you use frozen, skip the “steam” step entirely. Thaw the broccoli and pat it very dry with paper towels before tossing it into the pan at the very end just to warm it through. It won’t have the same “snap” as fresh, but it works in a pinch.
Why is my stir fry sauce too thin?
A thin sauce is usually the result of the cornstarch not reaching its activation temperature or too much liquid being released from the vegetables. Ensure the sauce comes to a full boil in the pan; you should see large bubbles. If it’s still too thin after boiling for a minute, mix another teaspoon of cornstarch with a teaspoon of cold water and stir it into the bubbling sauce to thicken it further.
What is the best substitute for oyster sauce?
If you don’t have oyster sauce, you can use a “vegetarian stir fry sauce” which is usually made from mushrooms and offers a similar umami profile. Alternatively, you can use extra soy sauce mixed with a little more honey and a dash of Worcestershire sauce. While the flavor won’t be identical, it will provide the necessary salty-sweet balance and dark color the dish requires.
How should I reheat leftovers so they aren’t mushy?
The best way to reheat this dish is in a skillet over medium-high heat. Add a tiny splash of water to loosen the glaze and toss it quickly until heated through. Avoid the microwave if possible, as it tends to steam the broccoli further, making it very soft. If you must use a microwave, heat it in short 30-second bursts and stop as soon as the chicken is warm.
Can I use a different protein like beef or shrimp?
Absolutely. This technique works wonderfully with flank steak or top sirloin sliced thin against the grain. For shrimp, the cooking time is much shorter—usually only 1-2 minutes per side. The key is to still use the cornstarch coating, as it provides that same “velveting” effect regardless of the protein you choose. Just ensure you don’t overcook the shrimp, or they will become tough and rubbery.
Garlic Ginger Chicken and Broccoli
Course: Main CourseCuisine: Asian-AmericanDifficulty: easy4
servings15
minutes12
minutes27
Minutes345
kcalAsian-American
Ingredients
1.5 lbs chicken breast, cut into 1-inch cubes
2 tablespoons cornstarch (divided: 1 tbsp for coating chicken, 1 tbsp for sauce)
2 large heads of broccoli, cut into medium florets
1 white onion, chopped into large chunks
1/4 cup soy sauce
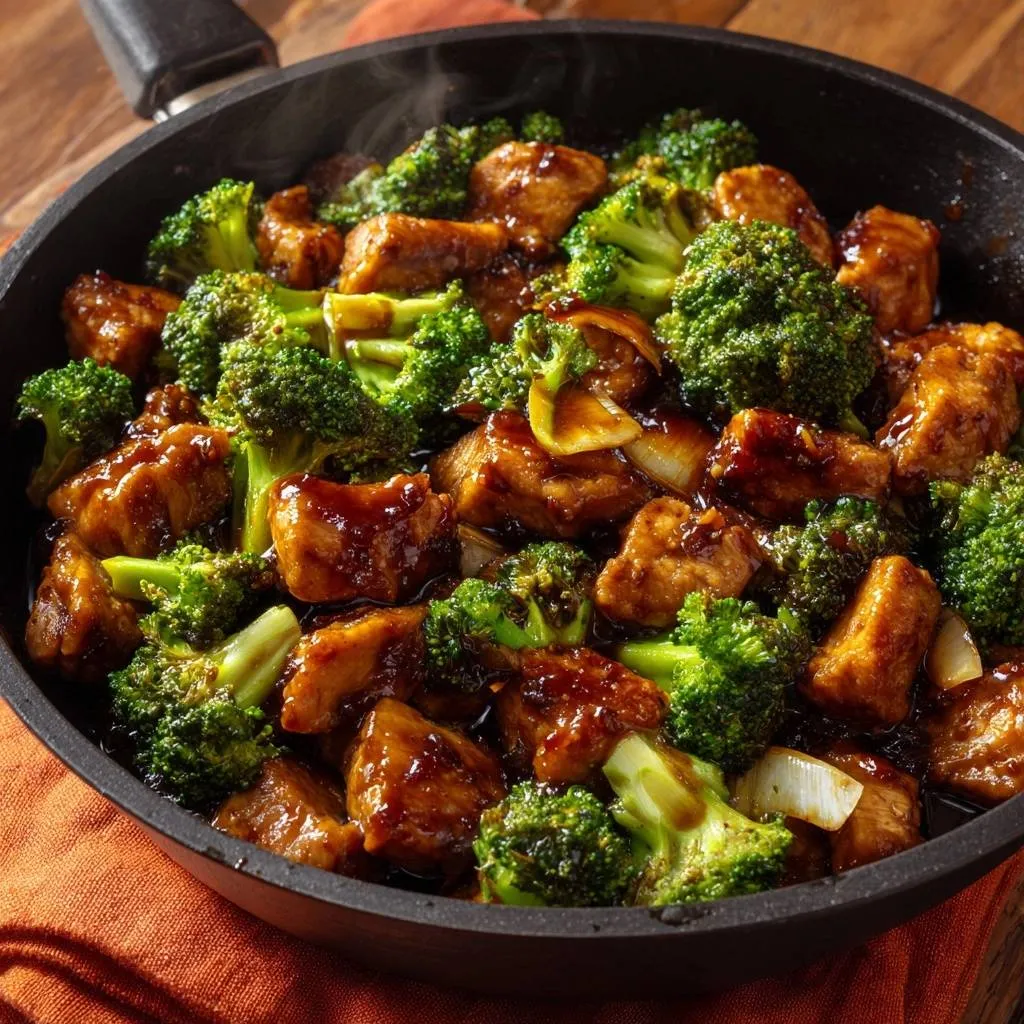
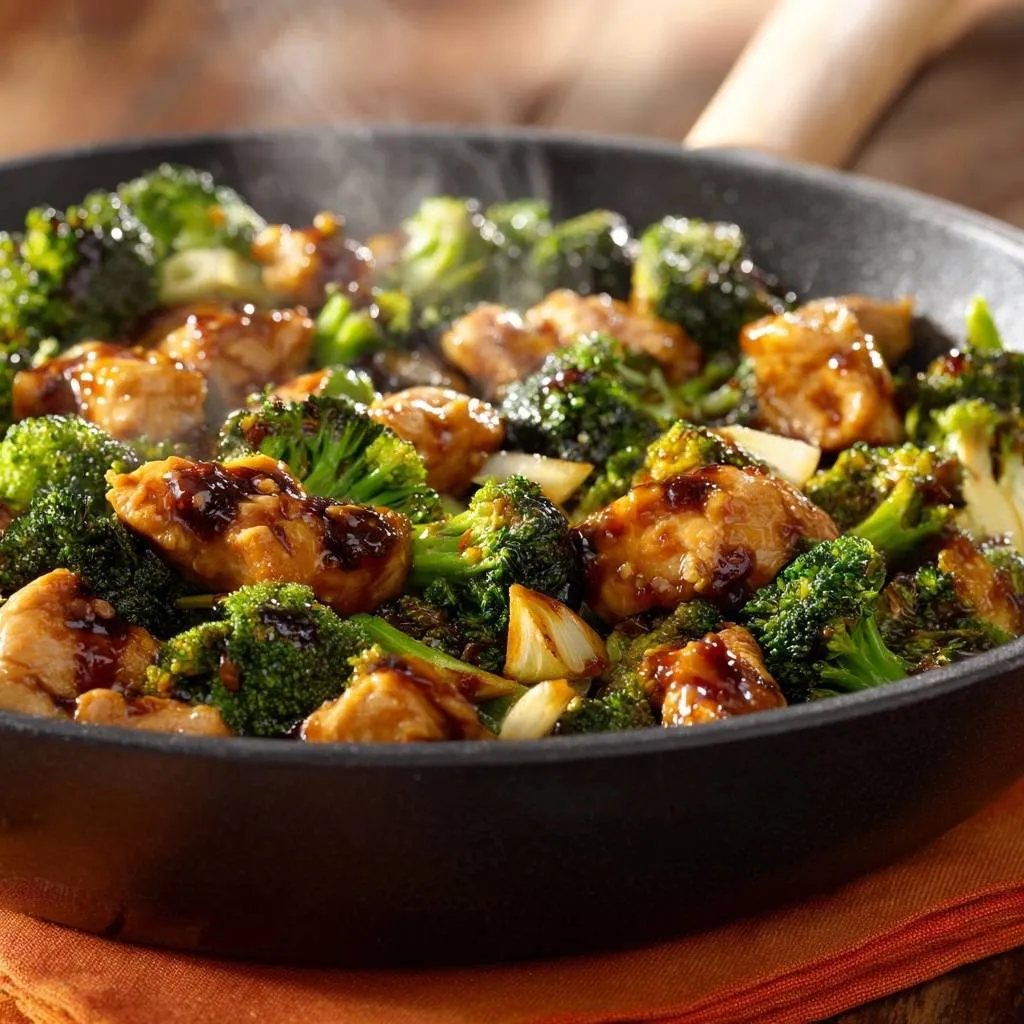
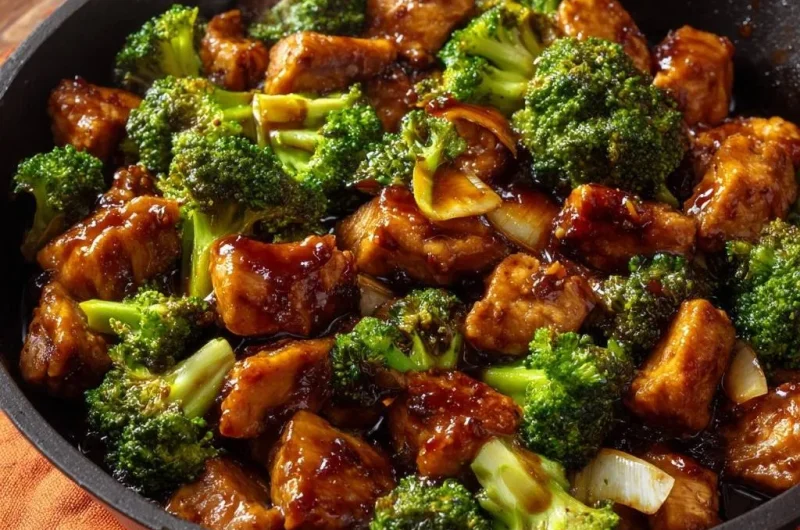
1 tablespoon oyster sauce (for that deep, dark glaze shown in the image)
1 tablespoon ginger, minced
3 cloves garlic, minced
1 tablespoon honey or brown sugar
1/2 cup chicken broth or water
3 tablespoons vegetable oil (divided)
1 teaspoon toasted sesame oil (optional)
Directions
- Prepare the Chicken: In a bowl, toss the chicken cubes with 1 tablespoon of cornstarch until lightly coated. This creates the golden, velvety crust seen in the image and prevents the meat from drying out.
- Make the Sauce: In a small bowl, whisk together the soy sauce, oyster sauce, honey, minced ginger, minced garlic, the remaining 1 tablespoon of cornstarch, and the chicken broth. Set aside.
- The “Steam-Sear” Broccoli: Heat 1 tablespoon of oil in a large skillet or wok over high heat. Add the broccoli florets and onion chunks. Stir-fry for 1 minute. Add 2 tablespoons of water and immediately cover with a lid for 90 seconds. This flash-steams the interior while the high heat sears the edges. Remove the vegetables from the pan and set aside on a plate.
- Sear the Chicken: Wipe the pan completely dry. Add the remaining 2 tablespoons of oil over high heat. Add the chicken in a single layer. Let it sear undisturbed for 3 minutes to develop a deep golden-brown crust. Flip and cook for another 2 minutes until cooked through.
- Thicken the Glaze: Pour the sauce mixture into the pan with the chicken. Stir constantly for 1-2 minutes. The sauce will bubble and transform into a thick, dark, glossy glaze that coats the chicken.
- Final Toss: Add the cooked broccoli and onions back into the pan. Toss quickly for 30 seconds to coat every crevice in the glaze. Drizzle with sesame oil if desired and serve immediately over rice to maintain the perfect crisp-tender texture.
Notes
- To ensure the best texture, do not overcrowd the pan during the chicken searing phase. Using oyster sauce is key for achieving the deep, dark glaze characteristic of restaurant-style dishes.