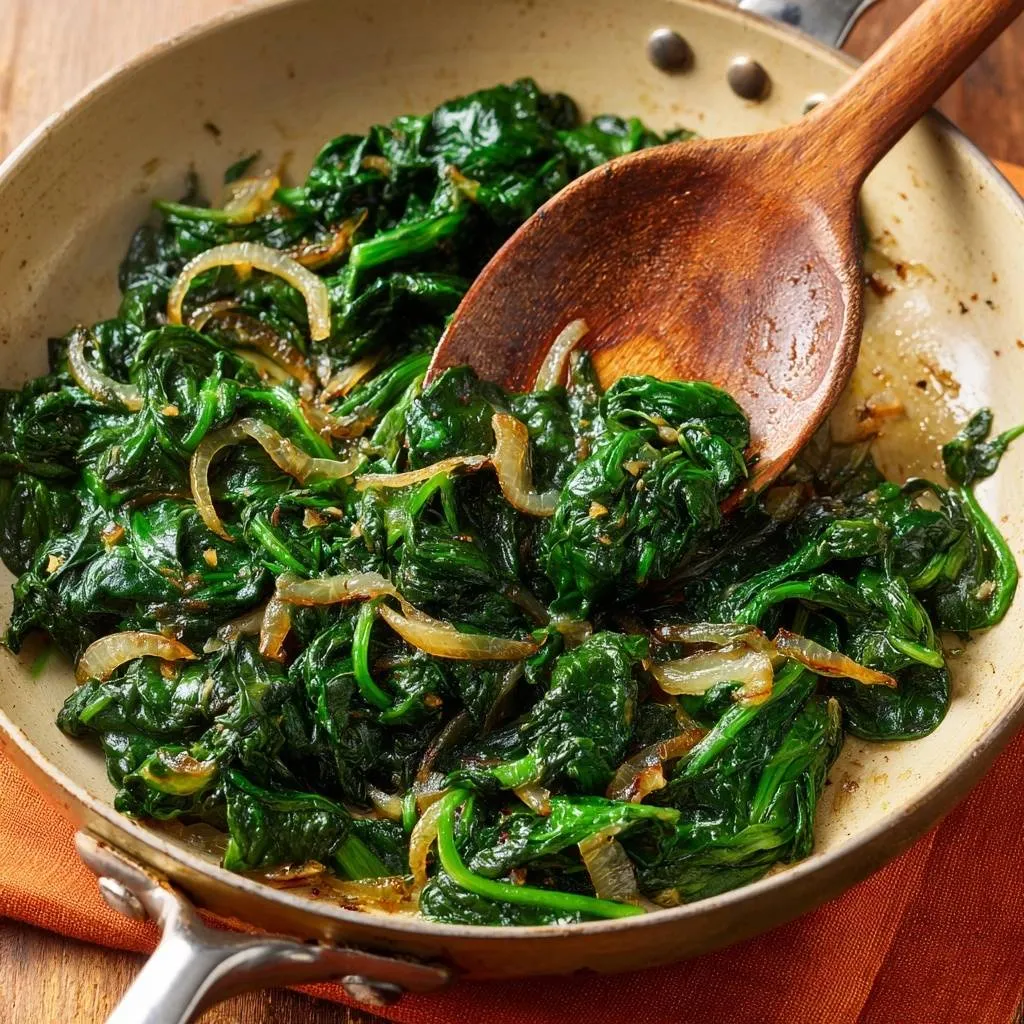
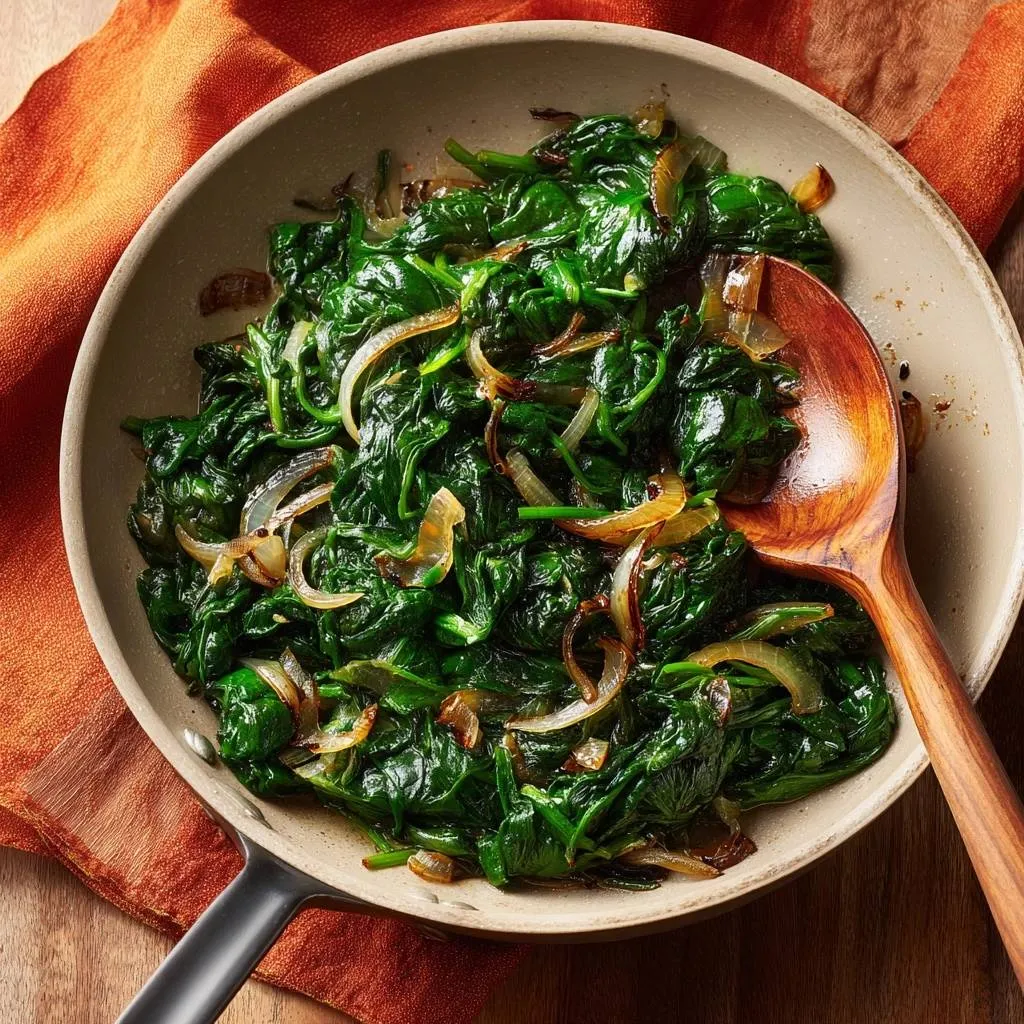
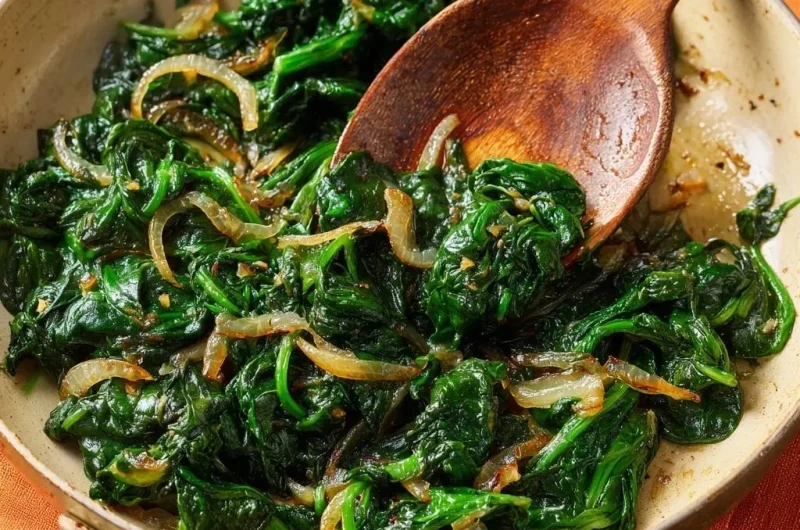
Imagine a forkful of vibrant, emerald-green spinach that is tender to the bite but still holds its structure. It is coated in a silky layer of extra virgin olive oil and tangled with sweet, golden-brown onions and toasted garlic. There is no puddle of gray liquid on your plate, and the greens don’t feel slimy or mushy. Instead, you get a bright, savory side dish that feels like it came straight out of a high-end steakhouse kitchen.
Most home cooks struggle with “spinach soup” because they treat these delicate leaves like a hearty root vegetable. However, the secret to a perfect sauté lies in speed and moisture control. By following this specific method, you can have a nutrient-dense, restaurant-quality side dish on the table in exactly 15 minutes, including prep time.
The real trick to success is the “dry-to-dry” principle. I’ve found that even a few drops of water left over from washing can ruin the entire batch. Therefore, you must ensure your leaves are bone-dry before they ever touch the oil. This allows the spinach to sear and wilt in the fat rather than steaming in its own juices.
The Science of Moisture in Leafy Greens
Spinach is roughly 90% water, which is why a massive bag of leaves seems to vanish into a single serving once cooked. When you apply heat, the cellular walls of the spinach begin to collapse, releasing that internal moisture. If your pan isn’t hot enough or if you add salt too early, that water floods the pan faster than it can evaporate.
Timing your salt application is the most important scientific factor here. Salt is an osmotic agent, meaning it draws moisture out of cells. If you salt the spinach while it is still wilting, you are essentially inviting the water to leak out. By waiting until the very last second to season, you keep the moisture locked inside the leaves, resulting in a plump, juicy texture rather than a soggy mess.
Furthermore, pan surface area plays a massive role in the physics of a good sauté. A deep pot traps steam, which condenses and falls back onto the greens. A wide, shallow skillet allows that steam to escape into the air immediately. This ensures the spinach “fries” in the olive oil rather than boiling in a pool of green liquid.
Essential Components for Garlic Sauteed Spinach and Onions
Because this dish has so few ingredients, the quality of each one is magnified. I recommend using a high-quality extra virgin olive oil because it acts as a flavor carrier for the garlic and onions. It also has the necessary viscosity to coat the leaves evenly without making them feel greasy.
When it comes to the greens, you have two main choices. Mature bunched spinach offers a deeper, more “earthy” flavor and a sturdier texture that stands up well to the heat of the onions. Baby spinach is much more convenient and wilts in seconds, making it perfect for a quick weeknight meal. Both work beautifully, but mature spinach requires a bit more attention to ensure the thicker stems are trimmed.
Fresh garlic is non-negotiable here. The pre-minced stuff in jars often has a metallic or acidic aftertaste that can ruin the delicate flavor of the greens. Use fresh cloves and mince them yourself right before cooking to ensure the oils are potent and aromatic.
Selecting and Prepping Your Spinach
If you are using bunched spinach, start by dunking it in a bowl of cold water to dislodge any hidden grit or sand. However, the most critical part of the process is the drying phase. A salad spinner is your best friend here; it uses centrifugal force to strip away every last drop of water.
If you don’t own a spinner, lay the leaves out on a clean kitchen towel and pat them thoroughly with paper towels. You want the leaves to feel “bone-dry” to the touch. If the leaves are wet when they hit the hot oil, the oil will splatter, and the spinach will steam instead of sautéing.
Aromatics: Onions, Garlic, and Heat
Yellow onions are the gold standard for this recipe because they have a high sugar content. As they cook in the olive oil, those sugars break down and caramelize, providing a sweet counterpoint to the slightly bitter spinach. White onions are often too sharp, and red onions can turn a muddy color when sautéed with greens.
The garlic provides the backbone of the dish’s aroma. When you mince garlic, you break open the cells and release allicin, which creates that classic pungent scent. However, smaller pieces burn faster. Therefore, we wait to add the garlic until the onions are nearly finished to ensure it toasts without turning bitter.
The Importance of Skillet Surface Area
You might be tempted to reach for a deep saucepan to contain the mountain of raw spinach, but that is a mistake. A 12-inch wide skillet is the superior tool for this job. The large surface area ensures that every leaf has a chance to touch the hot metal and wilt instantly.
Stainless steel or cast iron are both excellent choices because they hold heat well. When you dump a pound of cold spinach into a pan, the temperature drops rapidly. A heavy skillet maintains its heat better, which helps the moisture evaporate the moment it is released from the leaves.
Step-by-Step: Sautéing Onions to Golden Perfection
Start by heating your oil over medium heat until it shimmers. Add your onions, which should be sliced into thin half-moons. This shape ensures they cook at the same rate as the spinach and distribute evenly throughout the finished dish.
You aren’t just looking to soften the onions; you want to see those edges turn a beautiful golden-brown. This process usually takes about 5 to 7 minutes. You will know they are ready when the sharp raw onion smell transforms into a rich, sweet fragrance that fills your kitchen.
The 30-Second Garlic and Spice Infusion
Once the onions are golden, it is time for the high-stakes phase. Clear a small spot in the center of the pan and add your minced garlic and red pepper flakes. The garlic only needs about 30 seconds to become fragrant.
Watch it closely. As soon as you smell that incredible garlic aroma and see the pieces turn a pale golden color, move to the next step. If you wait until the garlic is dark brown, it will taste burnt and acrid, which will permeate the entire dish.
High-Heat Wilting: The Flash-Sauté Technique
Turn the heat up to medium-high and add the spinach in large handfuls. It will look like an impossible amount of greens at first, but don’t worry. Use tongs or a wooden spoon to constantly toss the leaves, bringing the bottom ones to the top and pushing the fresh ones down to the hot surface.
This “flash-sauté” should only take about 2 minutes. You are looking for the exact moment the leaves collapse and turn a vibrant, neon green. As soon as they look wilted but still have some body, pull the pan off the heat immediately. The residual heat will finish the job without overcooking them.
Seasoning Strategy: Why Salt Comes Last
Now that the pan is off the heat, sprinkle in your sea salt, black pepper, and a squeeze of fresh lemon juice. Adding the salt now prevents the “osmosis” effect from happening while the heat is still high, which is the ultimate secret to a dry plate.
The lemon juice acts as a “brightener.” It cuts through the richness of the olive oil and balances the earthy notes of the spinach. It also helps to keep the color of the greens looking fresh and appetizing rather than dull and gray.
Troubleshooting Common Texture Issues
If you find that your spinach has turned gray, it means it spent too much time on the heat. Next time, pull it off the burner while it still looks slightly “underdone.” The carryover heat is more powerful than you think!
If you see liquid pooling in the pan despite your best efforts, don’t panic. Simply use a slotted spoon to transfer the spinach to a serving bowl, leaving the liquid behind. You can also tilt the pan and soak up the excess moisture with a folded paper towel before serving.
Flavor Variations and Ingredient Swaps
While garlic and onions are a classic duo, you can easily customize this dish. If you want a more delicate flavor, try using sliced shallots instead of yellow onions. They offer a subtle sweetness that is less aggressive than standard onions.
For a bit of texture, toss in a tablespoon of toasted pine nuts or slivered almonds at the very end. If you want a deeper, earthier profile, a tiny pinch of ground nutmeg works wonders with spinach. For those who love heat, double the red pepper flakes or add a dash of hot sauce with the lemon juice.
Pairing Garlic Sauteed Spinach and Onions with Proteins
This side dish is incredibly versatile. The acidity from the lemon juice makes it a perfect partner for fatty proteins like a seared ribeye steak or roasted salmon. The brightness of the greens cuts through the richness of the meat beautifully.
It also pairs wonderfully with roasted chicken or even a simple omelet for a sophisticated breakfast. Because it cooks so quickly, it is my go-to side for pan-seared white fish, which often requires a fast-cooking accompaniment to ensure everything stays hot for service.
Storage and Reheating for Meal Prep
Sautéed spinach is definitely best when eaten immediately. However, if you have leftovers, store them in an airtight container in the fridge for up to 24 hours. I don’t recommend freezing it, as the texture becomes very mushy once thawed.
To reheat, avoid the microwave at all costs, as it will turn the spinach into a rubbery mess. Instead, toss the leftovers into a dry, hot skillet for about 60 seconds. This “flash-warm” method revives the flavors and helps evaporate any moisture that settled during storage.
Expert Tips for Restaurant-Quality Results
One professional secret is to “temper” your spinach. Take it out of the fridge about 15 minutes before cooking so it isn’t ice-cold when it hits the pan. This prevents the pan temperature from plummeting and ensures a faster wilt.
Another tip is to use a slotted spoon for plating. Even the most perfectly sautéed spinach will have a tiny bit of steam moisture. By using a slotted spoon, you ensure that only the flavorful greens and onions make it to the plate, keeping the presentation clean and professional.
Is Frozen Spinach a Viable Substitute?
Frozen spinach is a completely different product structurally. It is blanched before freezing, which breaks down the cell walls. While you can sauté it with onions and garlic, it will never have the light, airy texture of fresh leaves. If you must use frozen, you need to thaw it completely and squeeze it inside a kitchen towel until it is incredibly dry before adding it to the pan.
How to Scale This Recipe for Crowds
The “volume trap” is real with spinach. One pound looks like a lot, but it only serves about 3 to 4 people as a side. If you are cooking for a large group, do not try to cram 3 pounds into one skillet. The pan will lose all its heat, and you will end up with boiled spinach. Instead, cook in batches or use two separate large skillets simultaneously.
Managing the “Metallic” Aftertaste
Spinach contains oxalic acid, which can sometimes leave a “chalky” or metallic feeling on your teeth. The fat from the olive oil and the acid from the lemon juice work together to neutralize this sensation. If you are particularly sensitive to it, adding a small pat of butter at the very end can also help coat the palate and eliminate that feeling.
Can I Use Other Greens with This Method?
You can certainly use this method for Swiss chard or kale, but you will need to adjust the timing. Hearty greens have much tougher ribs and leaves. You should sauté the chopped stems with the onions first, then add the leaves and a splash of water or broth, covering the pan for 2-3 minutes to soften them before finishing with the high-heat sauté.
How do I prevent the garlic from burning while the onions caramelize?
This is a common mistake that leads to a bitter dish. Onions take significantly longer to cook than garlic. Therefore, you should always sauté your onions first until they reach your desired level of brownness. Only add the minced garlic during the last 30 to 60 seconds of the onion-cooking phase. This gives the garlic just enough time to release its oils without turning dark and bitter.
Why is my sautéed spinach always watery at the bottom of the bowl?
Watery spinach usually happens for two reasons: the leaves were wet when they started, or you salted them too early. To fix this, use a salad spinner to get the leaves bone-dry. Additionally, wait to add your salt until after you have turned off the heat. This prevents the salt from drawing out the internal juices of the spinach while it is still over the flame.
Can I substitute the lemon juice with something else?
If you don’t have a lemon on hand, a teaspoon of apple cider vinegar or red wine vinegar can provide the necessary acidity. The goal is to add a “bright” note to the dish. However, avoid using balsamic vinegar as it is too sweet and will turn the green spinach a muddy brown color. If you have no vinegar, a tiny bit of lemon zest can also provide that citrus aroma without the liquid.
How long can I store leftovers in the refrigerator?
Sautéed spinach is best enjoyed fresh, but it will stay safe in an airtight container for up to 2 days. Be aware that the texture will soften significantly the longer it sits. When you are ready to eat it, skip the microwave and quickly toss it in a hot pan for a minute to refresh the texture and evaporate any liquid that has pooled in the container.
Garlic Sauteed Spinach and Onions
Course: Side DishCuisine: AmericanDifficulty: easy4
servings5
minutes10
minutes15
Minutes85
kcalAmerican
Ingredients
1 pound fresh mature spinach or baby spinach, washed and thoroughly dried
1 medium yellow onion, thinly sliced into half-moons
3 cloves garlic, minced
2 tablespoons extra virgin olive oil
1/2 teaspoon sea salt
1/4 teaspoon black pepper
1/2 teaspoon red pepper flakes (optional)
1 teaspoon lemon juice
Directions
- The most critical step to avoid a watery result is ensuring your spinach is bone-dry. Use a salad spinner or pat the leaves between paper towels until no moisture remains.
- Heat the olive oil in a large, wide skillet over medium heat. A wide pan is essential because it allows moisture to evaporate quickly rather than steaming the greens.
- Add the sliced onions to the pan. Sauté for 5 to 7 minutes, stirring occasionally, until they are soft and have developed golden-brown caramelized edges as seen in the image.
- Stir in the minced garlic and red pepper flakes. Cook for just 30 seconds until fragrant. Do not let the garlic burn or it will turn bitter.
- Turn the heat up to medium-high. Add the spinach in large handfuls. Use a wooden spoon or tongs to toss the spinach constantly so it hits the hot surface of the pan and wilts immediately.
- As soon as the leaves have collapsed and turned bright green (usually about 2 minutes), remove the pan from the heat. Do not overcook, or the spinach will begin to release its internal liquid and turn gray.
- Immediately season with salt, pepper, and lemon juice. Adding salt at the very end prevents the cell walls from breaking down too early and releasing excess water during the cooking process.
- Serve immediately directly from the pan or using a slotted spoon to ensure any residual steam moisture stays off your plate.
Notes
- To prevent wateriness, ensure spinach is completely dry before cooking and add salt only at the very end of the process.