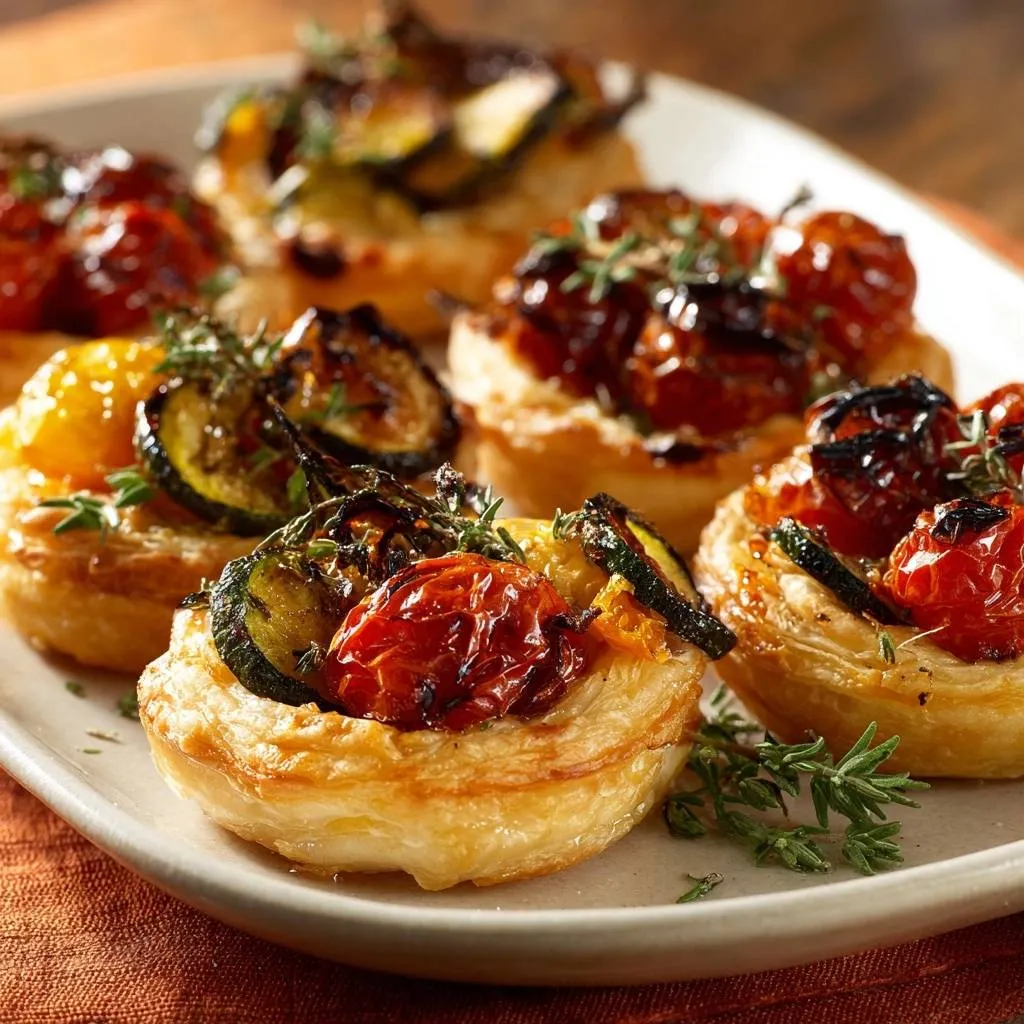
Imagine biting into a tart where the crust doesn’t just crumble; it shatters. You get that immediate, buttery crunch followed by the jammy sweetness of a roasted cherry tomato and the earthy, caramelized edge of a zucchini slice. It’s a textural masterpiece that balances the richness of laminated dough with the bright, concentrated flavors of a summer garden.
However, most home cooks struggle with the dreaded “soggy bottom.” When you put raw vegetables directly onto puff pastry, they release their juices during the bake, turning your beautiful tart into a limp, doughy mess. This recipe solves that problem by using a specific moisture-lock technique that ensures your pastry stays crisp enough to hold its shape, even under a pile of tender vegetables.
The secret to this professional-grade crunch is a two-step roasting process combined with a fat-based moisture barrier. By pre-roasting the vegetables, we evaporate the water that would otherwise ruin the dough. I’ve found that adding a thin layer of finely grated Parmesan cheese before the vegetables go on creates a hydrophobic seal, protecting the pastry from any remaining steam. It’s a game-changer for your baking repertoire.
The Science of Crispness in Vegetable Tarts
Puff pastry relies on physics to achieve its famous height. It consists of hundreds of layers of cold butter folded into dough. When that cold butter hits a hot oven, the water in the butter turns to steam, forcing the layers of dough upward before the heat sets the structure. This process is called lamination.
Vegetables like zucchini and tomatoes are the natural enemies of this process because they are over 90% water. If you place them raw onto the pastry, that water migrates into the dough layers as they try to rise. Instead of a light, airy puff, you end up with a dense, waterlogged center. Our method focuses on moisture management to ensure the pastry can perform its mechanical “lift” without interference.
Why Pre-Roasting is Non-Negotiable
Pre-roasting isn’t just about removing water; it’s about the Maillard reaction. This chemical reaction between amino acids and reducing sugars gives browned food its distinctive flavor. By roasting the zucchini and tomatoes at 400°F before they ever touch the dough, we concentrate their natural sugars and acids.
This step allows the excess moisture to escape as steam into the oven rather than into your crust. You’ll notice the tomatoes become jammy and the zucchini develops a concentrated, nutty flavor. This ensures that when the vegetables finally meet the pastry, they are flavor bombs rather than water balloons.
The Role of the Parmesan Moisture Barrier
Even after pre-roasting, vegetables can still release a tiny amount of residual moisture. This is where the Parmesan cheese comes in. Because Parmesan is a hard, aged cheese with a high fat-to-water ratio, it melts into a thin, oily film on the surface of the dough.
This film acts as a barrier. It prevents any liquid from the vegetables from penetrating the delicate layers of the pastry. Beyond the technical benefits, the cheese adds a savory, umami punch that seasons the tart from the bottom up.
Essential Components for Roasted Vegetable Puff Pastry Tarts
Quality is everything when you’re working with so few ingredients. If you can find an all-butter puff pastry, buy it. Shortening-based pastries often leave a waxy film on the roof of your mouth and don’t achieve the same mahogany color or shatter-crisp texture as the real deal.
The choice of vegetables matters just as much. I prefer cherry tomatoes over large beefsteak slices because their skin-to-flesh ratio is higher. This means they hold their shape better during the double-roasting process and provide little bursts of acidity that cut through the buttery dough.
Selecting the Best Produce for Roasting
When shopping for zucchini, look for small to medium-sized ones. Large zucchini tend to be more watery and have larger seeds, which can get mushy. A firm, dark green zucchini will hold its circular shape beautifully once sliced into rounds.
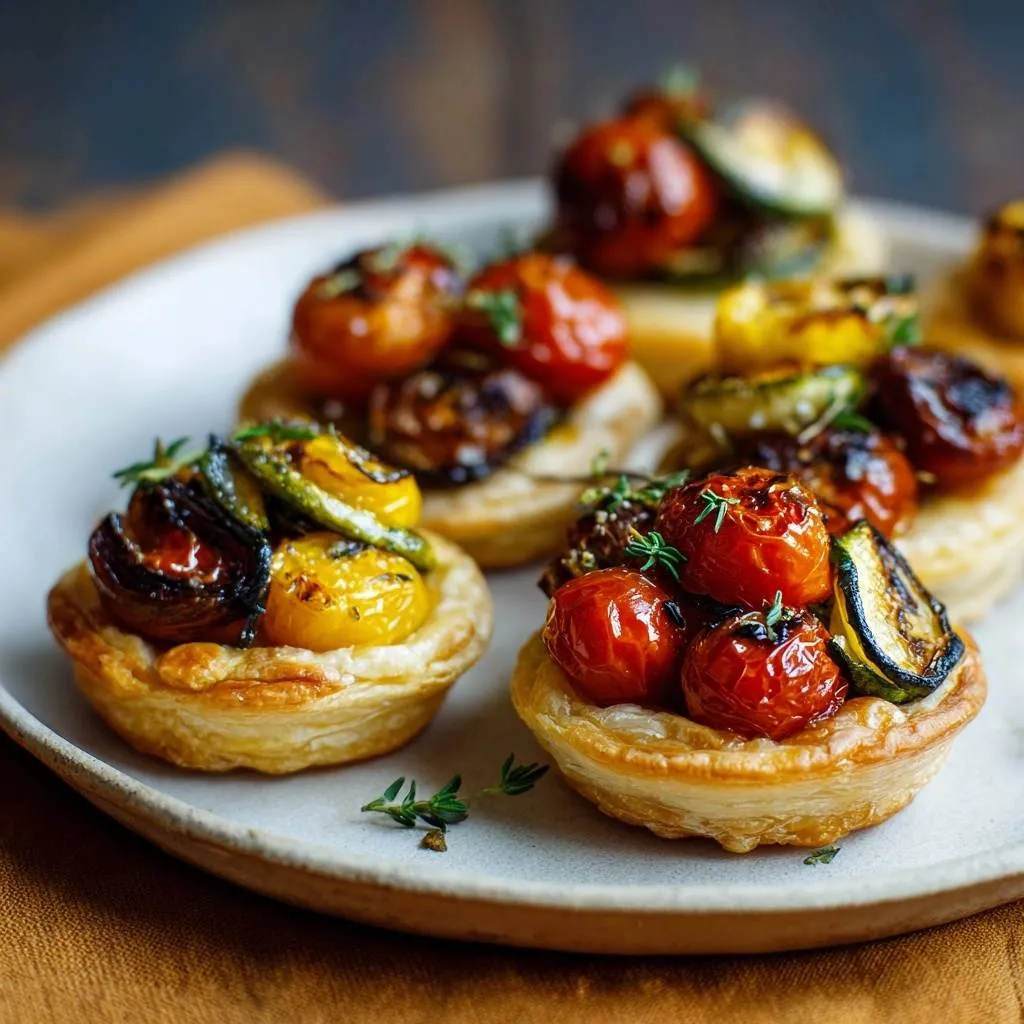
For the tomatoes, a mix of red and yellow varieties isn’t just for looks. Yellow tomatoes are often lower in acid and sweeter, while red ones provide that classic tangy bite. Together, they create a complex flavor profile and a stunning visual contrast on the finished tart.
Pantry Staples: Oils, Glazes, and Herbs
Use a high-quality olive oil for the roasting phase. You want something that can stand up to the heat without smoking. The balsamic glaze is another critical component; unlike thin balsamic vinegar, the glaze has a syrupy consistency and higher sugar content, which aids in the rapid caramelization of the vegetables.
For the herbs, I use dried oregano during the bake because it can withstand the high heat of the oven without burning. Fresh thyme is reserved for the very end. Its delicate, floral oils are volatile and would disappear in the 425°F heat, so we add it as a finishing touch to keep the aroma bright and fresh.
Step-by-Step: Preparing the Moisture-Lock Vegetables
Start by slicing your zucchini into uniform 1/4-inch rounds. Uniformity is key here; if some slices are thinner than others, they will burn before the thicker ones have a chance to soften. Toss them on a baking sheet with the cherry tomatoes, olive oil, and balsamic glaze.
Make sure every vegetable is well-coated. The oil acts as a heat conductor, ensuring the vegetables roast rather than steam. Spread them out in a single layer. If the pan is crowded, the moisture won’t evaporate efficiently, defeating the purpose of this step.
Achieving the Perfect Char on Zucchini and Tomatoes
After about 15 minutes at 400°F, you should see the tomato skins starting to blister and pop. The zucchini should have golden-brown edges but still retain some structural integrity. You aren’t looking to cook them into a mash at this stage.
Remove them from the oven and let them sit for a minute. You’ll see a bit of liquid on the pan—that’s exactly what we wanted to keep away from our pastry. We will pick the vegetables up from this pan and move them to the pastry, leaving that extra liquid behind.
Precision Pastry Prep: Scoring and Docking
Working with puff pastry requires speed. You want the dough to be thawed enough to cut, but still very cold to the touch. If the butter inside the dough melts before it hits the oven, you’ll lose those distinct, flaky layers. If it gets too soft, pop it back in the fridge for 10 minutes.
Once you’ve cut your rounds, you need to “dock” the center. This means pricking the middle of the pastry repeatedly with a fork. This creates tiny vents that prevent the center from rising, while the un-pricked edges are free to puff up and create a natural frame for your vegetables.
Creating the Perfect Pastry Border
To get that professional “raised edge” look, use a knife to lightly score a circle about 1/2 inch from the edge of your pastry round. Be careful not to cut all the way through. You’re just creating a “break” in the top layers of the dough.
This scoring technique tells the pastry exactly where to rise. The outer ring will shoot up, creating a golden wall that keeps the vegetables and cheese nestled safely in the center. It turns a simple flat circle into a sophisticated, deep-dish tartlet.
Assembling the Tarts for the Final Bake
Now it’s time to build. Start with a generous sprinkle of Parmesan cheese inside the scored border. This is your moisture shield. On top of the cheese, arrange your pre-roasted zucchini and tomatoes. I like to “shingle” the zucchini, overlapping them slightly in a circular pattern.
Overlapping the vegetables allows you to pack more flavor into every bite. Since they’ve already shrunk during the pre-roasting phase, they won’t shrink much more, so you can nestle them tightly together. Sprinkle with your dried herbs and garlic powder right before they go back in.
The Secret to a Deep Mahogany Crust
For that glossy, bakery-style finish, don’t skip the egg wash. Brushing the outer border with a beaten egg provides the proteins and fats necessary for deep browning. It’s the difference between a pale, sandy-colored tart and one that looks rich and artisanal.
Turn your oven up to 425°F for this final stage. The high heat provides the “oven spring” needed to make the pastry layers jump. Bake until the edges are a deep mahogany gold. If they look light tan, they aren’t done yet—keep going until they look bold and dark.
Troubleshooting Common Pastry Pitfalls
If your pastry isn’t rising, the most common culprit is warm dough. If the butter melts into the flour before the steam can lift the layers, the pastry will stay flat and greasy. Always keep your pastry in the fridge until the very second you are ready to score and fill it.
Another issue is “leaking” vegetables. If you notice a pool of liquid forming during the final bake, it means the pre-roasting wasn’t long enough or the oven temperature was too low. Ensure your oven is fully preheated before the tarts go in to set the dough immediately.
How to Handle Warm Dough
If you find that the dough has become floppy while you were decorating the tarts, use the “flash chill” method. Place the entire baking sheet with the assembled tarts into the freezer for 5 to 8 minutes. This firms the butter back up.
When that chilled butter hits the 425°F oven, the temperature shock creates a massive burst of steam. This results in a much higher, more dramatic puff. It’s a professional trick that ensures success even in a warm kitchen.
Flavor Variations and Seasonal Swaps
Once you master the pre-roasting technique, you can swap the vegetables for whatever is in season. Try thinly sliced bell peppers and red onions for a Mediterranean vibe. Just remember to roast them first until they are soft and slightly charred to remove their water content.
In the fall, roasted butternut squash cubes with fried sage make an incredible tart. The key is always the same: cook the vegetable until its moisture is gone and its flavor is concentrated before it ever meets the puff pastry.
Alternative Cheese Barriers
While Parmesan is my go-to, any hard, aged cheese will work as a moisture barrier. Pecorino Romano offers a saltier, funkier kick, while an aged Gruyère adds a nutty, sophisticated sweetness. These cheeses all have the low moisture content required to protect the crust.
Avoid soft cheeses like fresh mozzarella or ricotta for the base layer. They release far too much whey during baking and will guarantee a soggy bottom. If you want that creamy element, dollop a little goat cheese on top of the vegetables *after* the tart comes out of the oven.
Serving Suggestions and Professional Plating
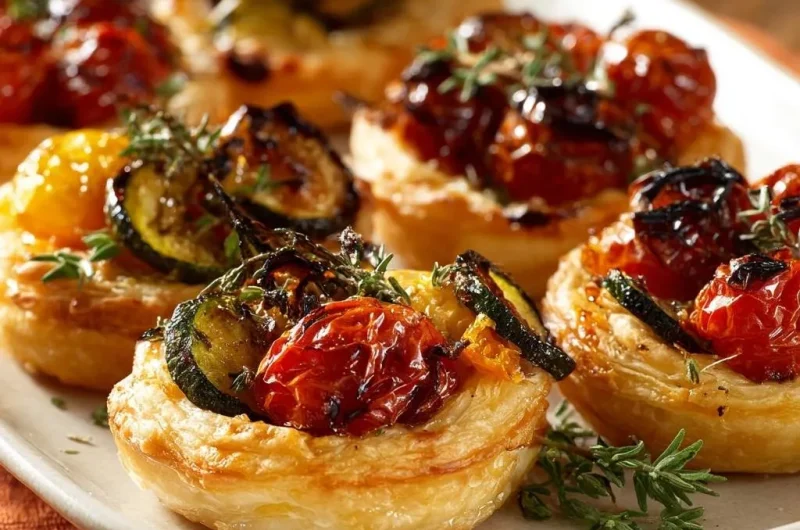
Presentation is simple but impactful. As soon as the tarts come out of the oven, hit them with fresh thyme sprigs. The residual heat will release the herb’s aroma without cooking away its bright green color. A final drizzle of high-quality extra virgin olive oil adds a luxurious mouthfeel.
For a restaurant-style look, sprinkle a pinch of flaky sea salt over the top. The large salt crystals provide a nice crunch and make the roasted flavors of the tomatoes pop. Serve these while they are still warm to maximize the contrast between the hot vegetables and the crisp pastry.
Ideal Side Dish Pairings
Because these tarts are rich and buttery, they pair best with something bright and acidic. A simple arugula salad tossed in a sharp lemon vinaigrette is the perfect companion. The peppery greens cut right through the fat of the puff pastry.
If you’re serving these for a light lunch, a cold cucumber soup or a vinegar-based slaw also works beautifully. You want a side dish that cleanses the palate between bites of the savory, umami-rich tart.
Make-Ahead Strategies and Storage Tips
You can easily prep the components of this dish in advance. Roast the vegetables up to two days ahead and store them in the fridge. You can even cut and score the pastry rounds and keep them layered between parchment paper in an airtight container in the refrigerator.
When you’re ready to serve, simply assemble and bake. While these are best eaten fresh, you can reheat leftovers in a 350°F oven for about 5 to 7 minutes. Avoid the microwave at all costs, as it will turn that beautiful, shatter-crisp pastry into a chewy, rubbery mess.
Freezing Unbaked vs. Baked Tarts
These tarts are excellent candidates for freezing unbaked. Assemble them completely (but skip the egg wash), then freeze them on a tray until solid. Once frozen, transfer them to a freezer bag. They will keep for up to a month.
When you’re ready for a quick appetizer, bake them straight from the freezer. Just add the egg wash right before they go in and increase the baking time by about 5 minutes. It’s the perfect solution for unexpected guests or a busy weeknight dinner.
Expert Tips for Success
Always use a heavy-duty baking sheet. Thin pans can warp in a 425°F oven, which causes the oil to pool on one side and can lead to uneven browning. A sturdy pan ensures even heat distribution across the bottom of every tart.
Parchment paper is your best friend here. It prevents the cheese from sticking to the pan and helps the bottom of the pastry brown evenly without burning. Never grease the pan directly with butter or spray, as this can actually fry the bottom of the pastry and make it too greasy.
Why Oven Calibration Matters
Puff pastry is incredibly sensitive to temperature. If your oven runs cool, the pastry will melt rather than puff. If it runs hot, the outside will burn before the inner layers are cooked through. Using an inexpensive oven thermometer can save you a lot of frustration.
If you find your tarts are browning too quickly on top but the bottom feels soft, move the rack to the lower third of the oven. This gives the bottom heat more direct access to the base of the tart, ensuring that “shatter” crunch we’re looking for.
The Importance of Immediate Service
The “shelf life” of a perfect crunch is short. As the tart cools, it begins to absorb moisture from the air and the vegetables. For the best experience, serve these within 5 to 10 minutes of taking them out of the oven.
If you aren’t serving them immediately, move them to a wire cooling rack. Leaving them on the hot baking sheet can cause steam to build up underneath the crust, softening that perfectly roasted bottom. The wire rack allows air to circulate, keeping the pastry crisp for as long as possible.
Frequently Asked Questions
How do I store leftover tarts?
Store any leftovers in an airtight container in the refrigerator for up to 2 days. To maintain the texture, do not stack them on top of each other. When you are ready to eat, reheat them in a toaster oven or conventional oven at 350°F until the pastry crisps up again. Do not freeze the tarts after they have been baked, as the vegetables will become mushy upon thawing.
Why did my puff pastry stay flat and greasy?
This usually happens if the pastry got too warm before it went into the oven. If the butter layers melt into the dough while you are assembling the tarts, they won’t create the steam needed for the “puff.” Always keep your dough chilled. If it feels soft, put the assembled tarts in the freezer for 10 minutes before baking to firm up the butter.
Can I use a different cheese instead of Parmesan?
Yes, but stick to hard, aged cheeses. Pecorino Romano, aged Manchego, or a very dry Gruyère are excellent substitutes. Avoid high-moisture cheeses like fresh mozzarella, feta, or ricotta for the base layer, as they release liquid during baking and will make the crust soggy. If you want a creamy cheese, add it as a garnish after the tart is finished baking.
Can I use different vegetables?
Absolutely. You can use bell peppers, red onions, eggplant, or even asparagus. The golden rule is to always pre-roast them first. Any vegetable with high water content needs to have that moisture evaporated in the oven before it is placed on the puff pastry. Slice them thinly and roast until they have charred edges for the best flavor.
What if I don’t have balsamic glaze?
You can make a quick substitute by simmering 1/2 cup of balsamic vinegar with 1 tablespoon of honey or sugar in a small saucepan until it reduces by half and becomes syrupy. If you prefer to skip the sweetness, just use extra olive oil and a pinch of salt, though you will lose some of that deep caramelization on the vegetables.
My vegetables look burnt after the second bake, what happened?
Since the vegetables are roasted twice, they can overcook if sliced too thin. Ensure your zucchini is at least 1/4 inch thick. If you notice the vegetables browning too fast during the final bake, you can lightly tent the tarts with foil, but be careful not to touch the pastry, or you might deflate the rise.
Roasted Vegetable Puff Pastry Tarts
Course: AppetizerCuisine: MediterraneanDifficulty: easy6
servings15
minutes35
minutes50
Minutes240
kcalMediterranean
Ingredients
1 sheet frozen puff pastry, thawed but cold
1 cup cherry tomatoes (mix of red and yellow)
1 medium zucchini, sliced into 1/4 inch rounds
3 tablespoons olive oil, divided
1 tablespoon balsamic glaze (for caramelization)
1/2 teaspoon dried oregano
1/2 teaspoon garlic powder
Salt and black pepper to taste
1/4 cup grated Parmesan cheese (moisture barrier)
1 egg, beaten (for egg wash)
Fresh thyme sprigs for garnish
Directions
- Preheat your oven to 400°F (200°C). Line a large baking sheet with parchment paper.
- The Moisture-Lock Step: Place the cherry tomatoes and zucchini slices on a separate baking tray. Toss with 2 tablespoons of olive oil, balsamic glaze, salt, and pepper. Roast for 15 minutes. This step is crucial as it evaporates excess water and caramelizes the vegetables (as seen in the charred edges in the image) before they touch the dough.
- While vegetables roast, use a circular biscuit cutter or a glass to cut the puff pastry into 6 rounds. Use a smaller circular object or a knife to lightly score a border 1/2 inch from the edge (do not cut all the way through). Use a fork to prick (dock) the center of each pastry circle multiple times.
- Remove the vegetables from the oven. Increase oven heat to 425°F (220°C).
- Sprinkle a thin layer of grated Parmesan cheese inside the docked center of each pastry round. This creates a fat-based barrier that prevents any remaining vegetable steam from softening the crust.
- Brush the outer borders of the pastry with the beaten egg wash for a deep golden shine.
- Arrange the pre-roasted zucchini and tomatoes tightly in the center of each pastry piece, overlapping them slightly. Sprinkle with oregano and garlic powder.
- Bake for 15-18 minutes or until the pastry has puffed significantly and is a deep, mahogany gold.
- Garnish with fresh thyme sprigs and an extra drizzle of olive oil. Serve immediately while the crust is at its peak crunch.
Notes
- The pre-roasting step and the Parmesan cheese layer are essential to prevent the pastry from becoming soggy from the vegetable juices.