
The sizzle of a hot pan and the smoky aroma of charred peppers are the hallmarks of a great fajita night. However, most home cooks struggle with the timing, often ending up with watery vegetables or shrimp that feel like rubber bands. This recipe changes that by focusing on the immediate, snap-crisp texture of jumbo shrimp and the deep, caramelized sweetness of roasted onions.
You want those vibrant colors and charred edges that look like they came straight off a restaurant grill. Therefore, we use a staggered roasting technique to ensure every component finishes at its peak. By the time the smoked paprika hits your nose, you’ll know you’ve mastered the balance of heat and timing.
The secret to this success is the preheated baking sheet. I’m telling you, putting a cold pan into the oven is the biggest mistake you can make. When you toss your marinated vegetables onto a screaming hot tray, they sear instantly rather than steaming in their own juices. This creates that authentic “plancha” flavor right in your kitchen.
The Science of Succulent Sheet Pan Shrimp
Cooking shrimp and peppers together is a challenge because they have completely different thermal needs. Bell peppers are dense and full of cellulose, which requires sustained high heat to break down into a soft, sweet consistency. If you don’t give them enough time, they stay unpleasantly crunchy and raw in the center.
Shrimp, on the other hand, is a delicate protein that begins to toughen the moment it hits 120°F. If you roast them for the same twenty minutes the peppers need, you’ll be left with tiny, dry curls of seafood. Therefore, we treat these ingredients as two separate phases of the same meal.
The staggered timing allows the onions to lose their sharp, raw bite and develop those beautiful browned edges. Meanwhile, the shrimp only enters the heat for the final few minutes. This ensures the seafood stays plump and juicy while the vegetables reach that perfect, melt-in-your-mouth texture. It’s all about managing the moisture loss so the pan stays dry and the flavors stay concentrated.
Essential Components for the Perfect Fajita Glaze
A great fajita isn’t just about the spice; it’s about the glaze that coats every bite. We use a combination of olive oil and honey to create a thick marinade that clings to the ingredients. The honey is the real hero here because it facilitates the Maillard reaction, helping the food brown quickly under the high heat of the oven.
In addition to the sweetener, smoked paprika is a non-negotiable ingredient for that “off-the-grill” essence. While standard paprika adds color, the smoked variety provides a deep, earthy wood-fire flavor that mimics a traditional outdoor griddle. When combined with cumin and garlic powder, it creates a savory crust that is absolutely addictive.
Quality matters when it comes to your protein choice. I always recommend using jumbo shrimp, specifically the 16/20 count. These larger pieces can withstand the intense 450°F heat without shrinking into nothing. They provide a meaty bite that stands up to the bold flavors of the peppers and onions.
Selecting and Preparing Your Seafood
When you’re at the market, look for shrimp that are already peeled and deveined to save yourself a massive amount of prep time. You can choose tail-on for a more elegant look, but tail-off is much easier for a quick weeknight dinner. Most importantly, you must pat the shrimp bone-dry with paper towels before adding the marinade. If they are wet, the oil won’t stick, and they will steam instead of searing.
The Vegetable Trio: Texture and Color
Using a mix of red, yellow, and green bell peppers provides a balance of flavors, from the bitter snap of the green to the candy-like sweetness of the red. Instead of cutting your red onion into thin rings, try slicing it into thick wedges. These wedges hold their structure much better during the high-heat roast, providing a juicy, charred bite rather than turning into mush.
Step-by-Step: Achieving the Perfect High-Heat Sear
To get this right, you have to treat your oven like a professional grill. We aren’t just baking; we are searing, roasting, and broiling in a specific sequence. This three-phase approach ensures that the honey in the marinade caramelizes without burning and the shrimp stays tender.
Phase 1: The Screaming Hot Pan Technique
First, slide your empty, rimmed baking sheet into the oven while it preheats to 450°F. This is a non-negotiable step. When you eventually pull that pan out and dump the vegetables on, you should hear a loud hiss. That sound is the moisture on the surface of the vegetables evaporating instantly, which is exactly how you get those charred, restaurant-style edges.
Phase 2: The Staggered Roasting Interval
Once the pan is hot, spread your marinated peppers and onions in a single layer. They need a ten-minute head start to soften. During this window, the onions will start to turn translucent and the peppers will begin to blister. This is the perfect time to toss your shrimp in the remaining marinade so they are ready to go the second the timer dings.
Phase 3: The 60-Second Broiler Finish
After the shrimp are added, the final minute is the most critical. Switch your oven to the broiler setting on high. This provides an intense burst of top-down heat that bubbles the honey glaze and creates a dark, smoky char on the tips of the shrimp. Stay right there and watch it closely; the window between perfectly charred and burnt is only a few seconds long.
Troubleshooting Common Sheet Pan Mistakes
The most common issue people face is “soggy vegetable syndrome.” This usually happens because the pan is overcrowded. If the vegetables are piled on top of each other, the steam gets trapped, and they boil rather than roast. Use the largest baking sheet you own, or split the recipe between two pans if necessary.
You also need to watch the shape of your shrimp. A perfectly cooked shrimp looks like a “C.” If it has curled tightly into an “O,” it is overcooked and will likely be tough. Furthermore, never use a glass baking dish for this method. Glass cannot handle the thermal shock of the broiler and won’t produce the same sear as a heavy metal sheet pan.
Flavor Variations and Dietary Adjustments
If you want to change the flavor profile, try a chipotle-lime variation by adding a teaspoon of adobo sauce to the marinade. For those who prefer an earthier, more rustic taste, double the amount of ground cumin and add a pinch of dried oregano. It’s a very forgiving base that handles extra spice well.
For a low-carb or keto-friendly meal, skip the tortillas entirely. These fajitas are incredible when served over a bed of cauliflower rice or tucked into crisp butter lettuce cups. The bold marinade provides so much flavor that you won’t even miss the flour or corn wraps.
What to Serve with Sheet Pan Shrimp Fajitas
While warm tortillas are the classic choice, you can easily expand the spread. A side of cilantro-lime rice or a charred corn salad adds great texture to the meal. I also love serving a simple black bean mash on the side to add some creaminess and extra protein to the plate.
Don’t forget the importance of acidity and fat to balance the heat. A squeeze of fresh lime juice right before serving is essential because it deglazes the pan and picks up all those caramelized honey bits. Top everything with sliced avocado or a dollop of Greek yogurt to cool down the smoky spices of the marinade.
Expert Tips for Preparation and Storage
Can I use frozen shrimp for this recipe?
Yes, you can use frozen shrimp, but they must be completely thawed before you start. The best way is to thaw them in the refrigerator overnight. If you’re in a rush, place them in a sealed bag under cold running water. Most importantly, dry them thoroughly with a towel, or the excess water will ruin the roasting process and make your fajitas soupy.
How do I reheat leftovers without toughening the shrimp?
Avoid the microwave at all costs, as it will turn your shrimp into rubber. Instead, toss the leftovers into a hot skillet for about two minutes just to warm them through. Alternatively, these fajitas are delicious served cold over a crisp green salad the next day, which preserves the original texture of the seafood perfectly.
What is the best way to warm the tortillas?
For the best flavor, char your tortillas directly over a low gas flame for ten seconds per side using tongs. If you don’t have a gas stove, wrap a stack of tortillas in aluminum foil and slide them into the oven during the final two minutes of the shrimp’s cook time. This keeps them soft, pliable, and warm for serving.
Can I add other vegetables like zucchini or mushrooms?
You can add other vegetables, but be mindful of their water content. Zucchini and mushrooms release a lot of liquid as they cook. If you add them, you may need to use two separate baking sheets to ensure there is enough space for the moisture to evaporate. Otherwise, the extra liquid will prevent the onions and peppers from getting those desired charred edges.
Sheet Pan Shrimp Fajitas
Course: Main CourseCuisine: Mexican-AmericanDifficulty: easy4
servings15
minutes15
minutes30
Minutes310
kcalMexican-American
Ingredients
1.5 pounds jumbo shrimp, peeled and deveined
3 large bell peppers (red, yellow, and green), sliced into thin strips
1 large red onion, sliced into thin wedges
3 tablespoons olive oil
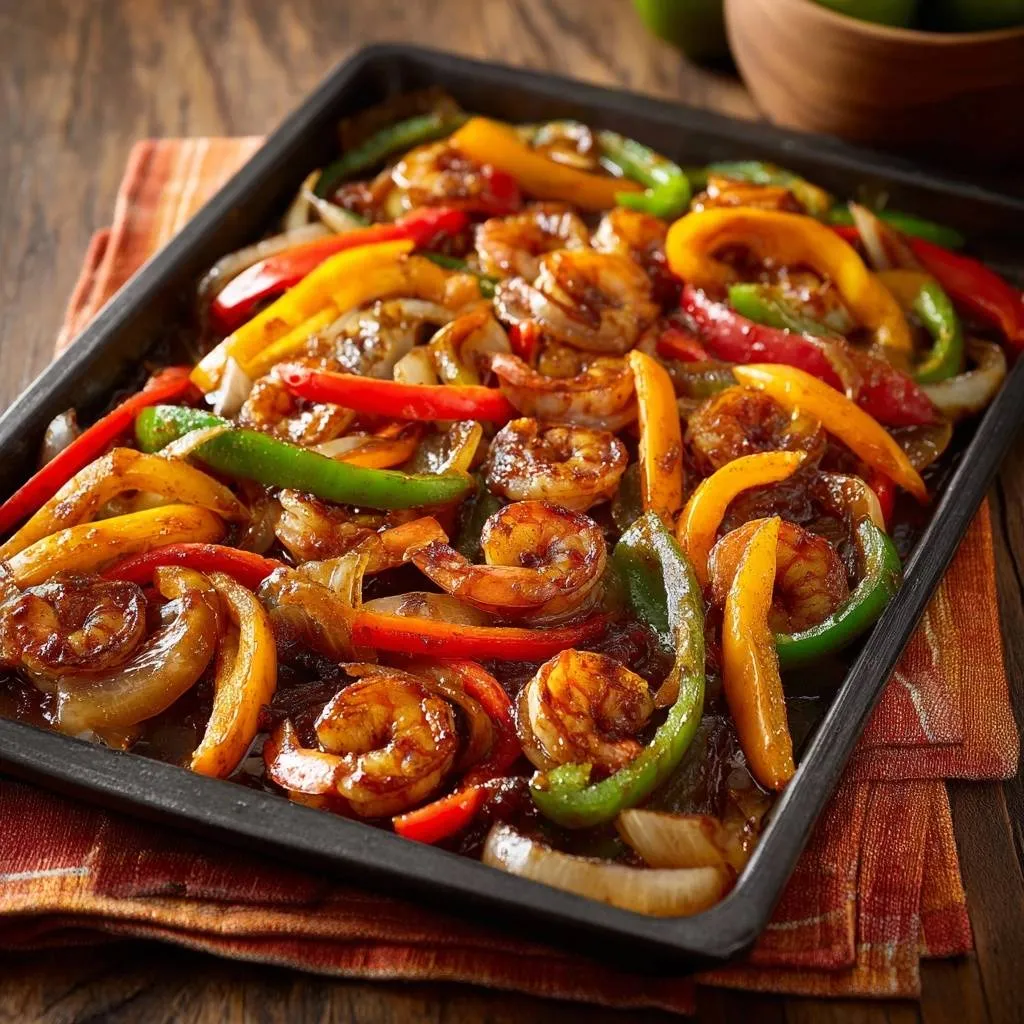
1 tablespoon honey or agave nectar (to achieve the glossy glaze shown in the image)
2 teaspoons chili powder
1 teaspoon ground cumin
1 teaspoon garlic powder
1 teaspoon smoked paprika
1/2 teaspoon onion powder
1/2 teaspoon salt
1/4 teaspoon black pepper
Fresh cilantro, chopped for garnish
Lime wedges for serving
Directions
- Preheat your oven to 450°F (230°C). Place a large, rimmed baking sheet inside the oven while it preheats. A screaming hot pan is essential for the immediate sear seen in the photo.
- In a large bowl, whisk together the olive oil, honey, chili powder, cumin, garlic powder, smoked paprika, onion powder, salt, and pepper to create a thick marinade.
- Toss the sliced bell peppers and red onions in half of the marinade until thoroughly coated.
- Carefully remove the hot baking sheet from the oven. Spread the vegetables in a single layer. Roast for 10 minutes. This head start allows the vegetables to soften and develop charred edges before the delicate protein is added.
- While the vegetables roast, toss the shrimp in the remaining marinade.
- Remove the pan from the oven. Move the vegetables to the edges and spread the shrimp in the center in a single layer, ensuring they touch the hot metal.
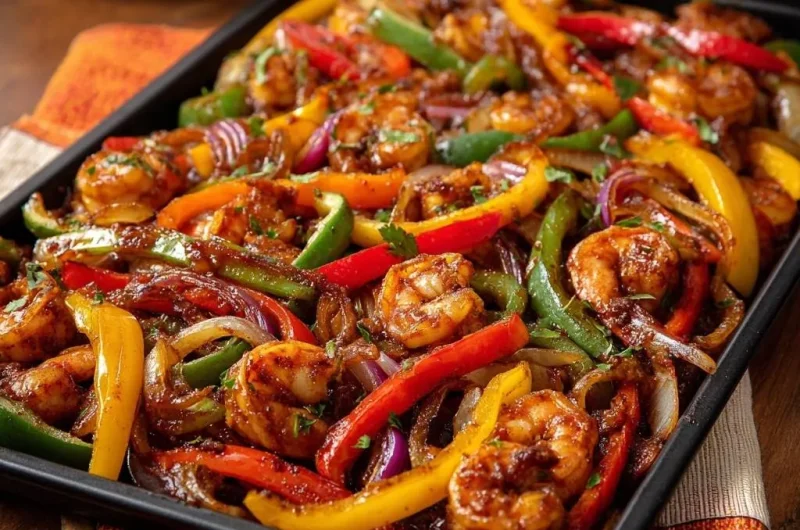
- Return the pan to the oven and bake for 4 to 5 minutes. For the specific charred look in the image, turn the broiler to HIGH for the final 60 seconds, watching closely to prevent burning.
- Remove from the oven as soon as the shrimp are opaque and have formed a “C” shape.
- Squeeze fresh lime juice over the pan to deglaze the browned bits. Garnish generously with fresh cilantro and serve immediately with warm tortillas.
Notes
- Use a preheated baking sheet for the best sear. Watch the broiler closely during the final minute to achieve the charred look without overcooking the shrimp.