Most home cooks struggle with the dreaded “mushy meatball” syndrome. You spend time rolling perfect spheres only to have them fall apart or turn into soft, boiled lumps the moment they hit the sauce. It’s frustrating when you want a hearty, restaurant-quality meal but end up with something that lacks texture.
The secret to avoiding this culinary pitfall is a technique I call the “Pan-Sear Lock.” By using a high-heat cast iron sear before you even think about adding liquid, you create a structural crust. This golden-brown barrier traps the juices inside and prevents the meat from absorbing too much sauce, ensuring a firm, meaty bite every single time.
I’ve found that the key to this recipe’s success lies in the temperature of your pan. If you don’t hear a loud, aggressive sizzle the second the meat touches the oil, you aren’t searing; you’re steaming. This 40-minute meal delivers 410 calories of pure comfort while maintaining a professional-grade texture that stands up to any thick marinara.
The Science of the Pan-Sear Lock Technique
When you sear ground beef at high temperatures, you trigger the Maillard reaction. This isn’t just about changing the color to a deep brown; it’s a chemical transformation that creates hundreds of new flavor compounds. More importantly, it creates a pressurized seal on the surface of the meatball.
Traditional “drop-in” methods, where raw meat is poached directly in simmering sauce, lead to a gray, spongy texture. The meat fibers essentially boil, which causes them to contract and squeeze out their natural juices. By searing first, you build a “crusty armor” that keeps the interior tender while providing a satisfying resistance when you cut into it with a fork.
Why Cast Iron is Non-Negotiable
You need a pan that can hold onto heat like a champion. Cast iron has incredible thermal mass, meaning it doesn’t cool down significantly when you add cold meat to the surface. This consistent heat is what gives you that uniform, 2-inch crust across the entire batch.
Stainless steel can work, but it often leads to sticking if your temperature isn’t perfect. Non-stick pans are generally the enemy here because they can’t safely reach the high temperatures required for a true sear. If you want that deep, caramelized flavor, reach for your heaviest seasoned skillet.
Essential Components for Structural Integrity
The foundation of a great Skillet Meatballs in Rich Tomato Sauce recipe starts with the meat itself. I always recommend an 80/20 ground beef blend. That 20% fat content is vital because it renders out during the high-heat sear, essentially frying the exterior of the meatball in its own flavorful juices.
If you use meat that is too lean, like 95/5, the meatballs will become dry and crumbly before the exterior even has a chance to brown. The fat acts as a thermal conductor, ensuring the heat travels evenly through the meat without toughening the proteins too quickly.
The Panade: Milk and Breadcrumb Chemistry
While the exterior needs to be firm, the interior must remain soft and juicy. This is where the panade comes in. By soaking your Italian breadcrumbs in whole milk for at least five minutes, you create a starch paste that coats the meat fibers.
This milk-soaked matrix prevents the meat proteins from bonding too tightly together as they cook. Without a panade, your meatballs would turn into dense, rubbery hockey sticks. This little bit of chemistry ensures that even with an aggressive sear, the middle stays melt-in-your-mouth tender.
Aromatic Profiles: Garlic, Oregano, and Parmesan
Layering flavors is what separates a “rich” sauce from a “bland” one. I always use fresh minced garlic rather than the jarred stuff or powder. Fresh garlic has pungent oils that bloom beautifully in the hot fat of the skillet, providing a sharp contrast to the sweet tomatoes.
The grated Parmesan cheese serves a dual purpose. It adds a salty, nutty depth of flavor, but it also acts as a secondary binder. As the cheese melts during the cooking process, it helps hold the meat together from the inside out, adding to that structural integrity we’re looking for.
Step-by-Step: Executing the Perfect Sear
Success in the kitchen is often about timing and observation. You aren’t just following a clock; you’re looking for specific visual and sensory cues. From the way the meat feels in your hands to the sound of the oil, every detail matters for the perfect result.
Phase 1: Hand-Mixing Without Overworking
When you combine your beef, egg, and panade, use your hands and keep your touch light. If you squeeze the meat too hard or mix it for too long, you develop a protein called myosin. This is great for making sausages, but it makes meatballs tough and bouncy.
Stop mixing the moment you can no longer see distinct clumps of breadcrumbs or streaks of egg. The mixture should look uniform but still have a slightly coarse texture. When rolling, aim for smooth spheres about 1.5 to 2 inches wide to ensure they cook through evenly.
Phase 2: Achieving the Shimmering Oil Point
Patience is your best friend here. Heat your olive oil until it is shimmering and you see the very first wisps of smoke rising from the pan. This is the “shimmering point,” and it tells you the oil is hot enough to sear the meat on contact.
If you drop the meat into “cold” oil, it will soak up the fat and stick to the bottom of the pan. When you try to flip it, the beautiful crust you’re trying to build will tear off and stay stuck to the skillet. Wait for the shimmer, and you’ll get a clean release every time.
Phase 3: The Batch Cooking Mandate
It is tempting to cram all the meatballs into the pan at once to save time, but don’t do it. Crowding the pan causes the temperature to plummet instantly. Instead of searing, the meatballs will release their moisture and begin to steam in a pool of gray liquid.
Work in two batches if necessary. Give each meatball at least an inch of space so the hot air can circulate. You want to see a deep, dark golden-brown color on all sides. This “Lock-In” phase should take about 3 to 4 minutes of frequent turning.
Developing the Rich Tomato Sauce Base
Once the meatballs are seared and resting on a plate, look at the bottom of your skillet. Those dark, stuck-on bits are called “fond,” and they are concentrated flavor gold. This is the secret ingredient that makes the sauce truly rich and savory.
Deglazing the Skillet for Maximum Depth
Pour your tomato sauce directly into the hot pan and use a wooden spoon to scrape up every bit of that fond. The acidity in the tomatoes will help loosen the caramelized beef bits, incorporating them into the sauce. This process adds a smoky, meaty complexity that you can’t get from a jar alone.
As the sauce bubbles, it will pick up the fats left behind from the searing process. This creates a glossy, emulsified texture. You’ll notice the sauce darkening slightly as it marries with the beef drippings, which is exactly what you want for a professional finish.
The Uncovered Simmer: Reducing for Thickness
Never put a tight lid on the pan during the final simmer. A lid traps steam, which drips back into the sauce and thins it out. More importantly, that trapped moisture will soften the crust you worked so hard to build during the searing phase.
By simmering uncovered for about 10 minutes, you allow excess water to evaporate. This concentrates the natural sugars in the tomatoes and thickens the sauce until it clings to the meatballs. Use a spoon to occasionally baste the meatballs, keeping them moist without soaking them.
Troubleshooting Common Meatball Failures
Even with the best instructions, things can go sideways in the kitchen. Understanding why a failure happens is the first step to fixing it. Most meatball issues come down to moisture balance or temperature control, both of which are easy to adjust.
What to Do if Meatballs Break Apart
If your meatballs are falling apart in the pan, your mixture was likely too wet. This happens if the egg was extra-large or the breadcrumbs didn’t absorb all the milk. You can save the remaining batch by mixing in another tablespoon of dry breadcrumbs.
Another pro tip is to chill the rolled meatballs in the fridge for 20 minutes before searing. Cold fat is more stable, and the chilling time allows the starches in the panade to set. This makes the meatballs much firmer and easier to handle during the high-heat sear.
Correcting an Overly Acidic Sauce
Sometimes a brand of canned tomatoes can be unpleasantly tart. If your sauce tastes too acidic, don’t just dump in sugar. Instead, let it simmer a few minutes longer to reduce. The longer tomatoes cook, the sweeter they naturally become as the acids break down.
If it’s still too sharp, stir in a small pat of butter at the very end. The fat in the butter coats the tongue and mellows out the harsh acidic notes without making the dish taste like dessert. It also adds a beautiful velvet sheen to the final sauce.
Make-Ahead Strategies and Storage Logistics
These meatballs are fantastic for meal prep because the flavors actually improve after a day in the fridge. The spices have more time to permeate the meat, and the sauce thickens even further. It’s a great way to get a head start on a busy week.
Freezing Raw vs. Seared Meatballs
If you want to freeze these, I highly recommend doing the “Lock-In” sear first. Freezing raw meat spheres often leads to them losing their shape or becoming mushy when they thaw. By searing them first, you “set” the structure.
Let the seared meatballs cool completely, then freeze them on a baking sheet before transferring them to a bag. When you’re ready to eat, you can drop the frozen, seared meatballs directly into simmering sauce. They will finish cooking through while the sauce thaws, maintaining their perfect texture.
Reheating Without Losing the Texture
Avoid the microwave if you can. Microwaves heat from the inside out, which can turn the meat rubbery and make the sauce explode. The best way to reheat is back in a skillet over low heat with a splash of water or extra sauce.
If you’re in a hurry, a toaster oven or regular oven at 350°F works wonders. Place the meatballs in a small baking dish, cover with foil to keep them from drying out, and heat for about 15 minutes. This preserves the “Pan-Sear Lock” much better than a microwave ever could.
Pairing Suggestions for a Complete Meal
While these meatballs are the star of the show, what you serve them with matters. You want something that can stand up to the weight of the rich tomato sauce. Thin pastas like angel hair will just get weighed down and lost in the shuffle.
Go for hearty shapes like Rigatoni or Pappardelle. The ridges in Rigatoni are perfect for “catching” the thick sauce, ensuring you get a bit of everything in every bite. If you want to skip the pasta, a thick slice of toasted sourdough is the best tool for mopping up every last drop of sauce.
Vegetable Accompaniments and Garnishes
Fresh parsley isn’t just for looks; its bright, grassy flavor cuts through the heavy richness of the beef and Parmesan. Don’t be afraid to be generous with the garnish right before serving. It adds a necessary pop of freshness to the palate.
To balance the savory profile, I love serving these alongside a bitter green salad. Arugula or radicchio tossed with a simple lemon vinaigrette provides a sharp contrast to the sweet, slow-cooked tomatoes. It cleanses the palate between bites, making the whole meal feel lighter and more balanced.
How long can I store these meatballs in the fridge?
You can safely store these meatballs in an airtight container for up to 4 days. In fact, many people find they taste even better on day two because the garlic and oregano have more time to infuse into the meat. When reheating, add a tablespoon of water to the pan to loosen the sauce, as it will thicken significantly while cold.
Why did my meatballs turn out tough and rubbery?
The most common reason for tough meatballs is over-mixing the meat. When you work the ground beef too much, the proteins link together and create a dense, bouncy texture similar to a hot dog. To fix this next time, use a light hand and stop mixing as soon as the ingredients are just combined. Also, ensure you aren’t skipping the milk-soaked panade, which is essential for internal tenderness.
Can I use ground turkey or chicken instead of beef?
Yes, you can substitute ground poultry, but keep in mind that turkey and chicken are much leaner than 80/20 beef. To prevent them from drying out during the sear, I recommend adding an extra tablespoon of olive oil to the pan. You might also want to chill the raw meatballs for 30 minutes before cooking, as ground poultry is often softer and more difficult to shape than beef.
What if I don’t have a cast iron skillet?
While cast iron is the gold standard for the “Pan-Sear Lock,” you can use a heavy-bottomed stainless steel skillet. The key is to ensure the pan is fully preheated before adding the oil and meatballs. If you use a non-stick pan, you likely won’t get the same deep brown crust, so you may need to simmer the sauce a bit longer to develop the flavor that you’d otherwise get from the seared crust.
Can I make this recipe gluten-free?
Absolutely. You can replace the Italian breadcrumbs with gluten-free breadcrumbs or even almond meal. If using almond meal, the texture will be slightly grainier, but it still functions well as a binder. Ensure your marinara sauce is also certified gluten-free, as some store-bought brands use thickeners that contain wheat.
My sauce is too thick, how do I fix it?
Because this recipe calls for an uncovered simmer to concentrate flavors, the sauce can sometimes reduce too much. If it looks more like a paste than a sauce, simply stir in a 1/4 cup of water or beef broth. This will thin it out instantly without washing away the rich flavor you’ve built up from the skillet fond.
Skillet Meatballs in Rich Tomato Sauce
Course: Main CourseCuisine: Italian-AmericanDifficulty: easy4
servings15
minutes25
minutes40
Minutes410
kcalItalian-American
Ingredients
1 pound ground beef (80/20 blend for better browning and flavor)
1/2 cup Italian breadcrumbs
1/4 cup whole milk
1 large egg, beaten
1/2 cup grated Parmesan cheese
3 cloves garlic, minced
1 teaspoon dried oregano
1/2 teaspoon salt
1/2 teaspoon black pepper
1/4 teaspoon red pepper flakes (optional, for depth)
3 tablespoons olive oil (divided)
2 1/2 cups thick marinara or crushed tomatoes with basil
Fresh parsley, finely chopped for garnish
Directions
- In a small bowl, soak the breadcrumbs in milk for 5 minutes. This creates a panade that keeps the interior moist while the exterior stays firm.
- In a large mixing bowl, combine the ground beef, beaten egg, Parmesan, garlic, oregano, salt, pepper, red pepper flakes, and the soaked breadcrumbs. Mix by hand until just combined. Do not overwork the meat or it will become tough.
- Roll the mixture into 1.5 to 2-inch balls. Ensure they are smooth to prevent cracking during the sear.
- Heat 2 tablespoons of olive oil in a large cast iron skillet over medium-high heat. Wait until the oil is shimmering and just starting to wisps of smoke.
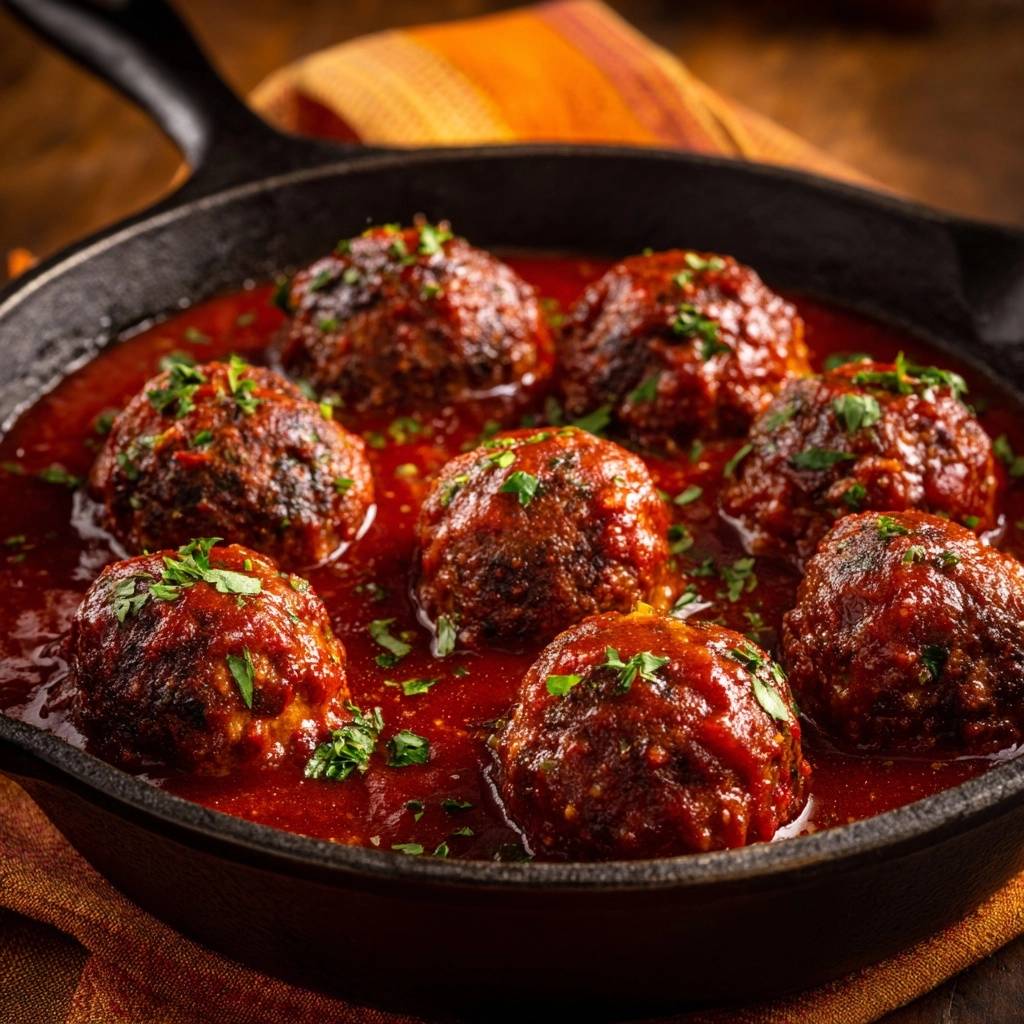
- Place the meatballs in the skillet. Do not crowd the pan; work in batches if necessary. Sear them for 3 to 4 minutes, turning frequently, until a deep, dark golden-brown crust forms on all sides. This “Lock-In” technique is what prevents the meatballs from getting soggy later.
- Remove the meatballs from the skillet and set aside on a plate. Drain excess grease, leaving about 1 tablespoon of fat in the pan.
- Pour the tomato sauce into the hot skillet, scraping the bottom with a wooden spoon to release the browned bits (fond). Bring the sauce to a light simmer.
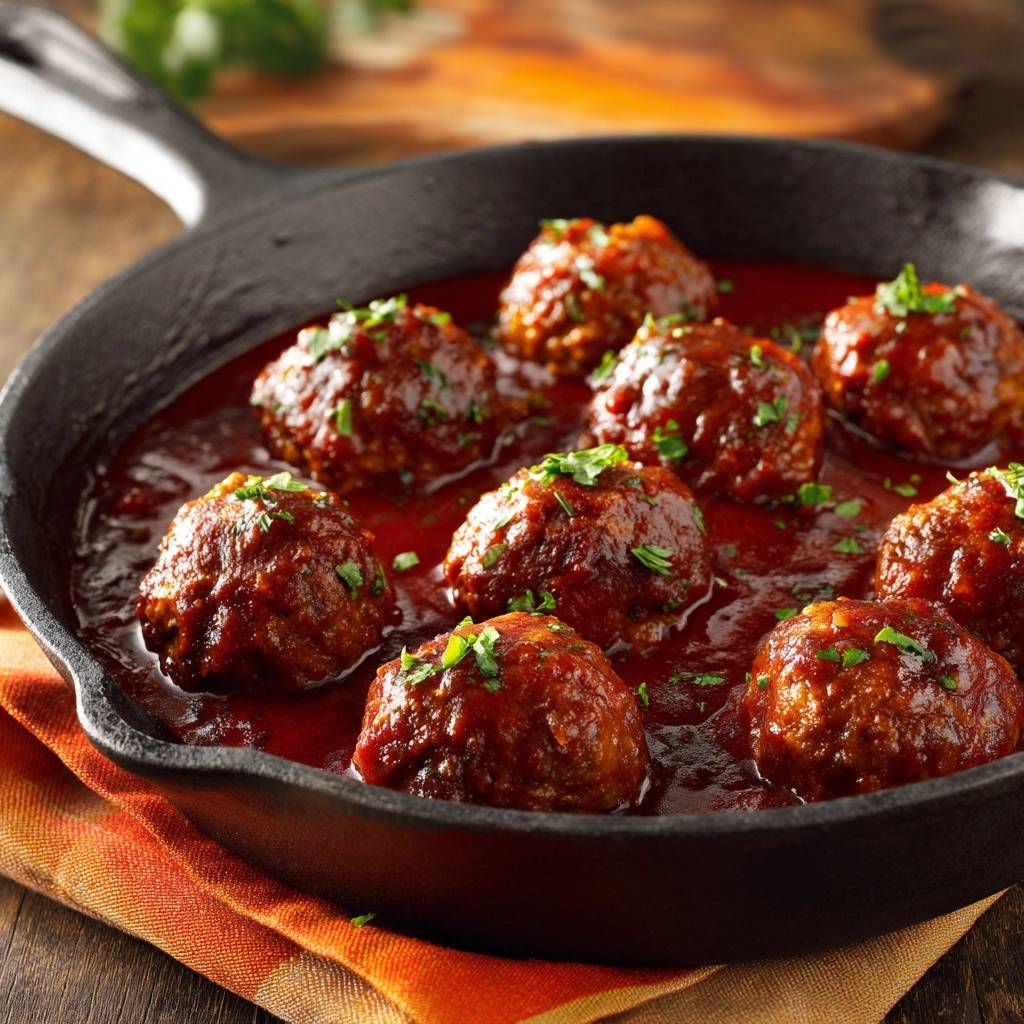
- Carefully nestle the meatballs back into the sauce. Reduce the heat to low. Do not cover the pan completely; leave it uncovered or use a splatter screen to allow the sauce to thicken and coat the meatballs as shown in the image.
- Simmer for 10 minutes, occasionally spooning the sauce over the meatballs.
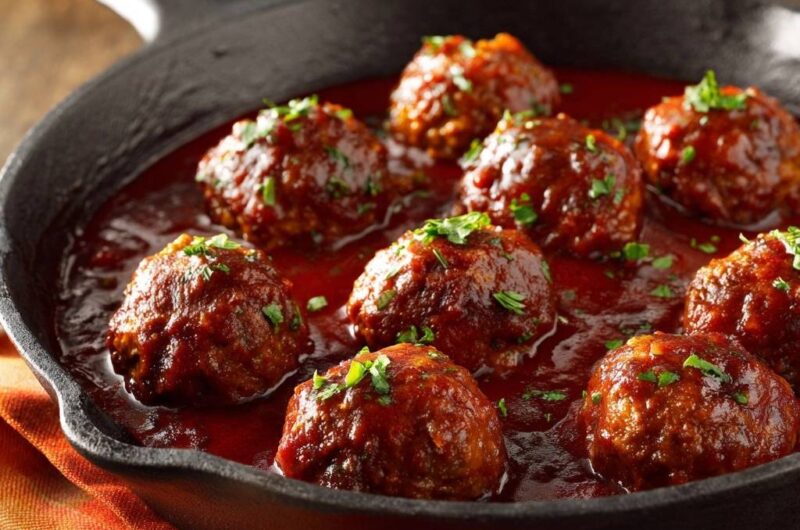
- Remove from heat and garnish generously with fresh parsley. Serve immediately while the seared exterior is still perfectly textured and the sauce is thick and glossy.
Notes
- The secret is the Pan-Sear Lock. Do not crowd the pan during the searing phase to ensure a proper crust forms. Use a panade of milk and breadcrumbs to keep the interior moist.