Most home cooks struggle with the dreaded “soup” effect when making stir-fry. You start with high hopes, but by the time the chicken is cooked, the pan is filled with a thin, watery liquid that refuses to stick to anything. It’s frustrating to see all those vibrant flavors pooling at the bottom of the bowl instead of coating your dinner in a beautiful, shiny lacquer.
The secret to achieving that restaurant-quality finish lies in a two-step starch application and a high-heat reduction. By using a skillet instead of a deep fryer, you get all the crispy edges and concentrated flavor without the mess of a bubbling vat of oil. This method ensures the sauce transforms into a heavy glaze that clings to every nook and cranny of the chicken and pineapple.
I’ve found that the real trick is the “vigorous boil” phase. Many people get nervous when the sauce starts to bubble rapidly, but that heat is exactly what activates the cornstarch. Without reaching that specific temperature threshold, your sauce will remain cloudy and thin rather than turning into that translucent, dark amber glaze we all crave. Trust the heat, and you’ll see the transformation happen right before your eyes.
The Science of the Cornstarch Dredge
If you’ve ever wondered why restaurant chicken stays so tender even when tossed in acidic sauces, the answer is “velveting.” In this skillet version, we use a cornstarch dredge to achieve a similar result. When you toss the raw chicken cubes in cornstarch, you’re creating a microscopic shield. This layer protects the delicate proteins from the direct, harsh heat of the cast iron, preventing the meat from becoming tough or rubbery.
As the chicken sears, the starch hydrates with the natural juices of the meat, forming a thin, crispy crust. This isn’t just about texture, though. That crust is incredibly porous. Once you introduce the sweet and sour liquid later in the process, those pores act like a sponge. Instead of the sauce sliding off a smooth piece of cooked chicken, it grips onto the dredged surface, creating a permanent bond between the protein and the glaze.
Furthermore, this dredging technique helps thicken the final dish from the outside in. As the chicken simmers in the sauce for those final sixty seconds, a small amount of the starch from the coating sloughs off into the liquid. This provides a secondary thickening boost, ensuring the sauce has enough body to stand up to the moisture released by the fresh peppers and onions. It’s a fail-safe way to guarantee a “no-weep” sauce that stays thick even as it sits on the table.
Essential Components for Skillet Sweet and Sour Chicken
The balance of a great sweet and sour sauce relies on the quality of your pantry staples. Apple cider vinegar is my go-to choice here because it offers a fruity, complex acidity that white vinegar simply can’t match. It cuts through the sugar without being harsh. When measuring your light brown sugar, make sure to pack it firmly into the cup. That molasses content in the brown sugar is vital for the viscosity and the deep, rich color of the final glaze.
Fresh pineapple is a non-negotiable for the best results. While canned pineapple is convenient, it often sits in heavy syrup that can throw off the sugar balance of the recipe. Fresh chunks have a sturdy cellular structure that holds up to high heat, allowing the edges to caramelize in the skillet without the fruit turning into mush. Plus, the natural bromelain in fresh pineapple juice helps tenderize the chicken as it cooks.
For the soy sauce, I recommend a standard naturally brewed version. If you use a “dark” soy sauce, the dish might become too salty and visually unappealing. The ketchup might seem like a humble addition, but it provides the necessary tomato base and stabilizers that help the sauce emulsify. It also gives the dish that classic, nostalgic red tint that defines the sweet and sour experience.
Selecting the Right Aromatics
Fresh ginger and garlic are the backbone of the flavor profile. I always recommend mincing them as finely as possible, almost into a paste. In a high-heat skillet environment, large chunks of garlic can burn quickly, turning bitter and ruining the sauce. Finely minced aromatics melt into the oil almost instantly, infusing the entire dish with a warm, spicy undertone that balances the sweetness of the pineapple juice.
The Role of Pineapple Juice in Sauce Reduction
Pineapple juice is more than just a sweetener; it’s a functional ingredient. The natural sugars in the juice undergo the Maillard reaction when they hit the hot skillet, creating complex new flavor compounds. As the water evaporates during the reduction phase, these sugars concentrate, helping the sauce achieve a syrupy consistency that provides a beautiful sheen to the finished meal.
Step-by-Step: Achieving the Perfect Sear and Glaze
Success in the skillet comes down to timing and temperature management. You want to move quickly once the heat is up to ensure the vegetables stay vibrant and the chicken stays crispy. It’s helpful to have all your ingredients prepped and the sauce whisked before you even turn on the stove. This prevents the pan from overheating while you’re busy chopping or measuring.
Phase 1: Searing the Chicken for Maximum Texture
Start by getting your oil shimmering. You’ll know it’s ready when a tiny pinch of starch dropped into the pan sizzles immediately. Add the chicken in a single layer, leaving space between the pieces. If you crowd the pan, the temperature will drop, and the chicken will release moisture and steam rather than sear. You’re looking for a deep golden-brown crust that looks dry and crispy before you flip it.
Phase 2: Charring Vegetables Without Losing Crunch
After removing the chicken, the pan will have some flavorful browned bits. Add the onions and peppers and keep them moving. The goal is “crisp-tender,” which means the vegetables should have slightly charred, blackened edges but still offer a distinct snap when you bite into them. This usually takes only two or three minutes over high heat. The smoky char provides a necessary contrast to the bright, acidic sauce.
Phase 3: Activating the Cornstarch Slurry
This is the “make or break” moment. Give your sauce base one last whisk to ensure the cornstarch hasn’t settled at the bottom, then pour it in. It will look cloudy and pale at first. Don’t panic! Let it come to a vigorous, rolling boil. As the starch granules reach the boiling point, they swell and burst, turning the liquid from a thin juice into a translucent, thick glaze. Once it looks like liquid velvet, toss the chicken back in to finish.
Troubleshooting Thin or Broken Sauces
If your sauce isn’t thickening after a minute of boiling, the most likely culprit is the temperature. Cornstarch needs to hit roughly 203°F to fully thicken. Crank up the heat for thirty seconds and see if it transforms. If it’s still too thin, you can mix an extra teaspoon of cornstarch with a tablespoon of cold water and stir it in, but usually, a harder boil solves the problem.
On the flip side, if the sauce becomes too “gloopy” or thick, it has likely reduced too much. This happens if the heat is too high for too long. Simply stir in a tablespoon of water or extra pineapple juice to loosen it up. The sauce should be thick enough to coat a spoon but still fluid enough to pool slightly around the rice. If it looks like jelly, it needs a splash of liquid to bring it back to life.
Optimal Pairings for a Balanced Meal
While standard long-grain white rice is the traditional choice, jasmine rice is a fantastic upgrade. Its natural floral aroma complements the sweetness of the pineapple beautifully. If you’re looking for something heartier, brown rice offers a nutty chew that stands up well to the heavy glaze. For those watching carbs, cauliflower rice works surprisingly well because the bold sauce masks the vegetable flavor of the “rice.”
To round out the plate, I love serving this with something green and simple. Steamed bok choy or snap peas provide a fresh, earthy balance to the rich sauce. The acidity in the sweet and sour chicken helps cut through the density of the rice, making for a very balanced bite. If you want a bit of crunch, a sprinkle of toasted sesame seeds on top adds a nice layer of texture and a hint of savory oil.
Make-Ahead Strategies and Storage Logistics
Leftovers of this dish are delicious, but the chicken will naturally lose its crispness as it sits in the sauce. To store, place everything in an airtight container in the refrigerator for up to three days. I don’t recommend freezing this specific recipe, as the bell peppers and pineapple will become mushy and watery upon thawing, which ruins the texture of the glaze.
When it’s time to reheat, skip the microwave if you can. The microwave tends to make the chicken rubbery and the sauce thin. Instead, toss everything back into a skillet over medium heat with a tablespoon of water. As the sauce warms up, the water will help it return to its original glossy consistency. Stir gently until the chicken is heated through, and it will taste almost as good as the moment you first made it.
Expert Tips for Skillet Success
Can I use chicken thighs instead of breasts?
Yes, chicken thighs are a great substitution. They have a higher fat content, which makes them more forgiving and less likely to dry out. However, they may take an extra minute or two per side to sear properly. Make sure to trim any excess fat so the cornstarch dredge can adhere directly to the meat for the best texture.
Why is my sauce turning out opaque instead of clear?
An opaque or cloudy sauce usually means the cornstarch hasn’t been cooked long enough or at a high enough temperature. Once the sauce reaches a full boil, it should clear up within about 60 seconds. If it stays cloudy, keep it bubbling for another minute. The transition from opaque to translucent is the visual cue that the starch is fully hydrated.
How do I make this spicier without ruining the balance?
The best way to add heat is to stir in a teaspoon of red pepper flakes or a squeeze of sriracha into the sauce base before pouring it into the pan. This allows the spice to distribute evenly. Since the dish is quite sweet, it can handle a fair amount of heat, creating a “sweet, sour, and spicy” profile that is incredibly addictive.
Can I substitute the white onion with red onion?
You can certainly use red onion, but keep in mind that it has a slightly sharper flavor and can bleed a purple tint into the sauce. White or yellow onions are preferred because they become very sweet when charred and keep the sauce looking bright and vibrant. If you use red onion, just cook it slightly less to maintain its color.
What is the best skillet to use for heat retention?
A well-seasoned cast iron skillet is the gold standard for this recipe. It holds heat exceptionally well, which is crucial for getting that initial sear on the chicken and the quick char on the vegetables. If you don’t have cast iron, a heavy-bottomed stainless steel pan is the next best choice. Avoid thin non-stick pans, as they often can’t handle the high heat required for a proper sear.
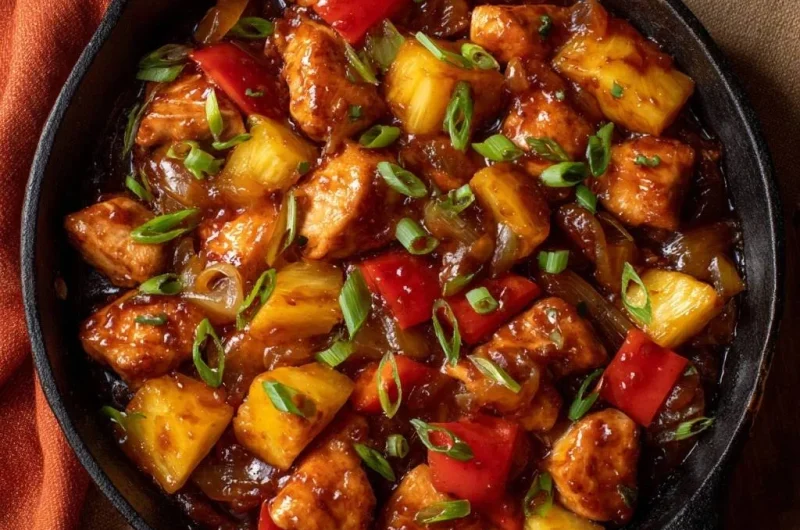
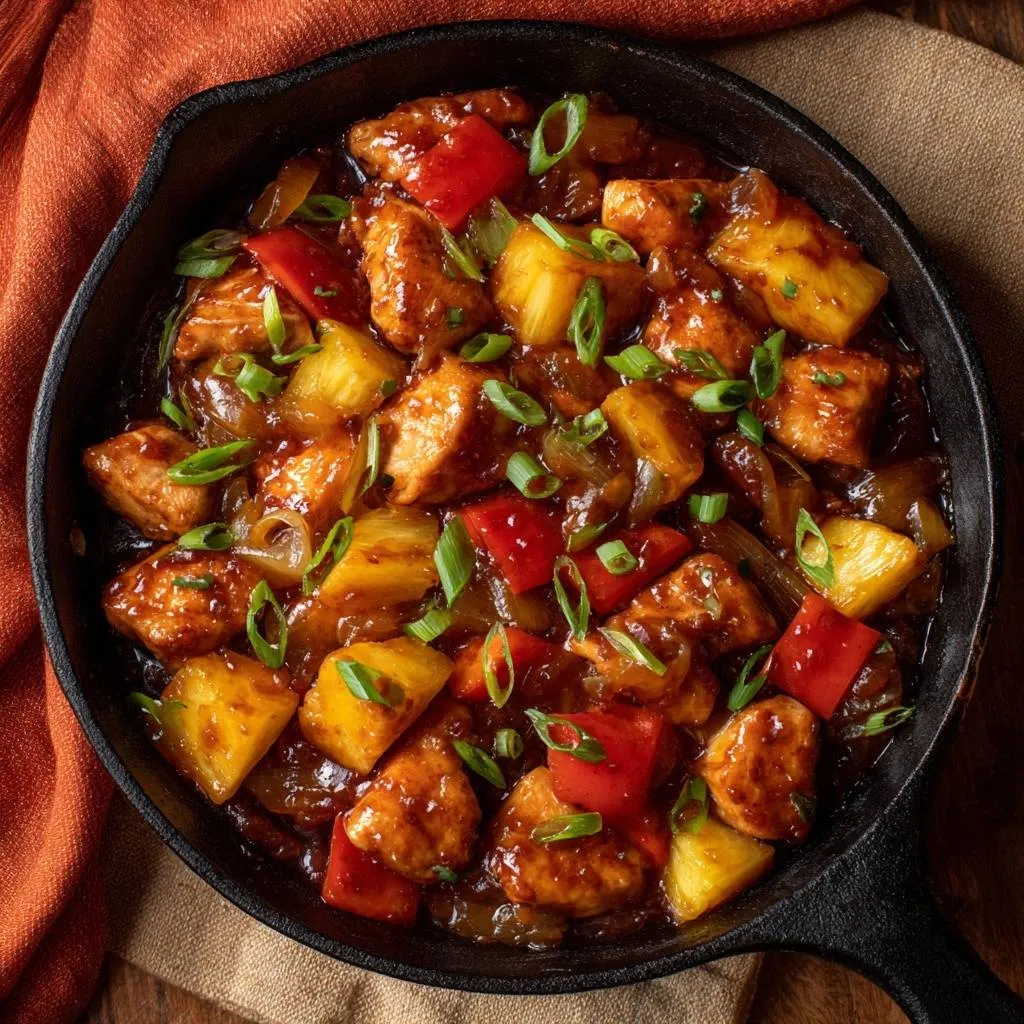
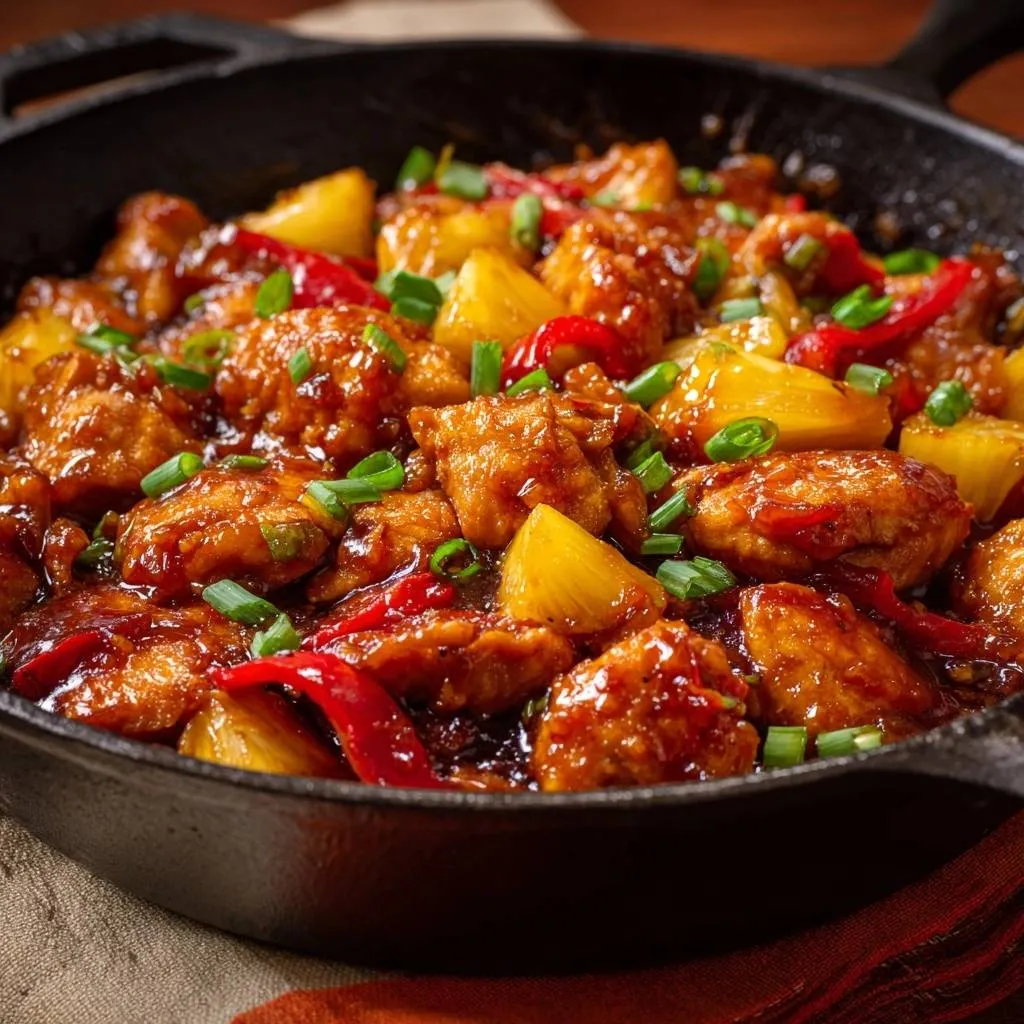
Skillet Sweet and Sour Chicken
Course: Main CourseCuisine: Asian-AmericanDifficulty: easy4
servings15
minutes15
minutes30
Minutes425
kcalAsian-American
Ingredients
1.5 lbs chicken breast, cut into 1-inch cubes
1/4 cup cornstarch (for dredging chicken)
1/2 teaspoon salt
1/4 teaspoon black pepper
2 cups fresh pineapple chunks
1 large red bell pepper, cut into 1-inch squares
1 small white onion, cut into 1-inch petals
3 green onions, sliced for garnish
3 tablespoons vegetable oil, divided
The Sauce Base:
1/2 cup pineapple juice
1/4 cup apple cider vinegar
1/4 cup soy sauce
1/3 cup light brown sugar, packed
2 tablespoons ketchup
1 tablespoon cornstarch (the thickener)
1 teaspoon ginger, minced
2 cloves garlic, minced
Directions
- In a medium bowl, whisk together all “Sauce Base” ingredients (including the 1 tablespoon of cornstarch) until the sugar and starch are fully dissolved. Set aside.
- Place the chicken cubes in a large bowl or zip-top bag. Add the 1/4 cup cornstarch, salt, and pepper. Toss thoroughly until every piece of chicken is evenly coated in a thin, powdery layer.
- Heat 2 tablespoons of vegetable oil in a large cast iron skillet over medium-high heat. Once the oil is shimmering, add the chicken in a single layer. Sear for 3-4 minutes per side until golden brown and crispy. Remove chicken from the pan and set aside.
- Wipe out any burnt starch bits from the skillet. Add the remaining 1 tablespoon of oil. Add the onions and red bell peppers. Sauté for 2-3 minutes until the edges are slightly charred but the vegetables remain crisp-tender.
- Add the pineapple chunks to the skillet and toss for 1 minute to caramelize the edges.
- Give the sauce base a final whisk to incorporate any settled starch and pour it into the skillet. Bring the liquid to a vigorous boil.
- To solve the watery sauce problem, let the sauce bubble for 1-2 minutes. The cornstarch will activate, transforming the liquid from a cloudy juice into a dark, translucent, and thick glaze.
- Return the chicken to the skillet. Toss everything together for 1-2 minutes. The pre-dredged coating on the chicken will bond with the sauce, creating a heavy, glossy “cling” that won’t weep or thin out.
- Remove from heat and garnish generously with fresh green onions. Serve immediately over steamed white rice.
Notes
- The secret to the non-watery sauce is the double use of cornstarch: once for dredging the chicken to create a bonding surface, and once in the sauce base as a thickener activated by a vigorous boil.