Imagine a bowl of curry where the sauce is so thick and glossy it clings to every piece of golden chicken. You take a bite and experience a velvety texture that carries the warmth of ginger and the bright, zesty punch of fresh lime. This isn’t a watery, thin soup that pools at the bottom of your plate; it’s a restaurant-quality masterpiece made in your own kitchen.
Most home cooks struggle with coconut milk separating or curdling the moment it hits the pan. However, you can achieve a perfectly bonded sauce in just 35 minutes by mastering a few simple temperature shifts. This recipe focuses on building a stable emulsion that stays creamy from the first bite to the last.
The secret to this professional finish is all in the timing of your acidity. While you might be tempted to squeeze the lime juice in while the pot is bubbling, that’s exactly what causes the sauce to break. I’ve found that whisking the lime juice in only after the heat is turned off preserves the silkiness and keeps the citrus flavor vibrant and fresh.
The Chemistry of a Stable Coconut Curry Sauce
Coconut milk is essentially a delicate balance of water, fat, and protein. When you heat it too quickly or let it reach a rolling boil, those proteins tighten up and squeeze out the fat. This results in that unappealing “broken” look where oil floats on top of a grainy liquid.
To keep your sauce stable, you have to respect the thermal threshold of the coconut fats. By maintaining a gentle simmer, you allow the water to evaporate slowly, which naturally thickens the sauce without stressing the proteins. This low-and-slow approach ensures the liquid stays unified and rich.
Using “light” coconut milk is often the primary reason a curry fails to thicken. Light versions are mostly water and lack the necessary fat solids to create a structural bond with your spices. Therefore, sticking to the full-fat variety is the only way to achieve that signature mouthfeel.
Why Full-Fat Coconut Milk is Non-Negotiable
Full-fat coconut milk contains the high concentration of medium-chain triglycerides needed to carry flavor. Since many aromatic compounds in curry powder and ginger are fat-soluble, they need that coconut fat to “bloom” and reach your taste buds. Without it, your curry will taste flat and one-dimensional.
Furthermore, the fat solids act as a natural thickener. As the sauce simmers, these fats reduce into a heavy cream consistency that coats the back of a spoon. If you use a low-fat version, you’ll likely end up with a thin broth that lacks the satisfying richness of a true curry.
The Role of Acidity in Sauce Texture
Lime juice is a powerful ingredient that can either make or break your sauce. The citric acid acts as a flavor brightener, but it also reacts with the proteins in the coconut milk. If the sauce is too hot, the acid causes the proteins to clump together instantly.
By waiting until the very end to add your lime, you bypass this chemical reaction. The sauce remains perfectly smooth because the temperature has dropped just enough to prevent curdling. This technique locks in the “zing” of the lime without sacrificing the glossy texture you’ve worked hard to build.
Essential Components for the Coconut Lime Base
Every ingredient in this dish serves a specific purpose for both flavor and structure. Fresh ginger is a must because it provides a sharp, peppery bite that dried powder simply cannot replicate. When grated finely, it melts into the sauce, adding heat that builds in the back of your throat.
Black mustard seeds are the unsung heroes of this base. They offer a nutty, slightly pungent pop that breaks up the creaminess of the coconut. In addition, using fresh garlic and finely diced onions creates a savory foundation that balances the sweetness of the coconut milk.
Don’t skip the cherry tomatoes, either. As they simmer, they release natural pectins and sugars into the liquid. This not only adds a subtle tang but also helps the sauce thicken naturally as it reduces in the pan.
Selecting and Preparing the Chicken Breast
Cutting your chicken into uniform 1-inch chunks is vital for even cooking. This size provides enough surface area for a beautiful golden sear while keeping the inside juicy. If the pieces are too small, they’ll dry out before the sauce is finished; if they’re too large, the centers will stay raw.
I highly recommend salting your chicken chunks about 15 minutes before you start cooking. This “dry brine” helps the meat retain its moisture during the high-heat searing phase. You’ll notice the chicken stays much more tender even after it finishes simmering in the curry liquid.
The Aromatic Foundation: Mustard Seeds and Ginger
The process begins with “tempering” the black mustard seeds in hot oil. You’ll know they’re ready when they start to dance and pop in the pan. This step releases their essential oils, scenting the entire base with a toasted, earthy aroma that defines the dish.
Black mustard seeds are significantly more intense than the yellow ones found in standard mustard. They provide a sophisticated bitterness that cuts through the heavy coconut fats. When combined with the fresh ginger, they create a complex flavor profile that tastes like it took hours to develop.
Step-by-Step: Building the Perfect Emulsion
Creating a professional curry is all about managing the transition from dry spices to a creamy liquid. You want to watch for visual cues at every stage. For instance, your onions should be soft and translucent, not browned, to ensure they provide sweetness rather than a burnt bitter note.
As you move through the phases, keep your whisk handy. Constant movement is your best friend when integrating the coconut milk. You are essentially teaching the fat and water to live together in harmony, and a steady hand makes all the difference in the final result.
Pay close attention to the bubbles in your pan. You aren’t looking for a violent boil that splashes the sides of the skillet. Instead, look for small, infrequent bubbles that gently break the surface, indicating a perfect simmering temperature.
Phase 1: Searing for Flavor Development
Start by searing the chicken in a hot pan until a golden crust forms. You aren’t trying to cook it all the way through at this point. The goal is the Maillard reaction, which creates deep, savory flavors on the surface of the meat.
Once the chicken is browned, remove it from the pan immediately. This prevents the “rubbery chicken” syndrome that happens when meat sits in boiling liquid for too long. By setting it aside, you ensure the chicken stays succulent while you focus on the sauce.
Phase 2: Tempering Spices and Deglazing
After the mustard seeds pop, add your onions, garlic, and ginger to the pan. The moisture from the onions will help loosen the “fond,” which are those delicious browned bits left behind by the chicken. Use a wooden spoon to scrape them up so they dissolve into the aromatics.
This step is crucial because those browned bits contain concentrated chicken flavor. By deglazing the pan with the onions, you are layering flavors directly into the foundation of the curry. Keep stirring until the mixture smells fragrant and the onions are completely soft.
Phase 3: The Low-Heat Coconut Integration
Turn your heat down to low before you even open the coconut milk. Shake the can vigorously to mix the cream and water, then pour it slowly into the pan while whisking. This physical action helps the coconut fats bond with the rendered chicken fat and aromatics.
Once the milk is in, stir in your curry powder and bring it to that very gentle simmer. You’ll see the sauce transform from a pale white to a vibrant, golden yellow. This is the moment where the emulsion becomes stable, creating a thick, velvety glaze that looks absolutely beautiful.
Troubleshooting Common Curry Texture Issues
Even the best cooks run into trouble sometimes, but most curry mistakes are easy to fix. If your sauce looks a bit thin, don’t panic and reach for the flour. Usually, a few more minutes of gentle simmering will evaporate the excess water and tighten the texture naturally.
If you notice the sauce starting to look “grainy,” it’s likely because the heat was a bit too high. You can often save it by acting quickly. The key is to lower the temperature immediately and introduce a stabilizing element to bring the fats back together.
Remember that the sauce will continue to thicken slightly as it cools. Therefore, it’s better to pull it off the stove when it looks just a tiny bit thinner than your desired final result. This prevents it from turning into a paste by the time it reaches the table.
Fixing a Thin or Watery Sauce
If your sauce is still too thin after simmering, the best solution is reduction. By leaving the lid off, you allow steam to escape, which concentrates the flavors and thickens the liquid. This is far superior to using a cornstarch slurry, which can give the curry a “gloppy” or artificial texture.
The cherry tomatoes also play a role here. As they break down, they release natural thickeners that help bind the sauce. If you need an extra boost, you can gently crush a few of the tomatoes against the side of the pan to release more of their juices into the base.
Preventing and Repairing Sauce Separation
If you see oil separating and floating on top, your emulsion has “broken.” To fix this, remove the pan from the heat entirely. Add a single tablespoon of room-temperature coconut milk or even a splash of water, and whisk vigorously for about thirty seconds.
This shot of cooler liquid and the mechanical action of whisking can often “catch” the emulsion and pull it back together. It’s a quick chef’s trick that saves the dish without changing the flavor. Once it looks smooth again, keep the heat very low for the remainder of the cooking time.
Customizing Heat and Flavor Profiles
This curry is designed to be mild and creamy, but it’s a fantastic canvas for customization. If you love a spicy kick, you can add diced Thai bird’s eye chilies along with the garlic and ginger. This infuses the oil with heat before the coconut milk is even added.
You can also play with the “Salt, Fat, Acid, Heat” framework to suit your palate. If the coconut feels too heavy, add an extra squeeze of lime. If the spices feel too sharp, a tiny pinch of brown sugar can mellow the flavors and bring everything into balance.
Vegetable Additions for Added Bulk
If you want to add more greens, snap peas or sliced bell peppers are excellent choices. However, you should add these during the last 3 or 4 minutes of simmering. This ensures they cook through but maintain a satisfying “snap” and bright color that contrasts with the creamy sauce.
Spinach is another great addition. Simply stir in a few handfuls right before you turn off the heat. The residual warmth of the coconut milk will wilt the leaves perfectly without turning them into a soggy mess.
Adjusting the Citrus and Spice Balance
Always taste your sauce right before serving. The lime juice is the final touch that makes the coconut flavor “pop.” If the dish tastes a bit dull, it usually needs either a pinch more salt or another half-teaspoon of lime juice to wake up the flavors.
Salt is particularly important in coconut dishes because it balances the natural sweetness of the milk. Don’t be afraid to adjust it incrementally. You’ll know it’s perfect when the savory spices and the bright citrus notes feel equally represented in every spoonful.
Optimal Pairings for Creamy Chicken Curry
While you can serve this curry on its own, the right grain makes a world of difference. You want something that can soak up that luxurious sauce without becoming mushy. The texture of the grain should provide a clean backdrop for the complex spices in the curry.
Freshness is also key for the final presentation. Adding cold, crisp garnishes right before eating provides a temperature and texture contrast that makes the warm curry feel even more comforting. It turns a simple meal into a multi-sensory experience.
Choosing the Right Grain: Basmati vs. Jasmine
Jasmine rice is the traditional choice for coconut-based curries. Its slightly sticky texture and floral aroma pair beautifully with the lime and ginger. It “grabs” the sauce effectively, ensuring you get plenty of creamy goodness in every bite.
Basmati rice is a great alternative if you prefer separate, fluffy grains. It has a nutty undertone that complements the toasted mustard seeds. Because it’s less starchy than Jasmine, it offers a lighter feel that balances the richness of the full-fat coconut milk.
Fresh Garnishes and Texture Toppers
Cilantro is a non-negotiable garnish for me, but it must be added at the very end. It is highly heat-sensitive and will lose its bright, peppery flavor if it’s cooked into the sauce. Roughly chop the leaves and stems to get the most flavor and aroma.
For an extra layer of crunch, try adding toasted cashews or fried shallots on top. These additions provide a textural counterpoint to the tender chicken and soft tomatoes. A few extra lime slices on the side allow everyone to customize their own level of acidity at the table.
Storage and Reheating for Maximum Creaminess
Coconut curry actually tastes even better the next day as the spices have more time to meld. However, coconut milk behaves differently than dairy when chilled. It will likely solidify into a thick, almost gelatinous block in the fridge as the fats firm up.
Don’t let the appearance of cold curry discourage you. With the right reheating technique, you can restore that glossy, emulsified texture perfectly. The goal is to gently melt the fats back into the liquid without causing them to separate from the proteins.
The Best Way to Reheat Coconut Sauces
I strongly advise against using the microwave for reheating this dish. The uneven, intense heat can cause the coconut milk to break instantly, leaving you with a greasy mess. Instead, use a small saucepan on the stovetop over low heat.
Add a tablespoon of water or chicken broth to the pan to help loosen the sauce as it warms. Stir constantly and gently until the curry is heated through. This slow approach coaxes the fats back into a smooth emulsion, making it taste just as fresh as the day you made it.
Freezing Guidelines for Batch Cooking
You can freeze this curry for up to three months in an airtight container. While the chicken and spices freeze beautifully, the sauce may look slightly separated once it thaws. This is completely normal and easy to fix during the reheating process.
Thaw the curry in the refrigerator overnight before reheating. When you put it in the pan, give it a vigorous whisk as it warms up. This mechanical action will re-incorporate the fats and liquids, returning the sauce to its original creamy state. Avoid freezing if you’ve added high-moisture veggies like zucchini, as they can become mushy.
Frequently Asked Questions
How should I store leftovers and does this freeze well?
Store your leftovers in an airtight container in the refrigerator for up to 3 days. The sauce will thicken significantly as it cools, which is normal. You can freeze this curry for up to 3 months, but for the best texture, thaw it completely in the fridge before reheating. When you reheat it on the stove, whisk it gently to bring the emulsion back together.
Why did my curry sauce turn out thin and watery?
This usually happens for two reasons: using “light” coconut milk or not simmering long enough. Light coconut milk lacks the fat solids needed for a thick consistency. To fix a thin sauce, keep the lid off and simmer on low for an extra 5-10 minutes. The cherry tomatoes also help thicken the sauce as they break down, so make sure they have softened completely.
Can I substitute the chicken breast with something else?
Yes, chicken thighs are a fantastic substitute and are even more forgiving if overcooked. If you want a vegetarian option, chickpeas or extra-firm tofu work beautifully. Just remember that if you use tofu, you should sear it separately to get a crisp exterior before adding it to the simmering sauce at the very end.
What can I use if I don’t have black mustard seeds?
If you can’t find black mustard seeds, you can omit them, though you will lose that specific nutty pop. Do not substitute them with standard yellow mustard seeds from the spice aisle, as they have a different flavor profile. Instead, try adding a half-teaspoon of cumin seeds or simply increase the fresh ginger slightly to maintain the aromatic depth.
Why did my sauce look grainy after I added the lime juice?
Graininess occurs when the acid in the lime juice reacts with the coconut proteins at a high temperature, causing them to curdle. To prevent this, always turn off the heat and let the bubbling stop before stirring in your lime juice. If it’s already grainy, you can sometimes smooth it out by whisking in a tablespoon of room-temperature coconut milk off the heat.
Is there a way to make this curry spicier?
The easiest way to increase the heat is to add 1-2 finely minced Thai chilies or a teaspoon of red chili flakes when you sauté the garlic and ginger. This allows the heat to infuse into the oil. You can also add a squeeze of Sriracha or a dash of cayenne pepper at the end if you want a more immediate spicy kick without changing the base flavor too much.
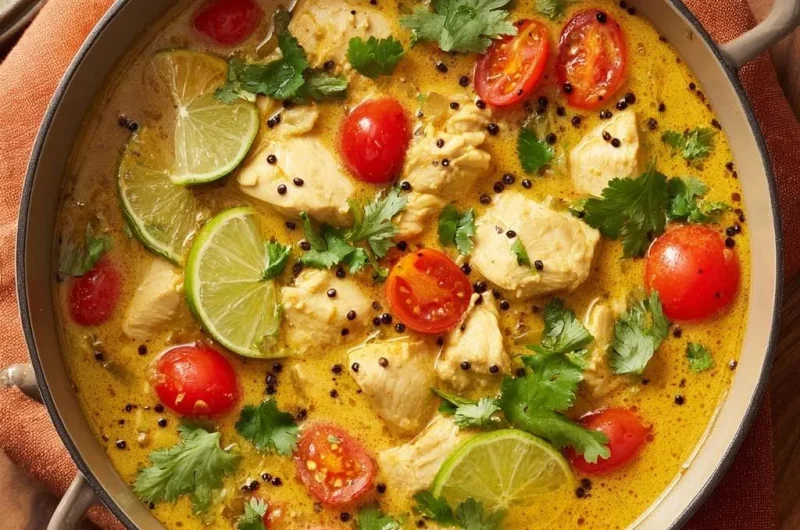
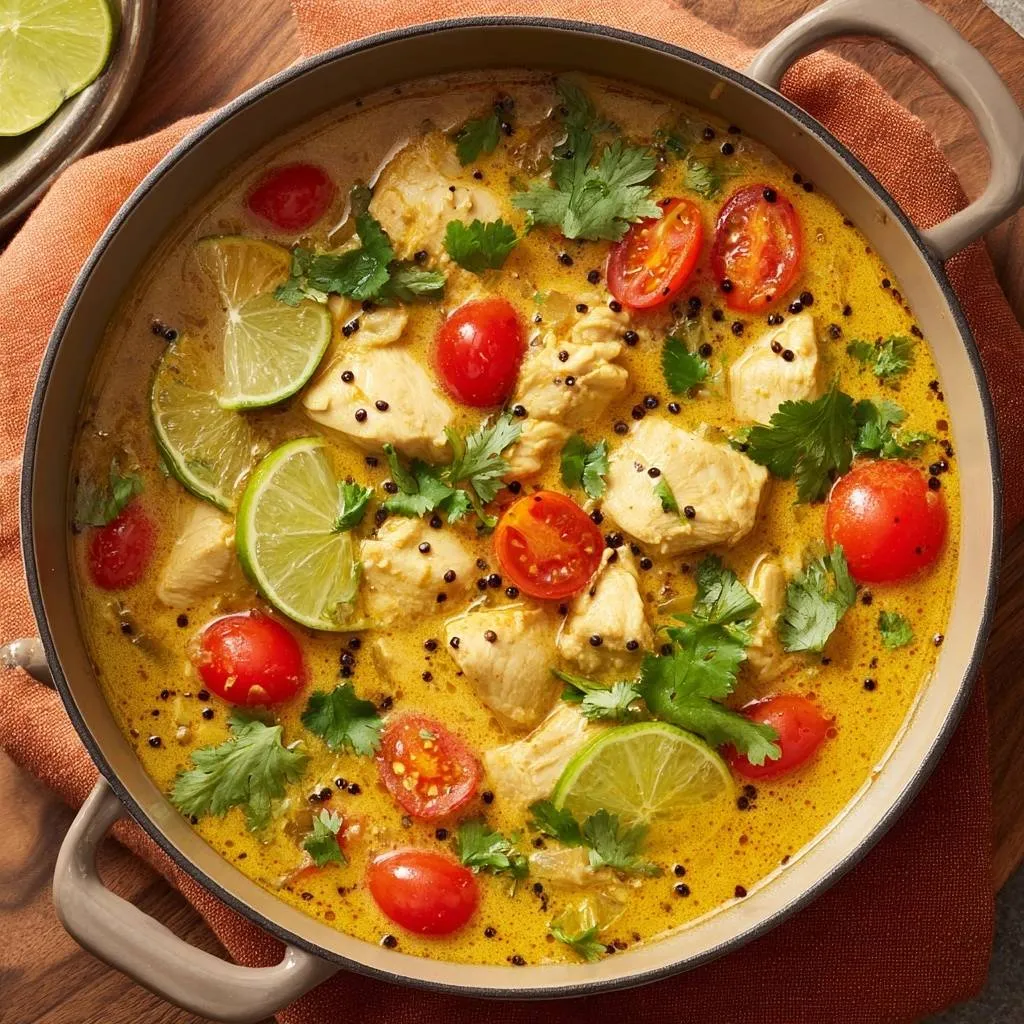
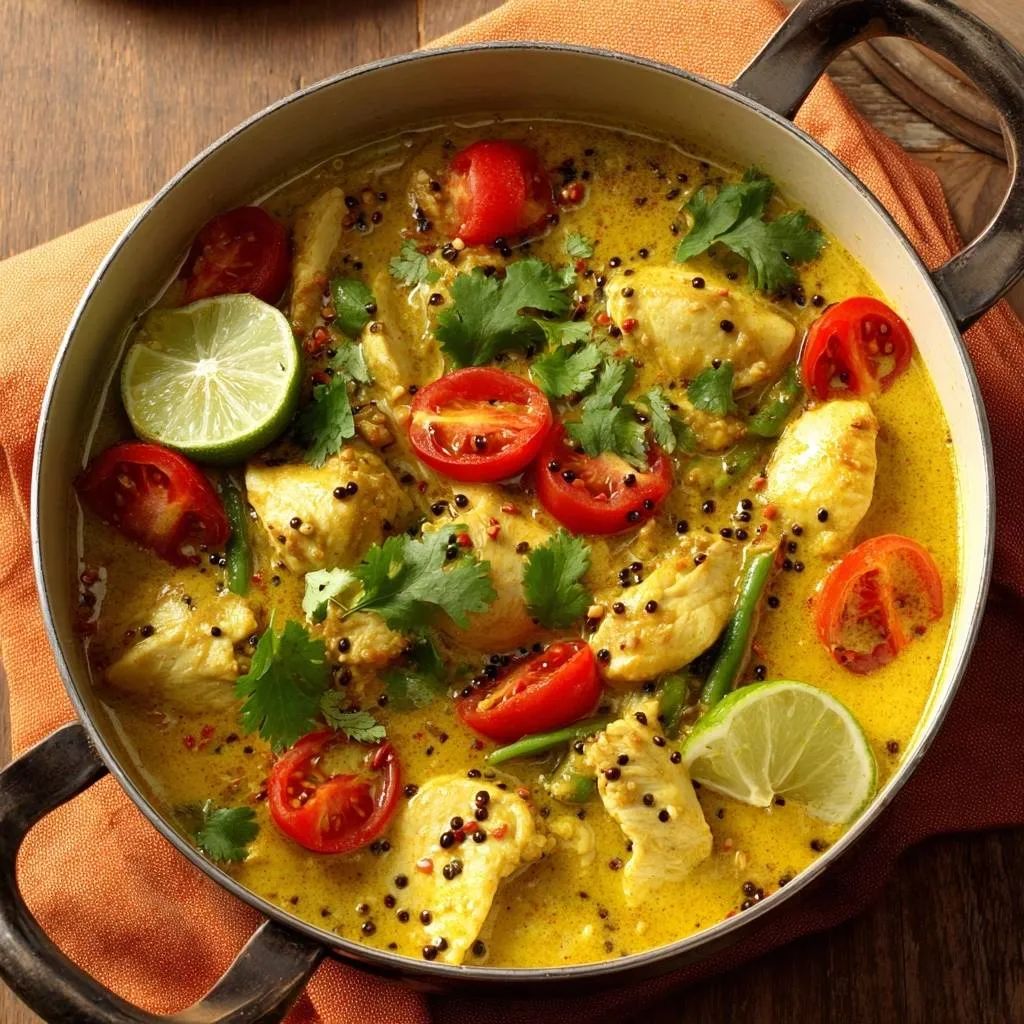
Creamy Coconut Lime Chicken Curry
Course: Main CourseCuisine: Thai InspiredDifficulty: easy4
servings15
minutes20
minutes35
Minutes385
kcalThai Inspired
Ingredients
1.5 lbs chicken breast, cut into 1-inch chunks
1 can (14 oz) full-fat coconut milk (do not use “light”)
1 cup cherry tomatoes, halved
2 tablespoons yellow curry powder
1 tablespoon vegetable oil
1 tablespoon black mustard seeds
1 small onion, finely diced
2 cloves garlic, minced
1 tablespoon fresh ginger, grated
2 limes (one juiced, one sliced into rounds for the pot)
1/2 cup fresh cilantro, roughly chopped
Salt and pepper to taste
Directions
- Season the chicken chunks with salt, pepper, and a teaspoon of the curry powder. Heat oil in a large deep skillet or braiser over medium-high heat.
- Sear the chicken until golden on all sides but not fully cooked through. Remove chicken from the pan and set aside. This prevents the meat from overcooking and becoming rubbery while the sauce develops.
- In the same pan, reduce heat to medium. Add the black mustard seeds and wait for them to begin popping. Immediately add the onion, garlic, and ginger, sautéing until the onions are translucent and fragrant.
- To solve the curdling issue, shake your coconut milk can vigorously before opening. Turn the heat down to low before pouring the milk into the pan. Whisk constantly as you pour to emulsify the coconut fats with the aromatics and the rendered chicken fat in the pan.
- Stir in the remaining curry powder. Bring the liquid to a very gentle simmer. Never let the sauce reach a rolling boil, as high heat is what causes coconut milk to separate and look thin.
- Add the chicken, halved cherry tomatoes, and several lime slices directly into the liquid. Simmer gently for 8 to 10 minutes. The tomatoes will soften slightly and release their juices into the sauce, while the coconut milk reduces into a thick, velvety glaze.
- The final critical step: Turn off the heat entirely before stirring in the lime juice. Adding acid to boiling coconut milk causes instant graininess. By stirring it in at the end, you lock in the bright flavor and maintain a perfectly smooth texture.
- Garnish heavily with fresh cilantro and additional lime slices. Serve directly from the pot over steamed rice.
Notes
- To prevent curdling, always shake the coconut milk can before opening and ensure the heat is turned off before adding the lime juice. Avoid a rolling boil to maintain the sauce’s thickness and emulsion.