Most home cooks struggle with chickpea curry that tastes like watery broth with beans floating in it. You’ve likely experienced that disappointing, thin yellow soup that lacks the body and punch of your favorite takeout spot. The difference between a mediocre meal and a professional-grade gravy isn’t a secret ingredient; it’s a specific technique called blooming.
By frying your spices and aromatics in hot oil before adding any liquid, you unlock deep oils and flavors that a simple simmer can never achieve. This method ensures every chickpea is infused with flavor rather than just sitting in yellow water. You’re looking for a rich, opaque sauce that clings to the spoon and coats every bean in a vibrant, golden sheen.
The real secret to that restaurant-quality finish is using a heavy-bottomed pot to maintain consistent heat. When you drop those mustard seeds into shimmering coconut oil, they should dance and pop immediately. This auditory cue tells you the oil is hot enough to extract the essential oils from your spices without scorching them.
The Science of Blooming Spices in Coconut Oil
Blooming is a chemical process where fat-soluble flavor compounds are released into a cooking medium. Many of the most potent flavors in turmeric, mustard seeds, and peppercorns don’t dissolve in water; they require fat to travel. When you heat these spices in coconut oil, the fat acts as a carrier, distributing those complex aromas throughout the entire dish.
Coconut oil is the superior choice for this specific curry because of its unique fatty acid profile and relatively high smoke point. It provides a rich, silky mouthfeel that vegetable oils simply can’t match. As the oil heats up, it coaxes the piperine out of the black peppercorns, creating a warm, lingering heat that builds slowly on the palate.
Furthermore, the heat transforms the turmeric from a raw, earthy powder into a mellow, nutty base. If you skip the blooming phase and just stir turmeric into a simmering liquid, you’ll often end up with a slightly metallic or bitter aftertaste. Frying the powder for just a few seconds in the oil rounds out those sharp edges and creates a more sophisticated flavor profile.

Why High Fat Content Defines the Visual Appeal
The interaction between full-fat coconut milk and turmeric is what creates that iconic, opaque yellow hue. When the fat molecules in the milk meet the turmeric-infused oil, they emulsify into a thick, vibrant gravy. This creates a visual depth that looks incredibly appetizing on the plate.
If you try to use low-fat or “lite” coconut milk, the sauce will often appear translucent or even greyish. The lack of fat prevents the emulsion from holding together, leading to a thin consistency that runs all over the plate. For that velvety, high-end look, the fat content is non-negotiable.
Essential Components for the Golden Chickpea Curry
Quality ingredients are the backbone of this dish, starting with the chickpeas themselves. While soaking dried beans is great, canned chickpeas are actually preferred here for their consistent, tender texture. They have already been cooked to a point where they can absorb the spiced oil without falling apart during the reduction phase.
Fresh curry leaves are another game-changer that you shouldn’t swap for dried versions if you can help it. Fresh leaves have a citrusy, herbal aroma that is lost once they are dehydrated. When they hit the hot oil, they crisp up and release a scent that defines the soul of this curry. If you can’t find them, it’s better to omit them than to use flavorless dried flakes.
Your ginger-garlic paste should be as fresh as possible to provide a sharp, pungent bite. This paste acts as the aromatic bridge between the earthy chickpeas and the creamy coconut milk. If the paste is old, it loses its sulfurous punch, leaving the curry tasting flat and one-dimensional.
Selecting the Right Aromatics and Spices
The heat in this Golden Chickpea Curry comes from two distinct sources: red chili flakes and whole black peppercorns. The chili flakes provide an immediate, sharp tingle on the tongue. In contrast, the whole peppercorns offer “pops” of intense, woody heat when you bite into them, adding an element of surprise to the texture.
Using whole peppercorns instead of ground pepper is a deliberate choice for clarity. Ground pepper can turn a bright yellow sauce into a muddy, brownish color. By keeping the spices whole or in large flakes, you maintain that clean, vibrant golden aesthetic while still delivering a powerful flavor punch.
Step-by-Step: Executing the Perfect Tempering Technique
Executing this recipe requires you to be a “virtual cooking coach” for yourself, paying close attention to sensory cues. The process moves quickly once the oil is hot, so have all your ingredients measured and ready. You are moving through three distinct phases: the temper, the infusion, and the reduction.
The goal is to transform individual ingredients into a cohesive, velvety sauce. You aren’t just heating things up; you are building layers of flavor. Each step relies on the one before it to create the final, complex result that tastes like it spent hours on the stove.
Phase 1: Achieving the Shimmer and Pop
Start by heating your coconut oil until it is shimmering. You’ll know it’s ready when a single mustard seed dropped into the pot sizzles instantly. When you add the rest of the seeds and peppercorns, they should begin to pop like tiny kernels of popcorn. This is the sound of flavor being released.
Once the popping starts, drop in the curry leaves and ginger-garlic paste. Be ready to stir rapidly! The paste has a high water content and will sizzle aggressively. You want to cook it just until the raw smell disappears and it turns a pale golden color. If it turns dark brown, it will taste bitter, so keep things moving.
Phase 2: Blistering the Chickpeas for Maximum Flavor
After the aromatics are fragrant, stir in the turmeric and chili flakes, then immediately add the chickpeas. This 3-minute “frying” window is crucial. You want the chickpeas to toss in that spiced oil until they look slightly blistered and are completely coated in the golden turmeric oil.
This step prevents the “boiled bean” texture that ruins so many home curries. By frying the chickpeas first, you create a barrier that helps them hold their shape. It also ensures that the flavor is cooked into the skin of the bean, rather than just sitting on the surface of the sauce.
Phase 3: The Low-Simmer Reduction Method
Now, pour in the full-fat coconut milk and the vegetable broth. Bring the mixture to a very gentle simmer, not a rolling boil. High heat can cause coconut milk to “break” or separate, leaving you with an oily mess. You want small, gentle bubbles that slowly reduce the liquid.
Allow the sauce to thicken for about 10 to 12 minutes. You’ll see the color deepen and the texture become velvety. Resist the urge to mash the chickpeas to thicken the sauce. The high fat content of the milk will do the work for you as it emulsifies with the spiced oil, creating a naturally thick gravy.
Troubleshooting Common Texture and Flavor Issues
If your sauce feels too thin after the reduction time, don’t panic. This usually happens if the heat was too low or the coconut milk had a higher water content. Simply simmer for another 5 minutes uncovered. The steam escaping will naturally thicken the remaining liquid into a rich coating.
If the curry tastes bitter, you likely scorched the turmeric or the garlic in the first phase. You can balance this bitterness by adding a tiny pinch of sugar or a splash more coconut milk. For future batches, remember that turmeric only needs about 10 seconds in hot oil before you add the next ingredient to stop the cooking process.
Flavor Variations and Regional Swaps
While this golden profile is stunning on its own, you can easily customize the dish. If you want more acidity, a squeeze of fresh lime juice right before serving cuts through the richness of the coconut milk beautifully. For a nutritional boost, fold in a few handfuls of fresh spinach at the very end until just wilted.
You can also bulk up the meal by adding roasted cauliflower or cubed sweet potato. If you go this route, roast the vegetables separately and toss them in during the final simmering stage. This keeps the vegetables from getting mushy and ensures they maintain their own distinct textures within the golden sauce.
Optimal Pairings for a Complete Meal
A sauce this thick and flavorful deserves a worthy companion. While plain white rice works, fragrant Basmati rice is the gold standard here. The long, separate grains are perfect for soaking up the velvety gravy without becoming a soggy mass. Jasmine rice is another great option if you prefer a slightly stickier texture.
To balance the warmth of the black pepper and chili, consider serving this with a cooling side. A simple cucumber raita or even just a dollop of plain yogurt provides a refreshing contrast. For a drink, a salted lime soda or a cold glass of sparkling apple juice complements the earthy spices perfectly.
Make Ahead, Storage, and Reheating Protocols
This is one of those rare dishes that actually tastes better the next day. As the curry sits in the fridge, the chickpeas continue to marinate in the spiced oil, deepening the flavor profile. Store your leftovers in an airtight container in the refrigerator for up to four days.
When reheating, do it gently on the stovetop over low heat. You might notice the sauce has thickened significantly or even solidified in the fridge due to the coconut oil. Add a splash of water or broth to loosen it up. Stir constantly as it warms to ensure the coconut milk re-emulsifies into a smooth sauce rather than breaking.
Freezing Guidelines for Batch Cooking
You can freeze this curry for up to two months, though the texture of the coconut milk may change slightly. To freeze, let the curry cool completely before transferring it to a freezer-safe bag or container. Leave a little bit of headspace as the liquid will expand when frozen.
When you thaw the curry, you might see some separation where the oil has moved away from the solids. This is completely normal. As you reheat it in a saucepan, give it a vigorous whisk or stir. This mechanical action will bring the emulsion back together, restoring that creamy, golden consistency you worked so hard to achieve.
Expert Tips for Restaurant-Quality Presentation
For a true restaurant-quality look, follow the “no-stir” rule at the very end. Once you’ve seasoned the curry with salt, let it sit for a minute. This allows the dark peppercorns and bright red chili flakes to settle on the surface of the thick sauce, creating a beautiful visual contrast against the yellow background.
Choose a wide, shallow bowl rather than a deep one to show off the texture of the chickpeas. Garnish with a few extra fresh curry leaves or a sprig of cilantro for a pop of green. The goal is to make the dish look as rich and vibrant as it tastes, ensuring your guests are impressed before they even take their first bite.
How do I store leftovers?
Store the curry in an airtight container in the refrigerator for up to 4 days. The flavors actually develop and improve overnight. When reheating, use a small saucepan over low heat and add a tablespoon of water to help the sauce regain its creamy consistency.
Why is my curry sauce thin and watery?
This usually happens if you use “lite” coconut milk or don’t allow the sauce to reduce long enough. To fix it, simmer the sauce uncovered for an extra 5-10 minutes on medium-low heat. This allows excess moisture to evaporate, leaving behind a thick, velvety gravy that clings to the chickpeas.
Can I use ground ginger and garlic instead of paste?
While you can use powders in a pinch, the result won’t be as vibrant. Fresh ginger-garlic paste provides a pungent, aromatic base that defines the dish’s character. If you must use powders, add them with the turmeric rather than frying them at the start to prevent them from burning in the hot oil.
What can I use if I don’t have fresh curry leaves?
Fresh curry leaves have a very specific citrus-herbal flavor that is hard to replicate. If you can’t find them, simply omit them. Do not use dried curry leaves, as they often taste like hay and add nothing to the dish. You can garnish with fresh cilantro at the end for a different but pleasant herbal note.
Is this curry very spicy?
The heat level is moderate but customizable. The black peppercorns provide a warm, earthy heat, while the chili flakes offer a sharper bite. If you prefer a mild curry, reduce the chili flakes to a half teaspoon. If you love heat, you can add a diced green chili during the aromatic frying stage.
Can I freeze this chickpea curry?
Yes, you can freeze it for up to 2 months. Note that coconut milk can sometimes grain or separate after freezing. To fix this, thaw the curry completely in the fridge and then reheat it slowly on the stove while stirring frequently to re-emulsify the fats into a smooth sauce.
Golden Chickpea Curry
Course: Main CourseCuisine: Indian-InspiredDifficulty: easy4
servings10
minutes20
minutes30
Minutes350
kcalIndian-Inspired
Ingredients
2 cans (15 oz each) chickpeas, drained and rinsed
3 tablespoons coconut oil (extra oil is needed for the visual “tempering” sheen)
1 tablespoon whole black peppercorns
1 teaspoon mustard seeds
12 to 15 fresh curry leaves (keep whole for visual impact)
1 teaspoon turmeric powder
1 teaspoon red chili flakes
1 tablespoon ginger garlic paste
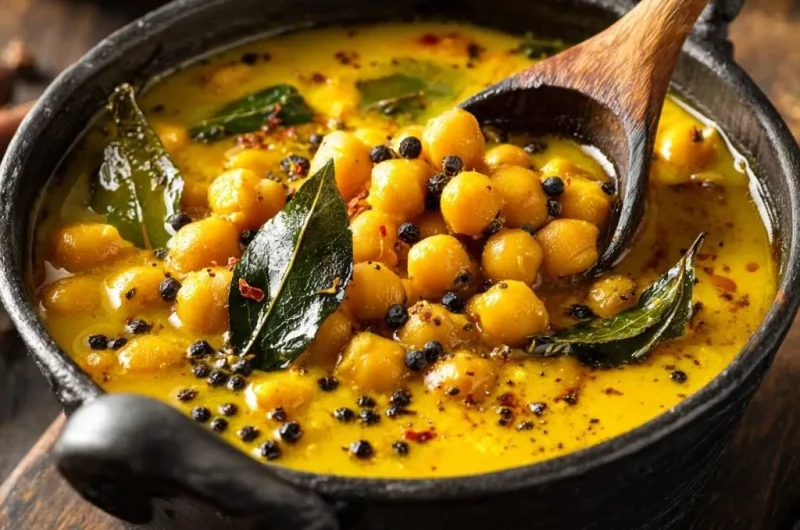
1 ½ cups full-fat coconut milk (for the opaque, creamy yellow color shown)
1/4 cup vegetable broth (minimal broth ensures the sauce stays thick)
Salt to taste
Directions
- Heat the coconut oil in a heavy-bottomed pot or kadai over medium heat. The oil must be shimmering to properly bloom the spices.
- Add the whole black peppercorns and mustard seeds. Wait until the mustard seeds begin to pop and the peppercorns become fragrant.
- Drop in the whole curry leaves and ginger garlic paste. Stir rapidly for 30 seconds. The curry leaves should crisp slightly but remain vibrant green.
- Stir in the turmeric and chili flakes. Immediately add the drained chickpeas and toss them in the spiced oil for 3 minutes. This “frying” step allows the chickpeas to blister slightly and absorb the golden turmeric oil.
- Pour in the full-fat coconut milk and the small amount of vegetable broth. Bring to a very gentle simmer.
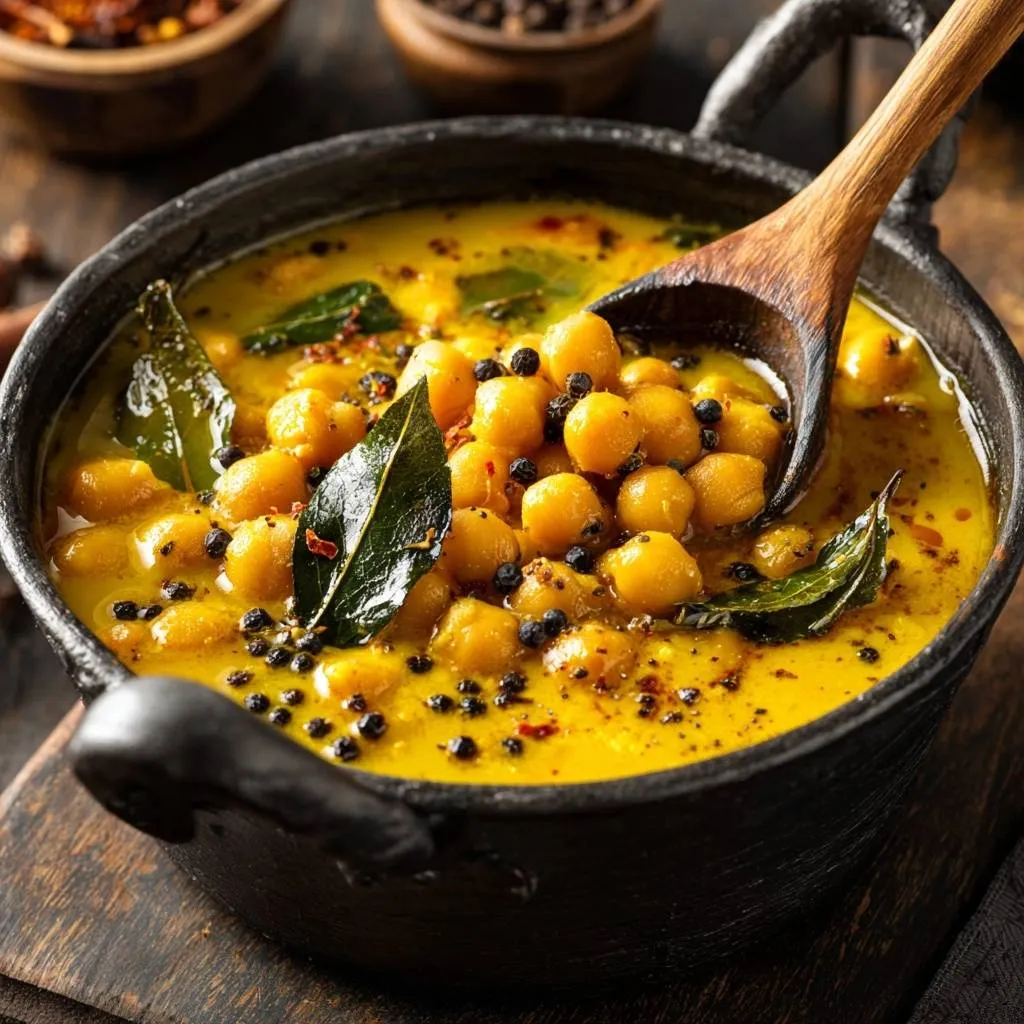
- To achieve the thick, velvety texture seen in the image, do not mash the chickpeas. Instead, allow the full-fat coconut milk to reduce over medium-low heat for 10-12 minutes. The high fat content will emulsify with the turmeric oil to create a vibrant, opaque yellow gravy.
- Season with salt to taste. For the final visual touch shown in the image, do not stir the pot vigorously at the end; let the dark peppercorns and red chili flakes settle on the surface of the thick, golden sauce. Serve hot.
Notes
- The secret to the rich color and flavor is the blooming step; ensure the oil is shimmering before adding spices. Do not mash the chickpeas; let the coconut milk reduce naturally for a thick consistency.