Nothing ruins a beautiful bowl of curry noodles faster than crispy chicken skin turning into a rubbery, wet mess the second it hits the broth. Most recipes tell you to simmer the meat directly in the liquid, but that’s a major flavor and texture mistake. You lose that satisfying crunch, and the skin becomes a soggy afterthought rather than a highlight of the meal.
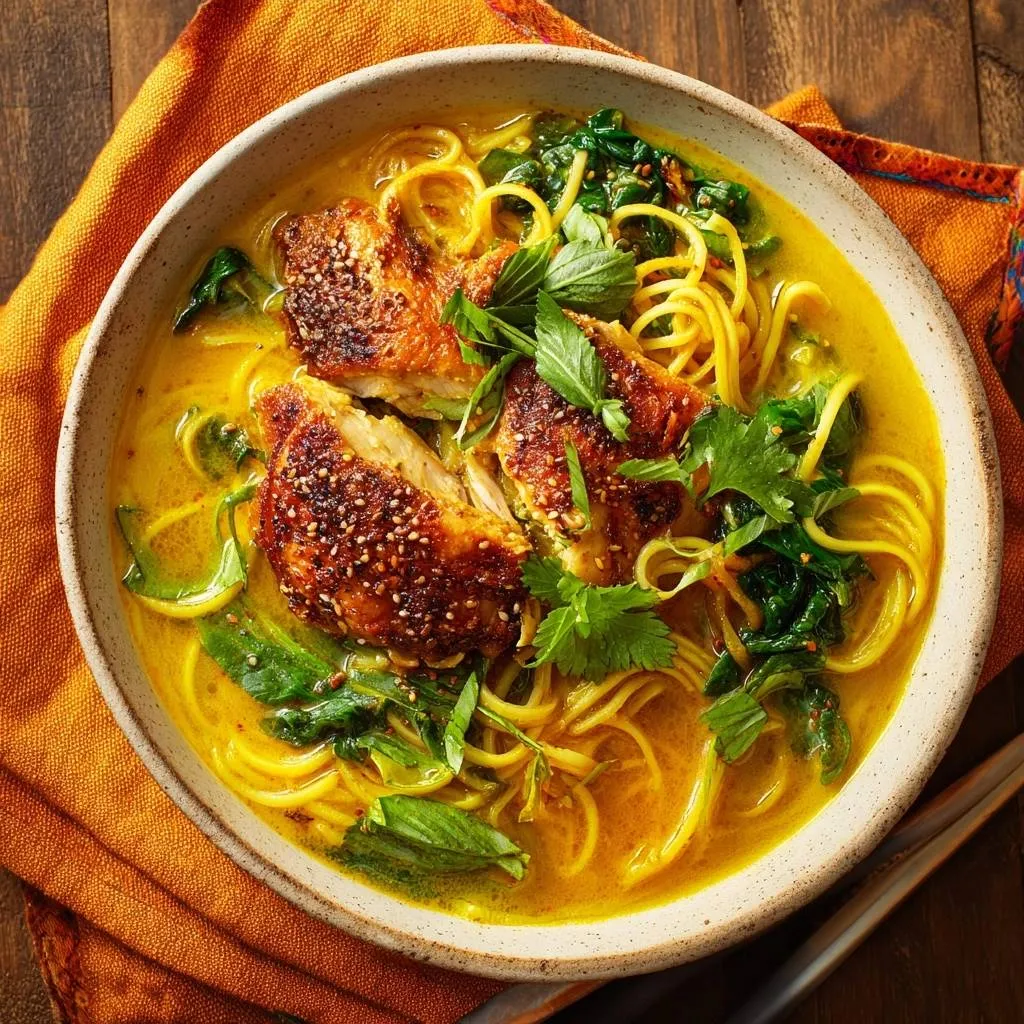
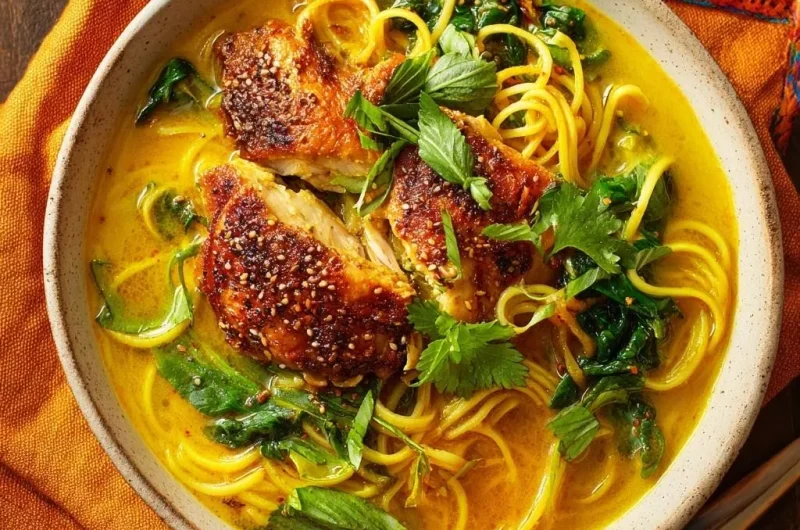
This Golden Coconut Curry Noodle Soup solves that problem with a specific searing and resting method. By treating the chicken as a separate, structural element, you get to enjoy a shatteringly crisp topping against a silky, rich coconut broth. It’s all about that sensory contrast—the hot, velvety soup meeting the salty, sesame-crusted crunch of perfectly rendered chicken skin.
The secret to this professional-level result is the “crunch barrier” we create during the initial sear. I’ve found that patting the chicken skin bone-dry with paper towels before it ever touches the pan is the most important step you’ll take. If there’s even a hint of moisture on that skin, it’ll steam instead of fry, and you’ll miss out on that golden, crackling texture that makes this dish legendary.
The Anatomy of a Perfect Golden Coconut Curry Noodle Soup
A truly great curry soup relies on a balance of earthy, sweet, and spicy elements. The “Golden” aspect of this dish comes from the combination of turmeric and yellow curry powder. These spices provide a deep, sunshine-yellow hue and a grounded, savory base that makes the bowl feel incredibly nourishing and warm.
However, the broth needs more than just color; it needs a luxurious mouthfeel. Full-fat coconut milk is the hero here, providing a creamy fat content that carries the heat of the red curry paste across your palate. Without that fat, the spices can feel sharp or aggressive, but the coconut milk rounds them out into a smooth, comforting experience.
Essential Pantry Staples and Fresh Aromatics
You really want to stick with bone-in, skin-on chicken thighs for this recipe. The bone keeps the meat juicy during the long sear, and the skin provides the essential texture we’re after. If you swap these for boneless breasts, you’ll likely end up with dry meat and zero crunch, which defeats the purpose of the technique.
Fresh aromatics are the next non-negotiable. While powdered ginger and garlic are fine for some recipes, they lack the bright, pungent punch needed to cut through heavy coconut milk. Grating fresh ginger directly into the pan releases oils that wake up the entire dish. It adds a zingy heat that you just can’t get from a jar.
Don’t be intimidated by fish sauce if you haven’t used it much. It’s the ultimate source of umami and salt, acting as the “secret seasoning” that makes the broth taste complex. To balance that saltiness and the acidity of the lime, a teaspoon of brown sugar is vital. It doesn’t make the soup sweet; it just bridges the gap between the spicy paste and the savory broth.
Selecting the Right Noodle for the Broth
The noodle you choose dictates how the broth behaves. Rice noodles are popular, but they can be fragile and often soak up too much liquid, turning the soup into a thick porridge if you don’t eat it immediately. Egg noodles are a sturdier choice, offering a nice chew that stands up well to the rich coconut base.
For this specific recipe, I highly recommend fresh ramen noodles. They have a distinct alkaline snap and a slippery texture that feels wonderful against the tender chicken. Their starch content also helps slightly thicken the broth as they cook, giving the soup a more cohesive, “clinging” quality that coats every strand perfectly.
The Science of the “Crunch Barrier” Technique
Creating crispy skin is all about the Maillard reaction, which is the chemical reaction between amino acids and reducing sugars that gives browned food its distinctive flavor. To get this right, moisture is your absolute enemy. When you pat the chicken dry, you’re ensuring the heat of the oil goes directly into crisping the skin rather than evaporating surface water.
By searing the chicken skin-side down over medium-high heat without moving it, you allow the fat to render out slowly. This fat essentially fries the skin from the inside out, creating a structural “shield.” This hardened layer is what I call the crunch barrier—it’s dense enough to resist wilting even when it’s sitting just millimeters above a steaming broth.
If you move the chicken too early, you break the contact with the pan and interrupt the rendering process. Patience is the key to a professional result. You want that skin to be so firm that it makes a tapping sound when you hit it with a fork. That’s how you know it will stay crispy until the very last bite of your soup.
Why the Wire Rack Beats the Plate
Once the chicken is done, your instinct might be to put it on a plate, but that’s a mistake. When hot meat sits on a flat surface, the heat trapped underneath creates steam. That steam has nowhere to go but back into the skin, turning your hard-earned crunch into a soggy mess in seconds.
A wire rack is the better tool because it allows for 360-degree airflow. By letting air circulate under the chicken, the skin stays dry and crisp while the meat rests and redistributes its juices. This small change in your kitchen workflow makes a massive difference in the final texture of the dish.
Step-by-Step: Searing the Chicken to Perfection
Start by heating your oil in a heavy skillet until it’s shimmering but not smoking. Place the chicken thighs skin-side down and then—this is the hard part—don’t touch them. For the next 8 to 10 minutes, your only job is to listen to the sizzle. You’re looking for the fat to pool in the pan and the edges of the skin to turn a deep, dark gold.
After that initial sear, flip the thighs. The skin should look like a piece of toasted parchment. Cook for another 5 to 7 minutes until the internal temperature hits 165°F. As soon as they come out of the pan and onto the wire rack, sprinkle them with toasted sesame seeds. The residual heat and oils will help the seeds stick, adding an extra layer of nutty flavor and visual flair.
Building the Aromatic Golden Curry Base
Building flavor starts with “blooming” your spices. Instead of just tossing everything into the liquid, you’ll sauté the garlic, ginger, and curry paste in a teaspoon of the rendered chicken fat. This fat is liquid gold; it carries the essence of the seared chicken and helps the spices release their fat-soluble flavors more effectively than plain vegetable oil.
When you add the coconut milk and broth, keep the heat at a gentle simmer. If you let the pot come to a vigorous, rolling boil, the emulsion of the coconut milk can break. This results in an oily, separated look rather than a smooth, creamy soup. A slow simmer ensures the flavors meld together while maintaining that beautiful, velvety consistency.
Integrating Greens and Finishing the Broth
The baby spinach should be the very last thing you add to the pot. You aren’t really “cooking” it so much as “flash wilting” it. Stir it in during the last 30 seconds of the noodle cooking time. This keeps the leaves bright green and prevents them from becoming slimy or losing their nutritional value.
The residual heat of the broth is more than enough to soften the spinach. By the time you ladle the soup into bowls, the greens will be perfectly tender. This adds a fresh, earthy contrast to the richness of the coconut and the savory spices of the curry base.
The Critical Assembly: Protecting the Texture
Assembly is where most people lose the “crunch.” When you’re ready to serve, slice the chicken thighs into thick strips. Use a very sharp knife and a gentle sawing motion. If you press down too hard with a dull blade, you’ll tear the skin away from the meat, ruining the presentation and the texture.
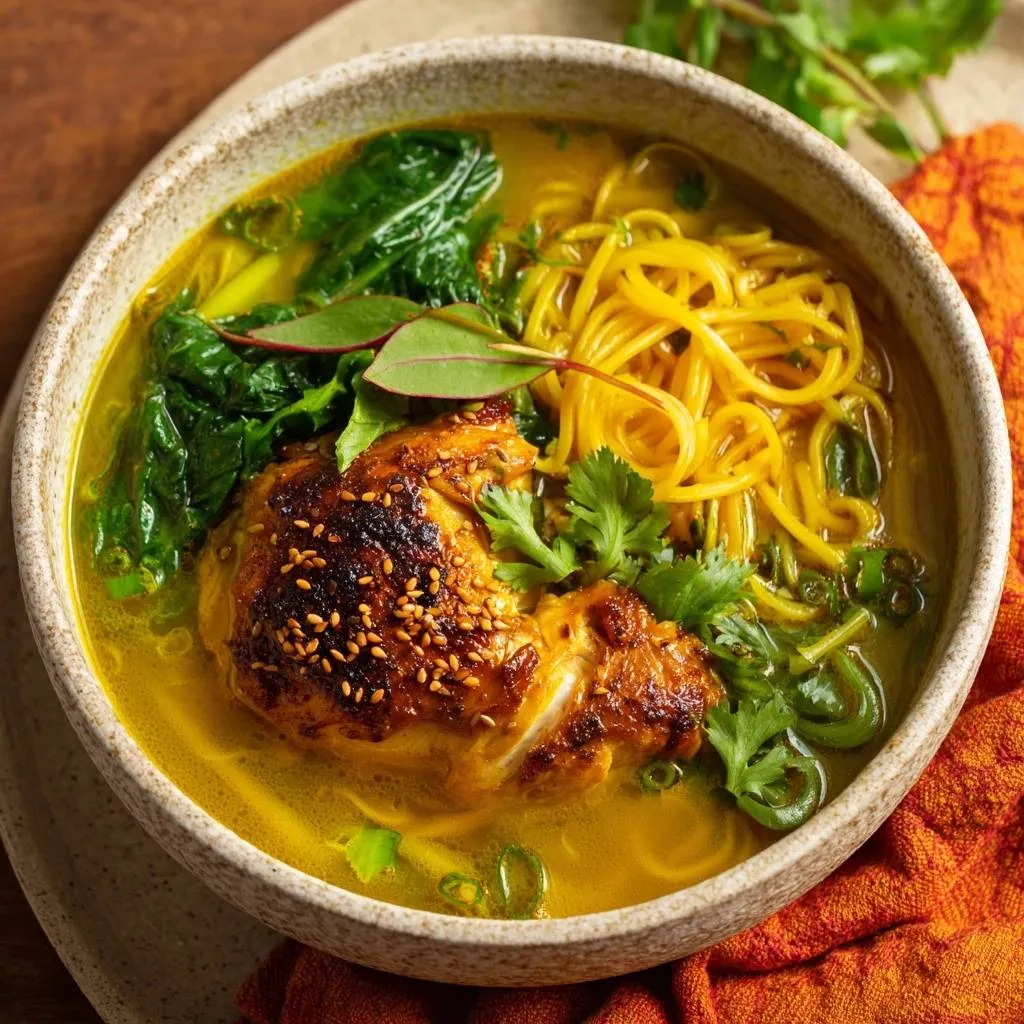
Place the chicken strips carefully on top of the noodles. The goal is to have the chicken sitting on an “island” of noodles and spinach so the skin stays entirely above the broth line. This prevents the liquid from soaking into the crust. You want the bottom of the meat to stay juicy in the soup while the top remains perfectly dry and crispy.
Flavor Variations and Ingredient Swaps
If you want to change things up, you can easily adapt this recipe. For a seafood version, seared shrimp works beautifully, though you’ll miss out on the crispy skin element. If you prefer a vegetarian-friendly base, firm tofu can be pan-seared until the edges are golden and used as the protein instead of chicken.
Adjusting the heat is also simple. If you want more fire without changing the vibrant yellow color, add a few sliced bird’s eye chilies at the very end. If you find the red curry paste too spicy, you can reduce it and increase the yellow curry powder to keep the flavor deep and earthy without the extra kick.
Troubleshooting Your Curry Noodle Soup
If your broth feels too thin, you can let it simmer for a few extra minutes to reduce, or whisk in a small cornstarch slurry for an instant fix. However, usually, the starch from the noodles is enough to give it body. If the broth tastes too salty, don’t panic—a squeeze of extra lime juice or a splash more coconut milk will balance it out perfectly.
The most common issue is mushy noodles. To avoid this, always check the package instructions and aim for the shortest recommended time. Remember that the noodles will continue to soften slightly as they sit in the hot broth, so “al dente” is your best friend here. If your skin isn’t crispy, it’s likely because the pan wasn’t hot enough or you didn’t pat the chicken dry enough before cooking.
Expert Tips for Professional Presentation
For a restaurant-quality look, go heavy on the “mountain of herbs.” Thai basil and cilantro provide a fresh, aromatic hit that cuts through the heavy fats of the dish. Always tear or chop them at the very last second. If you prep them too early, they’ll bruise and turn black, losing their vibrant flavor and aesthetic appeal.
The lime wedge isn’t just a garnish; it’s a functional tool. The citric acid is essential for “waking up” the spices and cutting through the richness of the coconut milk. Encourage your guests to squeeze the lime over the chicken and into the broth right before they take their first bite for the best flavor experience.
Make-Ahead Strategies and Storage
If you’re planning for leftovers, store the components separately. Keep the broth in one container and the chicken in another. If you store them together, the chicken will become completely soft, and the noodles will drink up all the soup, leaving you with a thick paste the next day.
To reheat, bring the broth to a simmer on the stove. For the chicken, avoid the microwave, as it will make the skin rubbery. Instead, pop the chicken strips into an air fryer or a hot oven for a few minutes. This will restore the “crunch barrier” and make the chicken taste just as fresh as the day you made it.
Frequently Asked Questions
Can I use chicken breast instead of thighs?
You can, but it’s much riskier. Chicken breast dries out very quickly, especially with the long searing time required to get the skin crispy. Thighs have more fat and connective tissue, which keeps them juicy and flavorful even under high heat. If you must use breasts, keep a close eye on the internal temperature to avoid a woody texture.
What if I can’t find Thai Basil?
Thai Basil has a distinct licorice-like flavor that is hard to replicate perfectly. However, if you can’t find it, a mix of regular Italian basil and a few fresh mint leaves is a great backup. It provides a similar herbal brightness that complements the coconut and curry flavors well.
Is there a substitute for fish sauce?
If you don’t have fish sauce, you can use soy sauce as a substitute. Use the same amount, but keep in mind that soy sauce lacks the specific fermented depth of fish sauce. You might want to add an extra pinch of salt or a finely minced anchovy to the sautéing aromatics to mimic that savory umami punch.
How do I make this spicier without changing the color?
The best way to ramp up the heat without turning the soup red is to use fresh chilies. Sliced bird’s eye chilies or serranos added as a garnish will provide a clean, sharp heat. You can also add a pinch of white pepper to the broth, which adds a subtle, throat-warming spice that doesn’t affect the golden hue.
How long will the leftovers stay fresh?
When stored separately, the broth will stay fresh in the refrigerator for up to 3 days. The chicken is best within 2 days to maintain its texture. I do not recommend freezing the assembled soup, as the coconut milk can grain and the noodles will lose their structural integrity upon thawing.
Why did my coconut milk separate?
Separation usually happens because the heat was too high. If the broth reaches a violent boil, the fat in the coconut milk detaches from the liquid. To fix this, you can try whisking it vigorously or adding a splash of room-temperature coconut milk to help re-emulsify the sauce, but the best cure is prevention by keeping the heat at a gentle simmer.
Golden Coconut Curry Noodle Soup
Course: Main CourseCuisine: Thai InspiredDifficulty: easy4
servings15
minutes25
minutes40
Minutes610
kcalThai Inspired
Ingredients
4 bone-in, skin-on chicken thighs
1 tablespoon vegetable oil
2 tablespoons yellow curry powder
1 teaspoon ground turmeric
1 tablespoon red curry paste (for depth of color and spice)
1 can (14 oz) full-fat coconut milk
2 cups chicken bone broth
1 tablespoon ginger, grated
2 cloves garlic, minced
1 tablespoon fish sauce
1 teaspoon brown sugar
10 oz fresh ramen or egg noodles
2 cups fresh baby spinach
1/2 cup fresh cilantro and Thai basil leaves
1 tablespoon toasted sesame seeds (for garnish)
1 lime, cut into wedges
Salt and cracked black pepper to taste
Directions
- Pat the chicken thighs extremely dry with paper towels. This is the first step to avoiding soggy skin. Season the skin side generously with salt, pepper, and a pinch of curry powder.
- Heat oil in a large heavy skillet over medium-high heat. Place chicken skin-side down. Do not move them for 8 to 10 minutes. This long, undisturbed sear renders the fat and creates a permanent “crunch barrier.” Flip and cook for 5 to 7 more minutes until the internal temperature reaches 165°F.
- Remove chicken to a wire rack, NOT a plate, to keep the skin from steaming. Sprinkle the skin immediately with toasted sesame seeds while the natural oils are still hot so they adhere.
- In a large pot, sauté the garlic and ginger in a teaspoon of the rendered chicken fat for 1 minute. Stir in the curry paste, remaining curry powder, and turmeric, toasting the spices for 30 seconds until fragrant.
- Pour in the coconut milk, chicken broth, fish sauce, and brown sugar. Bring to a gentle simmer. Do not boil vigorously or the coconut milk may separate.
- Add the noodles to the broth and cook according to package instructions (usually 2 to 3 minutes). In the last 30 seconds, stir in the fresh spinach just until wilted.
- Divide the noodles and broth into four deep bowls.
- The Critical Step: Slice the chicken thighs into thick strips using a very sharp knife to avoid tearing the skin. Place them carefully on top of the noodles so the crispy, sesame-crusted skin sits ABOVE the broth line. This prevents the skin from absorbing liquid and losing its texture.
- Garnish with a mountain of fresh cilantro, basil, and a squeeze of lime. Serve immediately while the contrast between the hot broth and crunchy chicken is at its peak.
Notes
- To maintain the ‘crunch barrier,’ always rest the cooked chicken on a wire rack rather than a plate to prevent steaming. Ensure the skin sits above the broth line when serving to keep it from getting soggy.