Imagine plunging a sturdy tortilla chip into a mountain of vibrant toppings, only to pull back a dripping, watery mess. We’ve all been there at the office potluck or the backyard barbecue, staring at a “weeping” dip that looks more like soup than a snack. A truly great taco dip should be a structural marvel, offering a clean, creamy break in every single scoop.
The secret to a professional-grade appetizer isn’t just about the spices you use; it’s about moisture management. By focusing on an “Anti-Soggy Bottom” philosophy, you can create a centerpiece that stays firm and delicious from the first whistle to the final play. This guide breaks down the physics of layering to ensure your dip remains stable and impressive for hours.
Expertise in the kitchen often comes down to one simple rule: temperature control. If you take away nothing else today, remember that adding warm meat to a cold dairy base is the fastest way to ruin your texture. I’ll show you exactly how to prep each component so they live in perfect, non-runny harmony.
The Structural Integrity of a Perfect Layered Dip
Building a layered dip is a lot like engineering a small building. You need a solid foundation that can support the weight of the “floors” above it without buckling or leaking. Most traditional recipes fail because they ignore moisture migration, which is just a fancy way of saying the liquid from the salsa and meat seeps down and turns the cream cheese into a puddle.
To achieve a dip that stays firm for over four hours on a buffet table, you must prioritize ingredient density. We want thick, bound layers rather than loose, watery ones. This requires a bit of patience during the prep phase, but the result is a dip you can actually slice into if you wanted to.
Temperature plays a massive role in this structural success. When dairy is hit with heat, the fats begin to separate and the emulsion breaks. By ensuring every layer is room temperature or cooler before assembly, you maintain the “set” of the cream cheese, providing the necessary friction to hold those heavy toppings in place.
Essential Components for the Loaded Layered Taco Dip
Your shopping list is your first line of defense against a soggy dip. When you’re at the grocery store, reach for the leanest ground beef available, ideally 90/10 or 93/7. While fat equals flavor in a burger, in a layered dip, excess grease becomes an orange oil slick that pools at the bottom of your glass dish.
The dairy base requires full-fat cream cheese for the best results. While low-fat versions are fine for a morning bagel, they lack the saturated fat content needed to provide structural “set” when mixed with sour cream. You want a base that feels heavy and substantial, not airy or whipped.
Don’t forget the cheese! Sharp cheddar provides a punchy flavor that cuts through the richness of the cream. Grating your own cheese from a block is always better because pre-shredded varieties are coated in potato starch, which can sometimes create a grainy mouthfeel in cold applications.
Selecting the Right Salsa and Seasoning
Salsa is the primary culprit behind watery dips. For this recipe, you need a “thick-style” or “chunky” salsa rather than a thin, blended restaurant-style version. Even then, we’re going to strain it to ensure only the flavorful solids make it into our creamy base layer.
When it comes to taco seasoning, look for brands that don’t list cornstarch as the very first ingredient. While a little starch helps the seasoning stick to the meat, too much can create a slimy texture once the meat cools. A high-quality, spice-forward blend ensures the beef tastes bold without adding unnecessary bulk.
The Importance of High-Moisture Produce Management
Roma tomatoes are the unsung heroes of the produce aisle for this specific dish. They have a much lower seed-to-flesh ratio than beefsteak or vine-ripened tomatoes. This means less “jelly” and water entering your dip, which keeps the top layer looking fresh and vibrant rather than wilted.
Green onions and black olives add the necessary salty, earthy accents that round out the flavor profile. However, even these need a little attention. Olives sitting in brine are moisture bombs, so they must be drained and dried thoroughly before they ever touch the cheese.
Phase One: Preparing the Seasoned Beef Base
Start by browning your lean beef over medium heat. You’re looking for a deep, rich brown color—this is the Maillard reaction in action, and it’s where all your savory flavor lives. Once the meat is fully cooked, don’t just tip the pan; pour the meat into a colander to drain every drop of rendered fat.
Return the “dry” meat to the skillet and add your taco seasoning and water. Here is the trick: simmer the mixture until the water has completely evaporated. You want the meat to look coated and glossy, but there should be no standing liquid in the bottom of the pan. This ensures the seasoning stays on the beef instead of running into the cream layer.
The Critical Cooling Period
This is the step where most home cooks get impatient, but it’s the most important 20 minutes of the entire process. You must let the seasoned meat cool completely to room temperature. If you spread hot beef over a cream cheese base, the heat will melt the dairy, creating a soupy mess that no amount of chilling can fix.
If you’re in a rush, spread the cooked meat out in a thin layer on a large baking sheet. This increases the surface area and allows the heat to escape much faster than it would in a deep bowl. You can even pop the tray in the fridge for 10 minutes to flash-cool it. Just make sure it’s stone-cold to the touch before you start layering.
Phase Two: Engineering the Moisture-Lock Base
While the meat cools, it’s time to build your foundation. Beat the softened cream cheese and sour cream together until the mixture is completely smooth and free of lumps. Using a hand mixer is much more effective than a spatula here, as it aerates the base just enough to make it scoopable without losing its density.
Now, take that thick-style salsa and pour it into a fine-mesh strainer. Let the excess liquid drip away for a minute, then fold the remaining chunky solids into the cream mixture. This gives you that beautiful reddish tint and all the tomato-chili flavor without the water that usually ruins the bottom of the dish.
Achieving the Perfect Spreadable Consistency
When you’re ready to assemble, use a sturdy offset spatula or the back of a large spoon. Spread the cream mixture firmly into the bottom of your glass dish. You want to press it down to eliminate any air pockets, as these are the spots where moisture likes to collect and hide.
Create a perfectly flat, even surface. This isn’t just for aesthetics; an even base ensures that every guest gets the same ratio of cream to meat to toppings. Think of it as the “slab” of your dip house—it needs to be level and solid.
Phase Three: The Strategic Layering Sequence
Most people put the meat directly on the cream, but we’re using the “Barrier Method.” Take your first cup of shredded cheddar and sprinkle it directly over the cream base. This layer of cheese acts as a waterproof seal, preventing any residual moisture from the meat from soaking into the dairy below.
Once the cheese barrier is down, layer your cooled taco meat on top. By placing the cheese in the middle, you’ve created a structural buffer that keeps the layers distinct and the colors bright. It’s a small change that makes a massive difference in the final texture.
Visual Presentation and Edge-Loading
If you’re using a glass dish, you want those layers to pop. Use a technique called “edge-loading” by concentrating a bit more of the meat and cheese around the perimeter of the dish. This creates that “skyscraper” look where every layer is clearly visible from the side.
Distribute the remaining cheese over the meat to lock everything in place. This second layer of cheese acts as a “glue” for your fresh toppings, ensuring that the tomatoes and onions don’t just slide off the meat when someone takes a big scoop.
Phase Four: Prepping and Applying Dry Toppings
The final layer is where the “Anti-Soggy” mission reaches its peak. After dicing your Roma tomatoes, place them on a double layer of paper towels. Press down firmly with another paper towel to wick away all the internal juice. You’ll be surprised at how much liquid comes out of even a “dry” tomato.
Repeat this process with your sliced olives and even the green onions if they were recently washed. By applying “dry” produce to the top of the dip, you prevent the toppings from wilting and keep the cheese underneath from getting damp. Scatter them evenly, and your masterpiece is complete.
Troubleshooting Common Taco Dip Failures
If you notice a little liquid pooling at the edge of your dish after an hour, don’t panic. This usually happens if the salsa wasn’t strained enough. You can easily “wick” this away by carefully tucking the corner of a clean paper towel into the edge of the dish to absorb the moisture before it spreads.
Room temperature is the enemy of dairy stability. If your party is outdoors or in a very warm room, the cream cheese will naturally soften. To combat this, keep the dip in the fridge until the very moment you’re ready to serve. A cold dip is a firm dip.
Flavor Variations and Ingredient Swaps
If you want a spicy kick, you can add diced pickled jalapeños to the top layer. Just remember the golden rule: drain them and pat them dry! The vinegar brine from the jar will break down the cheese layers if you aren’t careful. You could also swap the taco seasoning for a smoky chipotle powder for a deeper, earthier flavor.
For those who prefer a lighter profile, you can use ground turkey instead of beef. Since turkey is naturally leaner, you might not need to drain it as aggressively, but you should still follow the “simmer until dry” method to ensure the seasoning is concentrated and the moisture is gone.
Make-Ahead Strategies and Storage Logistics
You can absolutely make this dip up to 24 hours in advance, which makes it perfect for busy hosting schedules. The key is to wait until the last minute to add the fresh tomatoes and onions. Store the base layers (cream, cheese, and meat) tightly wrapped in plastic wrap in the fridge.
When wrapping the dip, try to press the plastic wrap gently against the surface of the cheese to prevent air from drying it out. Never freeze this dip! The cellular structure of the sour cream and cream cheese will break upon thawing, resulting in a grainy, separated texture that is impossible to fix.
The Best Vehicles: Choosing the Right Chips
A dip this thick requires a sturdy vessel. Standard thin “restaurant-style” chips will snap under the weight of these layers. Look for “scoop-shaped” chips or thick-cut yellow corn tortillas that can handle the heavy lifting. They provide a satisfying crunch that stands up to the creamy base.
If you want a lower-carb option, thick-cut bell pepper “chips” are a fantastic alternative. Simply cut a large bell pepper into wide wedges. They are naturally sturdy, offer a great crunch, and the sweetness of the pepper complements the salty taco seasoning perfectly.
Expert Tips for Large-Scale Party Service
When feeding a crowd of 50 or more, it’s better to make two medium-sized 9×13 glass pans rather than one giant deep bowl. Deep bowls make it hard for guests to get all the layers in one scoop, and the bottom layers often get crushed under the weight. Two pans also allow you to keep one in the fridge while the first one is being enjoyed.
For outdoor events, you can keep the dip chilled by placing your serving dish inside a slightly larger tray filled with crushed ice. This creates a makeshift cold-well that keeps the dairy base firm and safe to eat for much longer, even on a warm summer afternoon.
Frequently Asked Questions
Why is my taco dip watery at the bottom?
Water at the bottom is usually caused by two things: not straining the salsa and adding the meat while it’s still warm. The heat from the meat melts the cream cheese, while the liquid in the salsa eventually seeps through the layers. Always strain your salsa and let your meat cool to room temperature before assembly.
Can I use ground turkey instead of beef?
Yes, ground turkey works great! Just be aware that turkey has less natural fat, so it can dry out quickly. Make sure to simmer it with the seasoning and water until the liquid is just gone, but don’t overcook it to the point of being crumbly. The flavor will be slightly milder, so you might want an extra teaspoon of taco seasoning.
How long can the dip sit out safely?
According to standard food safety guidelines, dairy-based dips should not sit out at room temperature for more than two hours. If the temperature is above 90°F (like at an outdoor picnic), that time drops to one hour. To keep it out longer, use the ice-bath method mentioned above.
What is the best way to soften cream cheese quickly?
The best way is to leave it on the counter for about an hour. If you’re in a hurry, you can take it out of the foil wrapper and microwave it on 50% power in 15-second intervals. Be careful not to melt it; you just want it soft enough to beat into a smooth consistency with the sour cream.
Can I add guacamole as a layer?
You can, but be careful! Guacamole is very high in moisture and browns quickly when exposed to air. If you insist on a guac layer, place it between the cream cheese base and the meat, and make sure to add a squeeze of lime juice to help slow down the browning process. Use the cheese “barrier” on both sides of the guacamole to keep it contained.
Loaded Layered Taco Dip
Course: AppetizerCuisine: Mexican-AmericanDifficulty: easy10
servings15
minutes10
minutes25
MinutesMexican-American
Ingredients
1 pound lean ground beef
2 tablespoons taco seasoning
1/4 cup water
16 ounces cream cheese, softened
1 cup sour cream
1/2 cup thick-style salsa (strained of excess liquid)
2 cups shredded sharp cheddar cheese
1 cup diced Roma tomatoes (seeded)
1/2 cup sliced black olives
1/2 cup sliced green onions
Directions
- Brown the ground beef in a skillet over medium heat until fully cooked. To prevent sogginess, drain the fat completely in a colander. Return the meat to the skillet, add taco seasoning and 1/4 cup water. Simmer until the water has evaporated entirely and the meat is “dry” but seasoned. Transfer the meat to a bowl and let it cool completely to room temperature. Adding hot meat to the cream base causes the dairy to break and become watery.
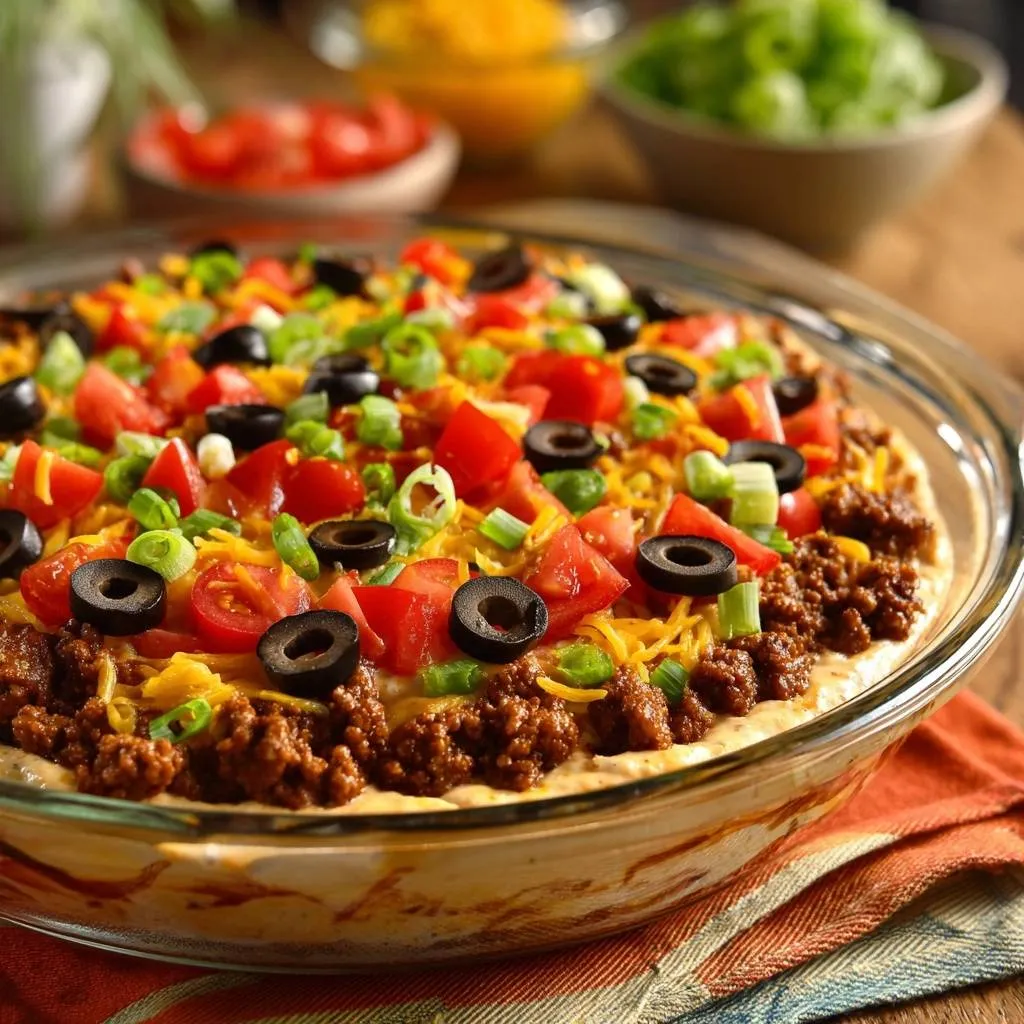
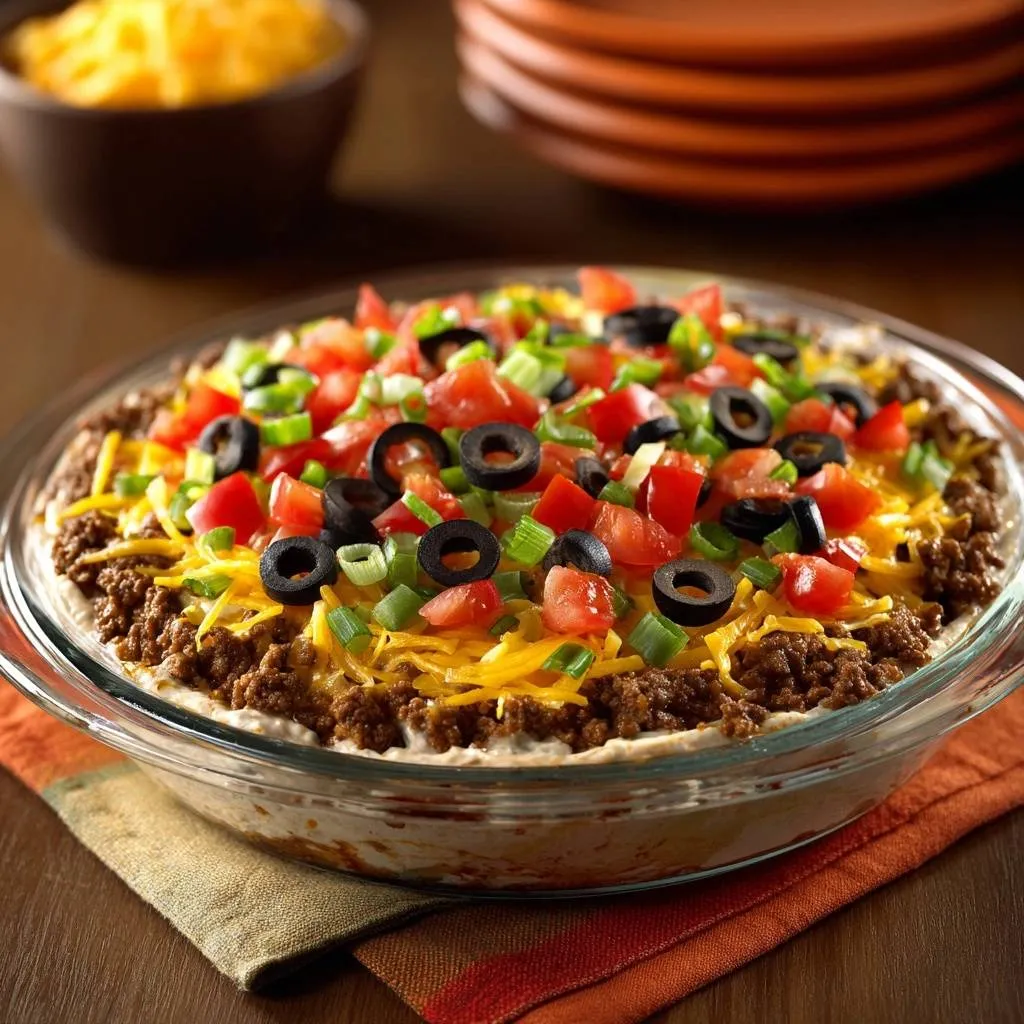
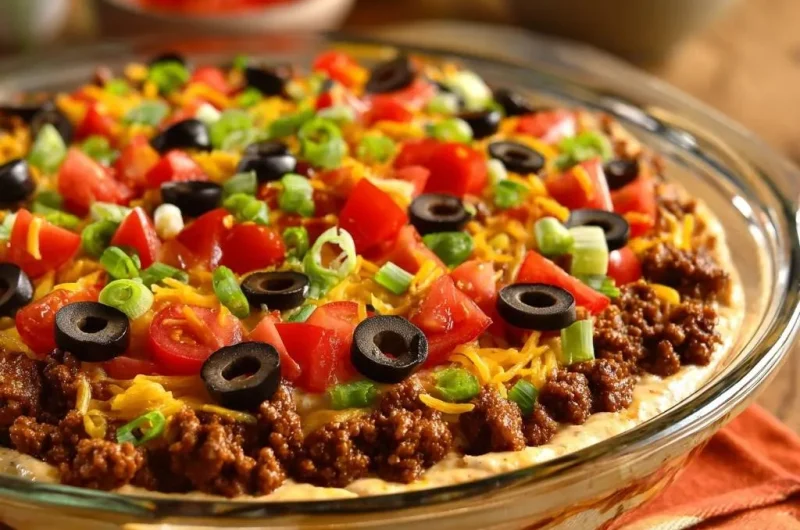
- In a medium bowl, beat the softened cream cheese, sour cream, and the strained salsa together until smooth. The salsa adds the reddish tint seen in the base layers of the image while the cream cheese provides the structural integrity to prevent sagging.
- Spread this thick cream mixture firmly into the bottom of a glass pie plate or shallow dish, smoothing the top to create a flat surface.
- Sprinkle 1 cup of the shredded cheddar cheese directly over the cream base. This acts as a secondary moisture barrier.
- Layer the cooled taco meat over the cheese. For the visual style shown in the image, concentrate the meat around the edges and lightly across the center.
- Top with the remaining 1 cup of cheddar cheese.
- Prepare the fresh toppings: Dice the tomatoes and place them on a paper towel, patting them firmly to remove all internal juice. Scatter the dry tomatoes, black olives, and green onions over the top.
- Serve immediately with sturdy tortilla chips or chill for 30 minutes to allow the layers to set further.
Notes
- Cooling the meat to room temperature is critical to prevent the dairy base from breaking and becoming watery.