Most grain bowls suffer from a fatal flaw: the “mush factor.” You’ve likely experienced it before—a pile of soggy vegetables sitting on top of gummy, over-boiled grains that lack any distinct texture. It’s a disappointing result for a dish that should feel vibrant and energizing. This Roasted Mediterranean Farro Bowl solves that crisis by focusing on thermal control and specific grain preparation.
The secret lies in treating your farro like risotto and your vegetables like a high-heat stir-fry. By toasting the grains before adding liquid, you create a barrier that keeps them “al dente.” Meanwhile, roasting the vegetables at a blistering 425°F ensures they caramelize and char rather than steaming in their own juices. The result is a bowl defined by earthy, charred, and herbaceous flavors that actually has a bite to it.
I’ve found that the key to success is managing moisture at every stage. If you let the vegetables crowd the pan, they’ll release water and turn into a soft puree. However, if you give them space and high heat, the natural sugars in the peppers and onions transform into something sweet and savory. This isn’t just a salad; it’s a masterclass in texture management.
The Anatomy of a Perfect Grain Bowl
A truly great grain bowl requires a sturdy foundation, and farro is the undisputed heavyweight champion for this task. As an ancient wheat grain, farro offers a nutty flavor and a complex nutritional profile rich in fiber and protein. Unlike rice or quinoa, which can easily disintegrate, farro maintains its structural integrity even when tossed with heavy roasted vegetables.
To get that restaurant-quality finish, we rely on the Maillard reaction. This chemical reaction occurs when the proteins and sugars in your vegetables hit high heat, creating that beautiful brown crust and deep flavor. By roasting eggplant and peppers until they are slightly charred, you introduce a smoky element that balances the brightness of the fresh parsley and the acidity of the tomatoes.
Selecting the Right Farro Variety
When you’re at the grocery store, you’ll likely see three types of farro: whole, semi-pearled, and pearled. Whole farro contains the entire grain husk and requires an overnight soak, while semi-pearled has part of the bran removed. For this recipe, I recommend pearled farro because it cooks in about 20 to 30 minutes without needing a soak.
Even though it’s “pearled,” it still retains a fantastic chewy exterior. It’s the perfect middle ground for a weeknight dinner. If you accidentally buy whole farro, just remember you’ll need to add about 20 minutes to your simmering time and likely an extra half-cup of broth to get it tender.
Vegetable Selection for Maximum Caramelization
Eggplant, bell peppers, and cherry tomatoes are the stars here because they react beautifully to high heat. Eggplant acts like a sponge, soaking up the olive oil and oregano before softening into a creamy interior. Keeping the skin on is vital; it provides a pop of purple color and prevents the cubes from falling apart during the roasting process.
Cherry tomatoes are the “secret sauce” of this bowl. At 425°F, their skins eventually reach a “burst point,” releasing concentrated, jammy juices onto the sheet pan. When you fold the farro into these vegetables later, those juices act as a natural dressing that ties the whole dish together without needing extra ingredients.
Essential Components for the Mediterranean Base
Quality ingredients make a massive difference when the list is this short. I always use vegetable broth instead of plain water to cook the farro. As the grain absorbs the liquid, it pulls in all those savory, aromatic notes from the broth, ensuring the base of your bowl is just as flavorful as the toppings.
For the herbs, we use a two-step approach. Dried oregano is heat-stable, so it goes into the oven with the vegetables to infuse the oil. Fresh parsley, on the other hand, is delicate. We save that for the very end so its bright, peppery flavor doesn’t get muted by the heat of the oven.
The Role of High-Smoke Point Fats
Extra virgin olive oil is the primary fat in Mediterranean cooking for a reason. While some worry about its smoke point, a high-quality EVOO is perfectly stable at 425°F for the duration of this roast. It serves as a vehicle for flavor, carrying the essence of the dried herbs deep into the flesh of the eggplant and peppers.
Beyond flavor, the oil is functional. In the saucepan, it coats each grain of farro, creating a “hydrophobic barrier.” This prevents the starch from gelatinizing too quickly once the broth hits the pan. If you skip the oil-toasting step, you’re much more likely to end up with a sticky, gummy mess.
Step-by-Step: Achieving the Al Dente Crunch
The “Toasting Phase” is where the magic happens. You’ll start by heating a tablespoon of oil and adding the dry farro. Don’t walk away! Stir it frequently for about 3 to 5 minutes. You’re looking for a distinct nutty aroma—it’ll smell almost like popcorn—and the grains should turn a shade darker. This step is non-negotiable if you want that “al dente” crunch.
Once you add the broth, the pan will hiss and steam. Bring it to a rolling boil, then immediately drop the heat to low. You want a very gentle simmer. If the heat is too high, the liquid will evaporate before the center of the grain is cooked, leaving you with farro that’s hard and stuck to the bottom of your pot.
After about 15 to 20 minutes, check the liquid. If it’s gone, you’re ready for the most important part: the rest. Turn off the heat, keep the lid on, and walk away for 5 minutes. This allows the moisture to redistribute evenly through the grains, making them plump and tender while remaining completely separate from one another.
Precision Roasting for Concentrated Flavor
While the farro simmers, focus on your sheet pan. Arrange your eggplant, peppers, and onions so they aren’t overlapping. If you crowd the pan, the moisture escaping the vegetables gets trapped, creating steam. Steam leads to mush. You want the dry heat of the oven to hit every surface of the vegetable to create those browned, caramelized edges.
Keep an eye on the cherry tomatoes. You’ll know they’re ready when the skins shrivel and a few of them pop open. That liquid gold on the bottom of the pan is packed with flavor. When the timer goes off, use a spatula to scrape every bit of that charred goodness into your farro bowl. It’s the best part of the dish!
The Steam-Rest Method for Grains
Think of resting your farro like resting a steak. When the grains finish boiling, the outsides are much wetter than the insides. By letting them sit undisturbed with the lid on, you’re allowing that residual steam to finish the cooking process gently. This prevents the grain husks from breaking, which is exactly how you avoid that dreaded mushy texture.
Once the five minutes are up, use a fork to fluff the grains. They should tumble off the fork easily. If they’re sticking together in clumps, they might need another minute of resting or a lighter touch with the fork. The goal is individual grains that feel firm to the tooth but tender to the tongue.
Troubleshooting Common Texture Issues
If your farro is still unpleasantly crunchy after the broth is gone, don’t panic. Simply add two tablespoons of hot water, put the lid back on, and simmer on the lowest setting for another 5 minutes. The age of the grain can affect how much water it absorbs, so older farro sometimes needs a little extra hydration to soften up.
On the flip side, if your vegetables look pale and watery instead of browned, your oven might be running cool. You can fix this by moving the tray to the top rack and turning on the broiler for the last 2 minutes. Just stay close and watch it carefully—the line between “perfectly charred” and “burnt” is very thin under the broiler!
Flavor Variations and Ingredient Swaps
This bowl is incredibly versatile. If you want more protein, toss a can of rinsed chickpeas onto the sheet pan with the vegetables. They’ll get crispy and nutty in the oven. You can also swap the eggplant for zucchini, but keep in mind that zucchini has a higher water content. Cut the zucchini into larger chunks so it doesn’t turn to mush before the peppers are done.
For a seasonal twist, try using cubed butternut squash and red kale in the autumn. The kale gets wonderfully crispy at 425°F, almost like seaweed snacks. In the spring, asparagus and snap peas make a great substitute for the peppers, though they only need about 10 to 12 minutes in the oven.
Infusing Aromatics into the Broth
If you want to take this to the next level, treat your cooking liquid like a tea. Drop a bay leaf, a few smashed garlic cloves, or even a long strip of lemon peel into the broth while the farro simmers. These aromatics infuse the grain with a subtle complexity that makes the whole dish taste like it came from a high-end Mediterranean bistro.
Just remember to fish out the bay leaf and lemon peel before you fluff the grains. The garlic will likely be soft enough to mash right into the farro, adding a sweet, mellow garlic flavor throughout the base of your bowl.
Strategic Meal Prep and Storage
Farro is a meal prep superstar. Unlike quinoa, which can get soggy after a day in the fridge, farro stays chewy and delicious for up to four days. I actually think the flavors improve on day two as the grains continue to soak up the juices from the roasted vegetables. It’s the perfect “make-ahead” lunch for a busy work week.
When reheating, I recommend using a skillet over medium heat with a tiny splash of water. This helps revive the texture of the vegetables without making them rubbery in the microwave. However, I don’t recommend freezing this specific dish. Roasted eggplant has a delicate cell structure that breaks down when frozen, resulting in a watery mess once thawed.
Pairing Suggestions for a Complete Meal
While this bowl is filling on its own, a few simple additions can make it feel like a feast. A sharp lemon-tahini dressing—made by whisking tahini, lemon juice, and a splash of water—adds a creamy richness that cuts through the earthy farro. Alternatively, a side of cooling cucumber yogurt provides a refreshing contrast to the warm, roasted vegetables.
The acidity is key here. Since the roasted vegetables are quite sweet and the farro is earthy, you need something bright to wake up the palate. A simple squeeze of fresh lemon juice right before serving is often all you need to make the flavors sing.
Expert Tips for Presentation
We eat with our eyes first, so don’t just dump everything into a bowl. Start with a bed of the fluffed farro, then pile the roasted vegetables in the center. Make sure those charred cherry tomatoes are visible on top. The contrast between the golden-brown grains and the deep purples and reds of the vegetables is stunning.
Finally, don’t be shy with the parsley. Add it at the very last second so it stays vibrant green. If you add it while the vegetables are piping hot, it will wilt and turn dark. That fresh, raw herb flavor provides the necessary “lift” to the cooked components of the dish.
Optimizing Your Oven Rack Position
For the best results, place your oven rack in the upper third of the oven. Heat rises, and the top of the oven is usually the hottest spot. This helps the vegetables brown quickly on the outside before the insides become too soft. It also leaves plenty of room on the stovetop for your farro to simmer undisturbed.
Scaling the Recipe for Large Groups
If you’re cooking for a crowd, you can easily double this recipe, but you must use two separate sheet pans. If you try to cram double the vegetables onto one pan, they will definitely steam. Rotate the pans halfway through the roasting time (top to bottom) to ensure they both get even heat and that perfect Mediterranean char.
How do I store leftovers and does this freeze well?
You can store this farro bowl in an airtight container in the refrigerator for up to 4 days. It’s one of the few grain bowls that actually tastes great cold or at room temperature. I do not recommend freezing this dish. The roasted eggplant and bell peppers contain a lot of water, and the freezing process breaks down their cell walls, making them unpleasantly mushy and watery once they are thawed and reheated.
Why is my farro still hard after the cooking time is up?
This usually happens for two reasons: the heat was too high or the farro is old. If the heat is too high, the broth evaporates before the grain can soften. If your farro is still crunchy, add 1/4 cup of broth or water, cover it tightly, and simmer on low for another 5-10 minutes. Always make sure you are using “pearled” farro for this specific cook time; “whole” farro takes much longer and requires soaking.
Can I use a different grain like quinoa or brown rice?
Yes, you can substitute other grains, but you’ll need to adjust the liquid ratios and cook times. Quinoa usually needs a 1:2 ratio and only takes 15 minutes, while brown rice takes about 45 minutes. Keep in mind that quinoa is much softer, so you won’t get that same “al dente” chewy texture that makes farro so special in this Mediterranean context.
What can I use if I don’t have vegetable broth?
If you don’t have broth, you can use water, but you’ll need to increase the salt and perhaps add a few more aromatics to the pot. Adding a clove of smashed garlic, a bay leaf, or even a teaspoon of nutritional yeast to the water can help mimic the depth of flavor that broth provides. Avoid using just plain water if possible, as the grains will taste a bit flat.
My vegetables are soggy instead of roasted. What went wrong?
Soggy vegetables are almost always caused by “crowding the pan.” When vegetables are too close together, the steam they release gets trapped between them instead of evaporating. This steams the food rather than roasting it. Next time, use a larger sheet pan or split the vegetables between two pans. Also, ensure your oven is fully preheated to 425°F before the tray goes in.
Is there a way to make this dish more filling?
To add more staying power, I recommend adding a protein source. Roasted chickpeas are a fantastic plant-based option; just toss them on the sheet pan with the vegetables. You could also top the finished bowl with a dollop of hummus, some crumbled feta cheese, or a handful of toasted pine nuts for extra healthy fats and texture.
Roasted Mediterranean Farro Bowl
Course: Main CourseCuisine: MediterraneanDifficulty: easy4
servings15
minutes30
minutes45
MinutesMediterranean
Ingredients
1 cup pearled farro
2 cups vegetable broth
1 medium eggplant, cubed (keep skin on for color)
1 red bell pepper, chopped into 1-inch pieces
1 yellow bell pepper, chopped into 1-inch pieces
1 red onion, chopped into large chunks
1 cup cherry tomatoes
4 tablespoons olive oil, divided
1 teaspoon dried oregano
1/2 teaspoon salt
1/4 teaspoon black pepper
1/2 cup fresh parsley, finely chopped
Directions
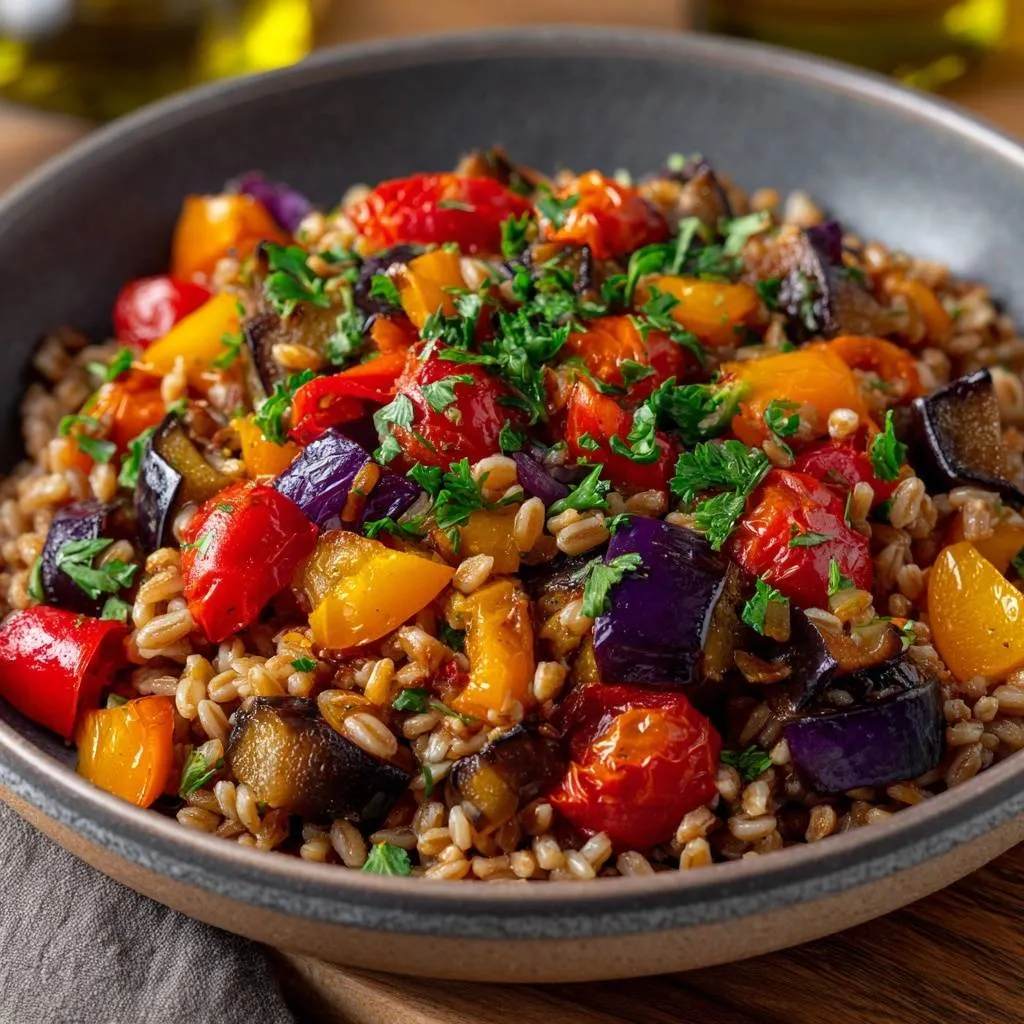
- Preheat your oven to 425°F (220°C). This high temperature is the secret to preventing soggy vegetables; it evaporates moisture instantly to create the browned, flavorful edges seen in the image.
- Place the cubed eggplant, bell peppers, red onion, and cherry tomatoes on a large sheet pan. Toss with 3 tablespoons of olive oil, oregano, salt, and pepper. Spread them in a single layer-crowding the pan will cause them to steam rather than roast.
- Roast for 20 to 25 minutes, tossing halfway through, until the eggplant is tender and the tomato skins have burst and slightly charred.
- While vegetables roast, address the grain texture. Heat the remaining 1 tablespoon of olive oil in a medium saucepan over medium heat. Add the dry farro and toast it for 3-5 minutes, stirring frequently, until it smells nutty and looks golden. This oil-toasting creates a hydrophobic barrier that prevents the grains from absorbing excess water and becoming gummy.
- Add the vegetable broth to the saucepan and bring to a rolling boil. Immediately reduce heat to low, cover tightly, and simmer for 15 to 20 minutes.
- Once the liquid is fully absorbed, remove from heat. Keep the lid on and let the farro sit undisturbed for 5 minutes. This allows the residual steam to finish the cooking process gently without breaking the grain husks.
- Fluff the farro with a fork. The grains should be individual and have a firm, pasta-like “al dente” bite.
- Transfer the farro to a large bowl. Gently fold in the roasted vegetables and any concentrated juices from the roasting pan.
- Top generously with fresh chopped parsley to provide the bright green finish shown in the image. Serve warm.
Notes
- To prevent soggy vegetables, ensure they are spread in a single layer on the sheet pan. Toasting the dry farro in olive oil before simmering is essential for achieving a firm, nutty texture.