
There’s something undeniably comforting and satisfying about a warm, cheesy slider. They’re perfect for game days, parties, easy weeknight dinners, or just a cozy snack. But let’s be honest, achieving truly juicy pulled beef for those sliders can sometimes feel like chasing a culinary unicorn. All too often, the beef turns out disappointingly dry, leaving you with a sad, crumbly filling instead of the moist, flavorful star it should be.
I know the struggle! For years, my pulled beef attempts would swing between okay and downright parched. I tried different cuts, various cooking times, you name it. But eventually, I discovered the simple, foolproof secret to keeping beef incredibly tender and juicy every single time you make pulled beef sliders. It’s all about how you treat the beef after it cooks. This recipe shares that exact trick, ensuring you get perfectly moist, melt-in-your-mouth pulled beef loaded with flavor, nestled under a gooey blanket of melted cheese on a soft slider bun.
Get ready to ditch dry beef forever and embrace the joy of these truly spectacular melted cheese pulled beef sliders. They are about to become your new favorite comfort food!
Why These Pulled Beef Sliders Will Steal Your Heart
Beyond just solving the dry beef dilemma, these sliders offer a whole host of reasons to fall in love:
- Unbelievably Juicy Beef: Seriously, the secret technique is a game-changer. No more dry, tough pulled beef!
- Effortless Main Course or Party Appetizer: While they require some passive cooking time in the oven, the hands-on prep is minimal, making them surprisingly easy.
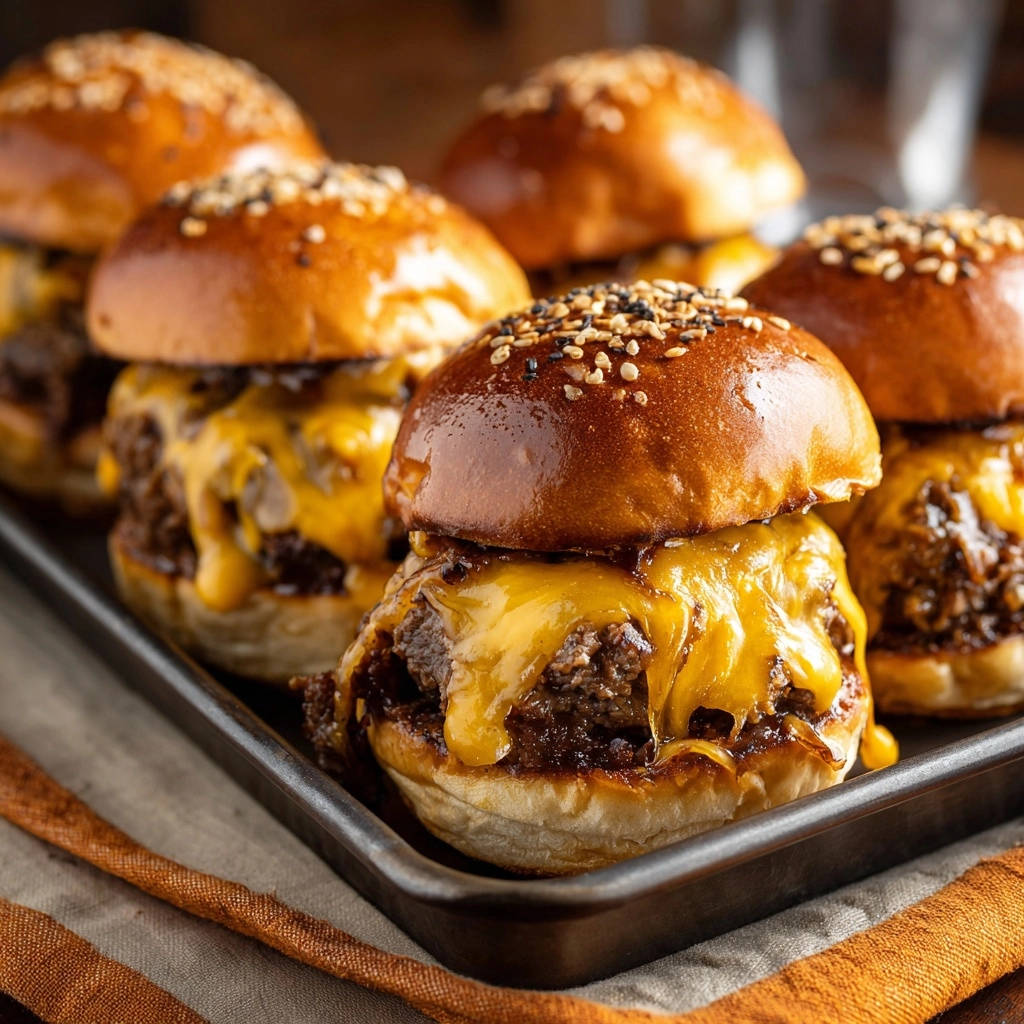
- Cheesy Perfection: The combination of sharp cheddar and melty mozzarella (or provolone) creates a gooey, irresistible topping that perfectly complements the savory beef.
- Crowd-Pleasing: Who doesn’t love a slider? These are guaranteed to disappear fast at any gathering.
- Great Make-Ahead Potential: The pulled beef can be cooked and stored ahead of time, making assembly quick when you’re ready to serve.
- Comfort Food at Its Finest: Warm bread, tender beef, gooey cheese… it hits all the right notes for ultimate comfort.
Gathering Your Ingredients for Juicy Pulled Beef Sliders
To embark on this journey to juicy pulled beef slider bliss, you’ll need a few key components. Each ingredient plays an important role in building the deep, savory flavor and ensuring that perfect, tender texture.
The foundation of our pulled beef is a substantial beef chuck roast, typically around 3 pounds. Chuck roast is ideal for this kind of slow cooking because it’s rich in connective tissue and marbling. Over a long, low braise, this tissue breaks down into gelatin, which is what makes the meat so incredibly tender and helps keep it moist. Look for a roast that has good marbling evenly distributed throughout.
To build a foundational flavor base, we incorporate simple, aromatic vegetables: one large onion, roughly chopped, and about four cloves of garlic, minced. As these cook slowly with the beef, they release their sweet and pungent compounds, infusing the cooking liquid and the meat with delicious depth without overpowering the beefy flavor.
The crucial liquid component is four cups of beef broth. This isn’t just for flavor; it’s the braising medium that provides the moisture needed to break down the tough fibers in the chuck roast and keeps the meat submerged and hydrated during the long cooking process. Using beef broth adds another layer of savory richness compared to just water.
Simple seasonings are all that’s needed to enhance the natural flavors of the beef and aromatics: one teaspoon of salt and one and a half teaspoons of black pepper. These bring out the best in the other ingredients and season the meat throughout the slow cook.
For the carriers of our glorious beef and cheese, you’ll need slider buns. The number will depend on the size of your buns and how generously you pile the beef, but a standard pack is usually sufficient for 3 pounds of beef. Soft, slightly sweet slider rolls work wonderfully, providing a tender contrast to the rich filling.
Finally, the crowning glory: cheese! We use a combination for the best balance of flavor and meltiness. Eight ounces of shredded cheddar cheese provides that classic sharp, savory taste, while four ounces of shredded mozzarella or provolone cheese adds incredible stretch and gooeyness when melted. This blend gives you both flavor punch and satisfying cheese pull.
Here’s the full list to get you ready:
- 3 pounds beef chuck roast
- 1 large onion, roughly chopped
- 4 cloves garlic, minced
- 4 cups beef broth
- 1 teaspoon salt
- 1 ½ teaspoon black pepper
- Slider buns (one package, quantity depends on size)
- 8 ounces shredded cheddar cheese
- 4 ounces shredded mozzarella or provolone cheese
Crafting Your Juicy Pulled Beef Sliders: Step-by-Step
Making these amazing sliders is straightforward, especially once you understand the simple techniques that guarantee a juicy result. Follow these steps, paying special attention to the key moisture-locking phases, and you’ll be rewarded with perfection.
- Begin by preheating your oven. Set it to a moderate 325 degrees Fahrenheit (160 degrees Celsius). This lower temperature is essential for the slow braising process that tenderizes the beef beautifully.
- Select a large, heavy-bottomed pot that’s oven-safe and has a tight-fitting lid. A Dutch oven is ideal because it distributes heat evenly and retains moisture well. Place the beef chuck roast inside the pot.
- Scatter the roughly chopped onion and minced garlic around the beef roast. These aromatics will slowly release their flavors into the cooking liquid as the beef braises.
- Pour the beef broth over the roast. This is a crucial step for moisture! Ensure the liquid comes up at least halfway, but ideally about two-thirds of the way up the sides of the roast. If the broth doesn’t quite reach, you can add a little extra beef broth or even hot water to achieve the right level. This ensures the meat stays hydrated as it cooks.
- Season the contents of the pot by adding the teaspoon of salt and the one and a half teaspoons of black pepper directly into the liquid. The salt will help season the meat as it cooks.
- Place the lid tightly on the pot. A good seal is important to trap the steam and moisture inside, which aids in the tenderizing process and keeps the meat from drying out.
- Carefully transfer the covered pot to your preheated 325°F oven.
- Let the beef braise for a good amount of time – typically 3 to 4 hours. The exact time will depend on the size and thickness of your roast and your oven’s calibration. The beef is ready when it is incredibly fork-tender, meaning you can easily shred it with just a fork. You can check periodically after 3 hours by carefully lifting the lid and gently testing the meat. While the lid helps retain moisture, if the liquid level seems to have significantly dropped, you can carefully add a little hot water or broth to maintain the level around the meat, though this is often unnecessary with a tight lid.
- Once the beef is perfectly tender, carefully remove the heavy pot from the hot oven.
- Now for the secret step that makes all the difference for juicy pulled beef! Do NOT drain the liquid yet. Using two forks, begin shredding the beef directly inside the pot, letting the shredded meat fall back into the savory cooking juices. Once shredded, let the beef sit submerged in those flavorful juices for at least 15 to 20 minutes before you do anything else. This resting period allows the meat fibers to relax and reabsorb a significant amount of the liquid, resulting in incredibly moist and flavorful pulled beef. This is the single most crucial step to prevent dryness!
- While the beef is happily soaking up those juices, preheat your oven or broiler for the final assembly stage. Set your oven to 375 degrees Fahrenheit (190 degrees Celsius). If you plan to use the broiler for faster browning, get that ready, but keep a very close eye on it!
- Prepare your slider buns. Using a serrated knife, carefully slice the entire package of buns horizontally, keeping the tops and bottoms together if possible for easy handling.
- Place the bottom halves of the sliced buns in a single layer on a large baking sheet. If needed, you can line the baking sheet with parchment paper for easier cleanup.
- Using tongs, lift the shredded beef from the pot. Allow any excess liquid to drain off slightly back into the pot, but make sure the beef remains very moist. Pile a generous amount of the juicy pulled beef onto each bottom bun. Don’t be shy!
- Now, layer on the cheese. Top the beef with a generous amount of the shredded cheddar cheese, followed by the shredded mozzarella or provolone. Get full coverage to ensure maximum melted cheese goodness.
- Place the top halves of the slider buns on top of the cheese-covered beef.
- Transfer the baking sheet to the preheated 375°F oven. Bake for 10 to 15 minutes, or until the cheese is completely melted and bubbly and the tops of the buns are lightly golden and toasted. If you opt to use the broiler, this step will be much faster, typically only 2 to 3 minutes. Watch them constantly under the broiler to prevent burning – cheese melts and bread toasts very quickly under direct heat!
- As soon as the cheese is melted and bubbly and the buns are just right, remove the sliders from the oven. Serve them immediately while everything is wonderfully hot and gooey.
Tips for Making the Best Pulled Beef Sliders
While the recipe steps are straightforward, a few extra tips can elevate your sliders from great to absolutely unforgettable:
- Choose Your Chuck Wisely: Look for a roast with good marbling. This fat renders down during cooking, adding flavor and contributing to moisture. Avoid cuts that look too lean.
- Don’t Skimp on the Liquid: Ensuring the beef is partially submerged in broth during the initial braise is non-negotiable. This is slow, wet cooking, which is key to breaking down connective tissues.
- The REST IS BEST: I’ll say it again because it’s that important: shredding the beef in the liquid and letting it rest there is the secret weapon against dryness. This isn’t like resting a steak; it’s about the pulled fibers soaking up that rich broth.
- Season the Liquid: The salt and pepper in the broth season the meat from the inside out as it cooks. You can adjust seasoning later, but starting with a flavorful liquid is key.
- Cheese Blend Magic: The cheddar provides flavor, and the mozzarella/provolone provides the stretch. Feel free to experiment with other good melting cheeses like Gruyère or Monterey Jack, but this classic blend is a winner.
- Bun Selection: While any slider bun works, slightly sweet Hawaiian rolls or soft potato rolls are fantastic choices. Their slight sweetness pairs wonderfully with the savory beef.
- Make Ahead: You can cook and shred the beef up to 3-4 days in advance. Store it in the cooking liquid in an airtight container in the refrigerator. Reheat gently on the stovetop or in the microwave before assembling the sliders. This makes party prep a breeze!
What to Serve With Your Sliders
These savory sliders are quite substantial, but they pair beautifully with a variety of side dishes. For a classic comfort food pairing, consider serving them alongside some crispy potato wedges or maybe some extra cheesy mac and cheese. If you’re looking for something lighter to balance the richness, a simple green salad or creamy coleslaw works well. For a heartier spread, our creamy potato salad is always a hit, or perhaps some classic pot roast inspired sides like roasted vegetables.
Your Melted Cheese Pulled Beef Slider Questions Answered (FAQ)
Got questions about making the perfect juicy pulled beef sliders? Here are some common inquiries and their answers:
Can I use a different cut of beef?
Beef chuck roast is highly recommended for this recipe because of its fat content and connective tissue, which breaks down into tender, juicy strands during the long, slow braise. Other cuts like brisket or round roast can be used for pulled beef, but they may require adjustments to cooking time or liquid levels, and chuck roast generally yields the most consistently tender and moist results with this method.
Can I make pulled beef in a slow cooker or Instant Pot instead of the oven?
Yes, you absolutely can make pulled beef in other appliances! However, the liquid amounts and cooking times will differ significantly. This specific recipe is calibrated for oven braising in a Dutch oven, focusing on that method for guaranteed juiciness. If you prefer to use a slow cooker or Instant Pot, I recommend seeking out a recipe specifically developed for those appliances to ensure the best results, as pressure cooking or slow cooking might require less initial liquid or different cooking temperatures/times.
My beef isn’t shredding easily after 3-4 hours. What went wrong?
Beef chuck needs time for the connective tissues to fully break down. If it’s not shredding easily, it simply needs more time cooking in the liquid. Cover the pot and return it to the oven, checking it again in 30-minute increments until it pulls apart easily with forks. Factors like the starting temperature of the roast, the exact thickness, and your oven’s accuracy can all affect the total cooking time.
Is the “rest in liquid” step really necessary?
Yes, absolutely! This is the golden ticket to preventing dry pulled beef. Meat fibers contract and release juices as they cook. When the meat cools slightly and rests submerged in the cooking liquid, the fibers relax and reabsorb those flavorful juices like a sponge. Skipping this step is the most common reason pulled beef turns out dry. Don’t skip it!
Can I add BBQ sauce or other flavors?
This recipe focuses on the pure, savory flavor of the beef, aromatics, and broth, crowned with melted cheese. You can certainly add flavors! After shredding and resting the beef, you could toss it with your favorite BBQ sauce for juicy BBQ beef sliders, or perhaps a simple au jus from the cooking liquid for a French Dip style slider. The base pulled beef from this method is a perfect canvas for various flavors, just add them after the resting step.
How do I store and reheat leftovers?
If you have leftover pulled beef, store it in an airtight container along with some of the cooking liquid to keep it moist. It will last for 3-4 days in the refrigerator. To reheat, you can warm the beef gently on the stovetop over low heat, adding a little more broth or water if needed, or microwave it in short bursts. For leftover assembled sliders, reheating can be tricky as the buns can dry out. Your best bet is to reheat them gently wrapped in foil in a low oven (around 300°F / 150°C) until warmed through, or disassemble and reheat the components separately.
Enjoy Your Homemade Melted Cheese Pulled Beef Sliders!
You are now equipped with the secret to making truly juicy, tender, and flavorful pulled beef for these irresistible sliders. Forget dry, disappointing beef forever! These melted cheese pulled beef sliders are the epitome of comfort food – warm, savory, cheesy, and utterly satisfying. They’re easy enough for a cozy family dinner but impressive enough to share with friends.
Give this recipe a try, experience the difference that little resting step makes, and get ready for rave reviews. Don’t forget to leave a comment below and let me know how yours turned out, or if you tried any fun variations! Happy cooking!
Melted Cheese Pulled Beef Sliders

Ingredients
- 3 pounds beef chuck roast
- 1 large onion roughly chopped
- 4 cloves garlic minced
- 4 cups beef broth
- 1 teaspoon salt
- 1 2 teaspoon black pepper
- Slider buns
- 8 ounces shredded cheddar cheese
- 4 ounces shredded mozzarella or provolone cheese
Directions
- Preheat oven to 325 degrees Fahrenheit.
- Place the beef chuck roast in a large Dutch oven or oven-safe pot with a lid.
- Add the chopped onion and minced garlic around the roast.
- Pour the beef broth over the roast. The liquid should come up at least halfway, ideally two thirds up the sides of the roast. This is key for moisture.
- Add the salt and pepper to the pot.
- Cover the pot tightly with a lid.
- Transfer the covered pot to the preheated oven.
- Bake for 3 to 4 hours, or until the beef is fork-tender and shreds easily. Check periodically to ensure liquid level remains adequate; add a little hot water or broth if needed, but generally the lid keeps moisture in.
- Carefully remove the pot from the oven.
- Using forks, shred the beef directly in the cooking liquid. Let the shredded beef sit in the juices for at least 15 20 minutes before assembling the sliders. This is the most crucial step to absorb moisture and prevent dryness.
- While the beef sits, preheat your broiler or oven to 375 degrees Fahrenheit.
- Slice slider buns horizontally.
- Place the bottom halves of the buns on a baking sheet.
- Use tongs to lift the shredded beef from the pot, letting excess liquid drain slightly but keeping it moist. Pile a generous amount of beef onto each bottom bun.
- Top the beef with the shredded cheddar and mozzarella or provolone cheeses.
- Place the top halves of the buns on top.
- Bake in the preheated oven for 10 15 minutes, or until the cheese is melted and bubbly and the buns are lightly toasted. If using a broiler, watch carefully as they can brown very quickly, about 2 3 minutes.
- Serve immediately while the cheese is hot and gooey.