As a seasoned baker, few things are as frustrating as pulling beautiful Mini Jam Tarts from the oven, only to find their delicate crusts have succumbed to a soggy fate. I’ve been there, and I’ve finally cracked the code to ensure that never happens again.
This recipe transforms a common baking challenge into a triumph, delivering perfectly crisp, buttery tart shells every single time. Get ready to bake irresistible Mini Jam Tarts that are truly perfect from top to bottom, making them ideal for any occasion.
Why This Mini Jam Tarts Recipe Will Be Your Go-To
Say Goodbye to Soggy Bottoms!
This recipe employs a strategic blind-baking step and smart dough preparation that creates an impermeable barrier against your jam’s moisture. It ensures your tart crusts remain wonderfully crisp, never turning soft or gummy, even hours after baking.
Effortless Elegance for Any Occasion
These individual mini tarts are inherently elegant and require minimal fuss. They’re perfect for dessert platters, afternoon tea, school lunches, or simply as a delightful sweet treat to brighten your day.
Customizable Sweetness: Your Jam, Your Way
While raspberry and cherry jam are classic choices, this versatile recipe welcomes any fruit preserve you love. Feel free to experiment with apricot, strawberry, or even a spicy pepper jelly for a unique twist.
The Simple Ingredients Behind Perfect Mini Jam Tarts
Achieving a truly exceptional mini tart starts with understanding your ingredients. Quality and proper handling are key to that coveted flaky, tender crust and vibrant filling.
For the Flaky Pastry Base
All-purpose flour: This provides the necessary structure for our tart shells. Measure it precisely for consistent results.
Cold unsalted butter: This is non-negotiable for flakiness. Cold butter creates pockets of steam during baking, which separate the layers of dough, resulting in a tender, flaky texture.
Granulated sugar and salt: Sugar adds a touch of sweetness to the crust, balancing the tartness of the jam. Salt enhances all the flavors, making the pastry taste richer.
Ice water: Keeping the dough cold is crucial. Ice water helps prevent the butter from melting prematurely, preserving those vital flaky layers.
The Sweet Star: Choosing Your Jam
Fruit jam: Select a high-quality jam with a good fruit-to-sugar ratio. Raspberry or cherry are specified for their classic flavor and vibrant color, but any thick fruit jam works beautifully here.
Powdered sugar: This is purely for aesthetic appeal, providing a delicate, elegant finish. It also adds a final whisper of sweetness.
Tools for Tart-Making Success
Having the right tools makes the tart-making process smooth and enjoyable. You likely have most of these on hand already.
Large bowl: Essential for combining your dry ingredients and incorporating the butter.
Pastry blender or your fingertips: These are ideal for cutting cold butter into flour, ensuring proper incorporation without overworking the dough.
Plastic wrap: Crucial for chilling the dough, which allows the gluten to relax and butter to firm up.
Mini muffin tin: A 12-cup tin is perfect for shaping individual mini tarts. Lightly greasing it ensures easy release.
Rolling pin: For evenly rolling out the chilled dough to the correct thickness.
Round cookie cutter (approx. 2.5 inches): This size works perfectly for creating uniform dough circles that fit standard mini muffin cups.
Fork: Used for pricking the tart bottoms, a simple but vital step to prevent puffing and soggy crusts.
Wire rack: For cooling the baked tarts completely, allowing air circulation to maintain crispness.
Crafting Your Mini Jam Tarts: A Step-by-Step Journey
- Prepare the Dry Ingredients:
In a large bowl, whisk together the all-purpose flour, granulated sugar, and salt. This ensures all the dry ingredients are evenly distributed, leading to a consistent dough.
- Incorporate the Cold Butter:
Add the cold, small pieces of unsalted butter to your dry mixture. Using a pastry blender or your fingertips, quickly cut in the butter until the mixture resembles coarse crumbs, with some pea-sized butter pieces still visible. These butter pieces are crucial for creating flaky layers.
- Form and Chill the Dough:
Gradually add the ice water, one tablespoon at a time, mixing just until the dough comes together. Be careful not to overmix; overmixing develops gluten, leading to a tough crust. Form the dough into a flat disk, wrap it tightly in plastic wrap, and refrigerate for at least 30 minutes. Chilling allows the butter to firm up and the gluten to relax, making the dough easier to roll and preventing shrinkage.
- Preheat and Prepare the Muffin Tin:
While the dough chills, preheat your oven to 375 degrees Fahrenheit (190 degrees Celsius). Lightly grease a 12-cup mini muffin tin to ensure the tarts don’t stick after baking.
- Roll, Cut, and Shape the Dough:
On a lightly floured surface, roll out the chilled dough to an even 1/8-inch thickness. Use your 2.5-inch round cookie cutter to cut out circles. Gently press each dough circle into the cups of your prepared mini muffin tin, carefully shaping it to fit the contours and making sure the dough goes up the sides evenly.
- Crucial Step: Prick the Tart Bottoms (Preventing Soggy Crusts!):
This is a game-changer! Using a fork, prick the bottom of each tart crust several times. These small holes allow steam to escape during the initial baking, preventing the crust from puffing up and creating a perfectly flat, stable base for your jam. This is a key secret to avoiding soggy bottoms.
- Blind Bake the Tart Crusts:
Bake the empty tart crusts for 8 to 10 minutes, or until the edges are lightly golden and the crusts look set. This crucial “blind bake” step pre-bakes the crust, developing its structure and creating a barrier against the jam’s moisture, guaranteeing a crisp base.
- Fill with Jam:
Remove the tin from the oven. While the crusts are still warm from the blind bake, carefully fill each pre-baked crust with about 1 tablespoon of your chosen fruit jam. Don’t overfill, as the jam will bubble up during the final bake.
- Final Bake:
Return the Mini Jam Tarts to the oven and bake for another 10 to 12 minutes. The jam should be bubbly and the crusts golden brown. The bubbling jam indicates it’s heated through and slightly caramelized.
- Cool and Finish:
Let the tarts cool in the muffin tin for a few minutes after baking. This allows them to firm up slightly, making them easier to handle. Then, carefully transfer them to a wire rack to cool completely. Cooling on a rack ensures air circulates around the entire tart, preventing condensation that could lead to softness.
- Dust and Serve:
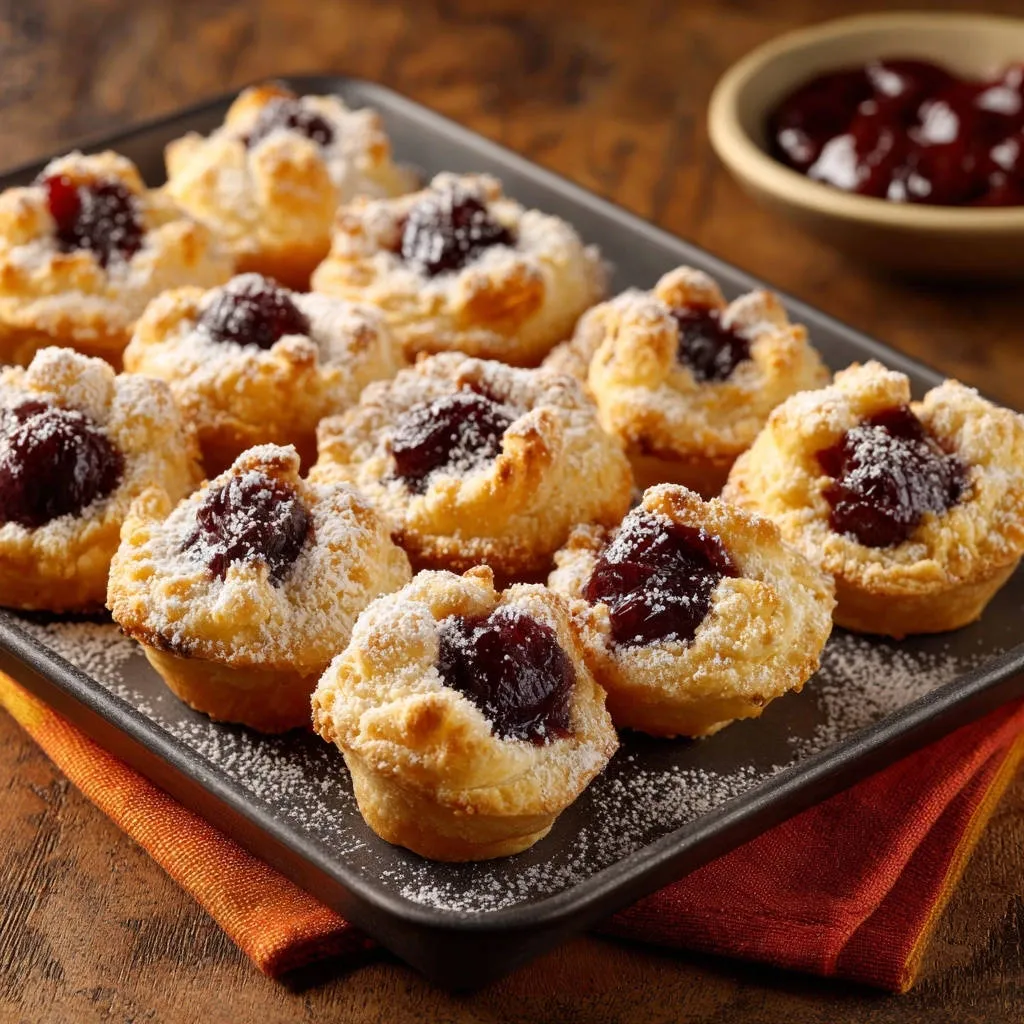
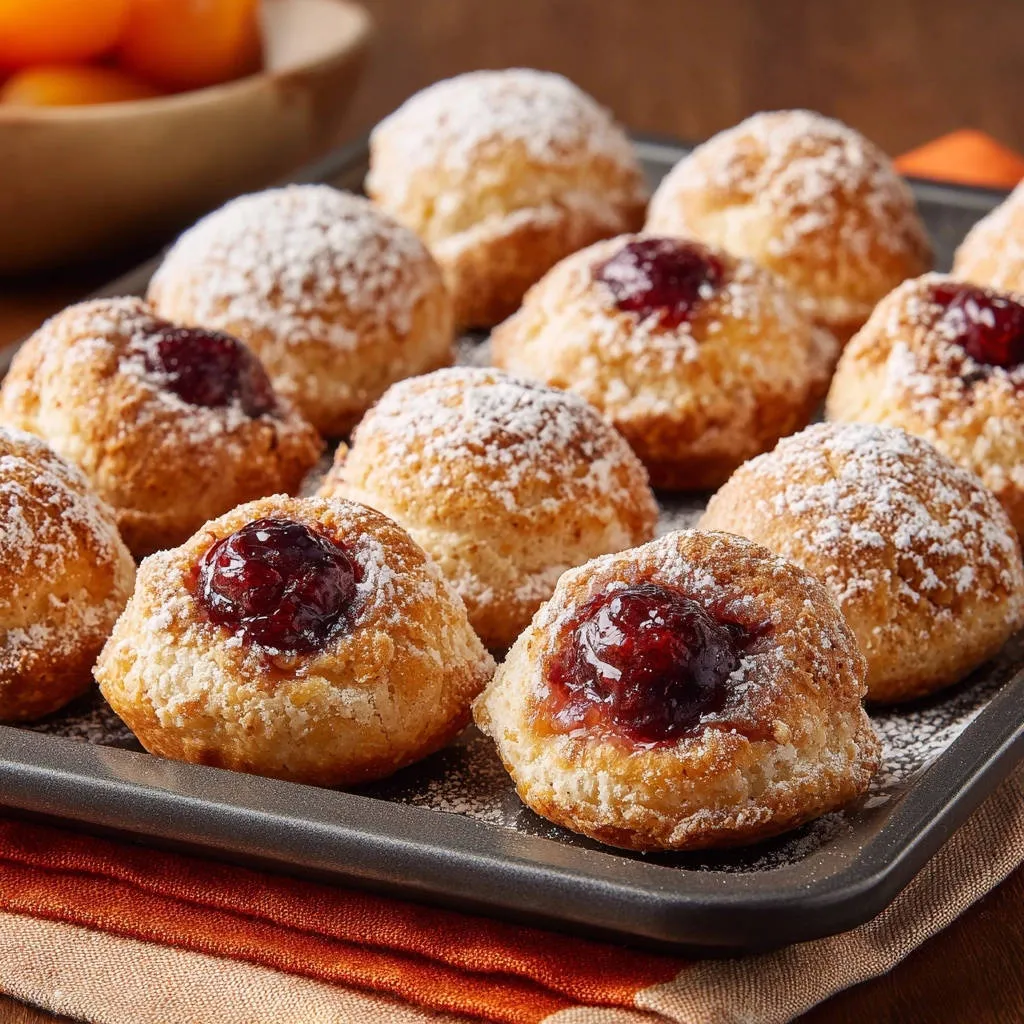
Once completely cooled, generously dust the Mini Jam Tarts with powdered sugar just before serving. This adds a beautiful, delicate finish and a touch of extra sweetness.
Chef’s Secrets: Elevating Your Mini Jam Tarts
Transforming a good recipe into a truly great one often comes down to small, impactful details. Here are a few expert tips for your Mini Jam Tarts.
The Power of Cold Butter
Always use butter that is ice cold, straight from the refrigerator, and cut into small pieces. You can even cube it and pop it in the freezer for 10 minutes before using.
The colder the butter, the less it will melt into the flour while you’re working, leading to a flakier crust. Large pieces of cold butter create steam pockets during baking, which results in those desirable layers.
Don’t Overmix Your Dough
Mix the dough only until it just comes together. Visible streaks of butter are perfectly fine, even desirable.
Overmixing develops gluten, which can make your tart crust tough and chewy instead of tender and flaky. Work quickly and handle the dough as little as possible.
Mastering the Blind Bake
The blind bake is non-negotiable for perfectly crisp bottoms. It creates a partially cooked barrier against the moist jam filling.
For an even crisper base, you can line the unbaked crusts with parchment paper and fill them with pie weights or dried beans during the blind bake. This helps hold their shape and further prevents puffing.
Achieving Uniform Tart Sizes
If you don’t have a cookie cutter, a drinking glass with an appropriate rim size works well. Aim for circles about 2.5 inches in diameter for standard mini muffin tins.
For extra consistency, lightly flour your cutter between each cut to prevent sticking.
Cooling for Crispness
Resist the urge to remove the tarts from the muffin tin too quickly. Letting them cool slightly in the tin allows them to set and firm up.
Always transfer to a wire rack to cool completely. This prevents steam from being trapped underneath, which could make the bottoms soggy after all your hard work.
Troubleshooting Common Mini Jam Tart Mishaps
Even expert bakers encounter challenges. Here’s how to navigate common issues with your Mini Jam Tarts.
My Tart Crusts Shrank!
Shrinkage often occurs if the dough wasn’t sufficiently chilled or if it was overworked. Ensure you chill your dough for at least 30 minutes (or longer) before rolling and shaping. Handle the dough minimally to keep it tender and reduce gluten development.
The Tarts Are Too Pale/Not Golden Enough
This can happen if your oven temperature is slightly off or if they didn’t bake long enough. Ensure your oven is accurately calibrated with an oven thermometer. You can extend the final baking time by a few minutes, watching closely for that lovely golden-brown hue on the crusts.
Still Getting Soggy Bottoms (What Went Wrong?)
The most common culprit is skipping or rushing the blind baking step. Ensure you blind bake until the crusts are visibly set and lightly golden. Also, verify that you pricked the bottoms thoroughly with a fork to allow steam to escape.
My Jam Overflowed During Baking
Overfilling the tart shells is the usual reason for overflow. Remember that jam bubbles and expands when heated. Stick to about 1 tablespoon per mini tart to prevent this sticky situation.
Your Mini Jam Tart Questions Answered
Can I use a different type of flour?
While all-purpose flour is recommended for its balance of protein and structure, you could experiment with a pastry flour for a more tender crust. Avoid bread flour, as its higher protein content would make the crust tough. For another delightful flour-based treat, consider making classic shortbread fingers.
How long do Mini Jam Tarts last and how should I store them?
Mini Jam Tarts are best enjoyed on the day they are baked for peak crispness. However, they will last for up to 2-3 days stored in an airtight container at room temperature. The crust may soften slightly over time.
Can I freeze Mini Jam Tarts?
Yes, you can freeze baked Mini Jam Tarts! Place cooled tarts in a single layer on a baking sheet to freeze solid, then transfer them to an airtight freezer-safe container or bag. Thaw at room temperature for a few hours. Reheating briefly in a warm oven can help crisp up the crust again.
What other fillings can I use besides jam?
The possibilities are endless! You could use lemon curd, chocolate ganache, a small dollop of cream cheese filling, or even a mini fruit compote. For another delightful fruit-filled dessert, you might enjoy these easy blueberry scones.
Is blind baking always necessary?
For a truly crisp bottom with a wet filling like jam, blind baking is highly recommended. It prevents the crust from becoming soggy. If you were using a completely dry filling, you might be able to skip it, but for these Mini Jam Tarts, it’s a critical step for success.
Serving Up Your Sweet Creations
These Mini Jam Tarts are delicious on their own, especially when freshly dusted with powdered sugar. For a delightful presentation, arrange them on a tiered dessert stand or a pretty platter.
Pair them with a cup of hot tea for an elegant afternoon treat, or serve them alongside a scoop of vanilla bean ice cream for a simple dessert. They also make a charming addition to any brunch spread or holiday cookie plate.
Ready to Bake Your Best Mini Jam Tarts Yet?
Now that you’re armed with all the secrets to a perfectly crisp crust and delicious jam filling, it’s time to get baking! These Mini Jam Tarts are more than just a dessert; they’re a testament to simple baking done right.
I can’t wait for you to experience the joy of biting into a truly perfect tart, free from any soggy disappointments. Share your creations and let us know your favorite jam fillings!

Mini Jam Tarts
Course: DessertCuisine: American CuisineDifficulty: easy4
12 tarts45
minutes20
minutes60
minutesAmerican Cuisine
Ingredients
1 and 1/2 cups all-purpose flour
1/2 cup cold unsalted butter, cut into small pieces
1/4 cup granulated sugar
1/4 teaspoon salt
2 to 3 tablespoons ice water
1/2 cup fruit jam, such as raspberry or cherry
Powdered sugar for dusting
Directions
- In a large bowl, whisk together the flour, granulated sugar, and salt.
- Add the cold butter pieces to the flour mixture. Using a pastry blender or your fingertips, cut in the butter until the mixture resembles coarse crumbs with some pea-sized butter pieces remaining.
- Gradually add the ice water, one tablespoon at a time, mixing until the dough just comes together. Be careful not to overmix. Form the dough into a disk, wrap it in plastic wrap, and refrigerate for at least 30 minutes.
- Preheat your oven to 375 degrees Fahrenheit. Lightly grease a 12-cup mini muffin tin.
- On a lightly floured surface, roll out the chilled dough to about 1/8-inch thickness. Use a round cookie cutter (about 2 and 1/2 inches in diameter) to cut out circles. Gently press each dough circle into the cups of the prepared mini muffin tin, shaping it to fit the contours.
- To prevent soggy bottoms: Using a fork, prick the bottom of each tart crust several times. This allows steam to escape during baking.
- Bake the empty tart crusts (blind bake) for 8 to 10 minutes, or until the edges are lightly golden and the crusts look set. This crucial step pre-bakes the crust, creating a barrier against the jam’s moisture.
- Remove the tin from the oven and carefully fill each pre-baked crust with about 1 tablespoon of your chosen fruit jam.
- Return the mini jam tarts to the oven and bake for another 10 to 12 minutes, or until the jam is bubbly and the crusts are golden brown.
- Let the tarts cool in the muffin tin for a few minutes before carefully transferring them to a wire rack to cool completely.
- Once cooled, dust generously with powdered sugar before serving.
Notes
- Key steps to prevent soggy bottoms are pricking crusts and blind baking.