Have you ever craved a dessert that’s rich, decadent, and utterly satisfying, but dreaded turning on the oven? This No-Bake Cookie Butter Dessert is your answer! This layered treat boasts a symphony of textures, from a buttery cookie crumb base to creamy, dreamy fillings. The secret? We’re using a simple “texture lock-in” method – freezing between layers to prevent any mushiness and ensure each bite is a heavenly experience. Get ready to fall in love with this easy, impressive dessert!
Why You’ll Love This No-Bake Dessert
This no-bake cookie butter dessert is more than just easy to make; it’s a crowd-pleaser with some serious advantages:
- No Oven Required: Perfect for hot days or when you just don’t feel like baking.
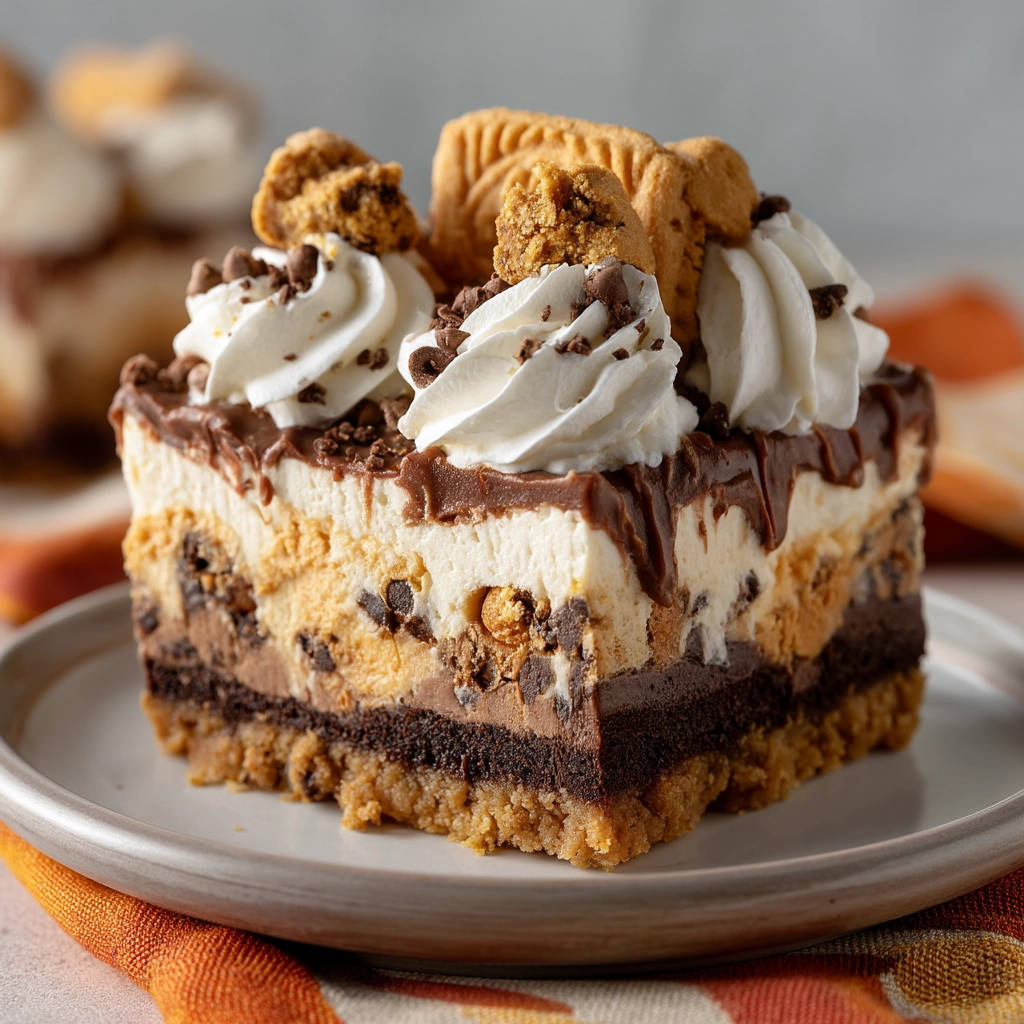
- Impressive Layers: The beautiful layers create a visually stunning dessert.
- Perfect Texture: The freezing technique ensures each layer holds its shape and offers a delightful contrast.
- Cookie Butter Bliss: The star ingredient, cookie butter, provides a unique, irresistible flavor.
- Customizable: Easily adapt the flavors to your liking with different toppings and variations.
Gathering Your Ingredients for No-Bake Cookie Butter Dessert
Before we dive into the magic, let’s gather the essential ingredients for this no-bake masterpiece. The key to this dessert is balancing the richness of the cookie butter with complimentary flavors and textures. We start with the crust, move to the creamy fillings, and end with a delightful garnish. This recipe offers a harmonious blend of sweetness and indulgence.
- For the Cookie Crust:
- 1 1/2 cups cookie crumbs (crushed cookie butter cookies): The foundation of our dessert! Cookie butter cookies provide the perfect flavor base, enhancing the cookie butter theme throughout. You can use store-bought or homemade.
- 1/2 cup unsalted butter, melted: This binds the cookie crumbs together, creating a solid, flavorful crust. Be sure to use unsalted butter to control the overall sweetness of the dessert.
- For the Creamy Layers:
- 8 ounces cream cheese, softened: This forms the base of our creamy filling, providing a tangy counterpoint to the sweetness of the cookie butter and chocolate. Make sure it’s softened to avoid lumps.
- 1 cup powdered sugar: This sweetens the cream cheese mixture and helps create a smooth, velvety texture.
- 1 teaspoon vanilla extract: A touch of vanilla enhances all the other flavors, adding a warm, comforting note.
- 1 cup heavy cream, divided: We use heavy cream in two ways: half is whipped into stiff peaks for a light and airy texture in the cream cheese base, and the other half is used to top the dessert with light, soft peaks before garnishing.
- 1/2 cup cookie butter, melted: The star of the show! Melted cookie butter adds a rich, caramelized flavor to one of the creamy layers.
- 1/4 cup chocolate syrup: For a touch of chocolatey goodness that complements the cookie butter perfectly. You could even use a homemade chocolate sauce for a richer flavor.
- For the Garnish:
- 1 cup whipped topping: Adds a light and airy finishing touch.
- Mini chocolate chips: For a pop of chocolate and visual appeal.
- Cookie butter cookies: To emphasize the main flavor and add a delightful crunch.
Crafting Your No-Bake Cookie Butter Dessert: Step-by-Step
Ready to create this decadent dessert? Don’t be intimidated! The process is simple and rewarding. The key to success lies in freezing each layer to achieve the perfect texture. This “texture lock-in” ensures each bite is a delight. Follow these steps, and you’ll be enjoying a slice of heaven in no time!
- Prepare the Cookie Crust: In a medium bowl, thoroughly combine the crushed cookie butter cookies and melted butter. The mixture should resemble wet sand. This ensures a uniform crust that won’t crumble easily. Press the mixture firmly and evenly into the bottom of an 8×8 inch baking dish. A flat-bottomed measuring cup or the back of a spoon can help you achieve an even surface.
- Create the Cream Cheese Base: In a large bowl, beat the softened cream cheese and powdered sugar together until smooth and creamy. Ensure there are no lumps for the best texture. Stir in the vanilla extract to enhance the overall flavor profile.
- Whip the Cream: In a separate bowl, whip 1/2 cup of the heavy cream until stiff peaks form. This step is crucial for creating a light and airy texture in the cream cheese layers. Be careful not to overwhip the cream, as it can turn grainy.
- Fold in the Whipped Cream: Gently fold the whipped cream into the cream cheese mixture. This creates a light and fluffy base for our flavored layers.
- Divide and Flavor: Divide the cream cheese mixture in half. To one half, add the melted cookie butter and mix until well combined, creating a luscious cookie butter cream. To the other half, add the chocolate syrup and mix until well combined, creating a rich chocolate cream.
- Layer the Chocolate: Spread the chocolate mixture evenly over the prepared cookie crust. This layer will be the first to set, so ensure it’s smooth and even. Freeze for 15 minutes to firm up. This is the first “texture lock-in” moment!
- Layer the Cookie Butter: Spread the cookie butter mixture evenly over the chilled chocolate layer. Again, ensure it’s smooth and even. Freeze for another 15 minutes to firm up. This second freeze is essential for creating distinct layers.
- Top with Cream: Top the dessert with the remaining 1/2 cup of heavy cream, whipped to soft peaks. The soft peaks will add a delightful creamy top to the dessert.
- Garnish and Freeze: Dollop the whipped topping over the cream layer. Garnish generously with mini chocolate chips and cookie butter cookies. Freeze for at least 2 hours before serving. This final freeze allows all the layers to meld together beautifully and ensures a perfect slice.
- Serve and Enjoy: Let the dessert soften slightly at room temperature before cutting into squares. This will make it easier to cut and enhance the creamy texture. Enjoy your masterpiece!
Tips for Perfect No-Bake Cookie Butter Dessert Every Time
Want to ensure your no-bake cookie butter dessert is a showstopper? Here are a few extra tips and tricks to elevate your creation:
- Softened Cream Cheese is Key: Make sure your cream cheese is properly softened to avoid lumps in the filling. Leaving it at room temperature for about 30 minutes usually does the trick.
- Don’t Skip the Freezing Steps: Freezing between each layer is absolutely crucial for achieving that perfect texture. It prevents the layers from blending together and ensures each bite is distinct.
- Cookie Crumb Consistency: Aim for a fine crumb when crushing the cookies for the crust. This will create a smoother, more cohesive base.
- Even Layers: Take your time when spreading each layer to ensure it’s even. This not only looks better but also ensures a consistent flavor in every bite.
- Alternative Garnishes: Feel free to get creative with your garnishes! Consider adding chopped nuts, a drizzle of melted chocolate, or a sprinkle of sea salt for extra flavor and texture.
- Make Ahead: This dessert is perfect for making ahead of time! You can assemble it up to 2 days in advance and store it in the freezer. Just be sure to wrap it well to prevent freezer burn.
What to Serve With No-Bake Cookie Butter Dessert
This no-bake cookie butter dessert is rich and satisfying on its own, but it also pairs well with a few complementary treats. Consider serving it with a scoop of vanilla ice cream or a dollop of lightly sweetened whipped cream. A cup of hot coffee or tea also makes a wonderful accompaniment. For a lighter option, fresh berries can add a touch of brightness and acidity to balance the richness of the dessert. If you’re looking for another easy caramel dessert, you might consider our Easy Caramel Nut Dessert Jars Recipe, though it doesn’t involve cookie butter.
Your No-Bake Cookie Butter Dessert Questions Answered (FAQ)
Can I use a different type of cookie for the crust?
Absolutely! While cookie butter cookies provide the best flavor synergy, you can use other types of cookies such as graham crackers, vanilla wafers, or even chocolate cookies. Just be sure to adjust the amount of butter accordingly to achieve the right consistency.
Can I make this dessert gluten-free?
Yes, you can easily make this dessert gluten-free by using gluten-free cookie butter cookies for the crust. Many brands offer delicious gluten-free alternatives that work perfectly in this recipe. Ensure all other ingredients are also certified gluten-free.
How long will this dessert last in the freezer?
Properly stored, this no-bake cookie butter dessert will last in the freezer for up to 2 months. Wrap it tightly in plastic wrap and then foil to prevent freezer burn.
Can I use regular sugar instead of powdered sugar?
Powdered sugar is recommended for its fine texture, which helps create a smooth and creamy filling. Using regular granulated sugar may result in a grainy texture. If you must substitute, use superfine sugar and ensure it is fully dissolved.
What can I use instead of chocolate syrup?
If you prefer a richer chocolate flavor, you can use melted chocolate instead of syrup. Use a high-quality dark chocolate, milk chocolate or white chocolate, depending on your preference. You can also use chocolate ganache. Another alternative is cocoa powder, although you may need to adjust the sugar accordingly.
Enjoy Your Homemade No-Bake Cookie Butter Dessert!
There you have it – a stunning No-Bake Cookie Butter Dessert that’s guaranteed to impress! With its layers of creamy goodness and perfectly balanced textures, this dessert is a true indulgence. Now it’s your turn to create this masterpiece. Give this recipe a try, and don’t forget to share your creations with us! Leave a comment below and let us know how it turned out. We love hearing from you!
No-Bake Layered Cookie Butter Dessert (Perfect Texture Lock-In)

Ingredients
- 1 1/2 cups cookie crumbs (crushed cookie butter cookies)
- 1/2 cup unsalted butter, melted
- 8 ounces cream cheese, softened
- 1 cup powdered sugar
- 1 teaspoon vanilla extract
- 1 cup heavy cream, divided
- 1/2 cup cookie butter, melted
- 1/4 cup chocolate syrup
- 1 cup whipped topping
- Mini chocolate chips for garnish
- Cookie butter cookies for garnish
Directions
- In a medium bowl, combine cookie crumbs and melted butter. Press into the bottom of an 8×8 inch baking dish to form the crust.
- In a large bowl, beat cream cheese and powdered sugar until smooth. Stir in vanilla extract.
- In a separate bowl, whip 1/2 cup heavy cream until stiff peaks form. Gently fold into the cream cheese mixture.
- Divide the cream cheese mixture in half. To one half, add melted cookie butter and mix until well combined. To the other half, add chocolate syrup and mix until well combined.
- Spread the chocolate mixture over the crust. Freeze for 15 minutes to firm.
- Spread the cookie butter mixture over the chocolate layer. Freeze for 15 minutes to firm.
- Top with remaining 1/2 cup of heavy cream (soft peaks) and dollops of whipped topping.
- Garnish with mini chocolate chips and cookie butter cookies.
- Freeze for at least 2 hours before serving. Let soften slightly before cutting into squares. The key is to freeze between each layer to achieve perfect texture.