Welcome back, fellow dessert lovers! If you’re anything like me, you appreciate a sweet treat that delivers on flavor without requiring you to turn on the oven. That’s where the magic of no-bake recipes comes in! Today, we’re diving into a classic combination that’s undeniably delicious: peanut butter, caramel, and chocolate. But these aren’t just any layered treats; we’re talking about making perfect No-Bake Peanut Caramel Bars that slice like a dream.
Have you ever spent time layering a beautiful dessert only to have it crumble or smear into a sticky mess when you try to cut it? It’s incredibly frustrating! I used to face this dilemma with layered bars all the time. But after much experimentation, I stumbled upon one simple trick that changed everything. Now, every single bar comes out of the pan with sharp, clean edges, making them look as impressive as they taste. Forget the mess; get ready for stunning, ready-to-share squares.
Why These No-Bake Peanut Caramel Bars Are a Keeper
There are so many reasons to fall in love with this recipe. Whether you’re a seasoned baker or just starting out, these bars offer a fantastic blend of ease and indulgence. They bring together classic flavors in a format that’s both simple to make and utterly satisfying.
- Effortless Elegance: No baking required means less time in a hot kitchen and a foolproof path to dessert success. Perfect for warmer months or when you just don’t feel like fussing with the oven.
- Flavor Powerhouse: The combination of salty peanuts, sweet caramel, rich chocolate, and creamy peanut butter is a match made in dessert heaven. It hits all the right notes!
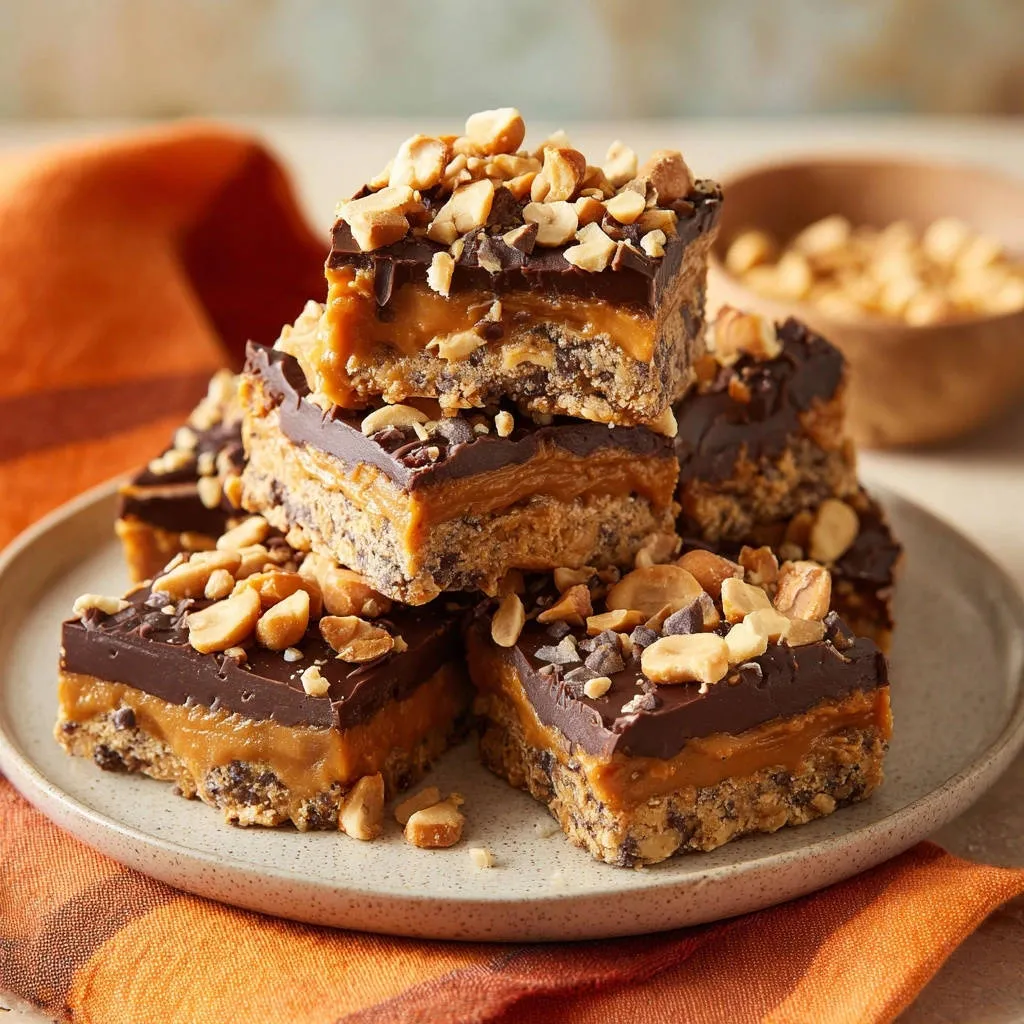
- Texture Contrast: You get the satisfying crunch of the base, the gooey pull of the caramel, the smooth richness of the chocolate, and the little bursts of nutty flavor from the peanuts on top.
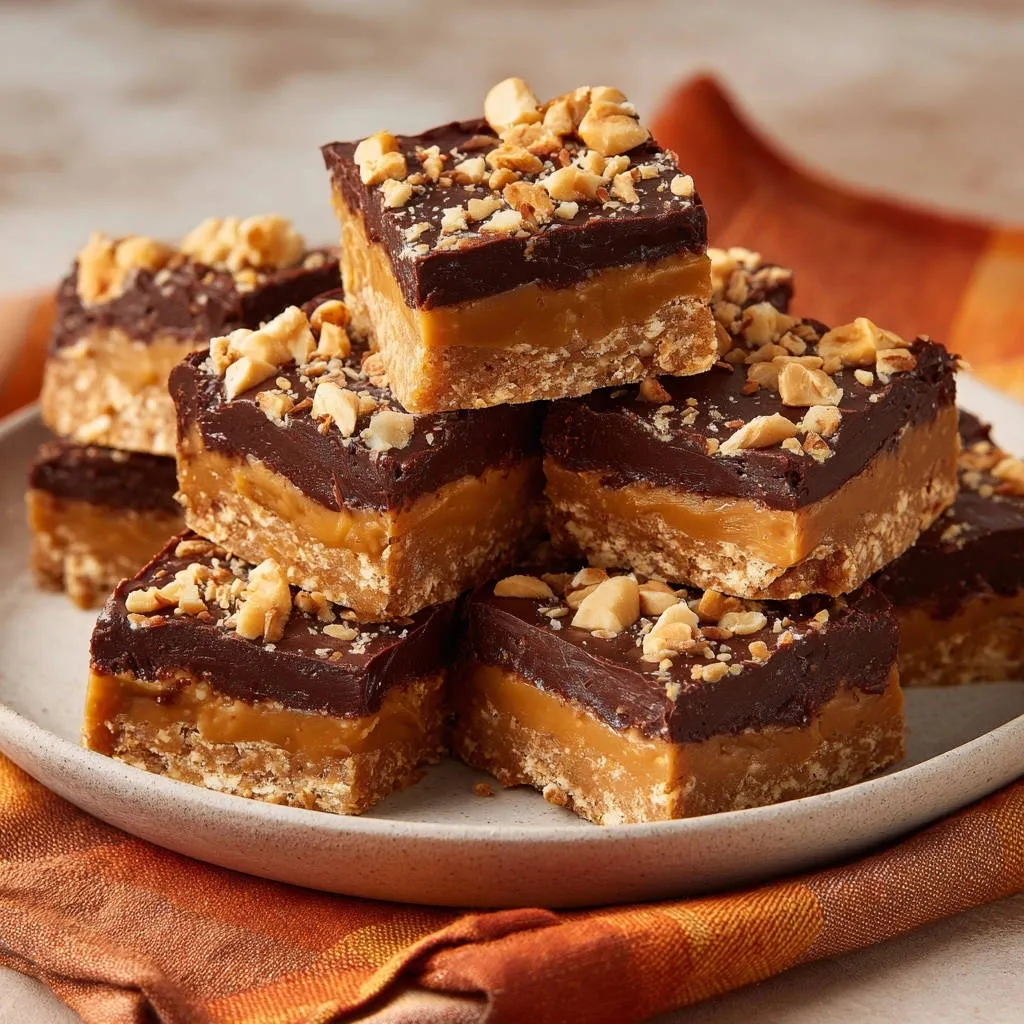
- That Clean Slice: Seriously, once you know the secret for cutting, serving these bars becomes a joy instead of a chore. Presentation matters, even for simple treats!
- Crowd-Pleaser: These flavors are universally loved. Take them to a party, potluck, or just share them with your family – they disappear fast!
If you enjoy the simplicity and decadent layers of no-bake desserts, you might also appreciate other easy bar recipes like our Simple Sugar Cookie Bars or maybe even something with a different flavor profile like Strawberry Lemon Bars for a brighter note.
Gathering Your Ingredients for Decadent Layers
One of the best things about these no-bake bars is that the ingredients are readily available and come together with minimal effort. Each component plays a vital role in building the texture and flavor layers that make these bars so irresistible.
For the sturdy, flavorful base, we start with a generous amount of crushed cookies. Graham crackers are a classic choice, offering a subtly sweet and crumbly foundation that pairs wonderfully with peanut butter. Alternatively, shortbread cookies provide a richer, buttery base. Choose your favorite! To bind these crumbs and add moisture, we use melted butter, creating a cohesive mixture that presses into a firm layer. A touch of powdered sugar adds a hint of sweetness and helps achieve that “wet sand” consistency, while creamy peanut butter doubles down on the flavor and acts as an extra binder, ensuring the base stays put. This combination is key to a base that holds its shape but isn’t rock hard.
The luscious middle layer comes from dulce de leche. This thick, caramelized milk is the star here, providing that signature gooey, sweet caramel flavor. Make sure you use a firm, spreadable caramel sauce or dulce de leche from a can, as thinner sauces might make slicing difficult later. If it’s too thick straight from the can, a gentle warming helps make it spreadable without becoming runny.
Finally, the top layer is a classic chocolate coating, elevated with the nutty crunch of peanuts. Chocolate chips are melted with a touch of coconut oil or vegetable shortening. The fat here isn’t just for melting; it helps the chocolate set smoothly and prevents it from being too brittle, contributing to that cleaner slice later on. And of course, a shower of chopped peanuts right on top adds texture, flavor, and a visual cue to the delightful peanutty goodness inside.
Here’s the simple lineup you’ll need:
- 2 cups crushed graham crackers or shortbread cookies
- 1/2 cup chopped peanuts (for the base)
- 1/2 cup melted butter
- 1/4 cup powdered sugar
- 1/2 cup creamy peanut butter
- 1 can (13.4 ounces) dulce de leche or firm caramel sauce
- 1 cup chocolate chips
- 2 tablespoons coconut oil or vegetable shortening
- 1/2 cup chopped peanuts (for topping)
Gathering everything before you start makes the process flow even more smoothly. Have your pan ready and ingredients measured for a truly effortless dessert experience!
Crafting Your Decadent No-Bake Peanut Caramel Bars: Step-by-Step
Alright, let’s get these beautiful layers built! This process is straightforward, requiring just a few mixing bowls and some patience for chilling. Pay close attention to the chilling times – they are crucial for the structure and, of course, that perfect slice!
- Prep Your Pan: First things first, get your pan ready. Grab an 8×8 inch baking pan. Line it generously with parchment paper. The key here is to leave enough overhang on the sides so you can easily lift the entire slab of bars out of the pan once they’re fully set. This makes cutting so much easier down the road!
- Mix the Base: In a medium-sized bowl, combine your crushed cookies (whether graham cracker crumbs or pulverized shortbread), the first portion of chopped peanuts (1/2 cup), the melted butter, powdered sugar, and creamy peanut butter. Get in there and mix everything together thoroughly. You’re looking for a consistency that feels like wet sand – it should hold together when you press it, but still be a bit crumbly.
- Form the Base Layer: Transfer this mixture into your prepared pan. Now, you need to compact it firmly and evenly across the bottom. The back of a sturdy spoon or the flat bottom of a glass works perfectly for this. Really press it down into a solid, level layer. This ensures a firm foundation for the subsequent layers and prevents crumbling when you slice.
- Add the Caramel: Take your can of dulce de leche or firm caramel sauce. If it seems very thick, you can gently warm it in a microwave-safe bowl for just a few seconds (like 10-15 seconds) or stir it in its can in a bowl of warm water. You want it spreadable, not hot or runny. Pour this lovely caramel over the pressed base layer, using an offset spatula or the back of a spoon to spread it smoothly and evenly from edge to edge.
- First Chill Time: Pop the pan into the refrigerator. Let it chill for at least 30 minutes. This short chilling period is important; it allows the caramel layer to firm up slightly on top of the base, preventing it from mixing too much with the warm chocolate layer you’ll add next. Think of it as creating a slightly more stable surface for the topping.
- Melt the Chocolate: While the caramel chills, prepare your chocolate topping. Get a microwave-safe bowl and add your chocolate chips and the coconut oil or vegetable shortening. Heat this mixture in short bursts – 30-second intervals are ideal – stirring really well after each interval. Keep going until the chocolate is completely melted and beautifully smooth and glossy. Don’t rush this; overheating chocolate can cause it to seize.
- Top and Sprinkle: Carefully pour the smooth melted chocolate over the chilled caramel layer in the pan. Spread it out quickly into an even layer. This is where the magic of that first chill comes in – the chocolate should sit nicely on top of the slightly firmed caramel. Immediately after pouring the chocolate, sprinkle the remaining 1/2 cup of chopped peanuts evenly over the top before the chocolate starts to set.
- The Big Chill: Now for the most crucial chilling step! Return the pan to the refrigerator. These bars need to chill and set thoroughly. This means at least 4 hours, but honestly, chilling them overnight is even better. A completely firm, cold block of bars is essential for the best results, especially when it comes time to slice.
- The Clean Cutting Secret: Okay, here it is – the tip that will make all the difference! Once your bars are completely firm, use the parchment paper overhang to carefully lift the entire block out of the pan and place it on a cutting board. Fill a tall glass or container with very hot (almost boiling) water. Have a clean towel ready. Dip a sharp knife (a chef’s knife or a large slicing knife works well) into the hot water for a few seconds to warm the blade. Immediately wipe the knife completely dry with the towel – water and melted chocolate don’t mix well! Make a clean, firm slice through the bars. After each and every cut, repeat the process: dip the knife in hot water, wipe it dry, and then make the next slice. Wipe away any residue on the knife between cuts as needed. Warming the blade helps it glide through the chilled layers (chocolate, caramel, and base) without dragging, sticking, or causing them to break or crumble. It’s a simple technique but incredibly effective!
- Cut and Enjoy: Continue using the hot-water knife method to cut the large block into your desired size squares. Serve these beautiful, perfectly layered bars right away or keep them chilled. Store any leftovers in an airtight container in the refrigerator. They stack nicely once cut cleanly!
Making layered treats is such a rewarding process, and mastering techniques like melting chocolate or getting clean cuts makes it even better. If you’re enjoying working with chocolate layers, you might also like trying your hand at something like our Deep Dark Chocolate Layer Cake or even smaller treats like Molten Lava Chocolate Chip Cookies.
Tips for Perfect Peanut Caramel Bars Every Time
While this recipe is incredibly forgiving and simple, a few extra tips can take your No-Bake Peanut Caramel Bars from great to absolutely perfect:
- Crumb Consistency: Whether you use graham crackers or shortbread, ensure they are finely crushed. A food processor works best for this, giving you an even crumb. If crushing by hand (e.g., in a bag with a rolling pin), try to get them as uniform as possible.
- Pressing the Base: Don’t be shy! Press the base layer down really firmly. The denser it is, the less likely it is to crumble when you cut the bars. Use your weight and a flat tool to get it packed tightly into the pan.
- Caramel Choice: A thick, spoonable dulce de leche or a firm jarred caramel sauce works best. Avoid runny caramel sauces designed for pouring over ice cream, as they may not set up enough for clean slicing.
- Chilling is Non-Negotiable: I know waiting is hard, but resist the urge to cut these bars before they are completely firm from chilling. Rushing this step is the number one reason for messy cuts (aside from not using the hot knife trick!). The longer, the better, especially overnight.
- The Hot Knife Method: Seriously, this is the game changer! It’s worth repeating: use a sharp knife, dip it in hot water, wipe it completely dry, and make a clean cut. Repeat for every single cut. This is the key to those beautiful, sharp edges.
- Storage: These bars need to be stored in the refrigerator due to the dulce de leche and to maintain their firmness. Keep them in an airtight container to prevent them from drying out or absorbing fridge odors.
Serving Suggestions
These bars are delightful all on their own, but here are a few ideas to make them even more special:
- Serve them chilled straight from the fridge.
- Pair them with a glass of cold milk or your favorite hot beverage.
- Cut them into smaller squares for a party or dessert platter.
- Crush one up and sprinkle it over ice cream for an extra treat.
Your No-Bake Peanut Caramel Bars Questions Answered (FAQ)
Got questions? Don’t worry, we’ve covered some common ones to help you nail this recipe!
Can I use a different type of cookie for the base?
Absolutely! While graham crackers and shortbread are recommended, you can experiment with other dry, crumbly cookies. Vanilla wafers, gingersnap cookies (for a spiced kick), or even chocolate cookies could work. Just make sure you have the correct volume of crushed crumbs and that the consistency when mixed with the butter, sugar, and peanut butter is similar to wet sand for pressing.
What’s the difference between dulce de leche and caramel sauce?
Dulce de leche is traditionally made by slowly heating sweetened milk until it caramelizes into a thick, spreadable confection. Caramel sauce is typically made by melting sugar and adding cream and butter. For this recipe, you need something thick and firm that sets up when chilled, which store-bought dulce de leche or a good quality firm jarred caramel sauce provides. A runny, pourable caramel sauce designed for toppings might not work as well for structural integrity.
Can I skip the peanuts or use different nuts?
Yes, if you have a peanut allergy or simply don’t like them, you can omit the peanuts entirely or substitute them with other chopped nuts like pecans, walnuts, or almonds. If omitting completely, the base might be slightly less textured but will still work. You could also sprinkle the top with something else like flaky sea salt (amazing with caramel and chocolate!), sprinkles, or a drizzle of extra chocolate.
Why do I need to add coconut oil or shortening to the chocolate?
Adding a small amount of fat like coconut oil or vegetable shortening helps the chocolate melt smoothly and, more importantly for bars, helps it set with a less brittle texture. This makes it easier to cut through the chocolate layer cleanly without it cracking or shattering excessively, especially when combined with the hot knife trick.
How long do these bars last and how should I store them?
These No-Bake Peanut Caramel Bars should be stored in an airtight container in the refrigerator. When stored properly, they will last for up to a week. For longer storage, you can cut them into individual squares and freeze them in a single layer on a baking sheet until firm, then transfer them to a freezer-safe container or bag, separating layers with parchment paper. Thaw in the refrigerator before serving.
My chocolate topping cracked when I cut the bars, even with the hot knife. What went wrong?
While the hot knife method significantly minimizes cracking, it’s not always possible to avoid a tiny bit, especially if the chocolate layer is very thick or the bars weren’t completely, completely chilled. Ensure your knife is sharp and that you are warming it before each cut. Wipe it dry quickly, make a decisive cut, and re-warm for the next one. If it’s still cracking excessively, try making sure the bars are truly rock-hard cold (overnight chilling is best) and consider if the chocolate mixture might have gotten too hot initially, which can sometimes make it more brittle upon setting. Using vegetable shortening instead of coconut oil can sometimes result in a slightly softer set, which might help too.
Enjoy Your Homemade No-Bake Peanut Caramel Bars!
There you have it – a simple, no-bake recipe for delicious layered bars that are guaranteed to impress with their flavor and their perfectly clean edges! The combination of crunchy base, gooey caramel, rich chocolate, and salty peanuts is truly addictive.
Give these No-Bake Peanut Caramel Bars a try and share the secret of the clean cut with your friends! They are perfect for parties, simple desserts, or just a special treat for yourself.
If you make them, be sure to leave a comment below and let me know how they turned out! Did the hot knife trick work its magic for you? Happy no-baking!
No-Bake Peanut Caramel Bars

Ingredients
- 2 cups crushed graham crackers or shortbread cookies
- 1/2 cup chopped peanuts
- 1/2 cup melted butter
- 1/4 cup powdered sugar
- 1/2 cup creamy peanut butter
- 1 can (13.4 ounces) dulce de leche (or firm caramel sauce)
- 1 cup chocolate chips
- 2 tablespoons coconut oil or vegetable shortening
- 1/2 cup chopped peanuts for topping
Directions
- Line an 8×8 inch baking pan with parchment paper, leaving an overhang on the sides.
- In a medium bowl, combine the crushed crackers, 1/2 cup chopped peanuts, melted butter, powdered sugar, and peanut butter. Mix until well combined and it resembles wet sand.
- Press this mixture firmly and evenly into the bottom of the prepared pan using the back of a spoon or a flat-bottomed glass.
- Warm the dulce de leche slightly if needed to make it spreadable, but not runny. Pour it evenly over the base layer in the pan.
- Place the pan in the refrigerator for at least 30 minutes to allow the caramel layer to set slightly.
- In a microwave-safe bowl, combine the chocolate chips and coconut oil. Heat in 30-second intervals, stirring in between, until the chocolate is completely melted and smooth.
- Pour the melted chocolate evenly over the chilled caramel layer. Sprinkle the remaining 1/2 cup chopped peanuts over the chocolate before it sets.
- Return the pan to the refrigerator and chill for at least 4 hours, or preferably overnight, until the bars are very firm. This thorough chilling is key!
- To achieve clean cuts (the secret!): Fill a tall glass with very hot water. Use the parchment paper overhang to lift the chilled bars out of the pan onto a cutting board. Dip a sharp knife into the hot water, wipe it completely dry with a towel, and immediately make a clean slice through the bars. Repeat this process, dipping and drying the knife before each cut, wiping away any residue as needed. This warms the blade just enough to glide through the layers without dragging or crumbling.
- Cut into squares and serve. Store leftovers in an airtight container in the refrigerator.