We’ve all chased that elusive, perfectly crisp takeout orange chicken at home, often ending up with a sauce-soaked disappointment. My journey to truly achieve Orange Chicken Perfection revealed a simple yet revolutionary trick: a double coating and precise frying technique that keeps every bite incredibly crunchy, even when drenched in its zesty sauce.
This recipe isn’t just about delicious flavor; it’s about delivering that satisfying, never-soggy texture every single time, making it the ultimate homemade version.
Beyond Takeout: Why This Orange Chicken Perfection Will Be Your New Favorite
Forget everything you thought you knew about homemade versions. This Orange Chicken Perfection recipe redefines what’s possible in your own kitchen.
It promises a culinary experience that rivals, and often surpasses, your favorite restaurant dish.
The “Never Soggy” Promise: Achieving Perfect Crispy Texture Every Time
The biggest hurdle with homemade orange chicken is maintaining crispness after saucing. Our unique double-dredging method and specific frying instructions create a robust, crunchy coating that stands up to the rich sauce.
You’ll enjoy an irresistible crunch with every single bite, a true game-changer for this beloved dish.
Authentic Flavor with Homemade Freshness: A Taste Sensation
Our signature orange sauce strikes the perfect balance of sweet, savory, and tangy notes, elevated by fresh ginger and garlic. Using quality ingredients transforms the flavor profile, offering a brighter, more complex taste than typical takeout.
This is homemade taste at its absolute finest, bursting with vibrant, authentic flavors.
A Complete Meal Solution: From Frying Pan to Family Table
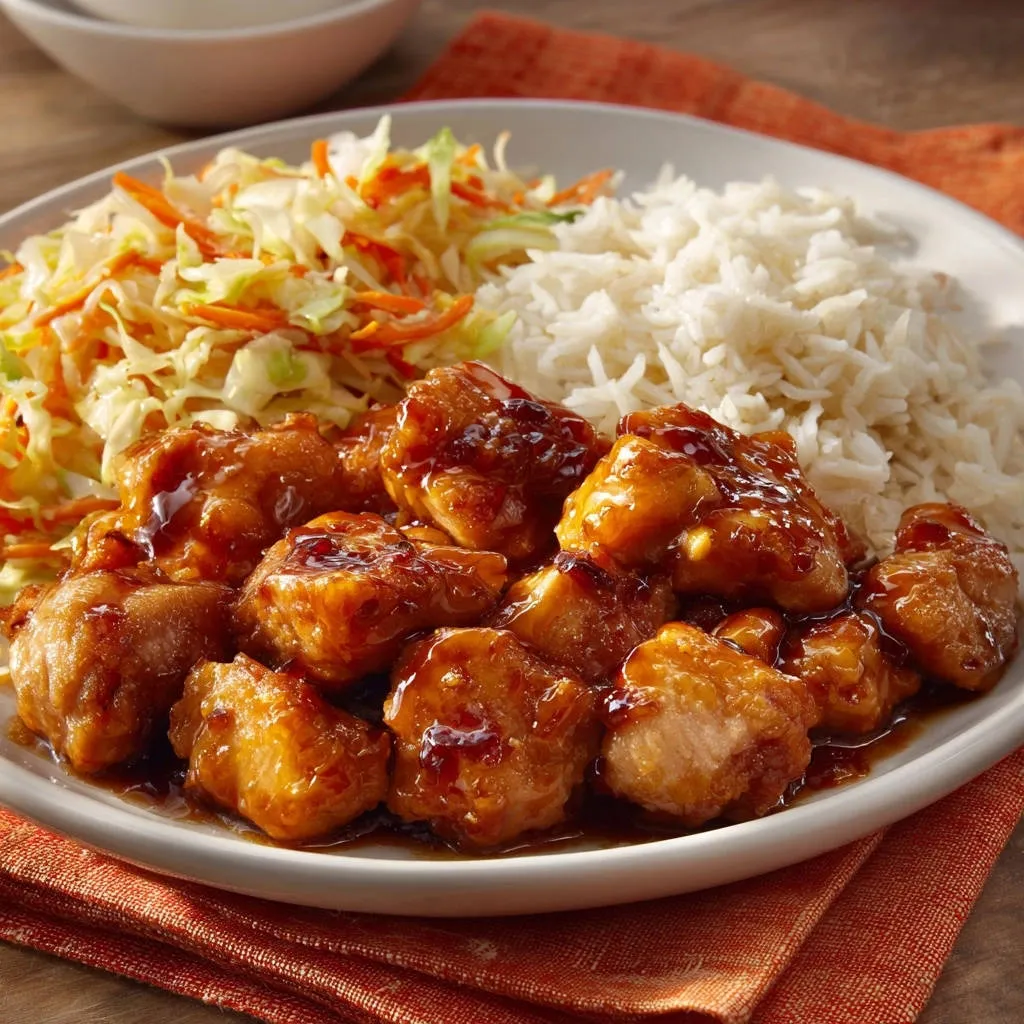
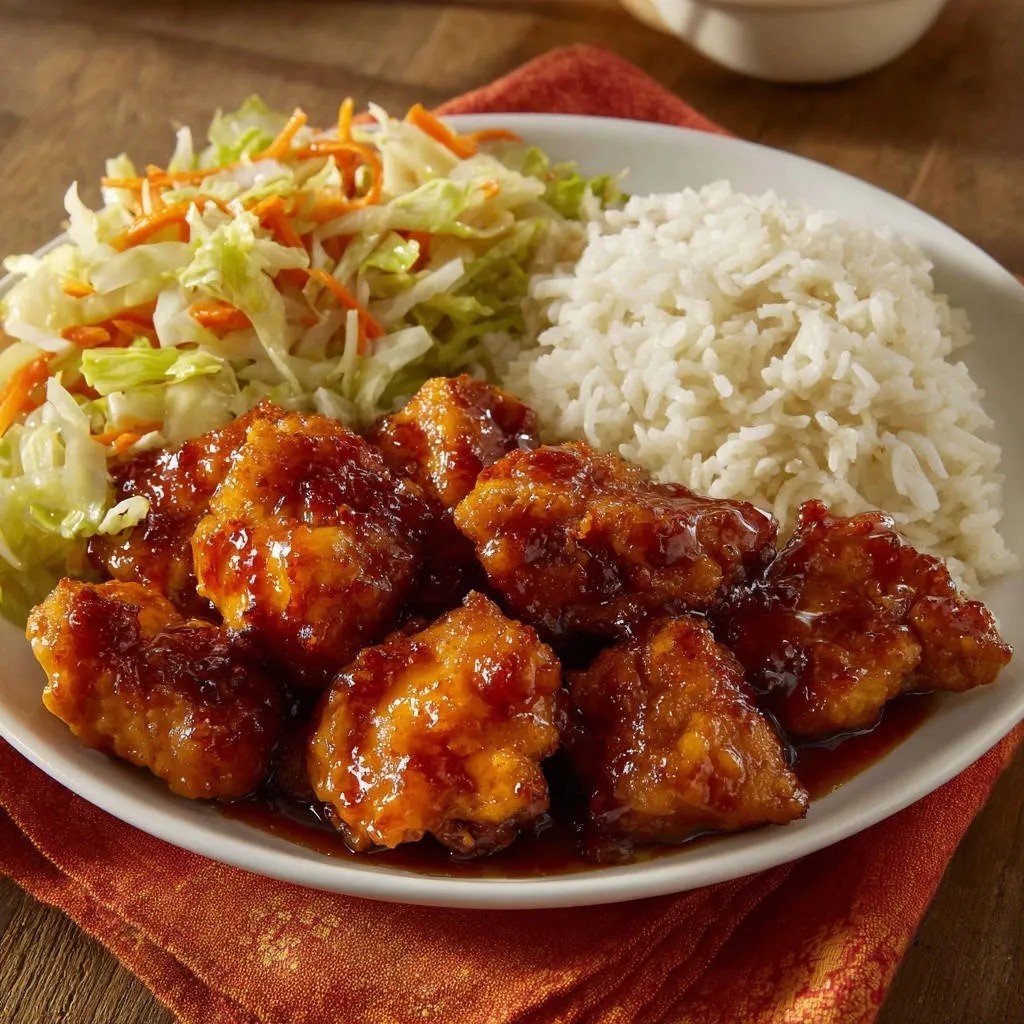
This isn’t just a chicken recipe; it’s a comprehensive meal plan. We provide detailed instructions for fluffy white rice and a refreshing coleslaw, creating a perfectly balanced and satisfying dinner.
Serve a full, harmonious meal with ease, designed for seamless home preparation.
Your Culinary Arsenal: Essential Ingredients & Tools for Orange Chicken Perfection
Gathering the right components is the first step to culinary success. Here’s what you’ll need to create this exceptional dish.
The Heart of the Dish: Chicken & Its Crispy Coating Components
-
Chicken Selection: Boneless, skinless chicken thighs offer superior juiciness and flavor, while breasts provide a leaner option. Both work beautifully when cut into uniform 1-inch pieces for even cooking.
-
The Crispy Foundation: A precise blend of all-purpose flour and cornstarch creates an incredibly light yet durable coating. This combination ensures maximum crunch and ideal sauce absorption without becoming heavy.
-
Egg Wash Essentials: Beaten eggs whisked with a touch of water form the critical adhesive layer. This helps the dry coating adhere perfectly, setting the stage for an ultimately crisp exterior.
Crafting the Signature Zesty Orange Sauce: Flavor Powerhouses
-
Fresh Orange Juice: The foundation of our vibrant sauce, providing natural sweetness and a bright, essential citrus tang. Always opt for fresh juice for the best flavor.
-
Soy Sauce & Brown Sugar: These components create the irresistible sweet and savory depth characteristic of classic orange chicken. The brown sugar adds a subtle caramel note.
-
Aromatic Boosters: Freshly grated ginger and minced garlic are non-negotiable for their aromatic complexity. Optional red pepper flakes introduce a customizable hint of warmth and spice.
-
Thickening Magic: A simple cornstarch slurry is crucial for achieving a perfectly glossy, clingy sauce. It ensures the sauce coats the chicken beautifully without being overly thin or clumpy.
Perfect Pairings: Fluffy Rice & Refreshing Coleslaw Elements
-
Long Grain White Rice: This classic staple provides a neutral, absorbent base, ideal for soaking up every drop of the rich orange sauce. Rinsing ensures a fluffier texture.
-
Crisp Coleslaw Components: A mix of shredded green cabbage and carrots offers a refreshing, crunchy counterpoint to the rich chicken. The tangy dressing cuts through the sweetness of the main dish.
Kitchen Essentials for Frying Success (and Beyond!)
-
Heavy-Bottomed Pot or Dutch Oven: Essential for deep frying, as its thick walls and base maintain consistent oil temperature. This prevents drastic temperature drops when chicken is added.
-
Wire Rack: Absolutely crucial for draining excess oil from the fried chicken and for holding coated pieces. Air circulation is key to preserving crispness and preventing sogginess.
-
Slotted Spoon or Spider: Allows for safe and easy retrieval of fried chicken from hot oil. It lets the oil drain away before transferring the chicken to the wire rack.
-
Whisks & Bowls: Multiple shallow dishes and whisks are needed for efficiently setting up the dredging station and whisking your sauce to a smooth, uniform consistency.
Your Step-by-Step Journey to Orange Chicken Perfection
Follow these detailed steps to create a meal that will impress even the most discerning palates.
-
Prepping Your Chicken for Maximum Crispness
Start by patting your chicken pieces thoroughly dry with paper towels. Excess moisture is the enemy of crispiness, so this step is crucial.
Season the dried chicken generously with salt and black pepper, ensuring every piece is ready to absorb flavor.
-
The Double-Dredge: Unlocking Unrivaled Crunch
In one shallow dish, whisk together the all-purpose flour and cornstarch for your dry coating. In another, prepare your egg wash by whisking beaten eggs with a quarter cup of water.
Dip each chicken piece first into the egg mixture, letting any excess drip off, then thoroughly dredge it in the flour-cornstarch mixture until fully coated. Place the coated chicken on a wire rack while you prepare for frying.
This double coating is the ingenious technique that provides the robust, ultimate crunch for our Orange Chicken Perfection.
-
Master the Fry: Achieving Golden, Crispy Bites
Pour enough vegetable oil into a large, heavy-bottomed pot to reach about 3 inches deep. Heat the oil over medium-high heat until it reaches a precise 350°F (175°C).
Fry the chicken in small batches, being careful not to overcrowd the pot, for 4 to 6 minutes, or until each piece is beautifully golden brown and cooked through. Overcrowding dramatically drops oil temperature, leading to soggy chicken.
Immediately remove the fried chicken with a slotted spoon and place it back onto the wire rack. This allows excess oil to drain away, preserving that hard-earned crispness.
-
Simmering Success: Creating the Signature Orange Sauce
In a small saucepan, whisk together the orange juice, soy sauce, brown sugar, rice vinegar, fresh ginger, minced garlic, and red pepper flakes (if using). Bring this mixture to a gentle simmer over medium heat.
In a separate small bowl, whisk together 1 tablespoon of cornstarch with 2 tablespoons of cold water to create a smooth slurry. Slowly whisk this cornstarch slurry into the simmering sauce.
Continue whisking until the sauce visibly thickens to your desired consistency, then remove it from the heat. It should be glossy and able to coat a spoon.
-
Fluffy Rice & Vibrant Coleslaw: Perfect Side Preparations
Rinse the long-grain white rice under cold running water until the water runs clear. This removes excess starch, ensuring a lighter, fluffier result.
Combine the rinsed rice, 3 cups of water, and half a teaspoon of salt in a medium saucepan. Bring to a boil, then reduce the heat to low, cover, and simmer for 18 to 20 minutes until all the water is absorbed.
Remove the rice from heat and let it stand, covered, for 5 minutes, then fluff gently with a fork. For the coleslaw, combine shredded green cabbage and carrots in a large bowl.
In a separate small bowl, whisk together mayonnaise, apple cider vinegar, sugar, salt, and pepper until smooth. Pour this tangy dressing over the cabbage and carrots, then toss to combine.
-
The Grand Finale: Tossing for Texture and Taste
Just before serving, transfer the fried chicken pieces to a large bowl. Pour the warm orange sauce over them, ensuring it’s evenly distributed.
Toss the chicken gently but quickly to coat each piece completely. This final, swift toss is absolutely critical.
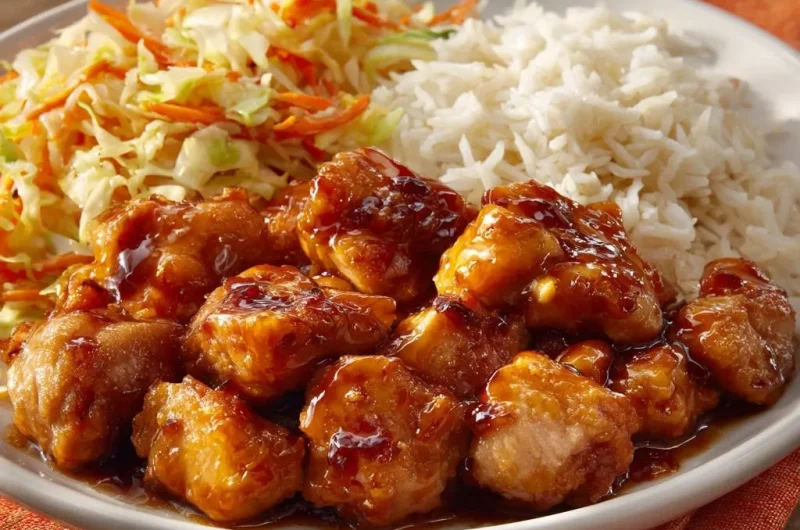
It ensures the chicken maintains its maximum crispness while still getting thoroughly coated in that irresistible, zesty sauce. Serve immediately with the fluffy white rice and refreshing coleslaw for the ultimate Orange Chicken Perfection experience.
Chef’s Secrets: Elevate Your Orange Chicken Perfection Game
Unlock even more potential with these expert tips, transforming a great meal into an extraordinary one.
-
Temperature Control is Key: The Golden Rule of Frying
Always use a thermometer to accurately monitor your oil temperature. If the oil is too cool, chicken becomes greasy; if too hot, it burns before cooking through. Maintaining a consistent 350°F (175°C) ensures optimal crispness and even cooking.
-
Don’t Crowd the Pot: The Art of Batch Frying for Uniform Crispness
Frying in small batches is non-negotiable for superior results. Overcrowding dramatically lowers the oil temperature, leading to steamed, rather than fried, chicken. Give each piece ample space to sizzle and develop that perfect golden crust.
-
The “Last Minute Toss”: Preserving the Ultimate Crunch
Only combine the sauce with the fried chicken just before serving. The longer the chicken sits immersed in the sauce, the softer its crispy coating will become. A quick, gentle toss right before plating maximizes textural enjoyment.
-
Flavor Boosters for a More Dynamic Orange Sauce
For an even brighter citrus punch, add a teaspoon of fresh orange zest to your sauce. A few drops of toasted sesame oil at the end can introduce a wonderful nutty aroma and deeper umami. For an extra kick, a small dash of sriracha offers a subtle, pleasant heat.
-
Ingredient Swaps and Dietary Considerations
To make this dish gluten-free, substitute all-purpose flour with a gluten-free blend and use tamari instead of regular soy sauce. While deep-frying offers unparalleled crispness, you can try air frying the chicken for a lighter alternative, though expect a slightly different texture.
Troubleshooting Common Orange Chicken Conundrums
Even expert chefs encounter challenges. Here’s how to resolve common issues and ensure your Orange Chicken Perfection lives up to its name.
“Why is My Chicken Soggy?”
The primary reasons for soggy chicken are overcrowding the frying pot or inadequate draining after frying. Always fry chicken in small batches to prevent the oil temperature from dropping, which causes steaming instead of crisping.
After frying, immediately transfer chicken to a wire rack, not paper towels, to allow air to circulate and excess oil to drip away. Also, remember the “last minute toss” rule; saucing too early will inevitably lead to a softer coating.
“My Orange Sauce Isn’t Thickening!”
Ensure your cornstarch slurry is made with cold water, as hot water can cause the cornstarch to clump and prevent proper thickening. Slowly whisk the slurry into the simmering sauce, allowing a minute or two for the cornstarch to activate and thicken.
If the sauce remains too thin, simply create another small cornstarch slurry and slowly whisk it in, repeating until your desired consistency is achieved. Patience is key with thickening sauces.
“Chicken is Dry Inside, But Crispy Outside.”
This issue typically arises from cooking the chicken at too high a temperature or for an excessive duration. High heat can quickly crisp the exterior before the interior has a chance to cook gently.
Carefully monitor your oil temperature with a thermometer, aiming for a consistent 350°F (175°C). Fry only until the chicken is golden brown and cooked through, typically 4-6 minutes, then promptly remove it from the oil.
Frequently Asked Questions About Orange Chicken Perfection
Find answers to common questions, helping you master this fantastic recipe with confidence.
Can I Bake or Air Fry the Chicken Instead of Deep Frying?
Yes, for a lighter version, baking or air frying are viable options. To bake, spray the coated chicken with oil and bake at 400°F (200°C) for 20-25 minutes, flipping halfway, until golden and cooked through. For air frying, preheat to 375°F (190°C) and cook for 15-20 minutes, shaking the basket frequently, until crispy.
While these methods achieve a pleasant crispness, they generally won’t match the intense crunch produced by deep-frying.
How Long Does Homemade Orange Chicken Last, and How Should I Store It?
Leftover orange chicken, once sauced, can be stored in an airtight container in the refrigerator for 2-3 days. For optimal crispness upon reheating, it’s best to store the fried chicken and sauce separately if possible.
Reheat the chicken in an air fryer or oven to revive some crunch before warming the sauce and combining.
Can I Make the Orange Sauce Ahead of Time?
Absolutely! The orange sauce is an excellent make-ahead component. It can be prepared up to 3-4 days in advance and stored securely in an airtight container in the refrigerator.
When ready to use, gently reheat the sauce on the stovetop over low heat, whisking occasionally to restore its smooth consistency, then toss with freshly fried chicken.
What Are the Best Side Dishes for Orange Chicken?
This recipe thoughtfully includes instructions for fluffy white rice and a refreshing, tangy coleslaw, both of which perfectly complement the rich and zesty chicken. The coleslaw’s crispness and acidity provide an excellent contrast.
Other fantastic side dish options include steamed vegetables like broccoli or asparagus, or a simple cucumber salad for added freshness.
Make-Ahead & Storage Tips for Effortless Entertaining
Streamline your cooking process and enjoy the dish even more with these practical preparation and storage suggestions.
Prepping Ahead for a Quick Weeknight Meal
To significantly reduce active cooking time on a busy weeknight, prepare several components in advance. You can cut and season the chicken, whisk together the dry flour mixture, and prepare the egg wash a day ahead.
The entire orange sauce can also be made and refrigerated. This strategy allows you to focus solely on the satisfying frying and final assembly on cooking day, making the process much smoother.
Storing Leftovers: Keeping the Crunch Alive (as much as possible!)
If you anticipate having leftovers, a smart tip is to only sauce the portion of chicken you intend to eat immediately. Store any unsauced fried chicken and the leftover sauce in separate airtight containers.
When reheating, crisp up the chicken in an air fryer, oven, or even a dry pan, then gently warm the sauce and combine. This method helps preserve some of that coveted crunch.
Share Your Masterpiece: A Call to Culinary Connection
Now that you hold the secrets to truly crispy, flavor-packed Orange Chicken Perfection, it’s time to unleash your inner chef! Say goodbye to soggy takeout disappointments and hello to rave reviews from your family and friends.
We invite you to try this recipe, savor every crunchy, saucy bite, and share your culinary creations with us. Happy cooking!
Orange Chicken Perfection
Course: Main CourseCuisine: Chinese cuisineDifficulty: easy4
servings40
minutes1
hour60
minutesChinese cuisine
Ingredients
For the Crispy Chicken:
1.5 pounds boneless, skinless chicken thighs or breasts, cut into 1 inch pieces
1 teaspoon salt
0.5 teaspoon black pepper
1 cup all purpose flour
0.5 cup cornstarch
2 large eggs, beaten
0.25 cup water
Vegetable oil, for deep frying
For the Orange Sauce:
1 cup orange juice
0.25 cup soy sauce
0.25 cup brown sugar
2 tablespoons rice vinegar
1 tablespoon grated fresh ginger
2 cloves garlic, minced
0.5 teaspoon red pepper flakes (optional)
1 tablespoon cornstarch
2 tablespoons cold water
For the White Rice:
1.5 cups long grain white rice
3 cups water
0.5 teaspoon salt
For the Coleslaw:
4 cups shredded green cabbage
1 cup shredded carrots
0.5 cup mayonnaise
2 tablespoons apple cider vinegar
1 tablespoon sugar
0.25 teaspoon salt
0.125 teaspoon black pepper
Directions
- Prepare the chicken: Pat chicken pieces thoroughly dry with paper towels. Season with 1 teaspoon salt and 0.5 teaspoon black pepper.
- Make the crispy coating: In a shallow dish, whisk together the flour and 0.5 cup cornstarch. In another shallow dish, whisk together the beaten eggs and 0.25 cup water. Dip each chicken piece first into the egg mixture, allowing excess to drip off, then dredge thoroughly in the flour mixture, ensuring it is completely coated. Place coated chicken on a wire rack while you prepare for frying. This double coating is key to the ultimate crunch.
- Fry the chicken: Pour enough vegetable oil into a large heavy bottomed pot or Dutch oven to reach about 3 inches deep. Heat the oil over medium high heat until it reaches 350 degrees Fahrenheit. Fry the chicken in batches, being careful not to overcrowd the pot, for 4 to 6 minutes, or until golden brown and cooked through. Remove the chicken with a slotted spoon and place it back on the wire rack to drain excess oil. Maintaining oil temperature and frying in batches prevents the chicken from steaming and ensures each piece gets incredibly crisp.
- Prepare the orange sauce: In a small saucepan, whisk together the orange juice, soy sauce, brown sugar, rice vinegar, ginger, garlic, and red pepper flakes (if using). Bring to a simmer over medium heat. In a small bowl, whisk together 1 tablespoon cornstarch and 2 tablespoons cold water to create a slurry. Slowly whisk the cornstarch slurry into the simmering sauce. Continue whisking until the sauce thickens to your desired consistency. Remove from heat.
- Cook the rice: Rinse the long grain white rice under cold water until the water runs clear. In a medium saucepan, combine the rinsed rice, 3 cups water, and 0.5 teaspoon salt. Bring to a boil, then reduce heat to low, cover, and simmer for 18 to 20 minutes, or until all the water is absorbed. Remove from heat and let stand, covered, for 5 minutes, then fluff with a fork.
- Make the coleslaw: In a large bowl, combine the shredded green cabbage and shredded carrots. In a separate small bowl, whisk together the mayonnaise, apple cider vinegar, sugar, 0.25 teaspoon salt, and 0.125 teaspoon black pepper until smooth. Pour the dressing over the cabbage and carrots and toss to combine.
- Assemble and serve: Just before serving, add the fried chicken pieces to a large bowl and pour the warm orange sauce over them. Toss gently but quickly to evenly coat each piece. This final toss is critical to ensure the chicken maintains its maximum crispness while still getting coated in that irresistible sauce. Serve immediately with the fluffy white rice and refreshing coleslaw.
Notes
- Frying in batches and using a double coating are key for maximum crispness.