Oh, the disappointment of cutting into a beautiful cake, only to find it dry and crumbly inside. It’s happened to all of us, right? Well, I’m here to tell you that those days are over, especially when it comes to creating the perfect orange cream cake. I’ve cracked the code to a cake that stays incredibly moist and bursting with bright, citrusy flavor, thanks to one simple, yet genius, technique. Get ready to transform a simple cake mix into a dessert that tastes completely homemade and utterly delightful.
This isn’t just any orange cream cake recipe; it’s the one that guarantees a tender crumb soaked in sweet, creamy goodness, making it a crowd-pleaser every single time. Let’s dive into how we achieve this moist masterpiece!
Why This Orange Cream Cake is a Must-Try
Aside from banishing dry cake blues forever, this orange cream cake boasts several fantastic qualities:
- Unbeatable Moisture: The secret soaking liquid ensures every bite is soft, tender, and saturated with flavor.
- Bright Citrus Flavor: A lovely hint of orange cuts through the sweetness, keeping it light and refreshing.
- Effortlessly Easy: Starting with a cake mix makes the base super simple, allowing you to focus on the magical soaking step.
- Make-Ahead Friendly: This cake actually gets better as it sits and the flavors meld and the liquid fully absorbs.
- Versatile Toppings: While mandarin oranges are classic, the whipped topping base welcomes other fruit or simple garnishes.
It’s the perfect dessert for a potluck, a family dinner, or just a sweet treat to enjoy at home. The combination of creamy, fruity, and cakey textures is simply divine.
Essential Ingredients for Your Moist Orange Cream Cake
Gathering your ingredients for this delightful orange cream cake is straightforward. We’re starting with a pantry staple and adding simple components to elevate it significantly. Each ingredient plays a crucial role, from forming the cake base to creating the luscious soaking liquid and the creamy, fruity topping.
For the cake base, we lean on the convenience of a standard box of vanilla or white cake mix. This gives us a consistent starting point. You’ll need the liquid ingredients called for on the cake mix box itself – typically water, oil, and eggs. Using these ensures the initial cake structure is correct before we introduce our moisture secret.

The real magic happens with the soaking liquid. This is a simple whisked mixture of milk, which adds moisture and helps distribute the flavors; sweetened condensed milk, providing rich sweetness and a thick, syrupy consistency that saturates the cake beautifully; fresh or store-bought orange juice for that essential citrus pop; and a touch of vanilla extract to round out the sweetness and complement the other flavors. Make sure these are well combined so the liquid soaks in evenly.
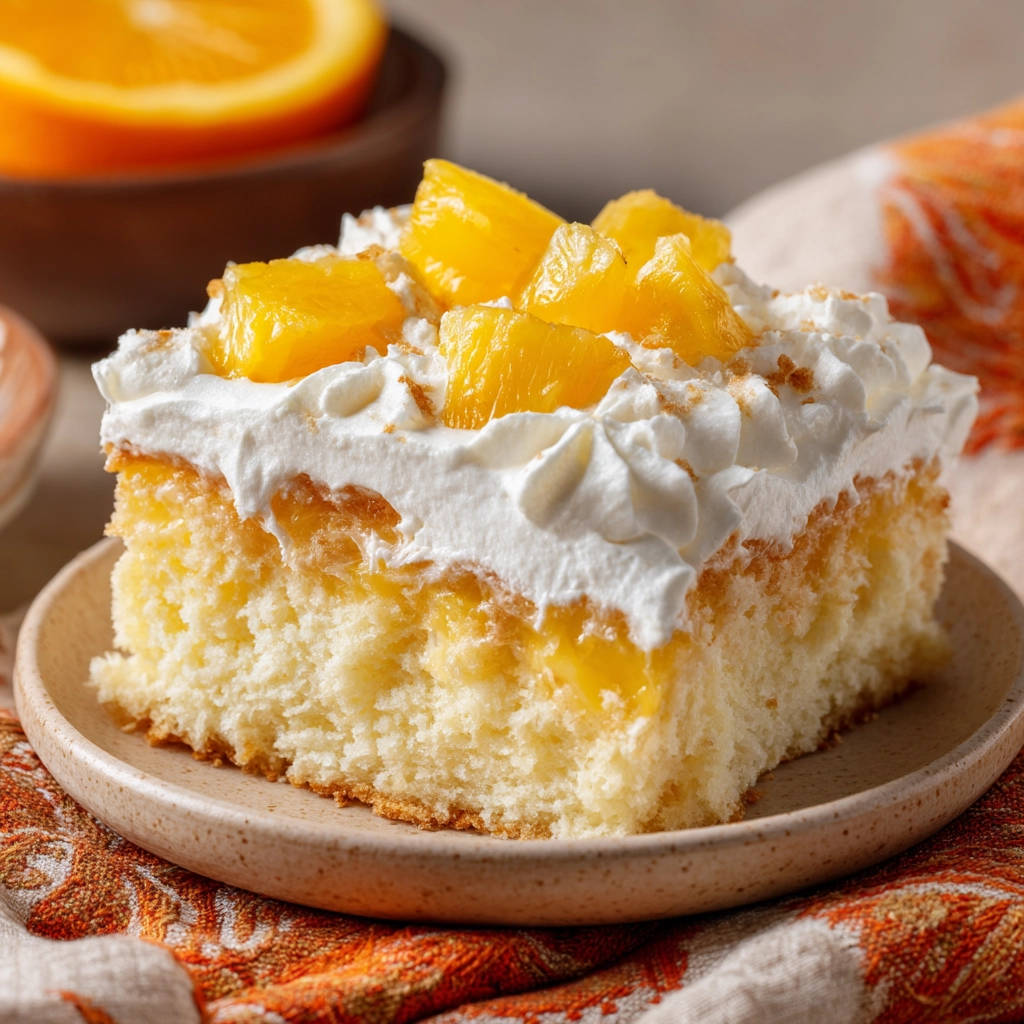
Finally, the topping and garnish bring everything together. A container of frozen whipped topping, thawed, provides a light, airy, and creamy contrast to the dense, moist cake. You’ll also need a can of drained mandarin oranges or diced peaches. These add bursts of fruity flavor and a lovely visual element. Optional garnishes like ground cinnamon or graham cracker crumbs offer extra texture and warmth if you like.
Here’s a quick list to help you gather everything:
- 1 box (about 15.25 ounces) vanilla or white cake mix
- Water, oil, and eggs called for on cake mix box
- 1 cup milk (any kind works, whole milk adds richness)
- 1/2 cup sweetened condensed milk
- 1/4 cup orange juice (pulp-free is recommended for smooth absorption)
- 1 teaspoon vanilla extract
- 1 container (8 ounces) frozen whipped topping, thawed
- 1 can (15 ounces) mandarin oranges or diced peaches, well-drained
- Optional: Ground cinnamon or graham cracker crumbs for dusting
Baking Bliss: Crafting the Perfect Orange Cream Cake
Creating this incredibly moist orange cream cake is a process, but it’s not complicated. The key steps are designed to build layers of flavor and moisture, ensuring that disappointing dry texture is a thing of the past. Follow these steps carefully, and you’ll be rewarded with cake perfection!
Begin by preheating your oven to 350 degrees F (175 degrees C). Preparing your pan properly is the first step to success! Thoroughly grease and flour a 9×13 inch baking pan. This prevents the cake from sticking and ensures a clean release, which is important before we soak it.
Next, prepare the cake batter according to the specific package directions on your vanilla or white cake mix box. Use the amounts of water, oil, and eggs listed there. Mix just until combined – don’t overmix, as that can develop the gluten too much and lead to a tougher cake. Pour the prepared batter evenly into your greased and floured 9×13 pan. Bake it according to the package directions as well, typically until a toothpick inserted into the very center comes out clean. This means there are no wet batter crumbs clinging to it, though a few moist crumbs are fine.
Once baked, take the cake out of the oven and place the pan on a wire rack to begin cooling. It’s crucial to let it cool slightly in the pan for about 15-20 minutes. This initial cooling time allows the cake to set slightly before we work our magic.
While your cake is starting its initial cool-down, it’s time to make our secret weapon: the soaking liquid! In a medium-sized bowl, simply whisk together the milk, sweetened condensed milk, orange juice, and vanilla extract until everything is smoothly combined. This is the liquid that will transform a standard cake into a moist, flavorful delight. Make sure there are no streaks of condensed milk.
Now for the crucial step – adding the moisture! While the cake is still slightly warm in the pan (after the 15-20 minute cooling), grab a fork or a skewer. You want to generously poke holes all over the top surface of the cake. Go almost all the way down to the bottom of the pan. Make plenty of holes, spaced about an inch apart. Pay special attention to the edges, as they tend to dry out faster. The goal is to create channels for the liquid to easily seep into the cake.
With the cake generously poked, slowly and evenly pour the prepared milk mixture over the entire surface of the cake while it’s still in the pan. Don’t rush this step. Take your time, tilting the pan slightly if needed, to ensure the liquid covers everything. You’ll see it start to pool on top and then slowly get absorbed into the holes you created. It might look like a lot of liquid, but trust the process!
After pouring the liquid, leave the cake in the pan on the wire rack to cool completely. This part takes patience, often an hour or two, as the cake needs time to fully absorb all that glorious moisture. You’ll know it’s ready when there’s no visible liquid pooling on top and the cake feels heavy and saturated. If you want to speed things up slightly and improve chilling for the next step, you can carefully transfer the pan to the refrigerator once it’s no longer warm to the touch.
Once the cake is completely cool and the liquid is fully absorbed, it’s time for the crowning glory! Gently spread the thawed whipped topping evenly over the entire top surface of the cake. Ensure you get nice coverage right up to the edges.
Arrange the drained mandarin orange segments or diced peaches attractively over the layer of whipped topping. You can cover the whole surface or create a pattern – whatever looks good to you! Make sure the fruit is very well-drained so you don’t add excess liquid back to the top.
If you like, add an extra touch of flavor and texture by dusting the top lightly with ground cinnamon or sprinkling graham cracker crumbs over the fruit and whipped topping. This step is entirely optional but adds a nice finish.
Your delicious orange cream cake is now ready, but it needs to be kept refrigerated until you’re ready to slice and serve it. Chilling helps it set further and keeps the whipped topping and fruit fresh.
Tips for Perfect Orange Cream Cake Every Time
Making this orange cream cake is quite forgiving, but a few extra tips can elevate it from delicious to absolutely unforgettable:
- Don’t Skimp on the Holes: The more holes you poke, the more liquid the cake can absorb! Use a fork for smaller holes or a skewer for slightly larger ones. Be brave and go deep – nearly to the bottom of the pan – especially around the edges which tend to dry out first.
- Warm Cake, Not Hot: Make sure the cake has cooled for the recommended 15-20 minutes before poking and pouring. If it’s too hot, it might tear easily or the liquid could affect the structure negatively. If it’s too cold, it won’t absorb the liquid as well. Slightly warm is just right.
- Patience is Key for Soaking: Don’t rush the absorption step. Let the cake sit undisturbed until all the liquid is gone from the surface. Refrigerating after the initial cooling can help the absorption process and get you to serving time faster.
- Drain the Fruit Well: Excess juice from the canned oranges or peaches can make the whipped topping watery. Pat them dry with a paper towel after draining if necessary.
- Flavor Boosters: For a stronger orange flavor, consider adding a teaspoon or two of orange zest to the cake batter before baking, or even whisk a little zest into the soaking liquid.
- Get Creative with Toppings: While whipped topping and oranges are classic, feel free to experiment. Try a layer of softened cream cheese mixed with a little powdered sugar before the whipped topping for extra richness, or top with different fruits like strawberries or berries. If you’re a fan of classic cake pairings, maybe you’d enjoy exploring a strawberry trifle or raspberry layer cake for other fruity dessert inspirations.
- Storage: This cake must be stored in the refrigerator due to the moist soak and whipped topping. Cover it tightly with plastic wrap once it’s completely chilled.
What to Serve With Orange Cream Cake
This delightful cake is wonderful on its own, but pairing it with a simple beverage is always a good idea. A glass of cold milk is a classic pairing, or for something a little more sophisticated, a cup of tea or coffee works well. If you’re serving it for a special occasion or brunch, consider serving alongside a light fruit salad or perhaps a simple scoop of vanilla ice cream – though honestly, it’s moist enough that ice cream isn’t necessary! If you’re looking for a refreshing drink that complements the citrus notes, making a batch of perfect iced tea is a fantastic choice.
Your Orange Cream Cake Questions Answered (FAQ)
Thinking about making this cake and have a few questions? Here are some common ones to help you out:
Can I use a different flavor of cake mix?
The recipe specifically calls for vanilla or white cake mix because their mild flavor provides the perfect backdrop for the orange and cream elements to shine. While you could experiment, other flavors might clash with the citrus and creamy soak. Stick to vanilla or white for the best results.
How long does the cake need to soak?
The soaking time can vary depending on the density of the cake and how warm it is. Generally, allow at least 1-2 hours at room temperature for the liquid to fully absorb. Refrigerating it after it’s no longer warm can speed up the chilling process and help absorption finish, but ensure the surface is dry before topping.
Can I make this cake ahead of time?
Absolutely! This cake is actually perfect for making ahead. You can bake the cake, poke and soak it, and let it absorb the liquid the day before serving. Store the soaked cake (without the topping) covered in the refrigerator. Add the whipped topping and fruit about an hour or two before you plan to serve it. This allows the flavors to meld and the texture to be perfectly moist.
How long does orange cream cake last in the refrigerator?
Stored properly in an airtight container in the refrigerator, this orange cream cake will typically last for 3-4 days. The moisture level helps keep it fresh, but the whipped topping means it needs to be kept cold.
Can I substitute the sweetened condensed milk?
Sweetened condensed milk is crucial for the texture and sweetness of the soaking liquid. It’s much thicker than regular milk and provides a specific richness. Substituting it with regular milk or evaporated milk will not yield the same results. It’s a key ingredient for that signature moistness.
Ready to Bake the Best Orange Cream Cake?
Say goodbye to dry, boring cakes forever! This orange cream cake recipe, with its simple yet effective soaking technique, is a game-changer. It’s easy enough for a beginner but impressive enough for any occasion. The bright orange flavor combined with the creamy, moist texture is truly irresistible.
Give this recipe a try, and I promise it will become a favorite in your household. Let me know how it turns out in the comments below! Did you try any variations? What did you serve it with? Your feedback is always welcome. Happy baking!
Orange Cream Cake

Ingredients
- 1 box (about 15.25 ounces) vanilla or white cake mix
- Water, oil, and eggs called for on cake mix box
- 1 cup milk
- 1/2 cup sweetened condensed milk
- 1/4 cup orange juice
- 1 teaspoon vanilla extract
- 1 container (8 ounces) frozen whipped topping, thawed
- 1 can (15 ounces) mandarin oranges or diced peaches, drained
- Optional: Ground cinnamon or graham cracker crumbs for dusting
Directions
- Preheat oven to 350 degrees F (175 degrees C). Grease and flour a 9×13 inch baking pan.
- Prepare cake mix according to package directions using water, oil, and eggs. Pour batter into the prepared pan and bake according to package directions until a toothpick inserted into the center comes out clean.
- Let the cake cool in the pan on a wire rack for about 15-20 minutes.
- While the cake is cooling, prepare the soaking liquid: In a medium bowl, whisk together the milk, sweetened condensed milk, orange juice, and vanilla extract until well combined.
- This is the key to a moist cake! While the cake is still slightly warm in the pan, use a fork or a skewer to generously poke holes all over the top of the cake, going almost all the way to the bottom. Make plenty of holes, spaced about an inch apart, especially around the edges.
- Slowly and evenly pour the milk mixture over the poked cake in the pan. Take your time and allow the liquid to soak into the holes. The cake will absorb the liquid as it cools further.
- Let the cake cool completely in the pan, allowing all the liquid to absorb. This may take an hour or two. You can refrigerate it once cool for faster chilling and better absorption.
- Once the cake is completely cooled and has absorbed the liquid, spread the thawed whipped topping evenly over the top.
- Arrange the drained mandarin orange segments or diced peaches over the whipped topping.
- Dust with a little ground cinnamon or graham cracker crumbs if desired.
- Keep cake refrigerated until ready to serve.