For any baker, the moment of truth with a Bundt cake is when you invert it from the pan. I’ve faced the heartbreak of a stuck cake more times than I care to admit, but those days are over thanks to a simple, foolproof technique.
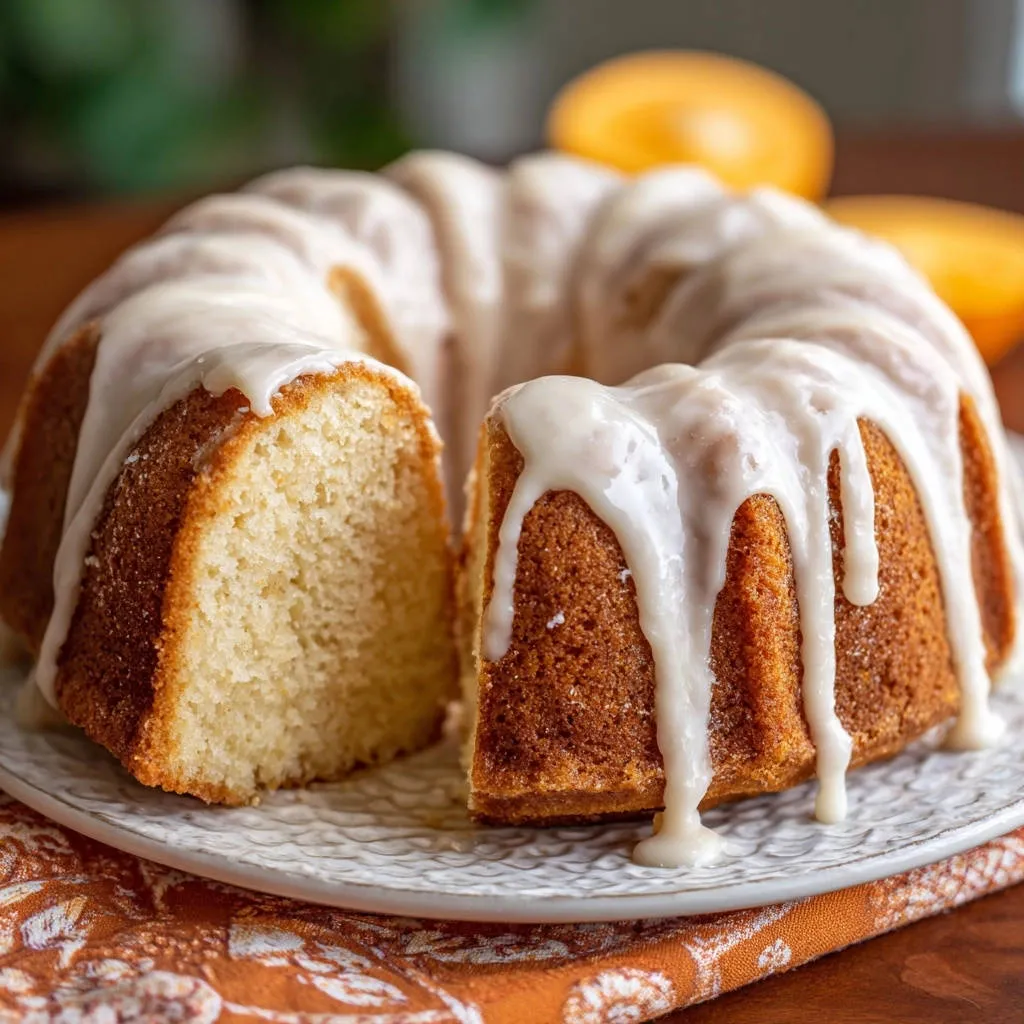
This Orange Kissed Bundt Cake recipe is not just about vibrant citrus flavor and an incredibly moist crumb; it’s also about guaranteed success. You’ll achieve a beautiful, perfectly released cake every time, ready to impress with its sun-kissed charm and effortless elegance.
Why This Orange Kissed Bundt Cake Will Be Your New Favorite
This recipe transforms a classic dessert into an experience of pure delight, blending reliability with exquisite flavor. It’s designed for bakers who want consistent, stunning results without the usual guesswork.
The Flawless Release Secret: No More Stuck Cakes!
Our unique greasing and flouring method creates an impenetrable non-stick barrier, ensuring your Orange Kissed Bundt Cake slides out effortlessly.
This technique eliminates the common dread of a broken cake, making the entire baking process stress-free and enjoyable. You’ll gain the confidence to bake beautiful Bundt cakes for any occasion.
A Burst of Bright Citrus Sunshine in Every Slice
Fresh orange zest and juice infuse this cake with an unparalleled brightness and aromatic warmth.
The “orange kissed” flavor profile is perfectly balanced, offering a sweet yet tangy experience that’s invigorating and comforting. It’s truly like tasting a ray of sunshine.
Simple Steps, Stunning Results: Baking with Confidence
This recipe breaks down the process into clear, manageable steps, suitable for bakers of all skill levels.
From mixing the batter to drizzling the glaze, each stage is straightforward, leading to an impressive dessert that looks and tastes professionally made.
Gather Your Ingredients: Crafting the Orange Kissed Bundt Cake
High-quality ingredients are the foundation of any exceptional cake. Selecting them with care ensures the best possible flavor and texture for your Orange Kissed Bundt Cake.
For the Moist and Flavorful Cake Base
All-purpose flour, baking powder, and salt: These dry ingredients provide the structure and leavening necessary for a light, tender crumb. Ensure your baking powder is fresh for optimal rise.
Unsalted butter, softened: Softened butter creams beautifully with sugar, incorporating air for a fluffy batter and contributing richness. Using unsalted butter allows you to control the overall saltiness.
Granulated sugar: Sugar sweetens the cake and helps create a moist texture by attracting and retaining moisture. It also aids in browning the crust.
Large eggs: Eggs bind the ingredients, add richness, and contribute to the cake’s structure and moisture. Room temperature eggs emulsify better with the butter and sugar.
Milk: Milk adds moisture and tenderness to the cake. Whole milk typically yields the richest results, but any milk will work.
Vanilla extract: A touch of vanilla complements the orange, adding depth and warmth to the overall flavor profile. Choose pure vanilla extract for the best taste.
Fresh orange zest and juice: These are the stars, providing intense, natural orange flavor and aroma. Zest carries the most concentrated citrus oil, while the juice adds tang and moisture.
The Zesty Orange Glaze: A Sweet and Tangy Finish
Powdered sugar: Also known as confectioners’ sugar, this fine sugar dissolves easily to create a smooth, pourable glaze with a beautiful opaque finish.
Fresh orange juice: This is essential for the glaze’s vibrant citrus kick and its perfect drizzling consistency. Using fresh juice makes a noticeable difference in flavor.
Essential Tools for Bundt Cake Baking Success
Having the right tools simplifies the baking process and contributes significantly to the success of your Orange Kissed Bundt Cake.
Your Go-To Bundt Pan: Size and Material Matters
A 10 or 12-cup Bundt pan is ideal for this recipe, ensuring enough space for the batter to rise without overflowing. Quality non-stick or heavy-gauge aluminum pans distribute heat evenly, promoting consistent baking and easier release.
Mixing & Measuring Must-Haves
An electric mixer (stand or hand-held) is crucial for thoroughly creaming butter and sugar, ensuring a light and airy cake batter. Accurate measuring cups and spoons are vital for maintaining the precise ingredient ratios, which impact texture and flavor.
The Finishing Touches: Cooling Rack & Zester
A wire rack is indispensable for cooling your cake completely, allowing air circulation underneath to prevent sogginess. A fine-grater or microplane zester efficiently removes only the brightly colored zest, avoiding the bitter white pith.
Baking Your Orange Kissed Bundt Cake: A Step-by-Step Journey
Follow these steps closely for a beautifully baked and effortlessly released Orange Kissed Bundt Cake, from start to stunning finish.
- Prep the Pan: The Foundation of a Flawless Cake Release
Thoroughly grease a 10 or 12-cup Bundt pan with softened butter, ensuring every crevice is coated. This attention to detail is paramount for release.
Then, lightly flour the pan, rotating and tapping to coat the entire surface. Tap out any excess flour; this creates a non-stick barrier. Preheat your oven to 350°F (175°C).
For more secrets to a perfect release, you might find our tips for a perfect peach bundt cake that never sticks incredibly helpful.
- Whisk Dry Ingredients: Building the Cake’s Structure
In a medium bowl, whisk together the flour, baking powder, and salt. Whisking ensures these ingredients are evenly distributed, preventing pockets of leavening agent or salt in the finished cake.
- Cream Butter and Sugar: Incorporating Air for a Light Texture
In a large bowl, using an electric mixer, cream together the softened butter and granulated sugar until light and fluffy. This typically takes 3-5 minutes and is crucial for creating a tender crumb by aerating the mixture.
- Add Wet Ingredients: Flavor and Moisture Infusion
Beat in the eggs one at a time, mixing well after each addition until fully incorporated. This gradual addition prevents the mixture from curdling and ensures even blending.
Stir in the vanilla extract, fresh orange zest, and fresh orange juice. The fresh citrus components will begin to release their delightful aroma.
- Combine Wet and Dry: The Art of Gentle Mixing
Gradually add the whisked dry ingredients to the wet ingredients, alternating with the milk. Begin and end with the dry ingredients to ensure proper emulsification.
Mix only until just combined; do not overmix. Overmixing develops gluten, which can lead to a tough, dry cake.
- Fill the Pan: Even Distribution for Even Baking
Pour the batter evenly into the prepared Bundt pan. Use a spatula to smooth the top, ensuring consistent thickness throughout the pan, which promotes even baking.
- Bake to Golden Perfection: The Doneness Test
Bake for 50-60 minutes, or until a wooden skewer inserted into the center of the cake comes out clean. This indicates the cake is fully cooked through without being dry.
- Cool in Pan: The Crucial 10-Minute Wait
Remove the cake from the oven and let it cool in the pan on a wire rack for exactly 10 minutes. This precise cooling time is essential for the cake to firm up enough for release without breaking or sticking.
- Release and Cool Completely: The Grand Reveal
After 10 minutes, invert the Bundt pan onto the wire rack and gently lift the pan off the cake. Allow the cake to cool completely on the rack before glazing.
Cooling completely prevents the glaze from melting and ensures the cake maintains its structural integrity.
- Prepare the Zesty Glaze: The Tangy Topping
In a medium bowl, whisk together the powdered sugar and orange juice until smooth. Start with 3 tablespoons of juice and add more, a little at a time, until you reach your desired drizzling consistency.
For more vibrant glazes, explore our easy orange glaze recipe for additional tips.
- Glaze and Serve: The Final Flourish
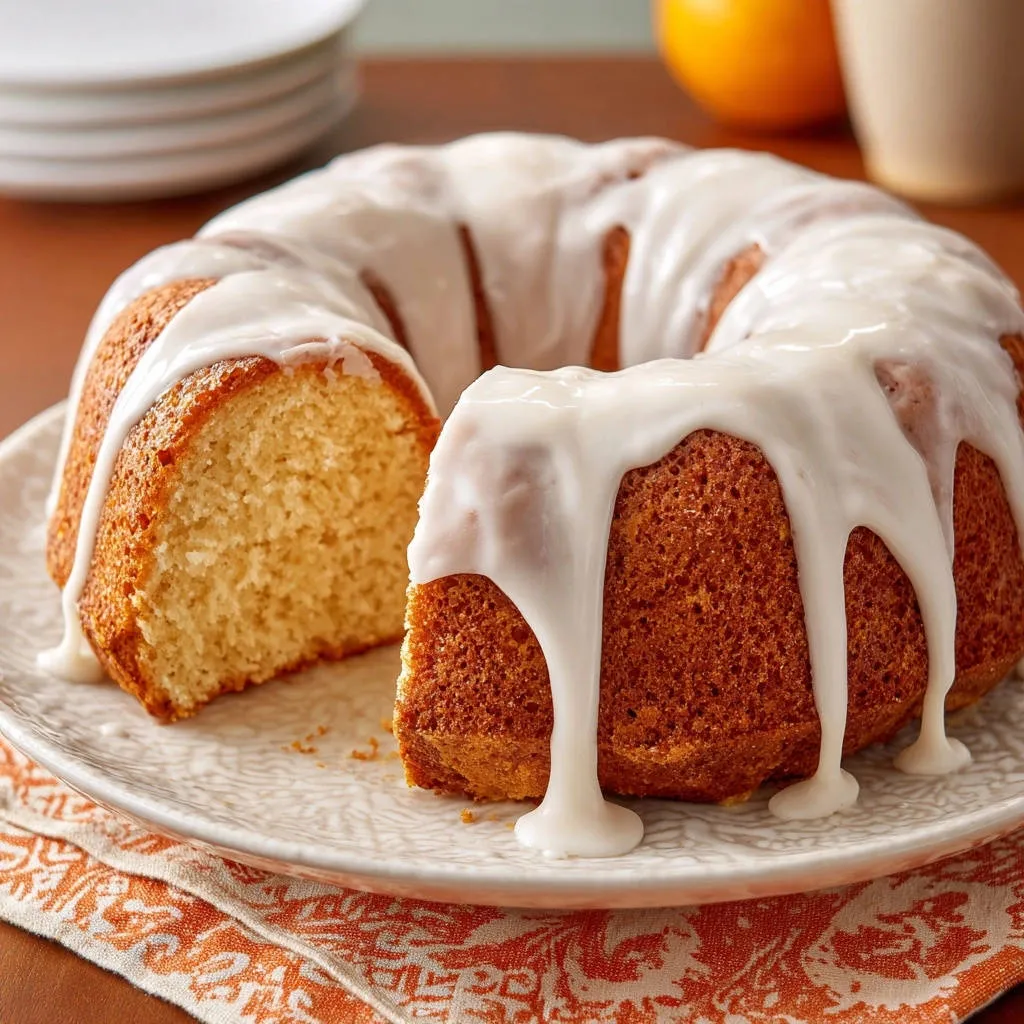
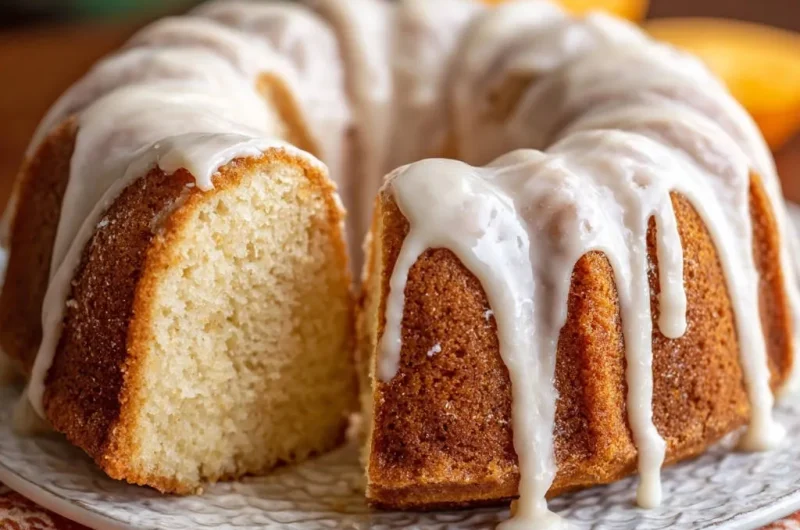
Once the cake is completely cool, generously drizzle the glaze over the top, letting it drip aesthetically down the sides. Slice and enjoy your perfectly released, delicious Orange Kissed Bundt Cake!
Chef’s Secrets: Elevating Your Orange Kissed Bundt Cake
These professional tips will help you achieve the absolute best results with your Orange Kissed Bundt Cake, ensuring a perfect texture and vibrant flavor every time.
Don’t Overmix for a Tender, Light Crumb
Mixing flour too much develops gluten, leading to a tough, chewy cake. Mix just until ingredients are combined, with no streaks of flour visible. A few lumps are perfectly fine.
Room Temperature Ingredients for a Seamless Blend
Ensuring butter, eggs, and milk are at room temperature allows them to emulsify properly, creating a smooth, homogenous batter. This helps the cake rise evenly and contributes to a finer crumb.
The Power of Fresh Citrus: Zest vs. Juice
Orange zest contains essential oils that deliver intense aromatic flavor, while the juice provides a bright, tangy sweetness. For maximum impact, always use fresh oranges.
Be sure to zest only the bright orange part of the peel, avoiding the bitter white pith underneath.
Adapting Your Bundt Cake for High Altitude
At high altitudes, liquid evaporates faster and leavening agents work more efficiently. You may need to slightly increase liquid, decrease leavening, and/or increase oven temperature for best results.
Adjustments are often subtle, so consult a specific high-altitude baking guide if you live above 3,500 feet.
Common Bundt Cake Woes & Quick Fixes
Even experienced bakers encounter challenges. Here are solutions to common Bundt cake problems, helping you troubleshoot and ensure success with your Orange Kissed Bundt Cake.
Why Did My Cake Stick to the Pan?
This is often due to insufficient greasing or flouring, or not cooling the cake for the correct amount of time. Ensure every crevice of your pan is thoroughly buttered and floured.
Cooling for exactly 10 minutes in the pan is crucial; too little and it’s fragile, too much and it might stick as it cools further.
My Cake is Dry or Crumbly! What Went Wrong?
A dry cake is typically a sign of overbaking. Start checking for doneness at the lower end of the baking time range. Overmixing the batter can also lead to a dry, tough texture.
My Glaze is Too Runny or Too Thick!
If your glaze is too runny, whisk in a tablespoon more of powdered sugar at a time until it reaches your desired consistency. If it’s too thick, add half a teaspoon of orange juice until it’s perfect for drizzling.
My Cake Sank in the Middle!
A sunken cake often indicates underbaking or opening the oven door too early, causing a sudden temperature drop. Ensure your oven temperature is accurate and resist the urge to peek until near the end of the baking time.
Enjoying Your Orange Kissed Bundt Cake: Serving & Storage Tips
Once your Orange Kissed Bundt Cake is beautifully baked and glazed, knowing how to serve and store it properly ensures every bite is as fresh and delicious as the first.
Creative Serving Suggestions
This vibrant Orange Kissed Bundt Cake is delightful on its own, but you can elevate it further. Serve slices with a dollop of whipped cream, a scoop of vanilla bean ice cream, or fresh berries like raspberries or blueberries.
A sprinkle of extra orange zest over each slice adds a lovely visual and aromatic flourish.
Storing Your Delicious Creation for Freshness
Store your glazed Orange Kissed Bundt Cake at room temperature, loosely covered, for up to 3-4 days. A cake dome or an airtight container works well to keep it moist.
If storing for longer, wrap individual slices tightly in plastic wrap and then foil, and freeze for up to 3 months. Thaw at room temperature before serving.
Can I Make This Orange Kissed Bundt Cake Ahead of Time?
Absolutely! The cake can be baked a day or two in advance. Store it, unglazed, tightly wrapped at room temperature or in the refrigerator.
Prepare the glaze just before serving for the freshest taste and best drizzling consistency.
Your Orange Kissed Bundt Cake Questions Answered
We’ve compiled answers to common questions about baking this delightful Orange Kissed Bundt Cake, ensuring you have all the information you need for a smooth baking experience.
Can I Use Bottled Orange Juice Instead of Fresh?
While fresh orange juice provides the best, most vibrant flavor, you can use good quality bottled orange juice as a substitute if absolutely necessary. Be aware that the flavor might be slightly less intense.
Can I Make This Orange Kissed Bundt Cake Gluten-Free?
Yes, you can adapt this recipe to be gluten-free. Substitute the all-purpose flour with a 1:1 gluten-free baking flour blend that contains xanthan gum for best results. Follow the remaining steps as written.
What If I Don’t Have a Bundt Pan? Are There Alternatives?
If you don’t have a Bundt pan, you can bake this cake in a 9×13 inch baking pan or two 8-inch round cake pans. Adjust baking time accordingly; a 9×13 might take 35-45 minutes, and 8-inch rounds around 25-35 minutes.
How Do I Properly Zest an Orange Without the White Pith?
To properly zest an orange, use a microplane grater or a fine zester. Gently rub the orange over the grater, rotating it as you go, until only the bright orange peel is removed. Stop before you reach the bitter white pith underneath.
Is it Possible to Reduce the Sugar in This Recipe?
Reducing sugar in baking can affect texture and moisture, not just sweetness. While you could try a slight reduction (e.g., 1/4 cup less sugar), significantly reducing it might impact the cake’s structure and moistness. We recommend trying as written for the first bake.
Bake with Confidence: Your Orange Kissed Bundt Cake Awaits!
With this comprehensive guide, you’re not just baking a cake; you’re mastering the art of the perfect Bundt. The foolproof release method and vibrant citrus flavor of this Orange Kissed Bundt Cake are sure to make it a cherished recipe in your collection.
Gather your ingredients, preheat your oven, and prepare for the pure joy of slicing into a beautifully moist, perfectly flavored, and effortlessly released citrus Bundt cake. Happy baking!
Orange Kissed Bundt Cake
Course: DessertCuisine: American CuisineDifficulty: easy12
servings25
minutes1
hour180
minutesAmerican Cuisine
Ingredients
For the Cake:
2 and 1/2 cups all-purpose flour
1 and 1/2 teaspoons baking powder
1/2 teaspoon salt
1 cup (2 sticks) unsalted butter, softened
2 cups granulated sugar
4 large eggs
1 cup milk
1 teaspoon vanilla extract
2 tablespoons fresh orange zest
1/4 cup fresh orange juice
For the Glaze:
2 cups powdered sugar
3 to 4 tablespoons fresh orange juice
Directions
- The Secret to Flawless Release: Thoroughly grease a 10 or 12-cup Bundt pan with softened butter, ensuring every crevice is coated. This is crucial! Then, lightly flour the pan, rotating and tapping to coat the entire surface. Tap out any excess flour. This creates a non-stick barrier that allows your cake to slide out cleanly. Preheat your oven to 350°F (175°C).
- In a medium bowl, whisk together the flour, baking powder, and salt.
- In a large bowl, using an electric mixer, cream together the softened butter and granulated sugar until light and fluffy, about 3-5 minutes.
- Beat in the eggs one at a time, mixing well after each addition. Stir in the vanilla extract, orange zest, and orange juice.
- Gradually add the dry ingredients to the wet ingredients, alternating with the milk, beginning and ending with the dry ingredients. Mix until just combined; do not overmix.
- Pour the batter evenly into the prepared Bundt pan. Smooth the top with a spatula.
- Bake for 50-60 minutes, or until a wooden skewer inserted into the center of the cake comes out clean.
- Remove the cake from the oven and let it cool in the pan on a wire rack for exactly 10 minutes. This cooling time is essential for the cake to firm up enough for release without breaking.
- After 10 minutes, invert the Bundt pan onto the wire rack and gently lift the pan off the cake. Allow the cake to cool completely on the rack before glazing.
- For the Glaze: In a medium bowl, whisk together the powdered sugar and orange juice until smooth. Start with 3 tablespoons of juice and add more, a little at a time, until you reach your desired drizzling consistency.
- Once the cake is completely cool, generously drizzle the glaze over the top, letting it drip down the sides. Slice and enjoy your perfectly released, delicious Bundt cake!
Notes
- The key to a perfect Bundt cake release is thorough greasing and flouring of the pan, followed by 10 minutes of cooling in the pan before inverting.